The WP Forms widget is a versatile form builder tool for Elementor. It’s one of the many important form builders we use inside our website every day.
This is a 3rd party widget in Element Pack and was integrated to provide for our consumers. Let’s see how you can use it.
Configuring WP Forms

Step-1
First, go to Dashboard> Element Pack> 3rd Party Widgets> and find the Wp Forms widget. Click on the download icon to install it.
Note: WP Forms is a Freemium tool, both the Lite & Pro version works with Elementor.
Step-2
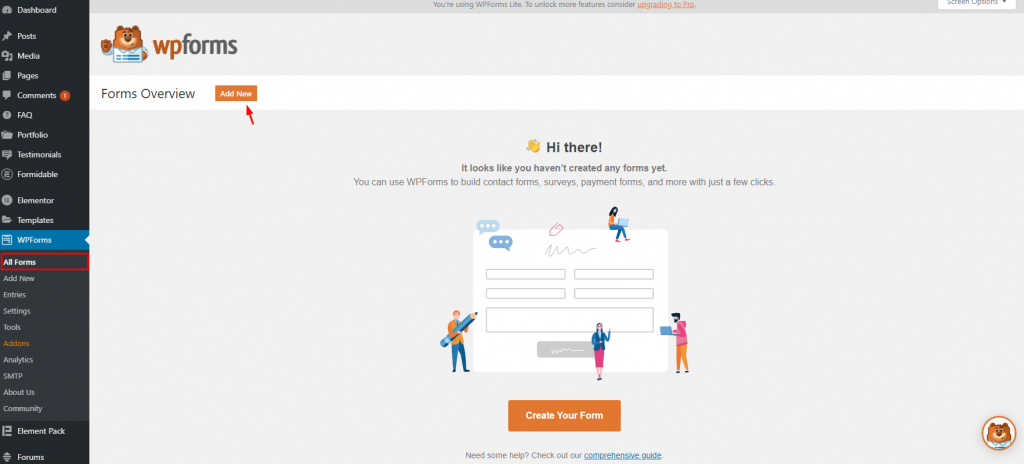
After installing, you will find the WPForms option inside your dashboard. Go inside and click on the Add New button to create a new form.
Step-3
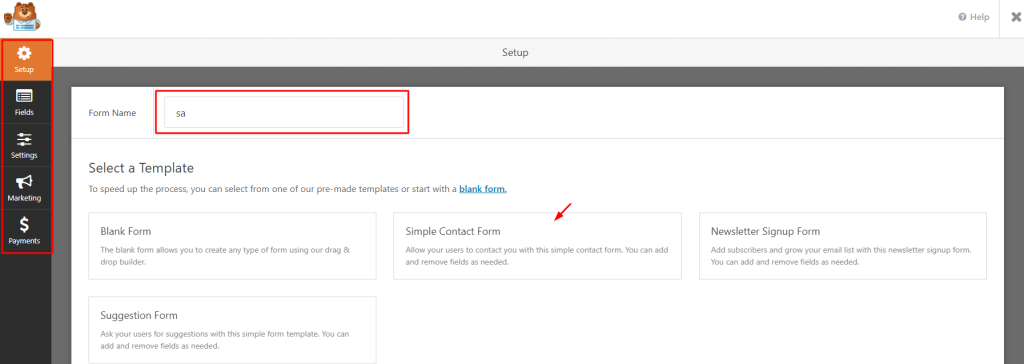
You will be redirected to a new window where you will see form settings on the left side and layout options in the middle. Give a name to your WordPress forms and select custom (Blank Form) or pre-made forms (Contact form, signup form).
Step-4
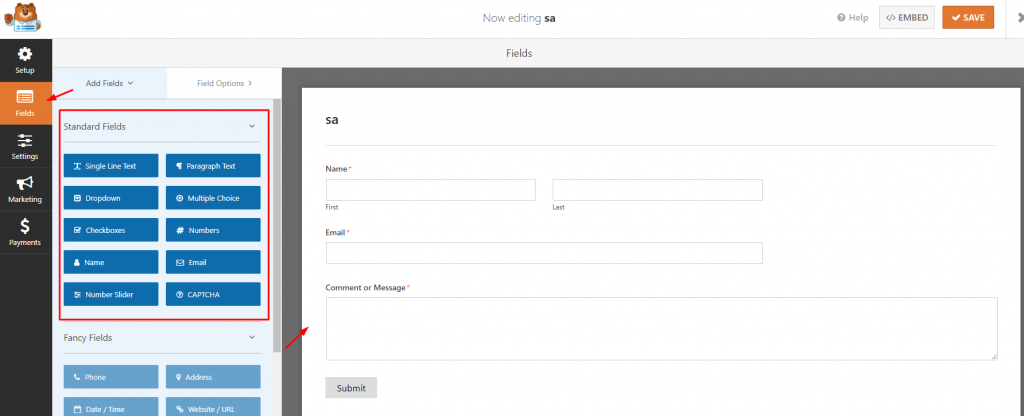
Once the selection is done, on the next tab, you can add or remove items manually on the visual form builder. Each item is designed as boxes. Just drag it inside the form building area to implement.
Step-5
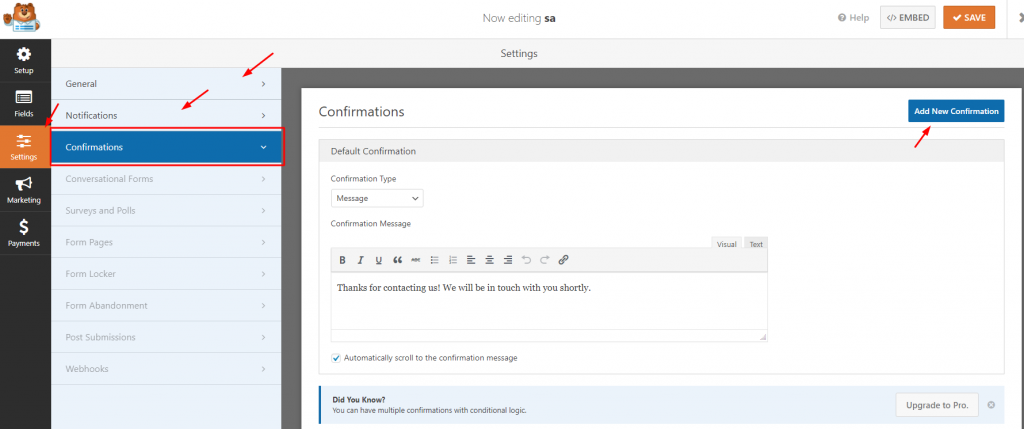
In the next section, you can add CSS style or change the messages for complete submission.
Additionally, you can add Marketing and Payments options on the WordPress form maker. Just keep in mind that these options will only work on the Pro version.
Inserting widget
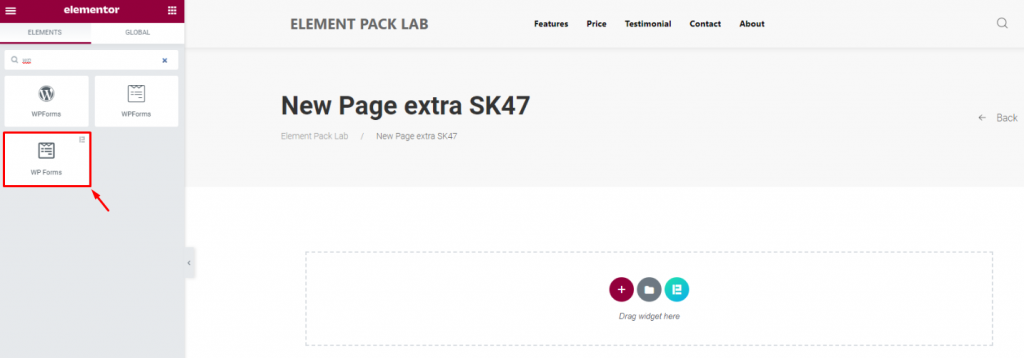
Go to the Elementor page editor’s widget menu and search for the WP Forms widget. Then drag it inside the page.
Difference between WP Forms Global & Element Pack version
Element Pack boosts its name due to the feature that enables any non-customizable widget to become customizable.
That’s right!
Any widget under Element Pack is loaded with a ton of customizations. The WP Forms widget isn’t an exception.
Original WP Forms widget

Just the form selecting option and Advanced option for the page.
WP Forms EP version

Form selection option, Style tab for customizations, and the Advanced option.
Content tab
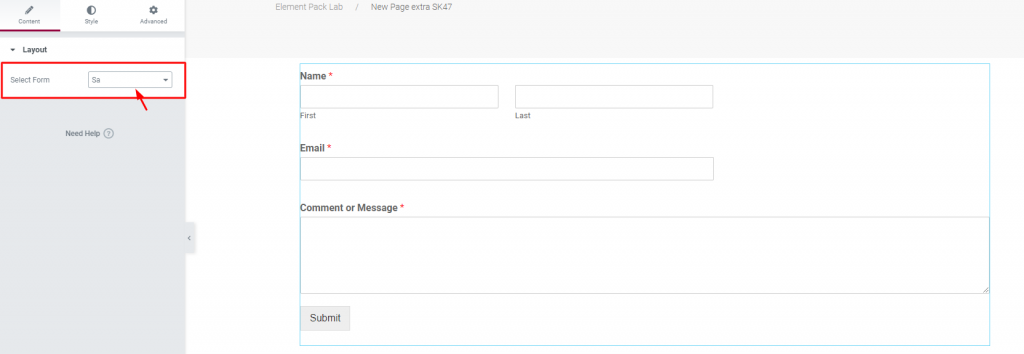
On the Content tab, you get the Layout section where you need to select your form.
Here, we selected the form we just made from the dashboard.
Style tab
Now, this part is for customizing the form’s appearance. You can change a number of aspects starting from colors to borders.
It’s divided into six sections. Each one for different items of the content area.
Label
Go to Style> Label
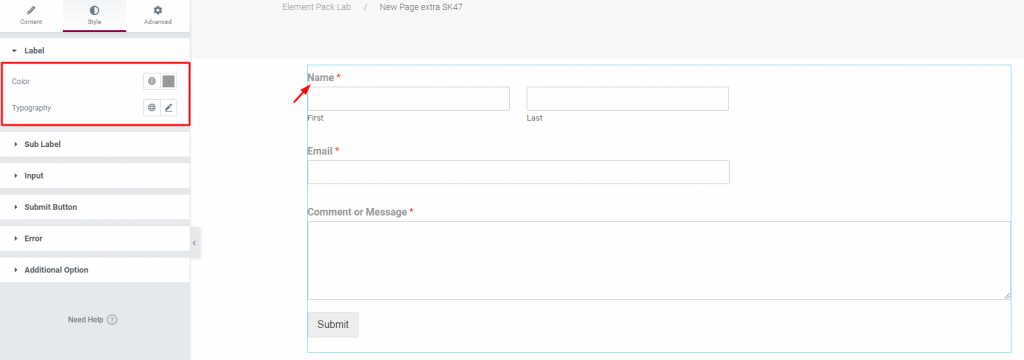
Change color and typography of the labels on your form.
Sub label
Go to Style> Sub Label

Color and typography options for the sub-labels.
Input
Go to Style> Input

In this section, you can change the color of the input text as well as input fields. The field’s width and spacing are also customizable. You may add paddings or border radius as well.
Submit Button
Go to Style> Submit Button

This section is for customizing the submit button. You can set its color for both active and hover modes. Set border-radius and padding to change the overall shape of the WP Forms widget.
Error
Go to Style> Error
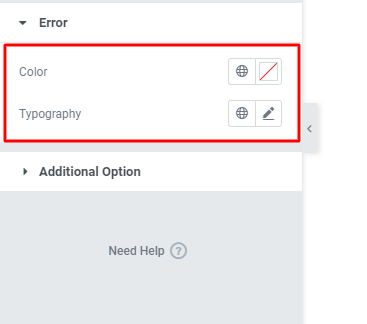
Customize the color and typography of the error message upon invalid form submission.
Additional Option
Go to Style> Additional Option

Lastly, you can create a full-width submit button on the form.
That’s it!
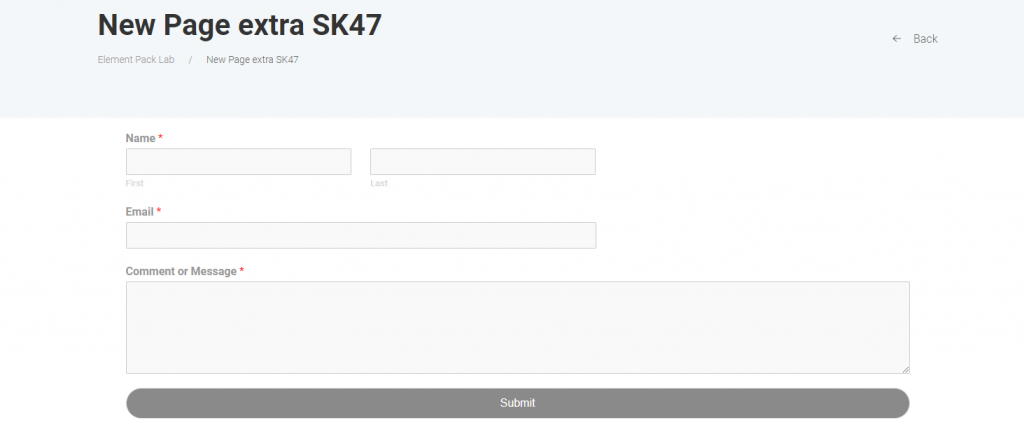
Your WordPress forms are now ready.
Conclusion
If you are still stuck, please watch this quick video on the WP Forms widget. Visit the demo page for more examples, provided by Bdthemes.

