The Soft Elementor Timeline widget is a minimalistic post widget having a tree-shaped layout style. This is a time-based blogging tool, developed by Ultimate Post Kit, for displaying your blog post in the featured section with a sleek view, making users comfortable digesting the post info quickly.
Let’s see how this vertical timeline widget works.
Inserting Widget

Inserting a widget is very easy. Just search and find the Soft Elementor timeline widget from the widget menu and drag it inside the page by holding the left click button.
Content Tab
The Content tab holds the base settings for the widget and lays the foundation of the layout of the final content. It’s divided into two parts for the non horizontal Timeline widget.
Layout
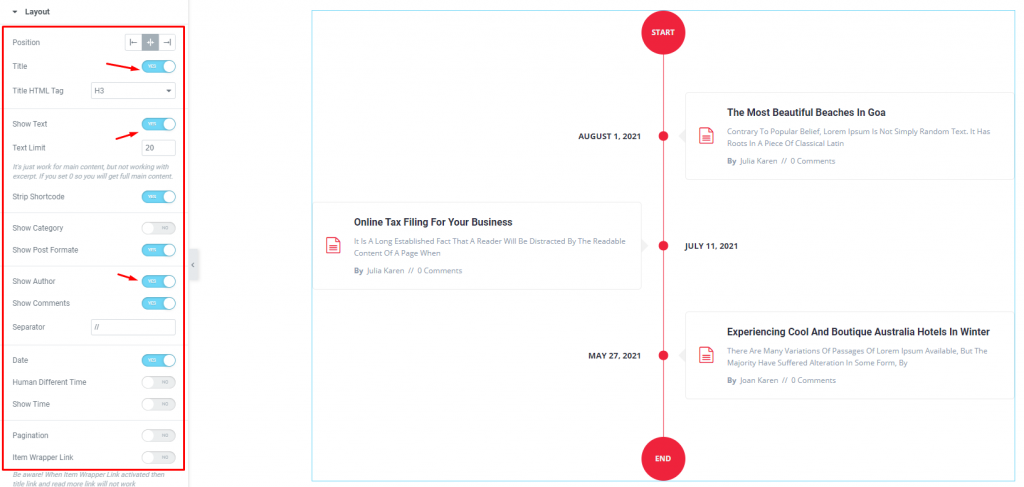
Go to Content> Layout
The Layout section is full of switchers that show/hide specific content on the display upon switching. Here, blogs are on the display according to their publishing date in a flow chart manner on the WordPress timeline plugin. It delivers a lot of information such as tags, title, image, author, description, in a compact style.
Using the positing option on the top of the menu list, you can adjust the content layout from arriving on both sides of the timeline like a tree or just set them on a single side.
There’s a text limit button for adjusting the excerpt word count for the posts. Also, you can show a real-time difference in post dates and pagination using the switchers.
Query
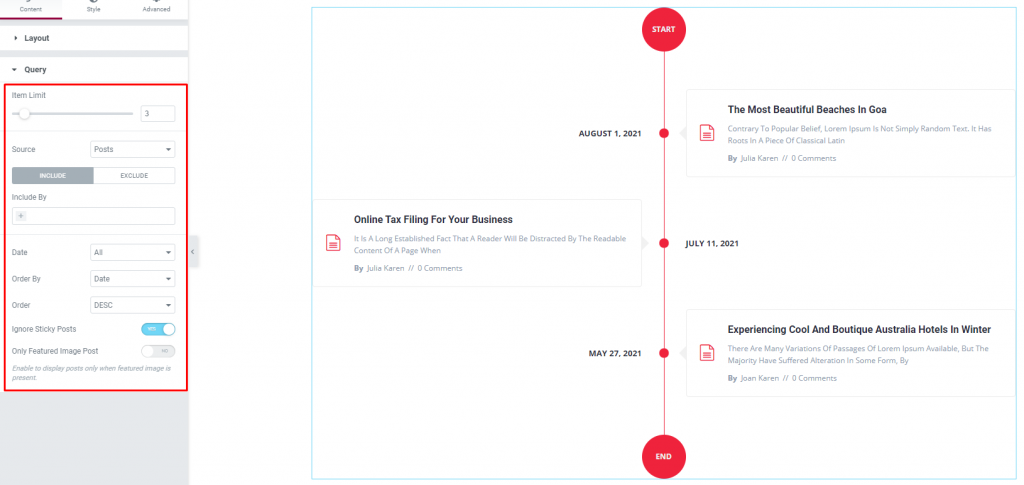
Go to Content> Query
Here, you need to define the number of posts shown on the vertical timeline layout by the option named Item Limit. By the way, you can select the source of display from category, tags, & events throughout different post sections.
The include/exclude option lets you select any specific post category for displaying or excluding category or specific posts as you wish. Ultimate Post Kit plugin made it possible to manually edit everything to the minute detail.
Style tab
The style tab allows you to change or customize the appearance of the Timeline for website content layout. The options include color settings, borders, paddings, etc.
There are several sections on this tab.
Items
Step 1
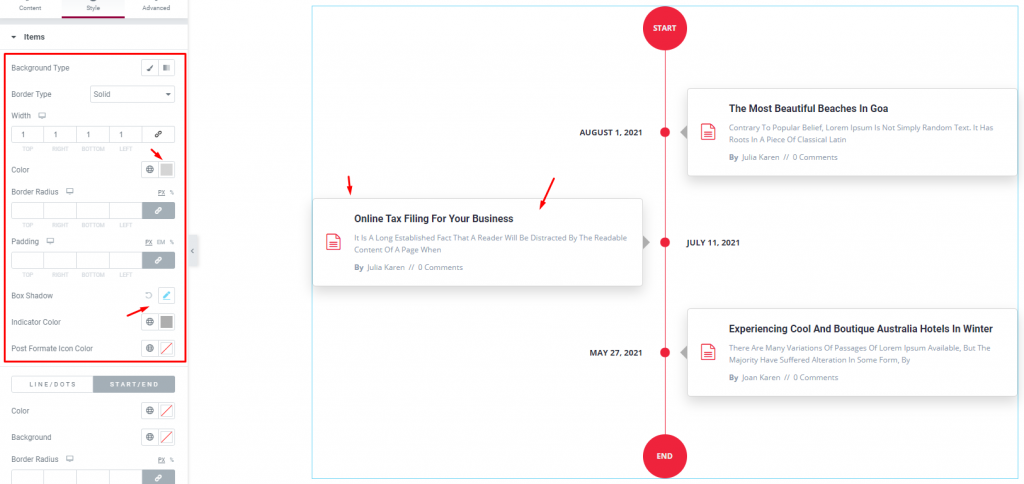
Go to Style> Items
From the top, you will get a background option to select any image or color to act as the background of the Soft Elementor timeline widget. There’s a border option right below where you can put 5 different border styles along with custom width and color.
The widget has a default border along with an indicator arrow. The color option for the indicator comes right below the Box shadow option.
Step 2
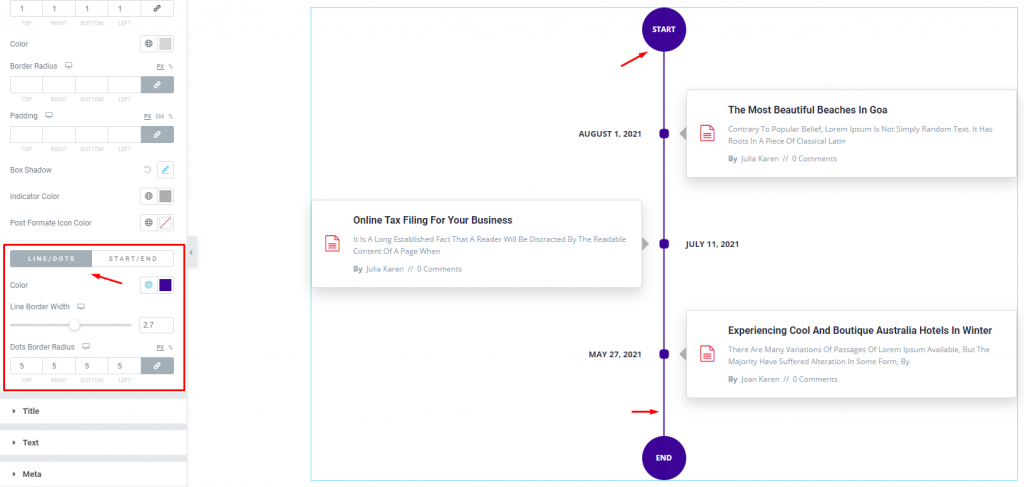
At the bottom of the current section, you will find the controls for customizing the start/end & line/dots. The options are quite alike for both subsections. Hence, you will get a color option, line width, and dots border radius for the line/dots.
Title
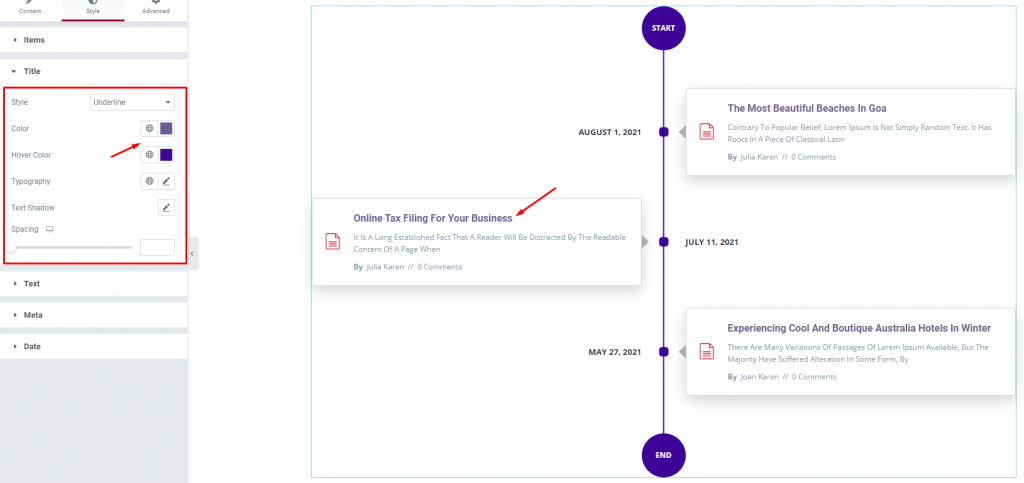
Go to Style> Title
The titles of the blog posts are customizable through this section by color, overlay style, typography, text-shadow, and spacing.
Text
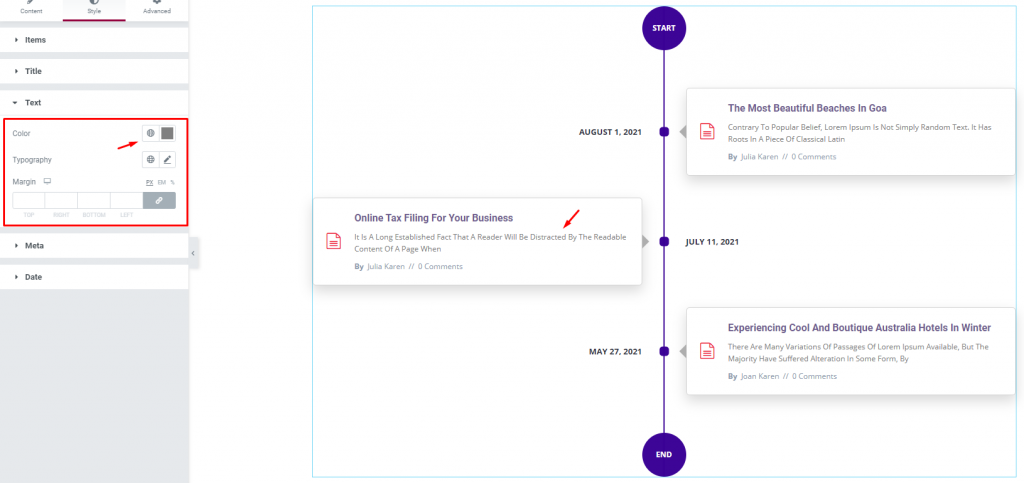
Go to Style> Text
Here, you can change the color and typography of the post excerpt of the soft Elementor timeline widget. The margin field is there to let you adjust the spacing further.
Meta
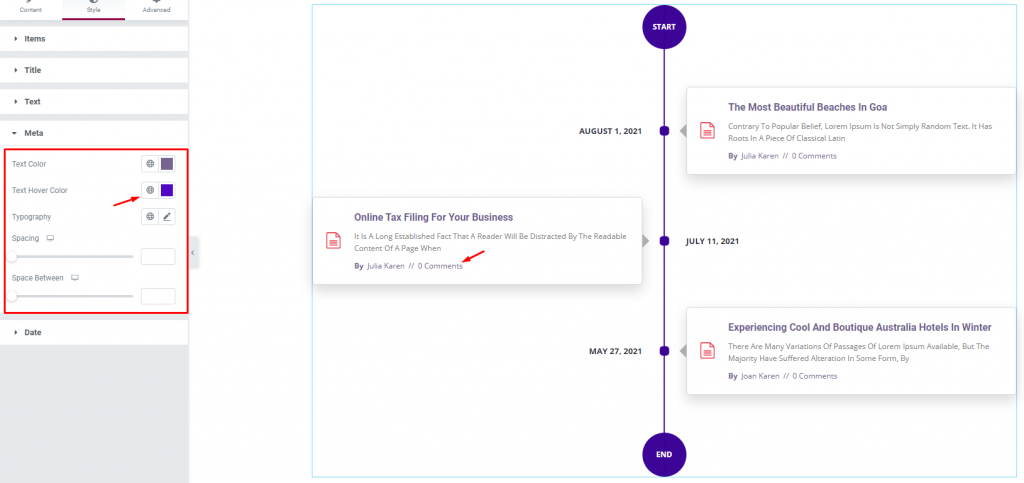
Go to Style> Meta
The post meta description is located right below the except. Let’s change the color for both normal and hover mode for the meta. You can also change the typography and spacing for the meta-text of the timeline layout.
Date
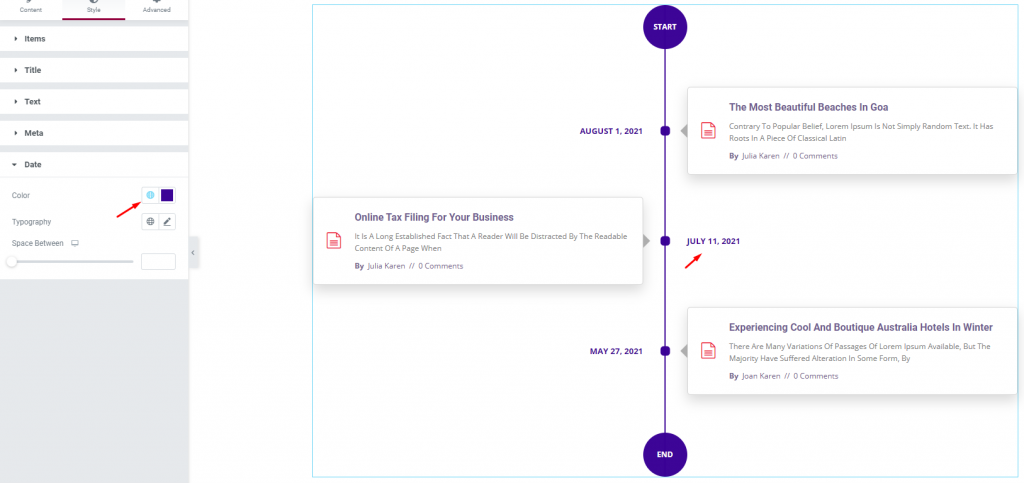
Go to Style> Date
The last section of the style tab has the customization options for the post dates. They are always at the opposite part of the post description. Just change their colors, typography, and adjust the spacing to make them appear nice on the non horizontal timeline.
Conclusion
Like that, you can design an awesome post timeline using the Soft Elementor timeline widget by the Ultimate Post Kit plugin.
Still, stuck? See this quick video on how to adjust the options for the timeline widget.

