The Prime Slider Isolate Widget with Locate skin has a minimalistic layout with lots of white areas that keeps the readers focus on the main content. You can embed a lightbox video on top of the Locate slider along with lots of animations.
Let’s see how this widget works!
Inserting Widget

Type Isolate in the widget search field in the Elementor page builder and drag the WordPress slider inside your page. It’s super easy and fun.
Content Tab
This is the part where all the basic layout settings of the Elementor slider widget reside. You can use the sections of this tab to manipulate the layout of the Isolate slider, making your very own and unique slider for your website.
Layout
Step 1
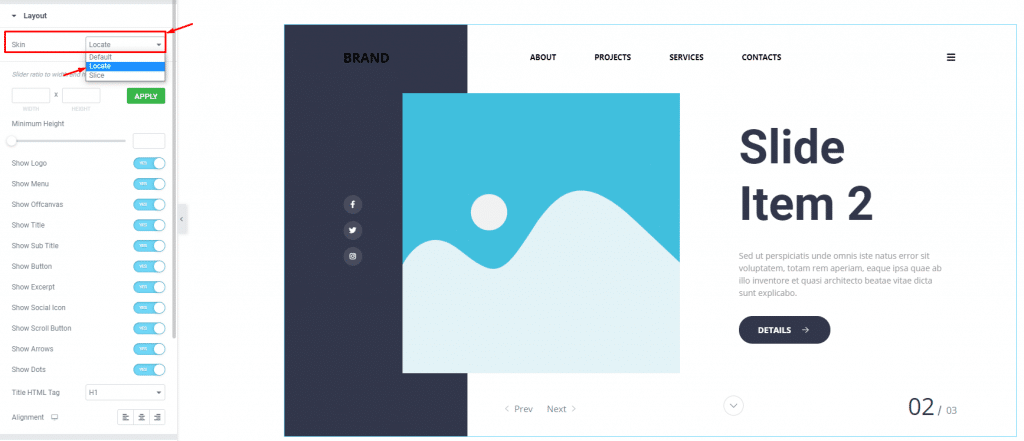
Go to Content> Layout
First, click on the Skin option and select the Locate skin.
Step 2
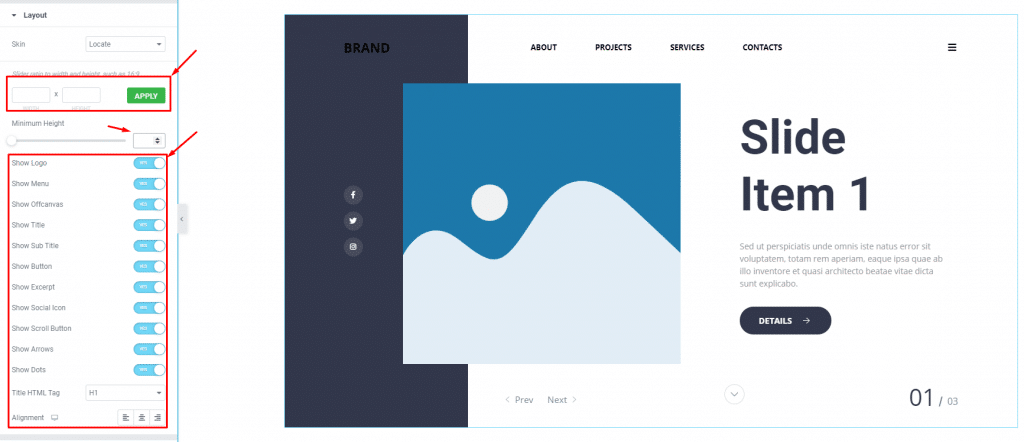
Once you drag and drop the widget inside the page, you will see its first appearance along with a long list of options on your left-hand side. Basically, there’s a lot of switchers with a couple of fields and drop-down options.
The custom slider dimension fields allow you get to pick a custom height and width of your Locate slider. The Minimum height scrollbar lets you adjust only the height of the slider widget.
The rest are switchers that can show or hide specific elements of the Isolate slider from the display.
Header
Step 1
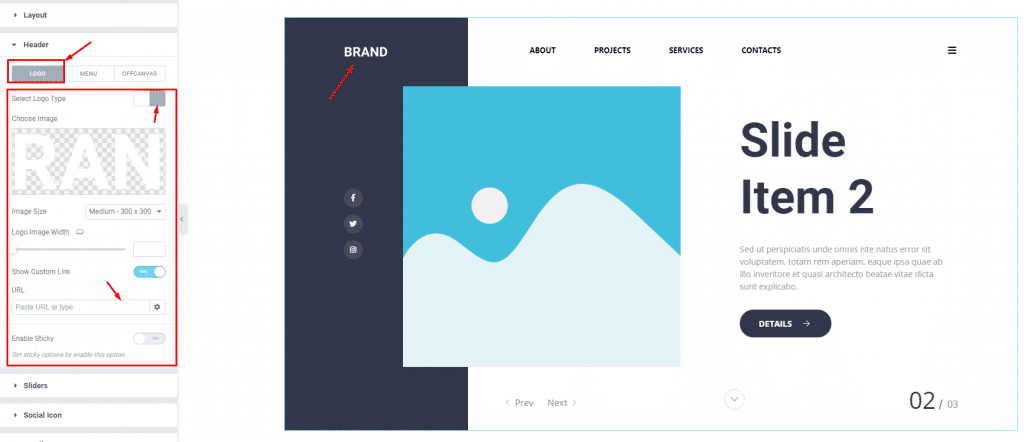
Got to Content> Header> Logo
This section contains customization options for the header part of the slider, including logo, menu, & off-canvas. For the logo, you can select either picture or plain text. In our case, we picked a logo image.
Clicking on the Show Custom Link button, you can add a custom link to the logo instead of redirecting to the current page.
Step 2
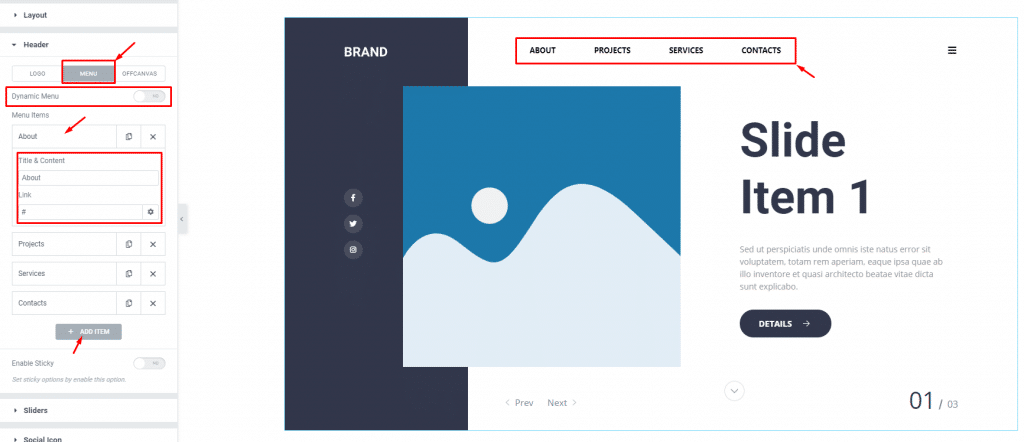
Go to Header> Menu
By clicking on the Menu sub-section, you will see the menu items and a switcher to turn on the dynamic menu. Let’s click on a menu item. There, you will see a text field and a link field. Unless providing a custom link, these menu items on the Prime Slider Isolate Widget with Locate skin won’t work themselves.
With the dynamic menu switcher turned on, you can select your existing menu from WordPress and add animations to it.
Step 3
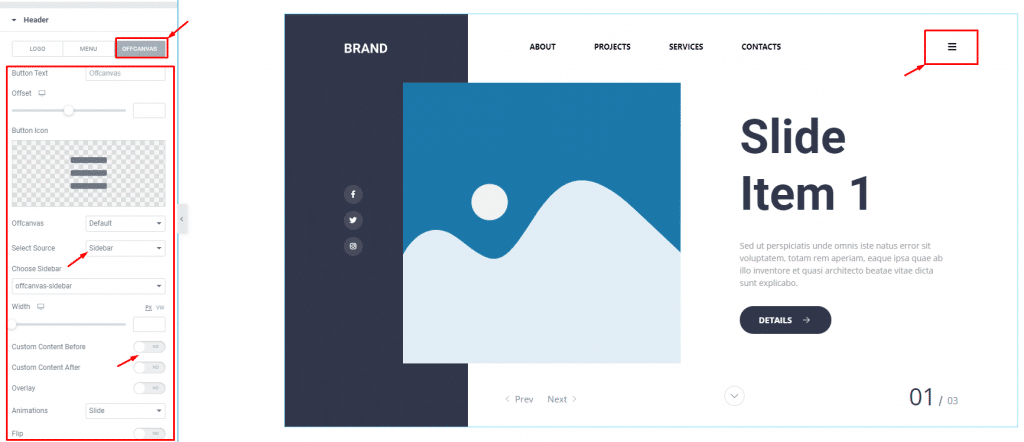
Go to Header> Offcanvas
For the offcanvas menu, you can customize it by adding a custom text beside it, changing the button icon, selecting default sidebars or Elementor templates, or even go for a fully custom menu.
There are more options like offcanvas width, content after/before, and animations to further enhance the offcanvas menu on the locate slider.
Sliders
Step 1
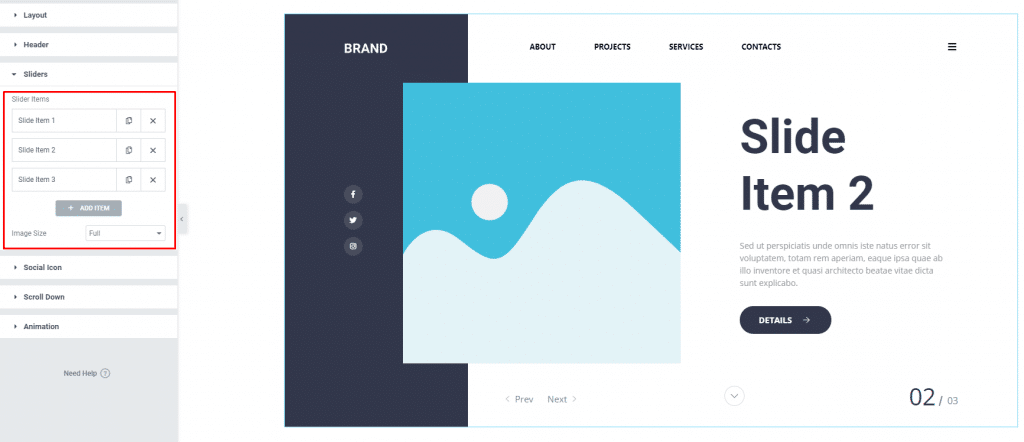
Go to Content> Sliders
This section contains the slider items. You can see them on the top, followed by the Image Size option below. Keeping image size to the maximum will preserve the image resolution for the WordPress slider.
Step 2
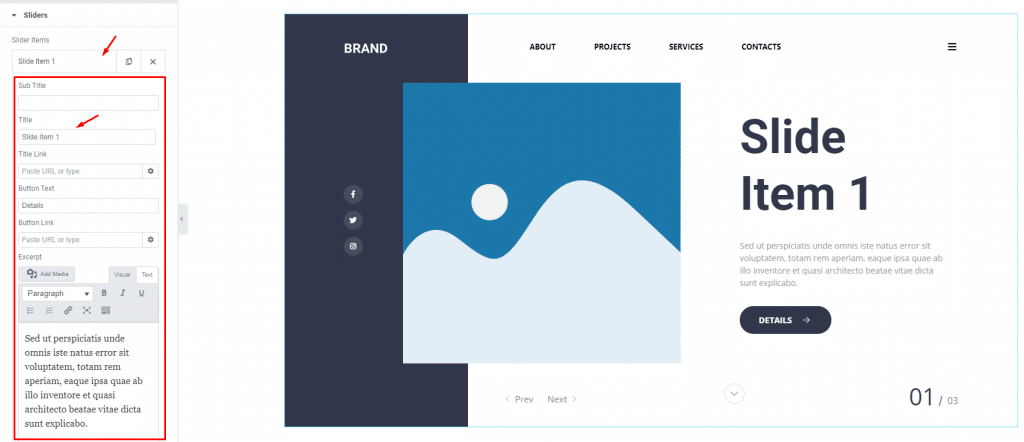
Once you click on any slider item, you will see a bunch of options unfolding for the locate slider widget. Here, you can put the custom text for the subtitle, title, button, link, and excerpt. Also, you can add links to the button and the title.
Step 3
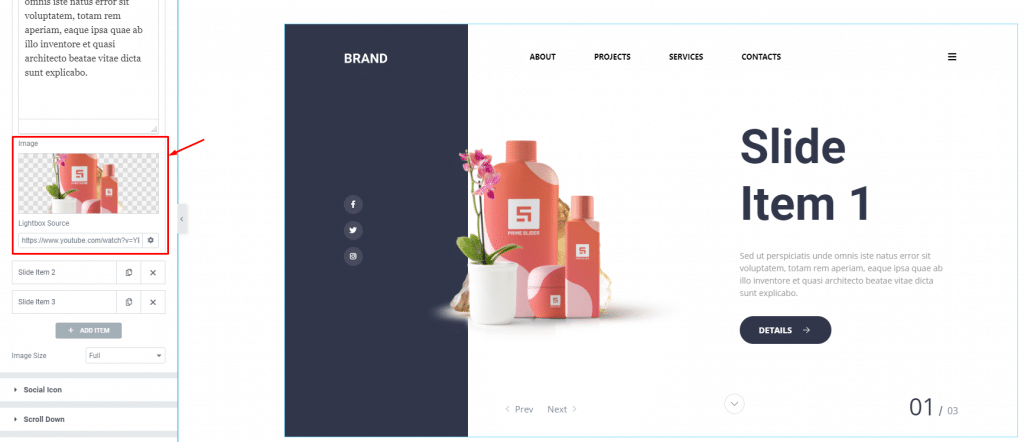
Right below the excerpt field, you can change the slider image for the selected slider item along with a custom link field for the lightbox video.
Social Icon
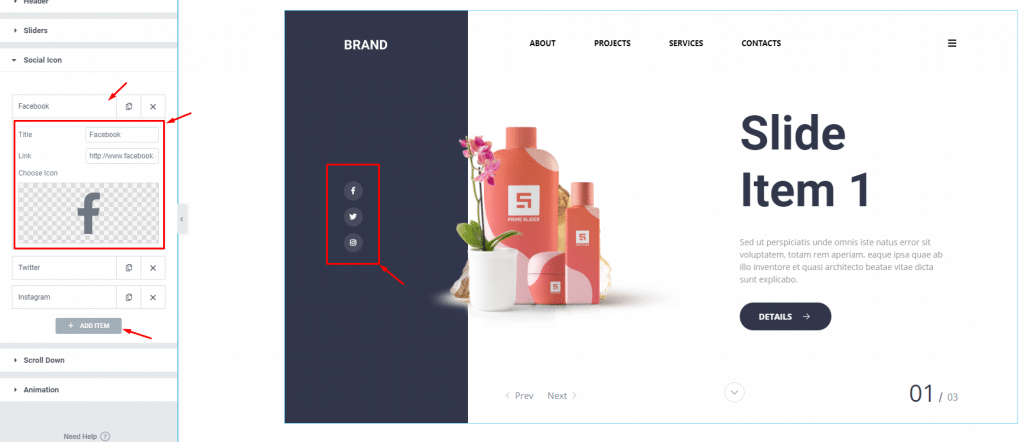
Go to Content> Social Icon
The Prime Slider Isolate widget with Locate skin has social media sharing options displayed on the left side of the slider window. By default, there are 3 social links are visible. You can always increase their number by clicking on the ADD ITEM button below.
Clicking on each social media item, you will see 3 options there, a title field, a link field, and an icon selection field. You can always add custom social channels here on the Locate slider.
Scroll Down
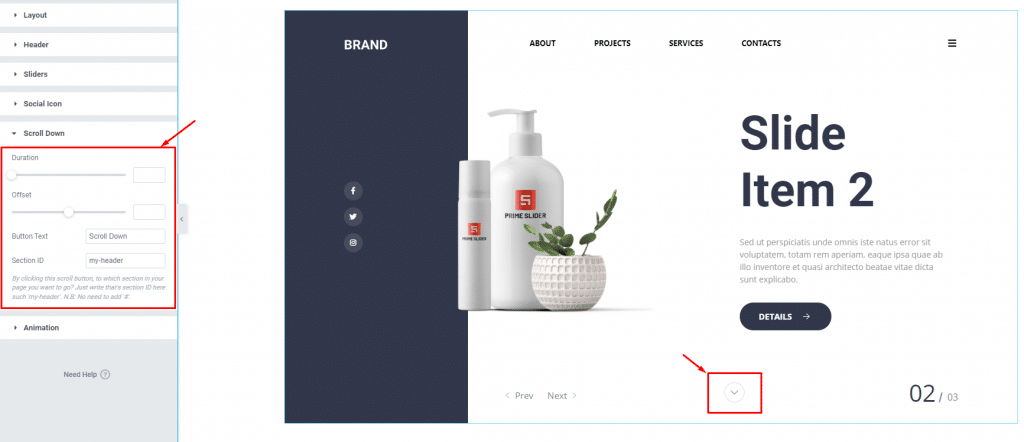
Go to Content> Scroll Down
The scroll down button takes you to any selected section away from the slider section upon click. Just put the section ID inside the field to link it. You can also set the span duration, offset value, and button text here for the Locate slider.
Animation
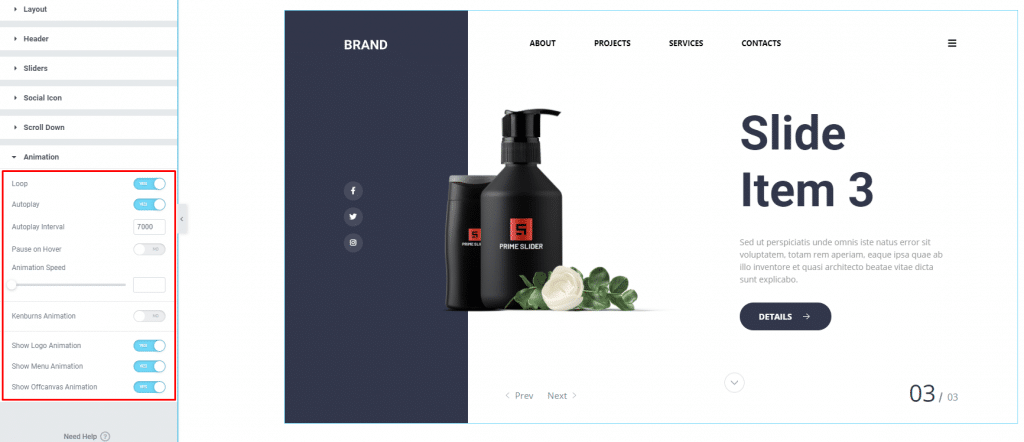
Go to Content> Animation
The last section contains all the base animation settings for the slider. There are a bunch of switchers to turn on the animation loop, autoplay, etc. on the Prime Slider Isolate widget with Locate skin. The animation speed and autoplay interval time are also changeable.
There’s another animation effect available for the Elementor slider widget that reads as Kenburns animation. This is a type of zooming effect that affects the background image. Better to add slider images and then turn on this switcher to see the effects clearly.
Once you reach this section, let’s move on to the style tab to customize the Locate slider appearance and make it look better.
Style tab
The style tab has customization options that directly change the appearance of the whole Locate slider through color, border, typography, etc. Using these sections, you can change the look step by step, making a whole new and unique slider widget for your website.
Header
Step 1
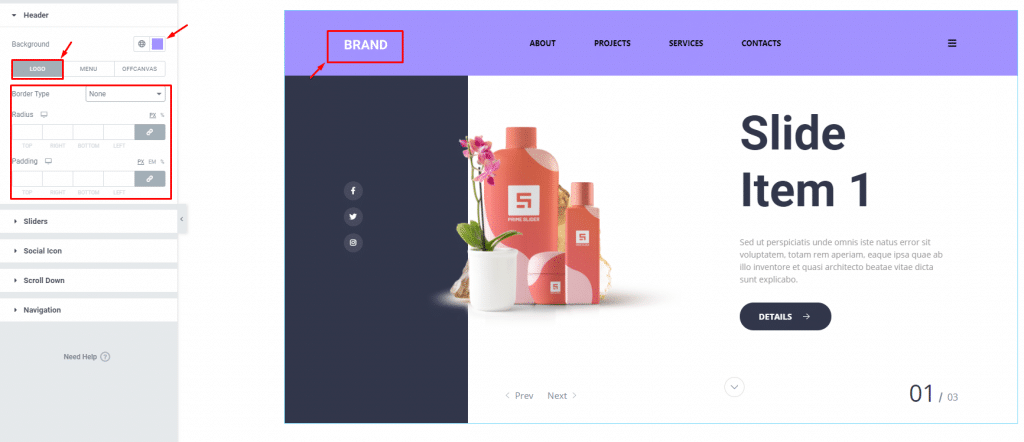
Go to Style> Header
In this section, you can pick any color for the header part from the background option on the top. Use it to make the header visible through the Isolate slider skin background.
Right below, the section gets divided into 3 subsections to customize the logo, menu, and offcanvas.
For the header logo, you will get border and padding options available (selected Image as logo)
Step 2
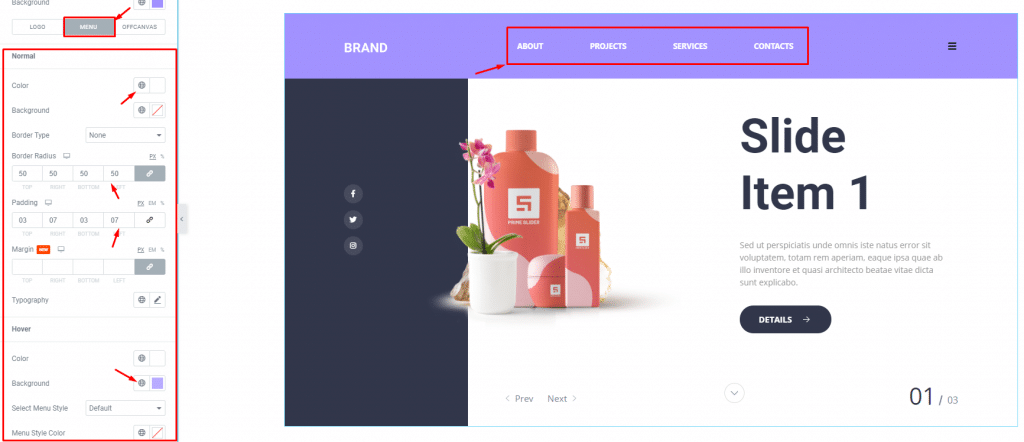
For the menu, the bunch of options available is color, background, border, border-radius, padding, margin, and typography. Using slight padding and some border radius over a lighter background color, you can highlight the Locate slider menus easily.
Step 3
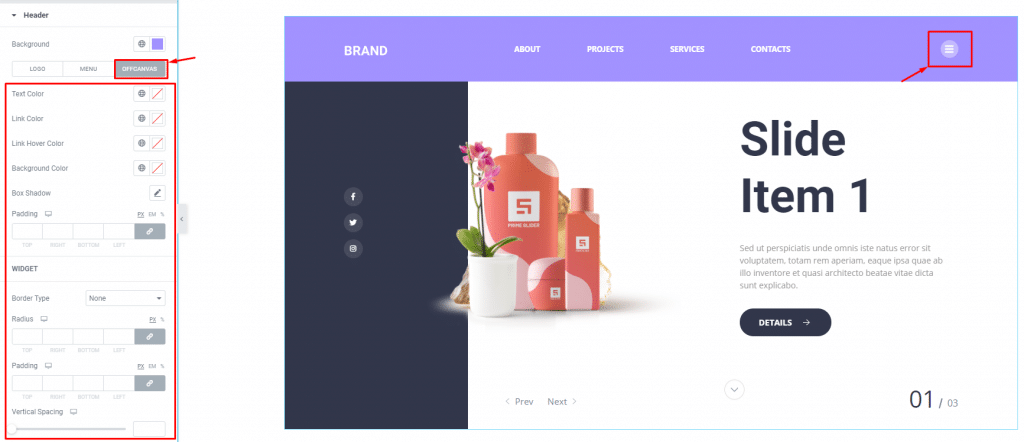
The offcanvas menu is for mobile devices mainly but we kept it visible for pcs for now. Hence, you can customize it through color options, padding, border, border radius, and more. The options are divided into two parts here, one for the visible offcanvas logo and the other for the offcanvas popup window.
Sliders
Step 1
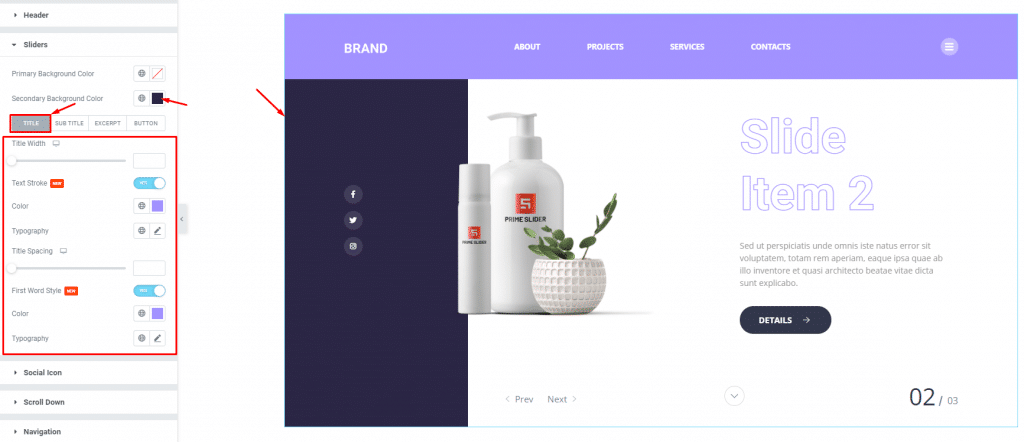
Go to Style> Sliders
The first thing you will see here is the primary and secondary background color options for the Isolate widget with Locate skin.
Then comes the customization options for the title, subtitle, excerpt, and button; each in a separate subsection. For example, you can customize the title by changing the color and width. Also, clicking on the Text Stroke switcher will add a stroke style to the title. Notice, the text stroke option is available for the 2 parts of the title.
Step 2
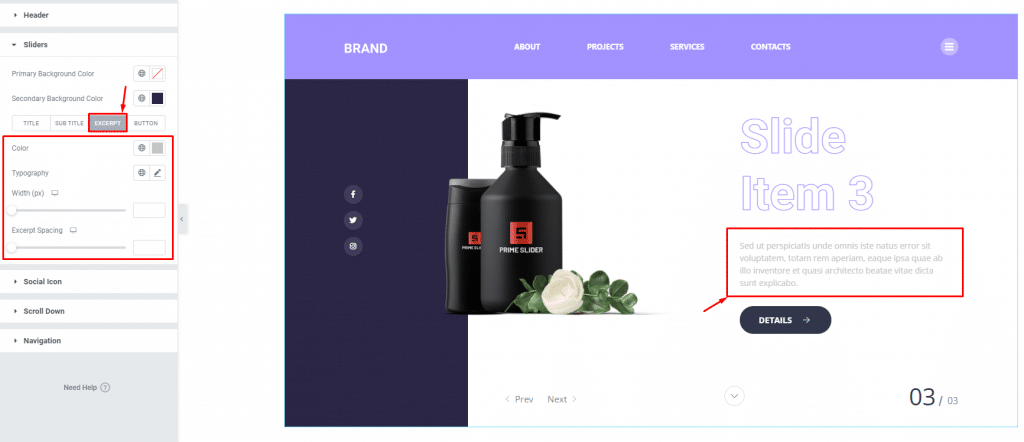
For the excerpt, you will have color, typography, and spacing options available here.
Step 3
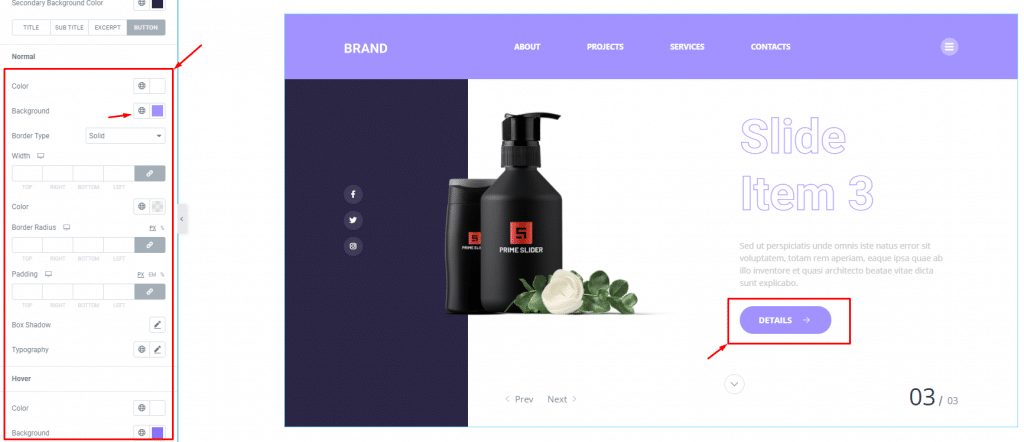
The Locate slider button is located right under the excerpt of the slider. From this subsection here, you can customize the buttons’ appearance by changing the text & background color, border & border-radius, padding, and typography.
Social Icon
Go to Style> Social Icon
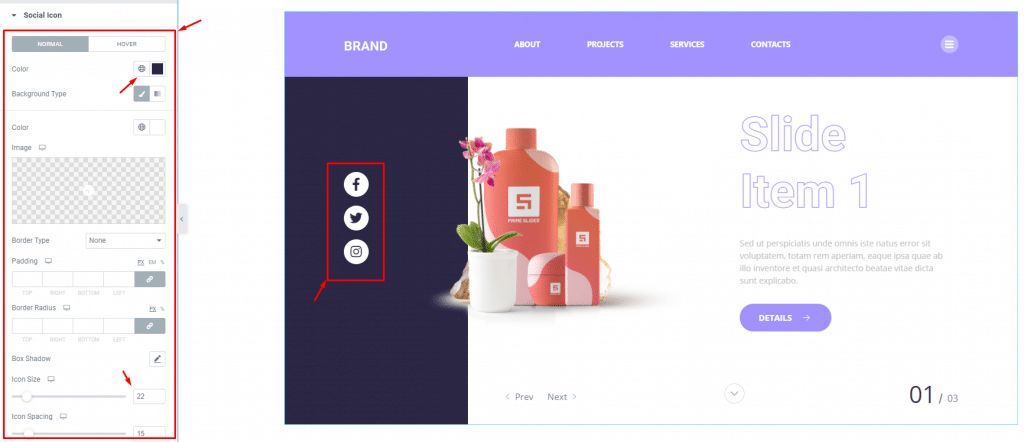
For the social icons, you can customize them by changing their colors, both icon and background. The color options work in hover mode as well.
To make the icons look like the image above, add some padding on them, increase the icon size, and then increase the border-radius to apply a circular background. Like that, your Prime Slider Isolate widget with Locate skin will have rounded social share icons on the display.
Scroll Down
Go to Style> Scroll Button
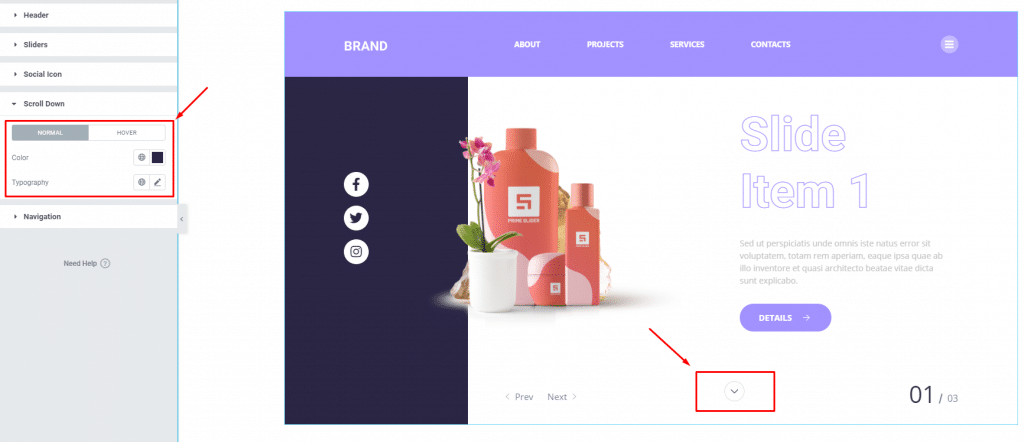
The scroll button can be customized by changing its color, border, padding, and typography. The button has a default animation which makes it jump quite often.
Navigation
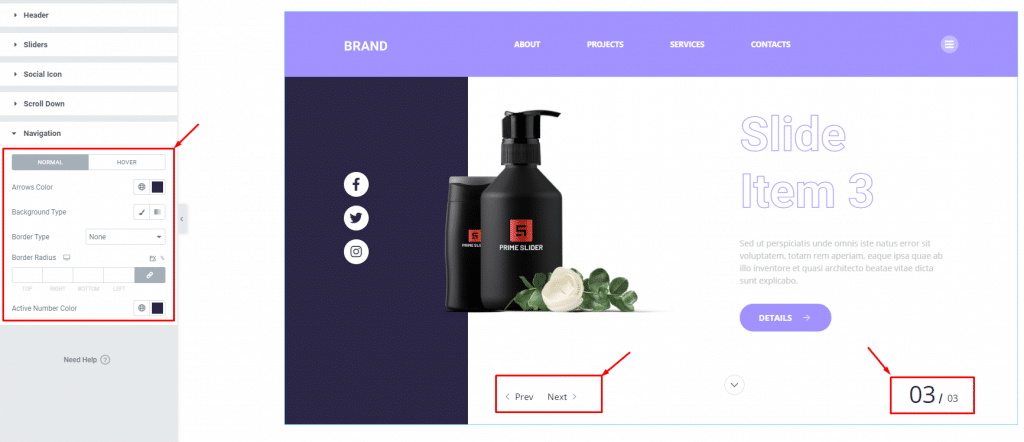
Go to Style> Navigation
There are two types of navigation systems located inside this Elementor slider widget. The arrows and the numbers. With this section, you can customize the arrows navigation using color, background, border, border radius, etc.
There is only one active color option available for the numbers.
Like that, you have seen all the currently available customizing options for the Prime Slider Isolate widget with Locate skin.
Conclusion
Still stuck? See the quick video on how to operate the prime slider Isolate widget with Locate skin.
This example highlights the working principle of the Isolate Skin Locate Widget. However, there are options for hiding certain items like- Logo, Menu, Offcanvas, Title, Sub Title, Button, Excerpt, Social, Icon, Scroll Button, Arrows, Dots, etc. Last but not least, you can place the content by setting align left, center, and right.
