In this documentation, we will show you how to customize the Variation Swatches Feature by Ultimate Store Kit.
Enable Variation Swatches Feature
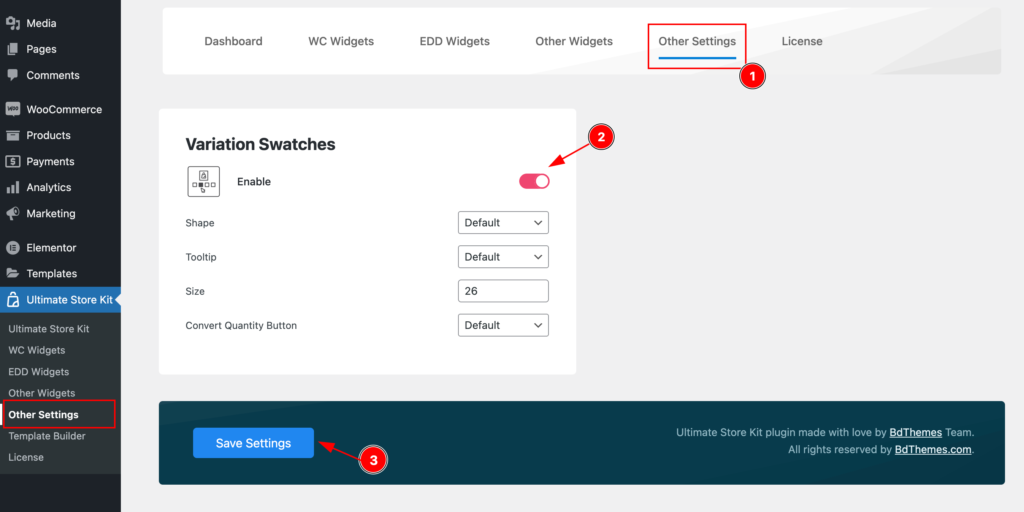
Enable the Variation Swatches,
- Navigate to Ultimate Store Kit > Other Settings in your dashboard.
- Locate the Variation Swatches option and enable it.
- Click the Save Settings button to apply your changes.
Configure the Variation Swatches
Set the Attributes
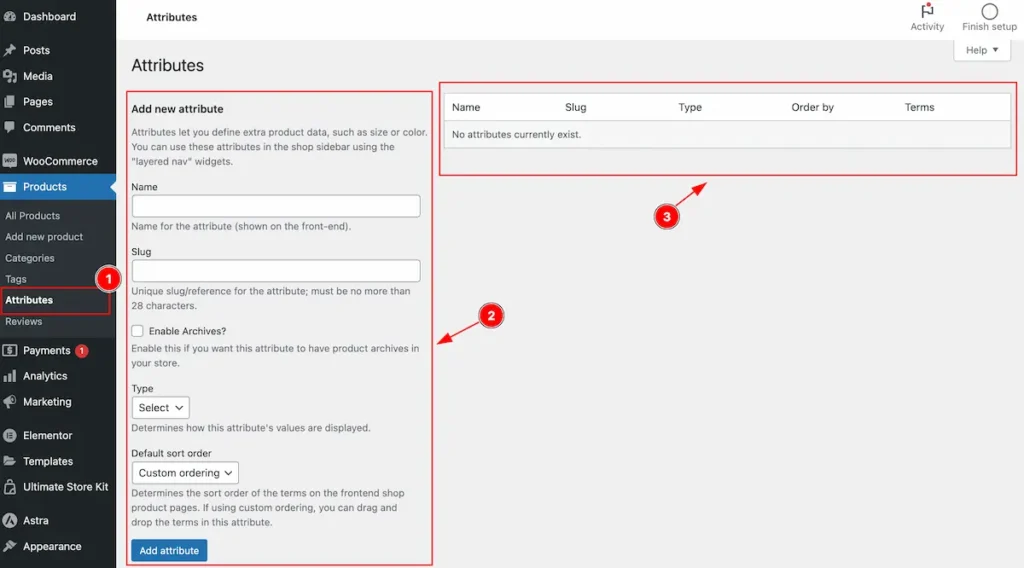
Go to Products section on dashboard.
- Navigate to Attributes Section.
- Find the Attributes form on the left, Add attributes by following.
- The Added Attributes will appear on right section.
Add Color Attributes
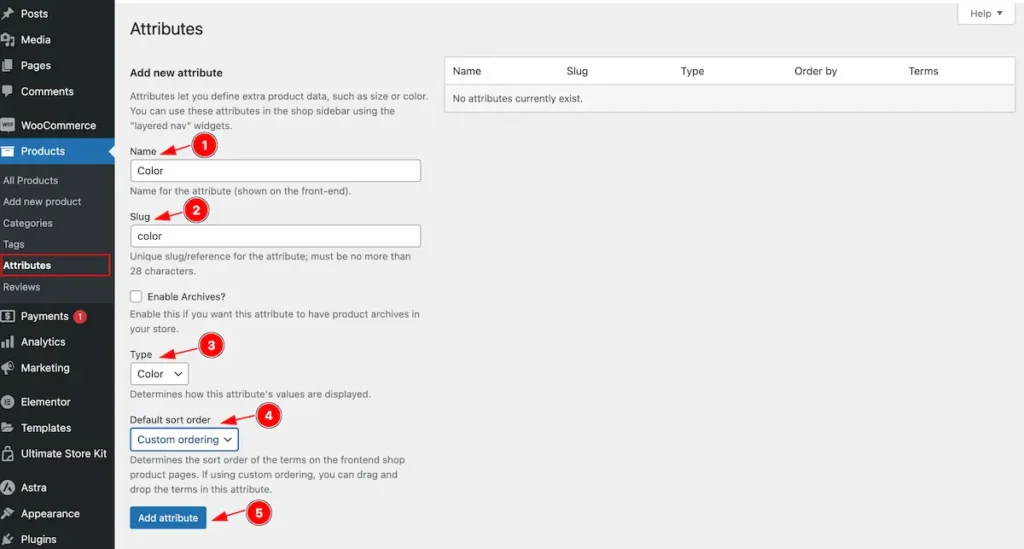
- Name: Set the name for the Attributes ( e.g.: Color ).
- Slug: Set the slug for the attributes ( unique slug/references ).
- Type: Select the type for the attributes ( e.g.: Color, Image, Label, Button ).
- Default Sort Order: Set the default sort order Custom Order ( e.g.: Custom Order, Name, Name ( Numeric, Term ID ).
- Click on the ” Add Attributes ” to create new added.
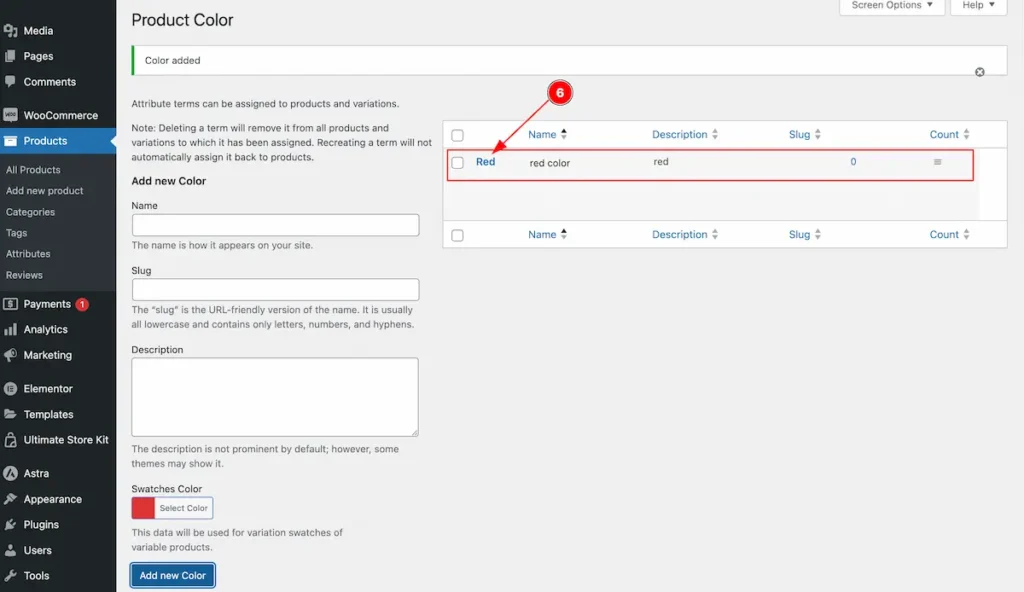
- Added Attribute appear on the right.
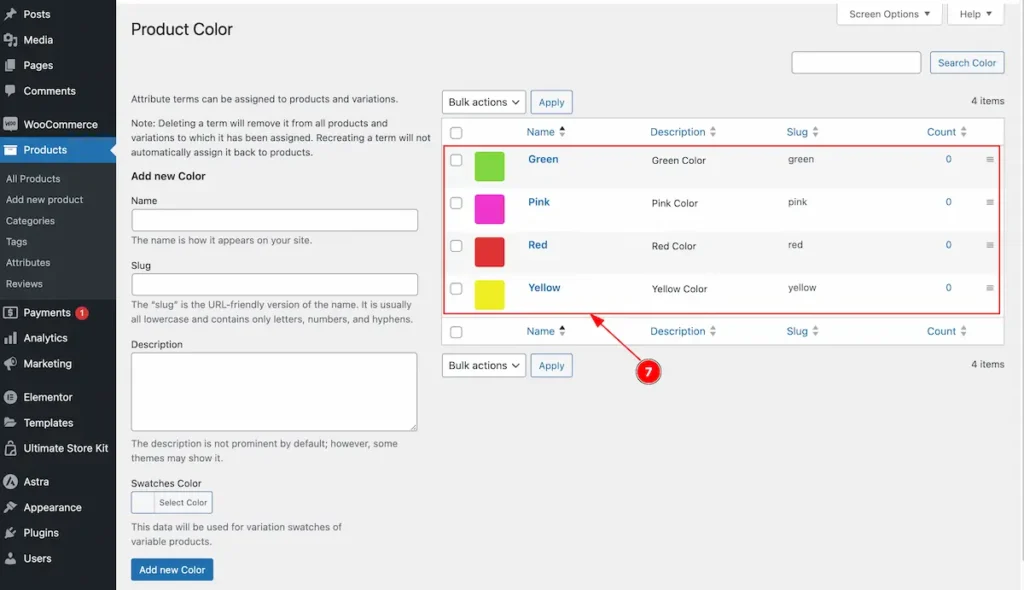
- After adding all attributes.
Configure Terms ( e.g.: Color )
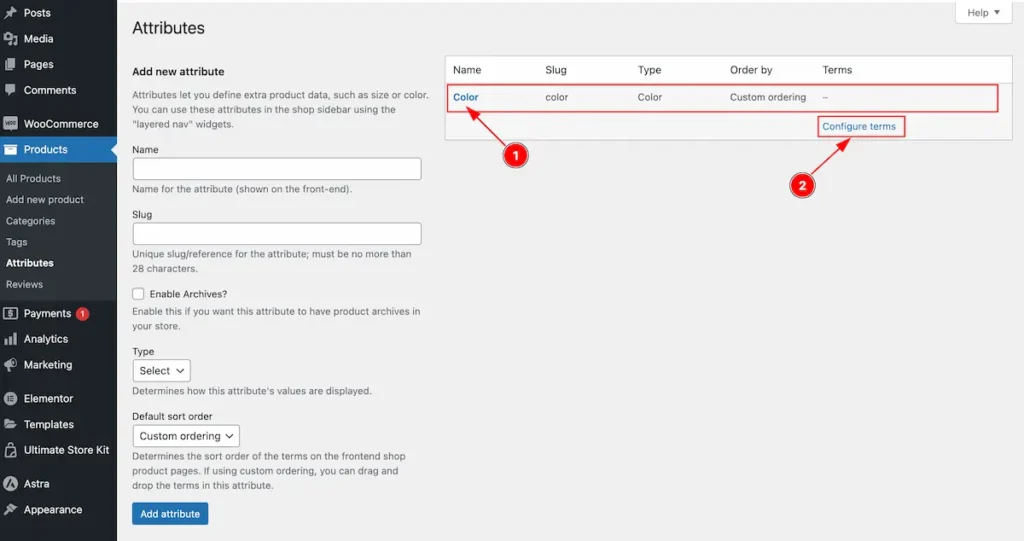
- Select the Attributes ( e.g: Color ).
- Click on the “ Configure Terms ” to add new configure.
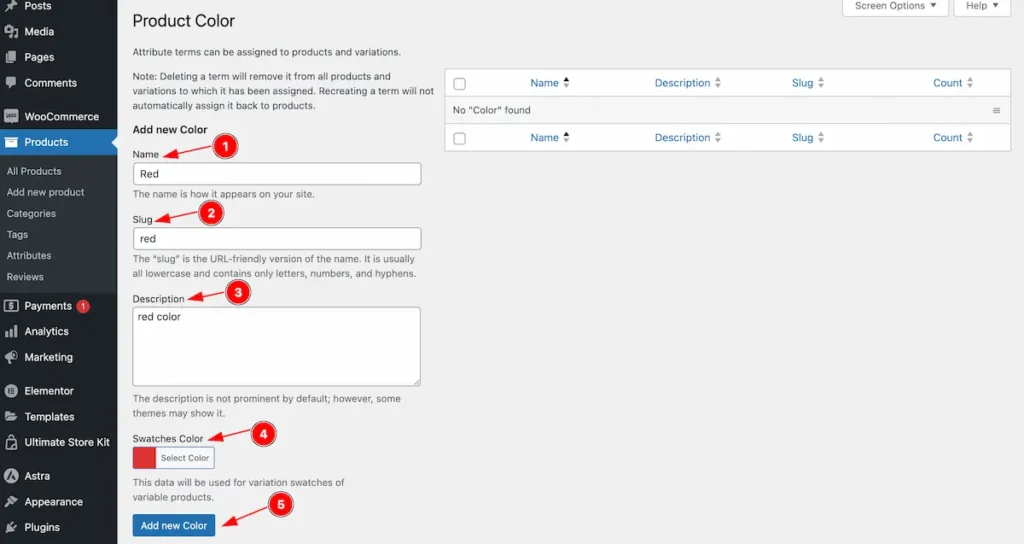
- Name: Set the name of the color ( e.g.: Red ).
- Slug: Set the slug for the attributes ( unique slug/references ).
- Description: Set the description of it.
- Swatches Color: Set the swatches color.
- Click on the ” Add new Color ” button to add new variation.
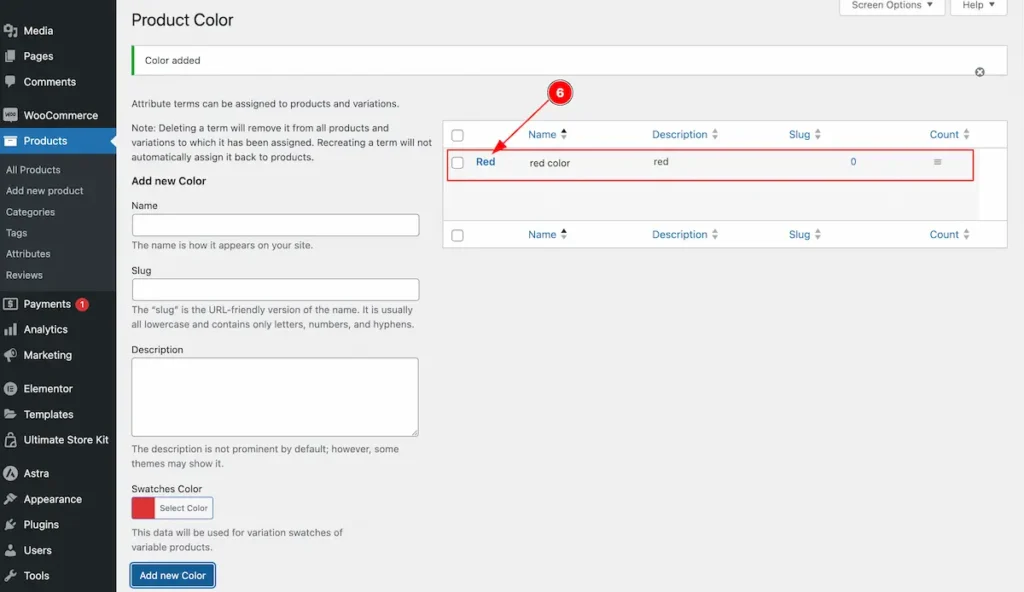
- The Color attributes swatches appear.
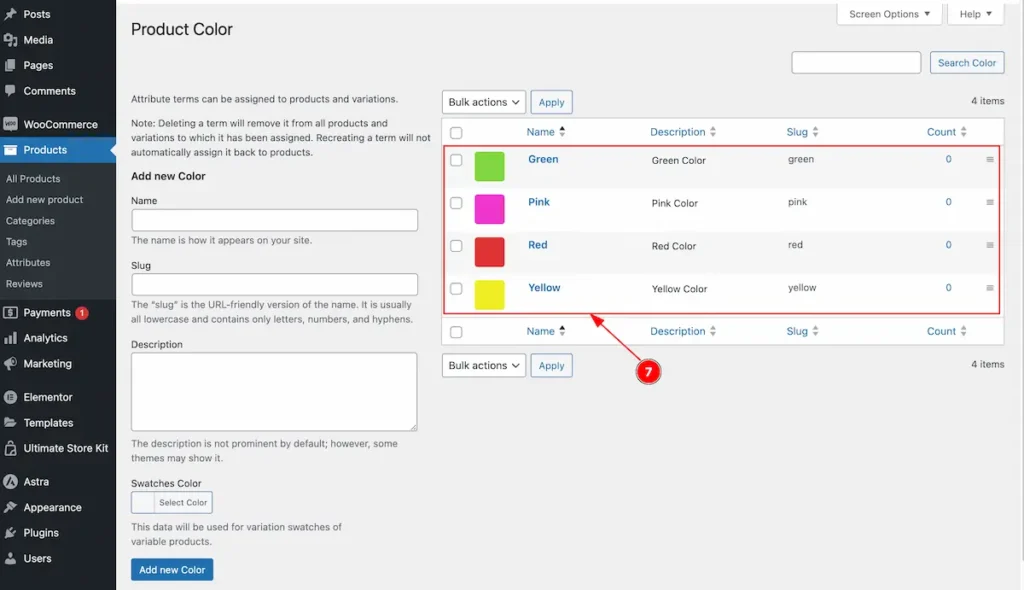
- After adding new color.
Add Image Attributes
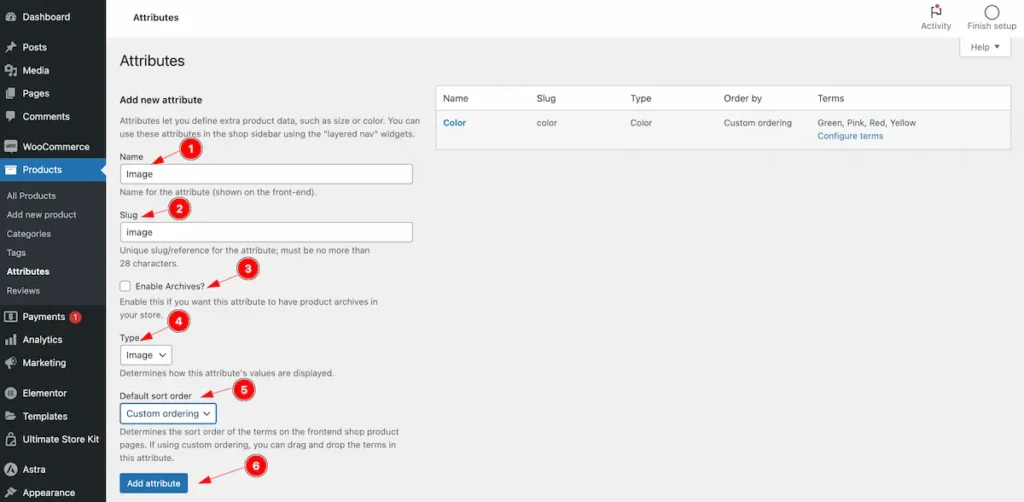
Set the Image Attributes,
- Name: Set the name of the Attributes ( e.g.: Image ).
- Slug: Set the slug for the attributes ( unique slug/references ).
- Enable Archives: Enable this if you want this attributes to have products archives in your strore.
- Type: Select the type for the attributes ( e.g.: Color, Image, Label, Button ).
- Default sort Order: Set the default sort order Custom Order ( e.g.: Custom Order, Name, Name ( Numeric, Term ID ).
- Click on the ” Add Attributes ” to create new added.
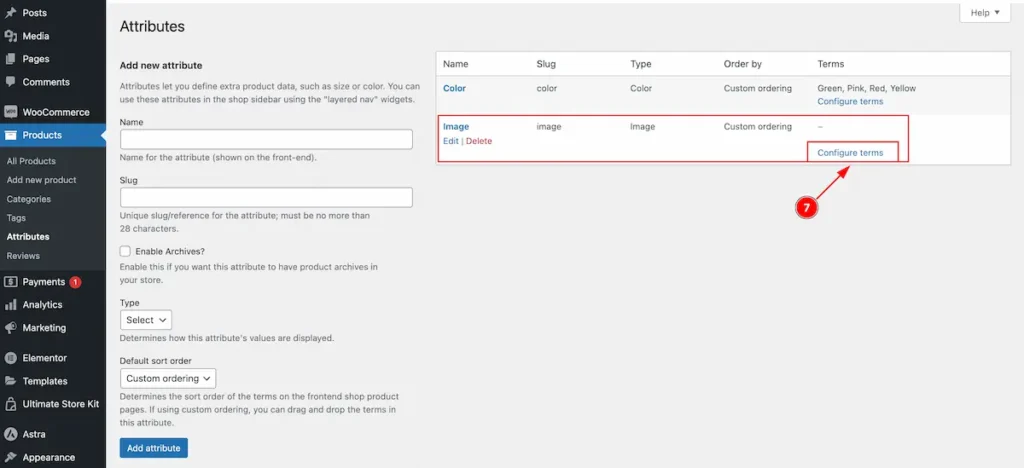
After adding attributes it will appear on the list.
- Click on the ” Configure Terms ” to configure the attributes.
Configure Terms ( e.g.: Image )
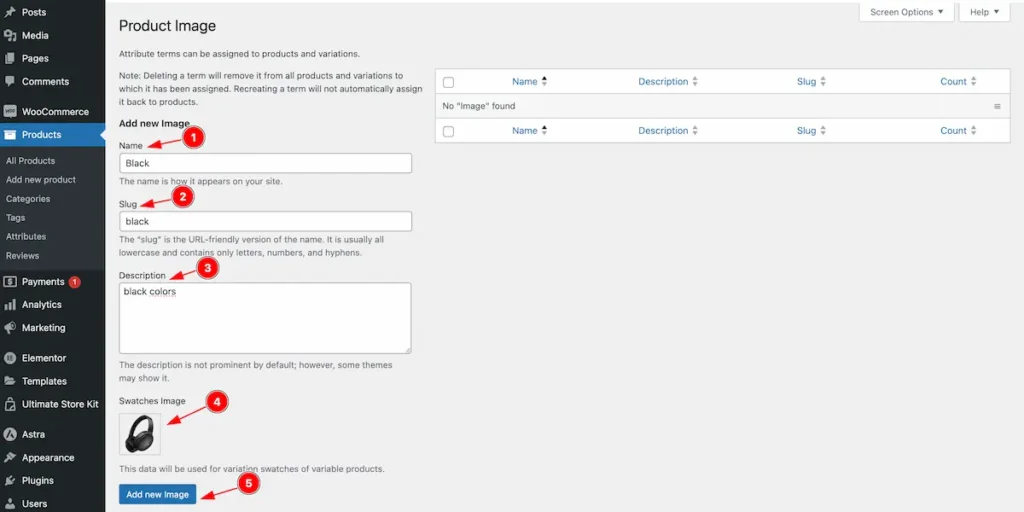
Set the products images ( Edited based on color of image ).
- Name: Set the name of the Attributes ( e.g.: Black ).
- Slug: Set the slug for the attributes ( unique slug/references ).
- Description: Set the description for the images.
- Swatches Image: Select the swatches image.
- Click on the ” Add New Image ” button to add new products.
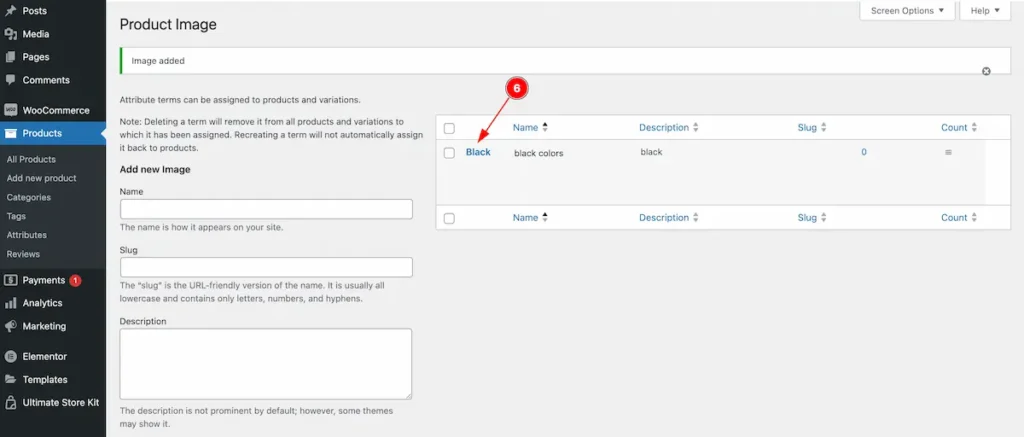
- After adding product color. It will appear here.
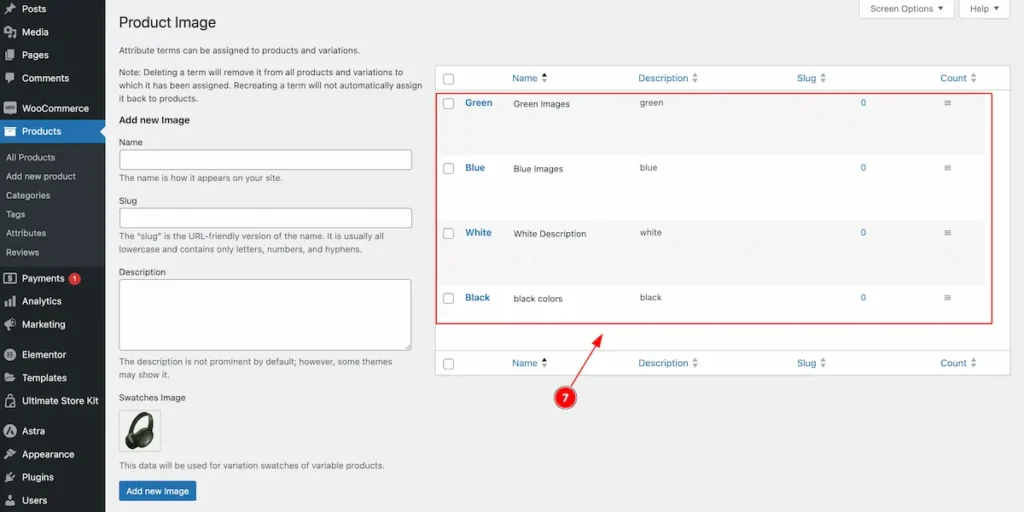
- All the variation appears here.
Add New Products
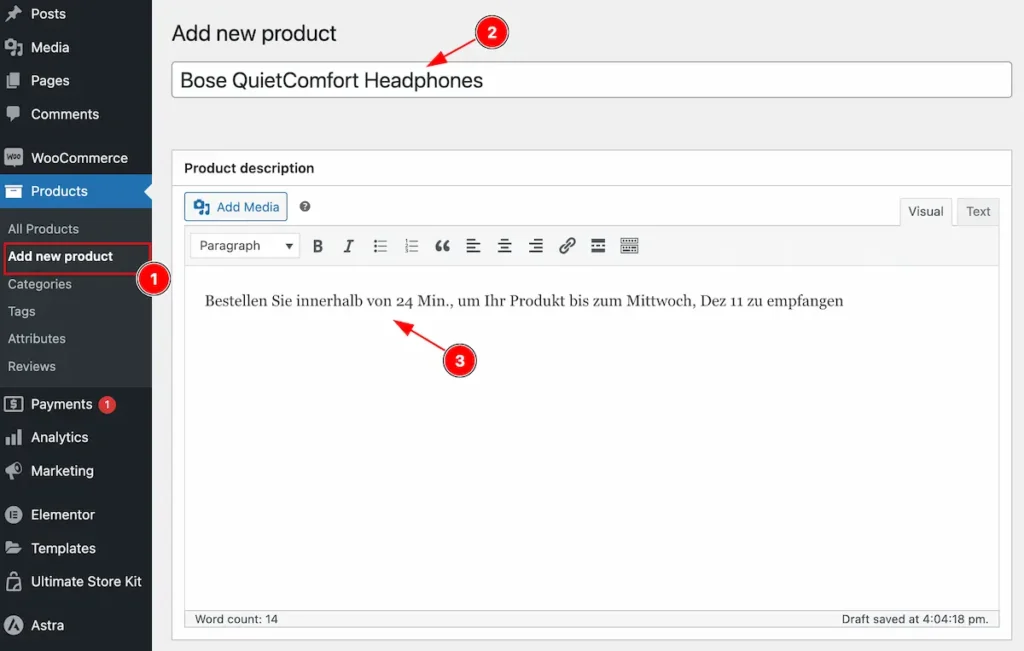
Add New Products,
- Set the Title for the Products.
- Set Products Description.
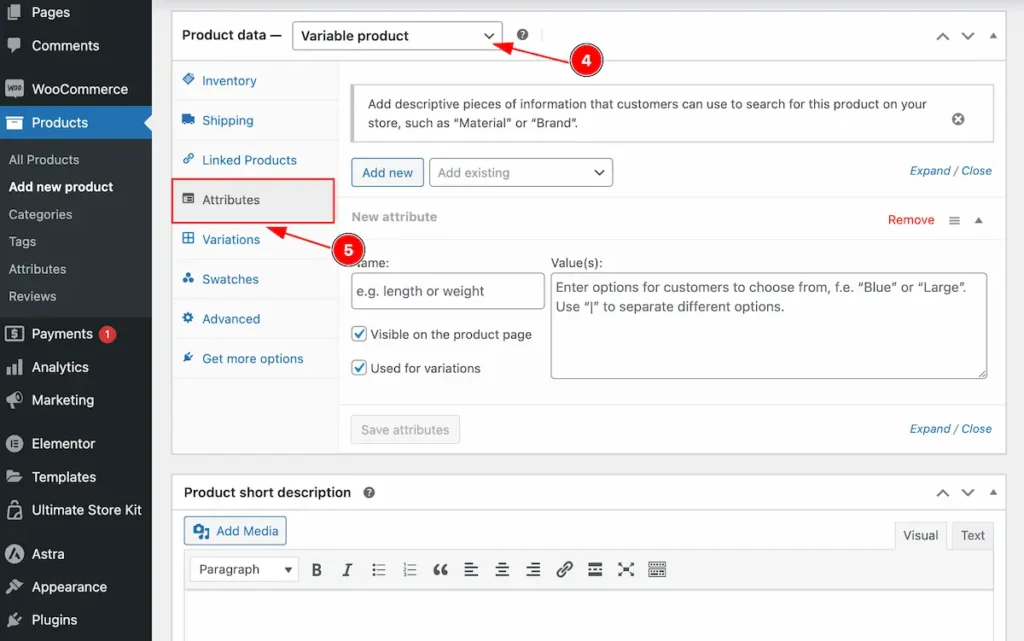
- Select Product Data > Variable Products
- Select the ” Attributes ”
Note: Must Select the ” Variable Product “ to set attributes.
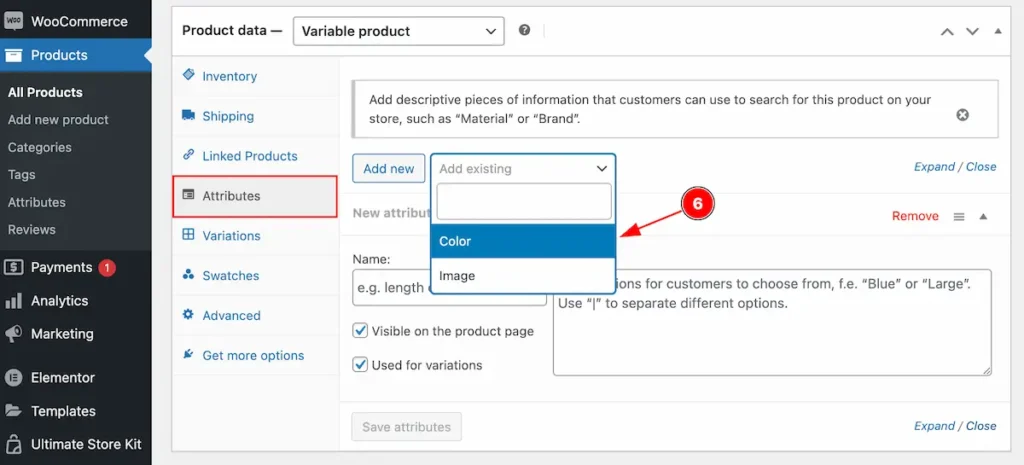
- Select the attributes for the products ” Color “.
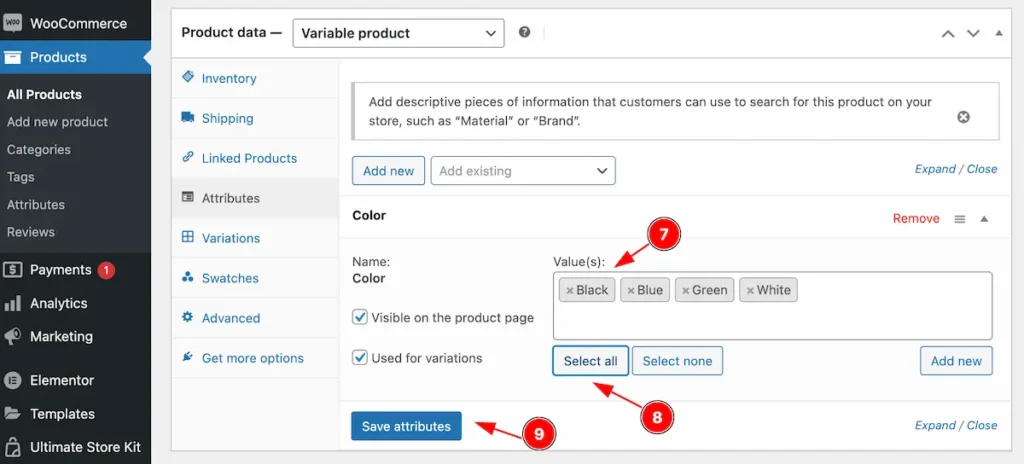
- Values: Added values from this color.
- Click on the ” Select All ” to add new products.
- Click on the “ Save attributes ” to save it.
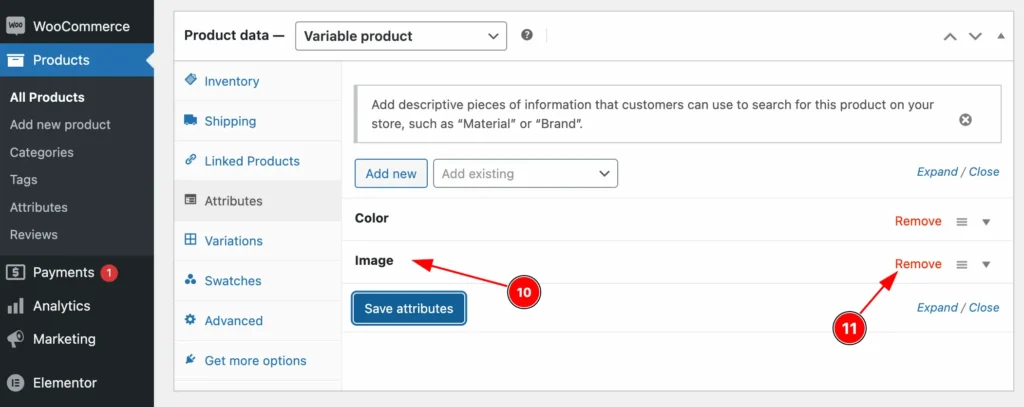
- Adding new attributes.
- Remove the attributes by clicking on the ” Remove ” button.
Variation Added
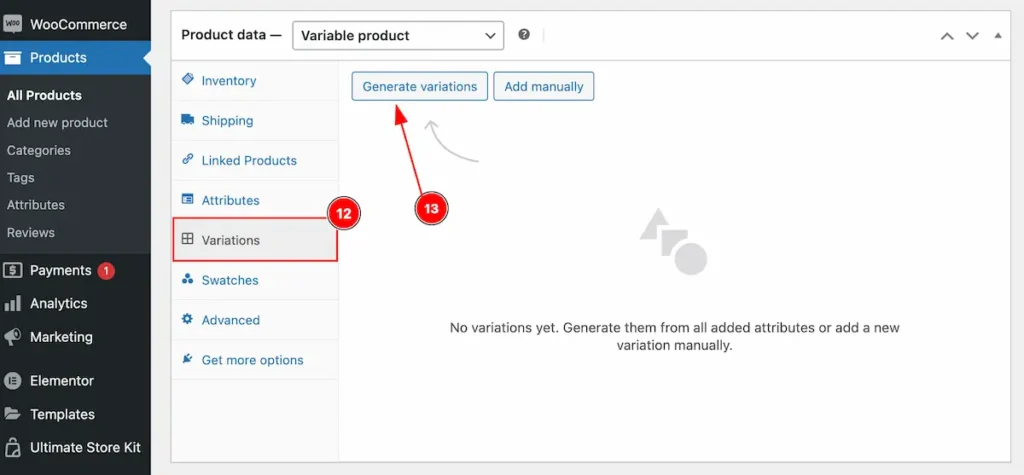
- Navigat to ” Variation ” section.
- Set the ” Generate Variation ” button to generate new variation.
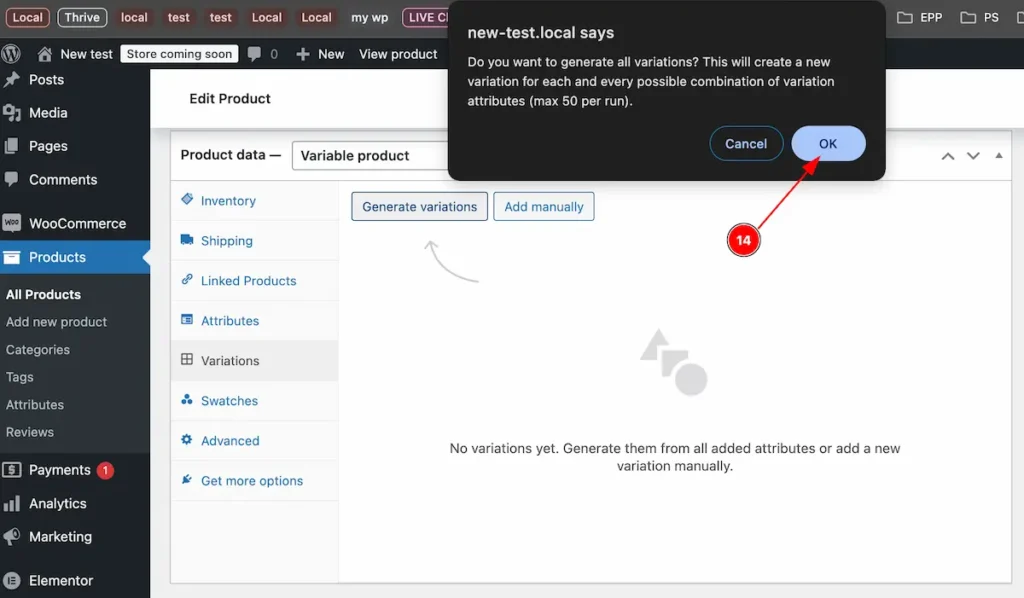
- The message will appear click on it.
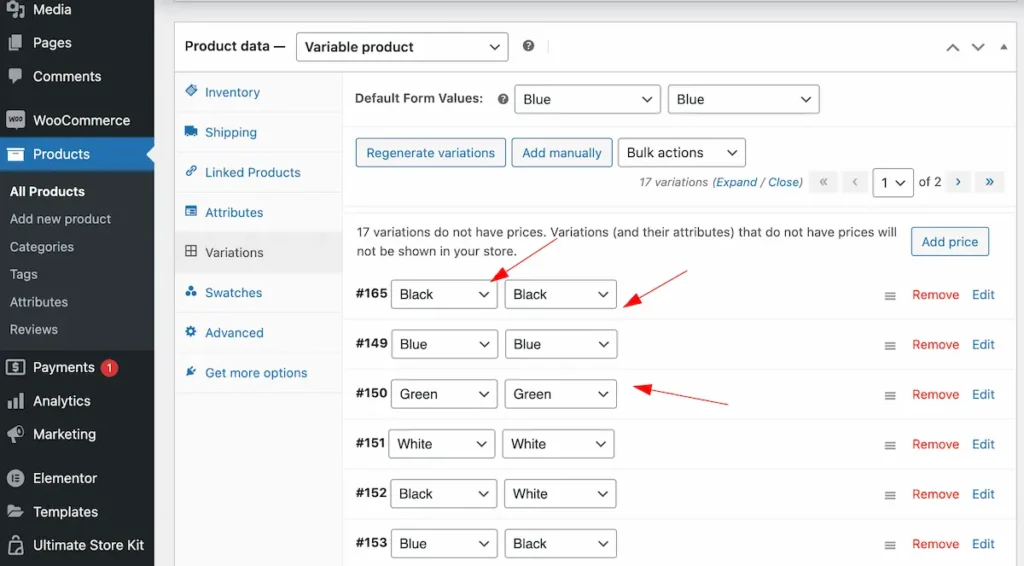
After generating variation it will appear all the variation.
Swatches
Color Attributes
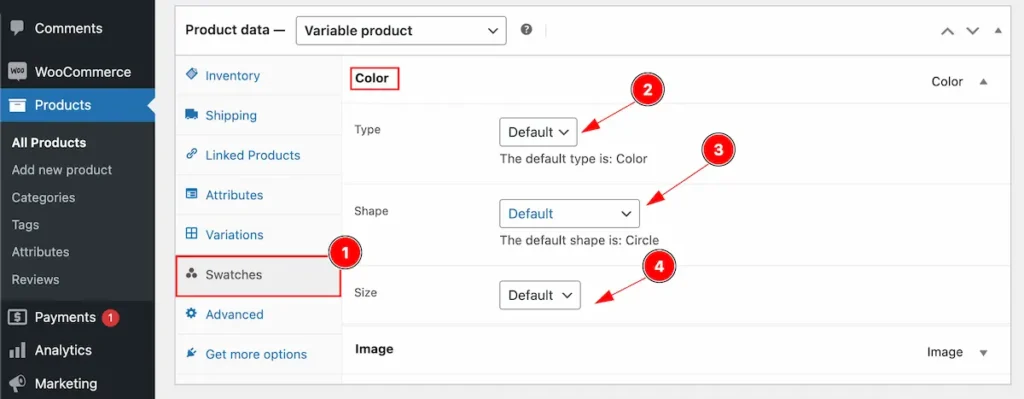
Set the swatches for the attributes ( e.g.: Color ),
- Navigate to Swatches section.
- Type: Set the type( e.g.: Default, Color, Image, Label, Button ).
- Shape: Set the shape ( e.g.: Default, Circle, Rounded Corner, Square ).
- Size: Set the size ( e.g.: Default, custom ).
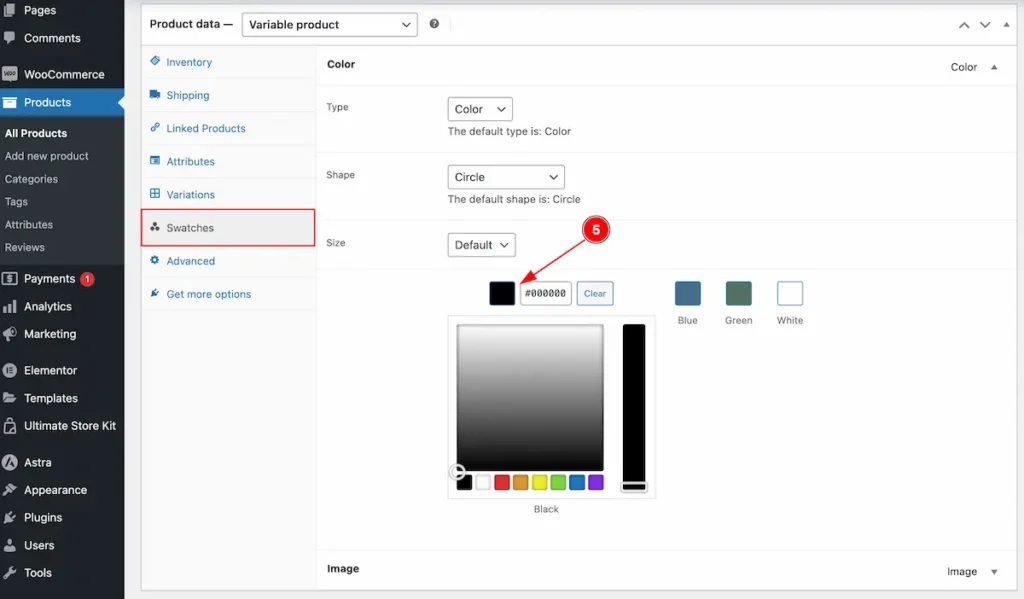
- Set the swatches color for the Color attributes.
Image Attributes
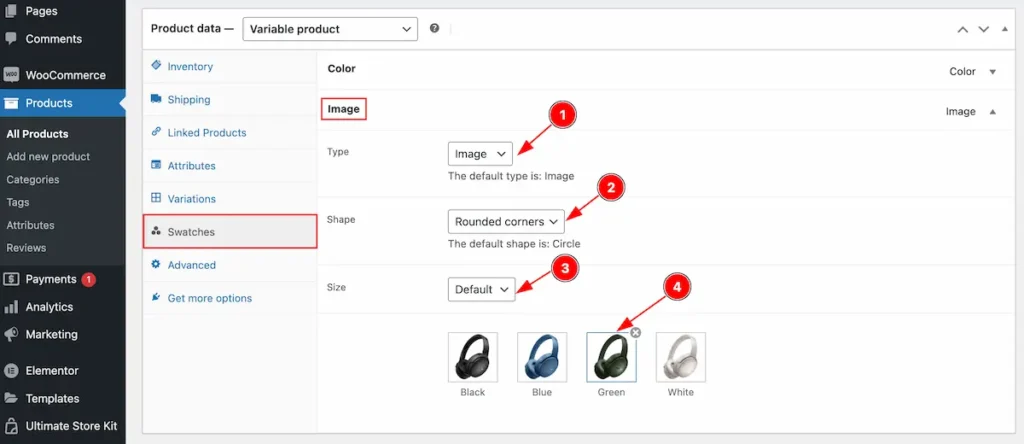
Image attributes for the images,
- Type: Set the type for the image ( e.g.: Image ).
- Shape: Set the shape for the images.
- Size: Set the size for the default image.
- Set the image for the swatches items.
View Products
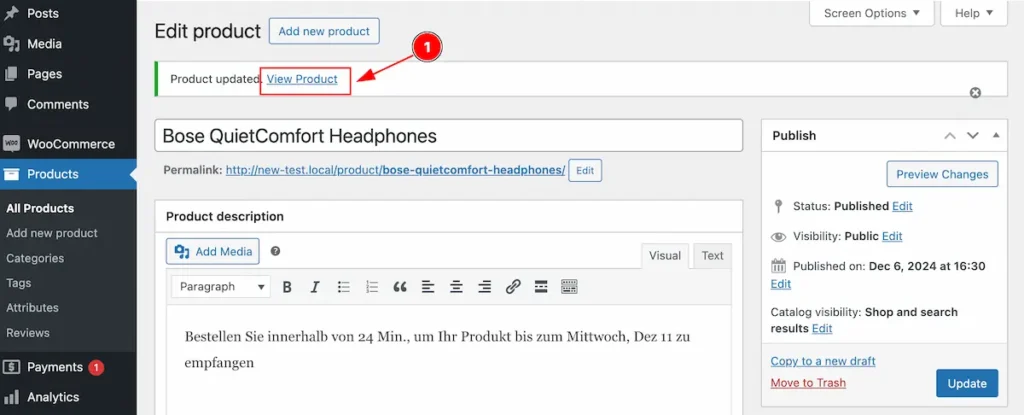
- Click on the ” View Product ” and it will take to new products pages.
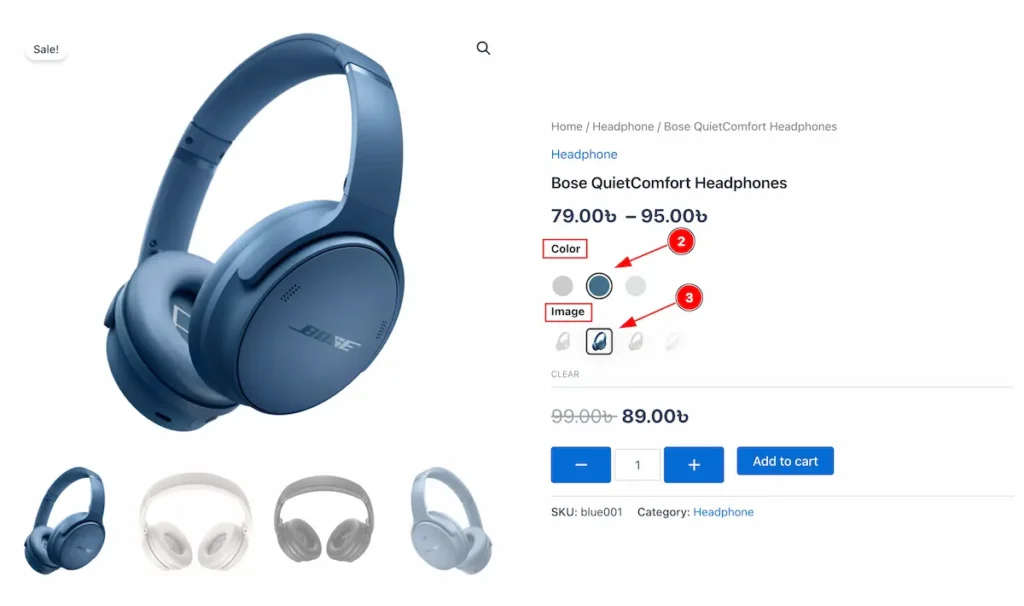
- Color Attributes will appear.
- Image attributes will appear.
Adding The Customisation
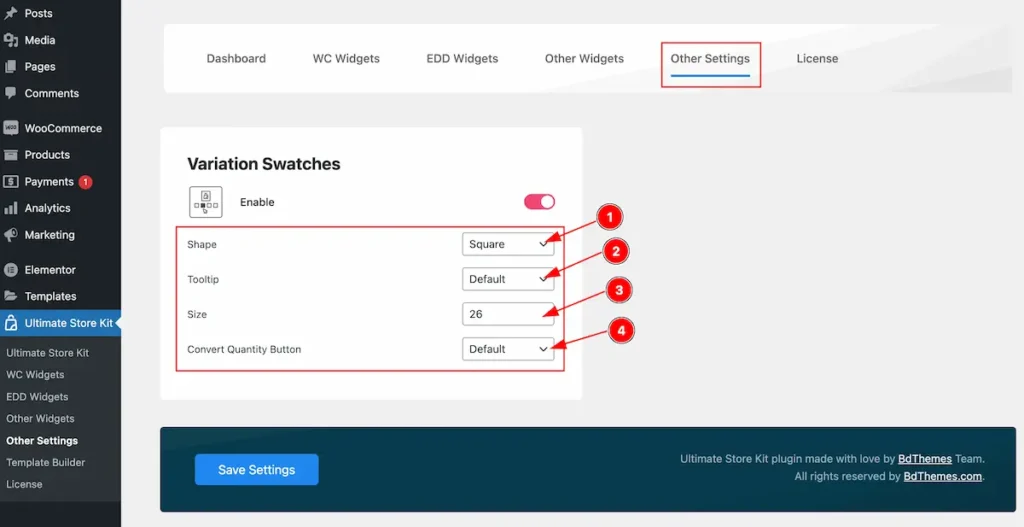
Go to the Other Settings section.
- Shape: Set the shape for the attributes design. ( e.g.: Default, Circle, Square ).
- Tooltip: Set the tooltip ( e.g.: Default, No ).
- Size: Set the size for the attributes.
- Convert Quantity Button: Set the quantity button ( e.g.: Default, No ).
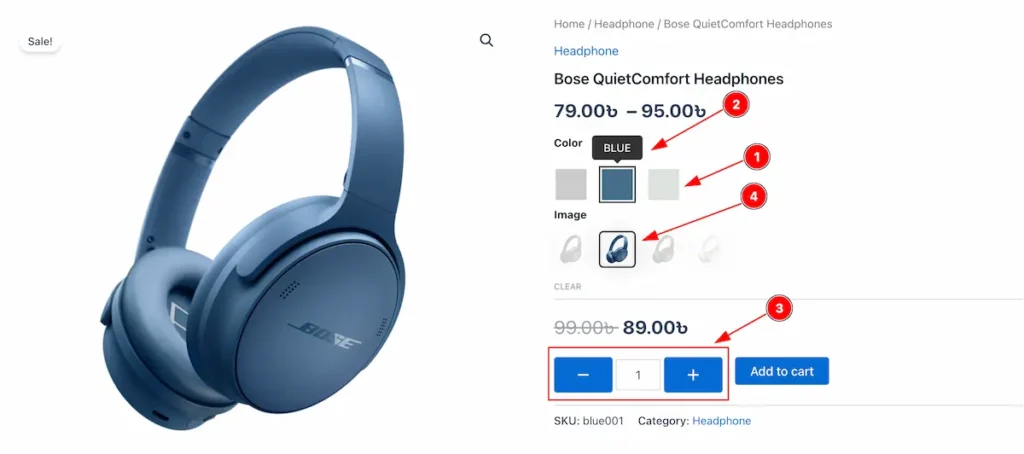
- Set the shape for the attributes.
- Tooltip appear on the attributes.
- The Convert Quantity button appear to add or remove the quantity.
- Set the Size for the button.
By Following this you can use the variation swatches for adding your own customization. You can set the Custom attributes for Color, Image, Label and Button.
Thanks for reading the documentation.
Video Assist
I hope the video will help us properly to understand the feature. Here is the demo page link.
Thanks.
