A testimonial statement is essential for the purpose of business. Using the Testimonial Carousel widget by Element Pack, you can easily create appealing and convincing user testimonial showcases for your business.
Let’s explore the widget and its controls below.
To Insert Widget

Like the screenshot above, drag the Elementor Testimonial Carousel widget inside your page to start customizing it the way you want.
Content Tab
Using the Content Tab, you’ll be able to make a layout of a particular part of a website. And in this regard, some handy sections in the tab will assist you a lot in designing the testimonial slider.
Layout section
Go to Content > Layout
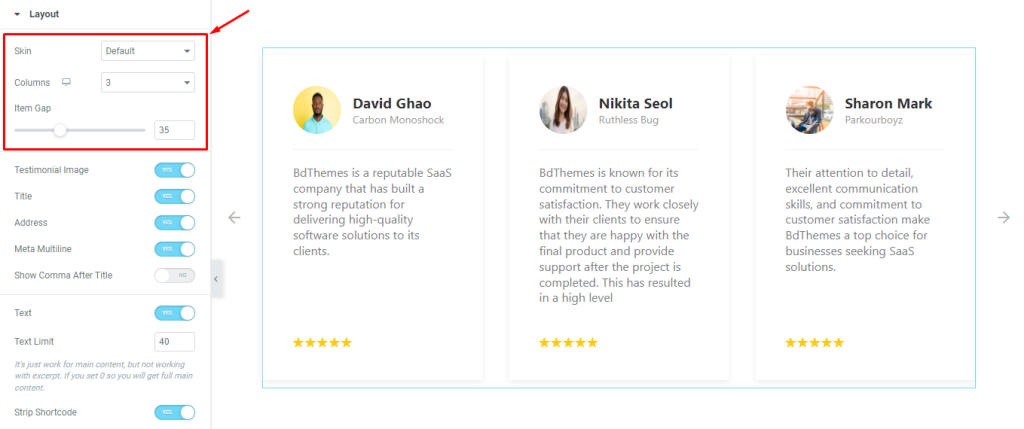
In this section, you can modify the layout of the Testimonial Carousel with initial controls. From the top, you have Skin, Columns, and item gap options. While you may choose up to 6 columns to display the testimonials on the screen and use item gap to create white spaces between items, the skin offers three layout styles for the widget.
What you are seeing above is the default skin that shows the author name & designation on top, then the text below after a separator line and rating at the bottom.
Skin > Twyla
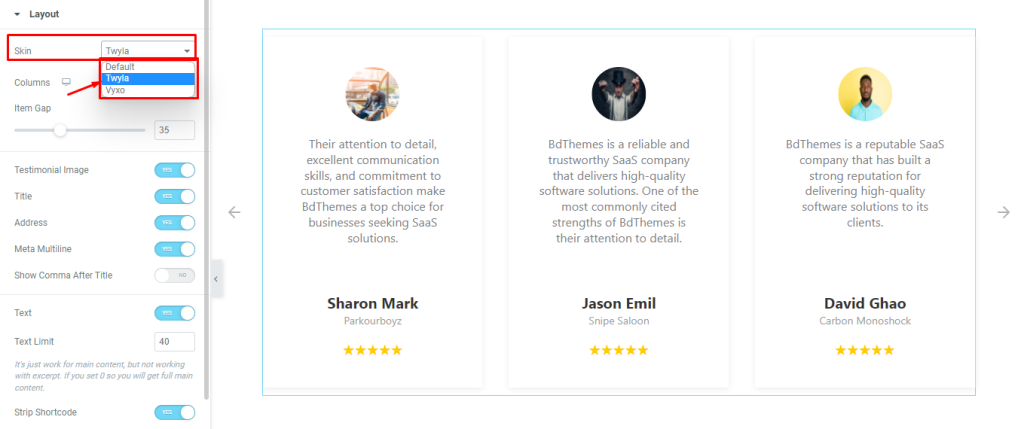
The Twyla skin, by default, repositions the content with middle alignment enabled with the author image on top, followed by the text, author name, designation, and rating at the bottom.
Skin > Vyxo
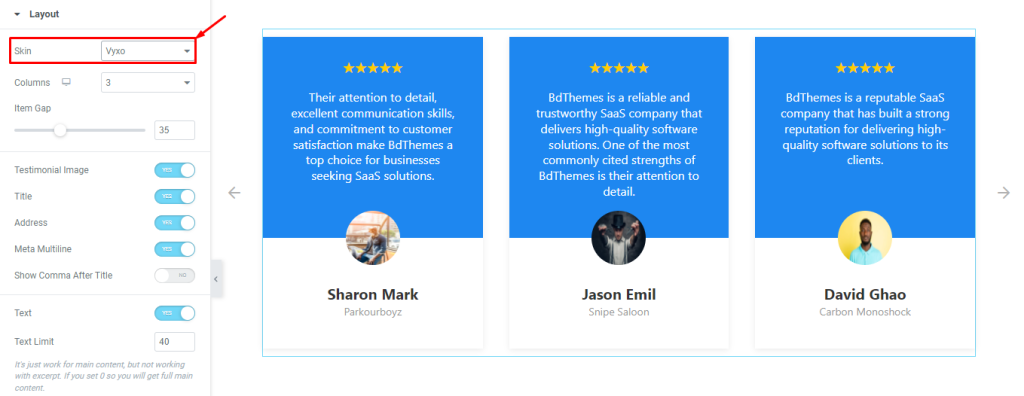
The Vyxo skin positions the rating bar and text on top with a different background color and places the author image in the middle of the intersection with the author’s name and designation at the bottom space. The rating placement is changeable for the Vyxo skin.
Let’s continue with the other options.
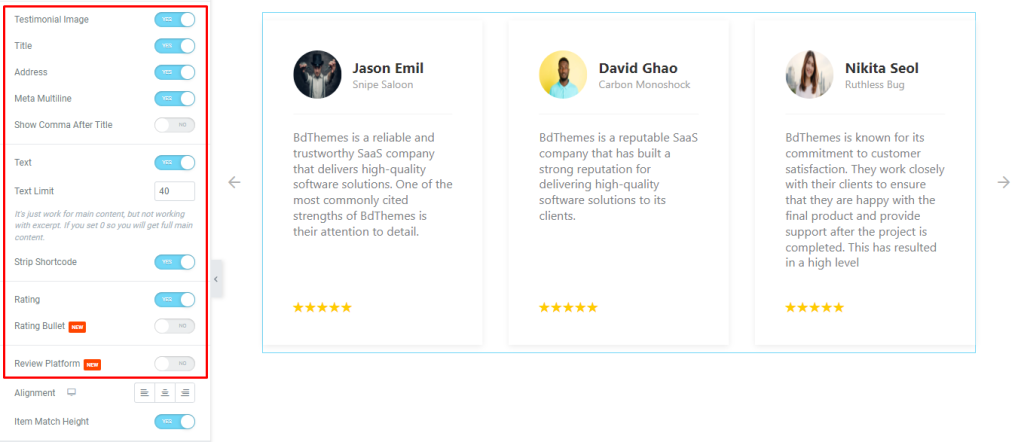
The switchers below can show/hide specific elements on display, such as the image, title, address, meta, text, etc. There is a text limit below the text switcher that lets you limit the testimonial text by the word limit.
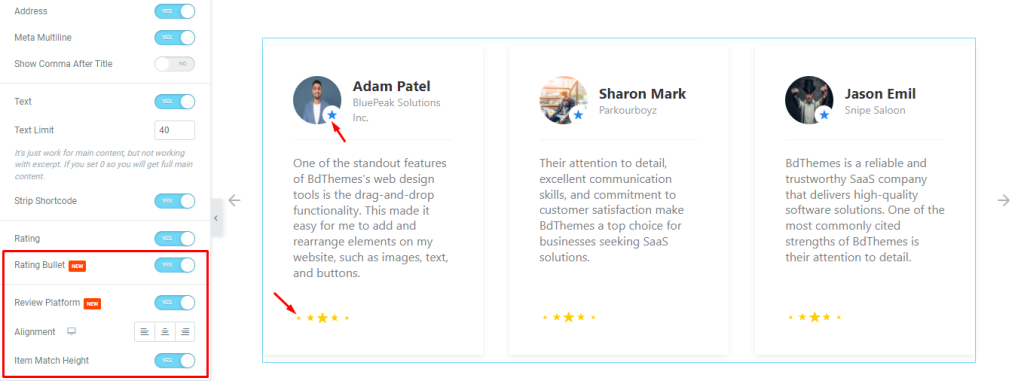
The rating bullet switcher can make the rating stars into dynamic bullets. Turning on the Review Platform switcher will show an additional icon over the author’s image as marked, which determines where the testimonial is recorded/generated.
The alignment option works on the content part and item match height makes all testimonials the same height, regardless of the content size/length.
That’s all the options in the layout part of the Testimonial Carousel widget.
Query Section
Go to Content > Query
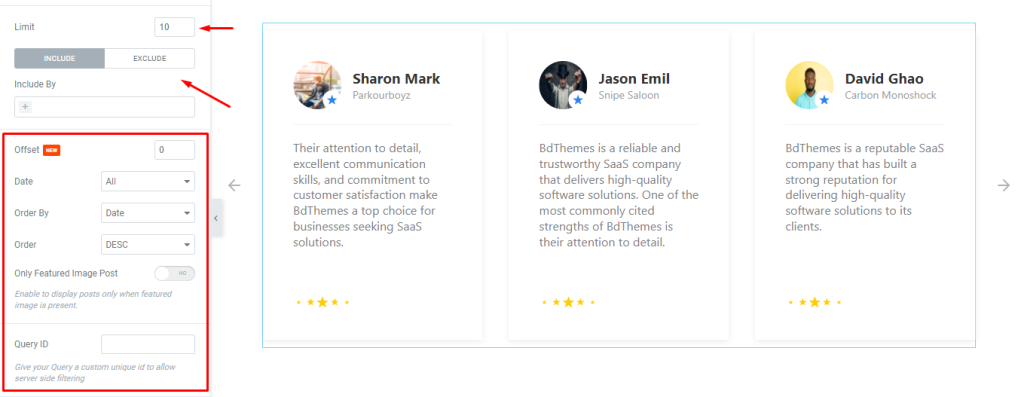
The query section lets you set a Limit to the number of items to be displayed in total on the screen. Then, the Include/Exclude fields act as filters to show or hide specific items, i.e. by the category or author names.
Below are some sorting options with an offset field on top. Sorting helps rearrange the order of the items.
Navigation Section
Go to Content > Navigation
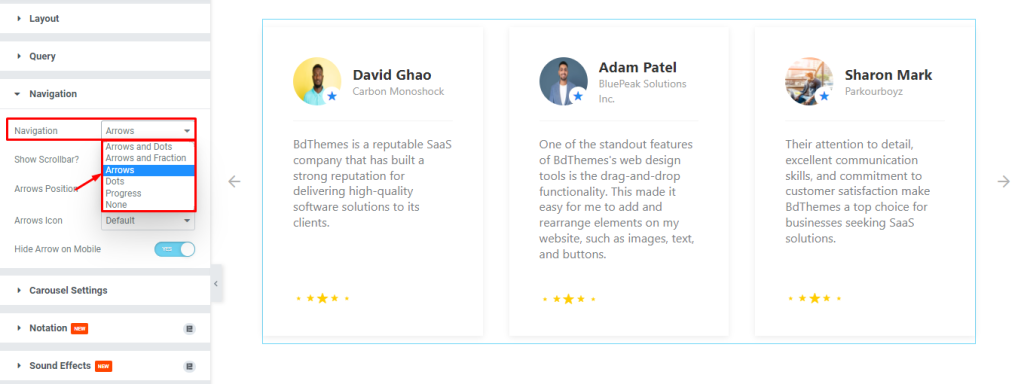
The testimonial slider comes with a number of navigation setups. Here, arrows navigation is selected. There are a total of 5 navigation styles available to choose from.
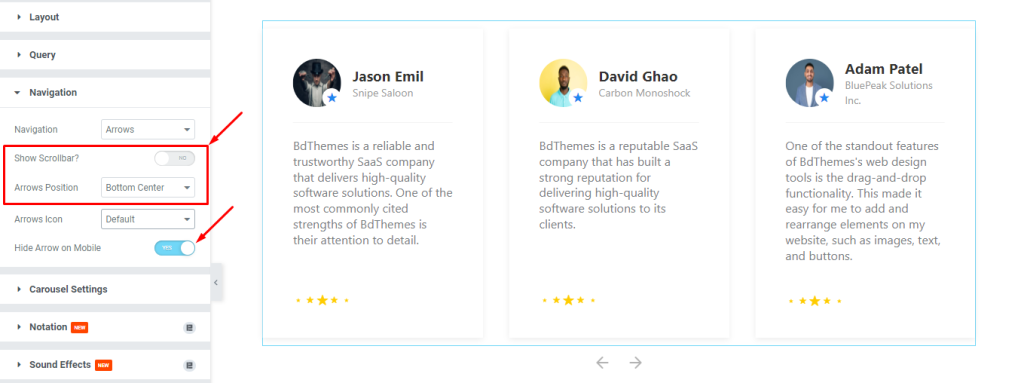
You can set the arrows position to your preferred location on display. Turning on the Show scrollbar? switcher will display a scrollbar under the testimonial slider items. Also, it is possible to hide navigation on mobile devices by turning on the Hide Arrow on Mobile switcher.
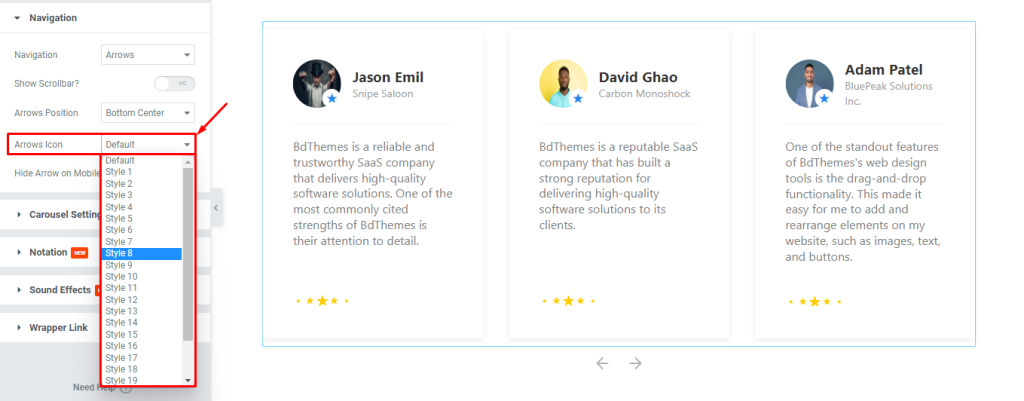
For your concern, 23 unique arrowhead icons are listed inside the Arrows Icon option for you to choose from.
Carousel Settings section
Go to Content > Carousel Settings
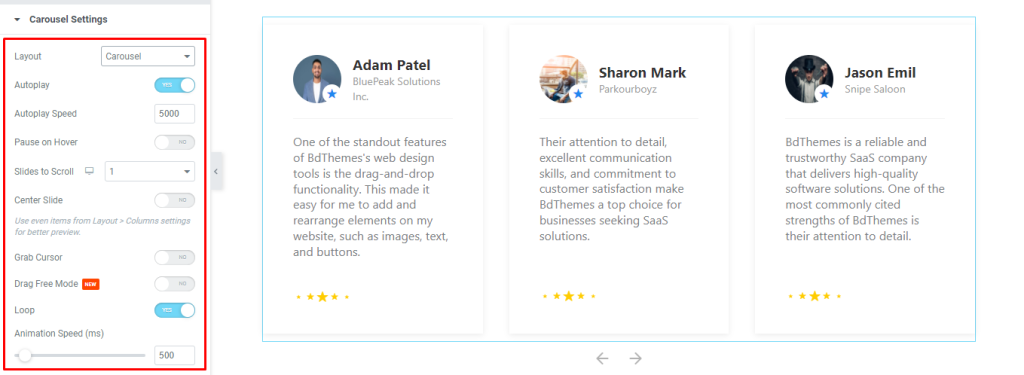
This section mainly holds the animation settings for the widget.
From here, you will be able to select the widget layout between Carousel and Coverflow. Carousel is the default view that you have seen till now.
Coverflow layout
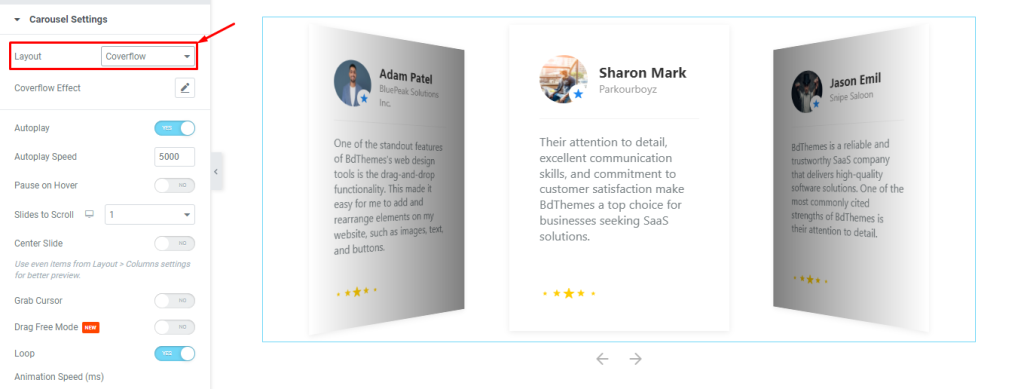
The coverflow layout changes the plain interface into animated item panels. These panels can be further tuned from the coverflow effect option.
Then the rest of the options are for animation controls such as Autoplay, Pause on Hover, Loop, Autoplay Speed, Drag Free Mode, Animation Speed, Observer, and Center Slide.
Keep note that the Drag Free Mode switcher lets your visitors infinitely scroll the carousel sideways smoothly and without stopping (depending on how much pressure you put when scrolling).
Style Tab customizations
Let’s explore how you can change the appearance of the testimonial carousel widget using the precise controls provided by Element Pack Pro.
Item section
Go to the Style Tab > Item
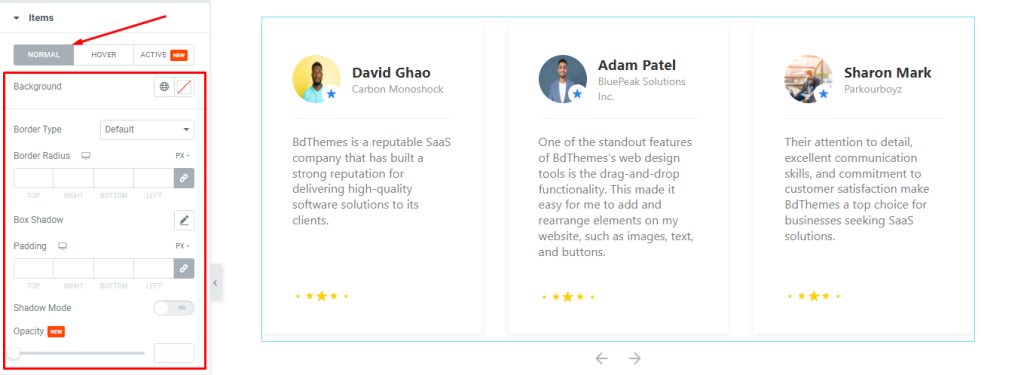
The items section provides controls such as background color, border type, radius, box shadow, padding, shadow mode, and opacity options to customize the whole item’s appearance.
The section is broken into three subsections. Let’s customize them one by one.
Normal subsection
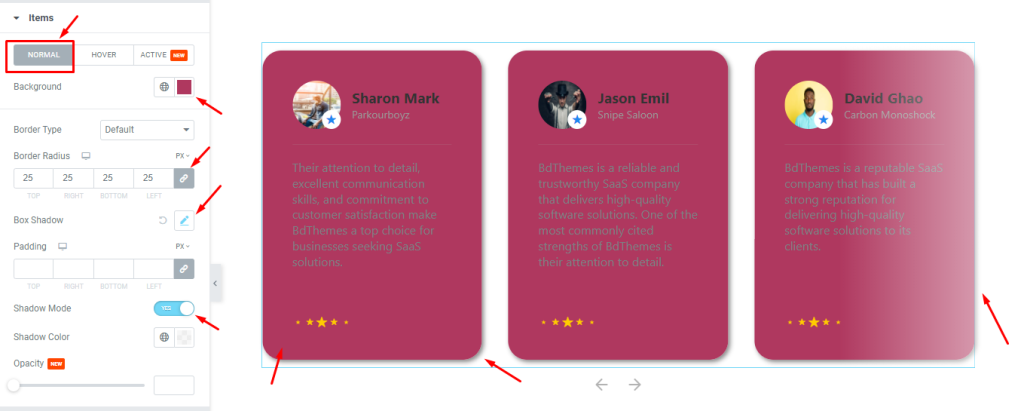
You are already familiar with the options in normal mode. Here, box shadow and shadow mode options are used. Shadow mode lets you select a color for the right side of the carousel to create a blending effect. Here, white is selected.
Hover subsection
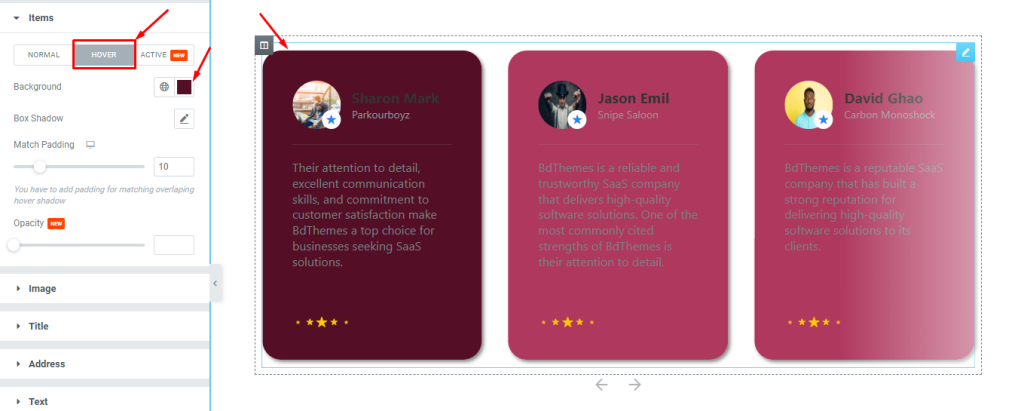
For hover, you may select a different color shade to create the hover effect. For that, you have a background color option, box shadow, match padding, and opacity controls.
Active subsection
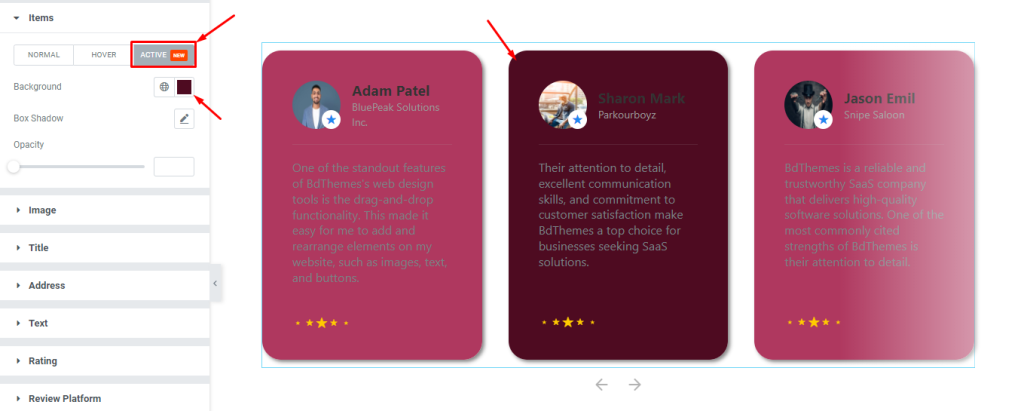
For the carousel, one item can act as an active item or highlighted item for the testimonial carousel widget.
Image section
Go to Style > Image
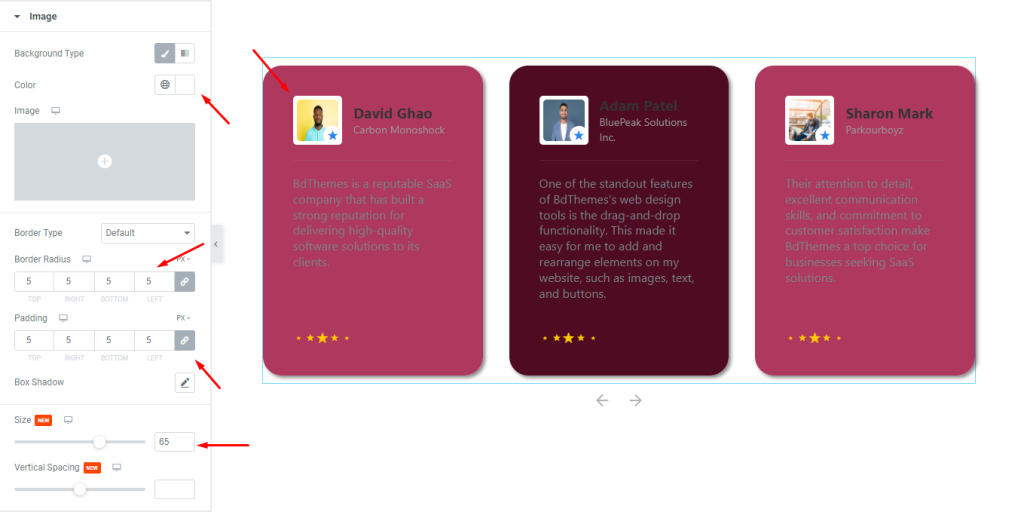
For the images on the testimonial carousel widget, you can select white background color, add a border radius, and some padding around the images. Also, you can adjust the image Size with the scrollbar below. There are other options for you to check out.
Title section
Go to Style > Title
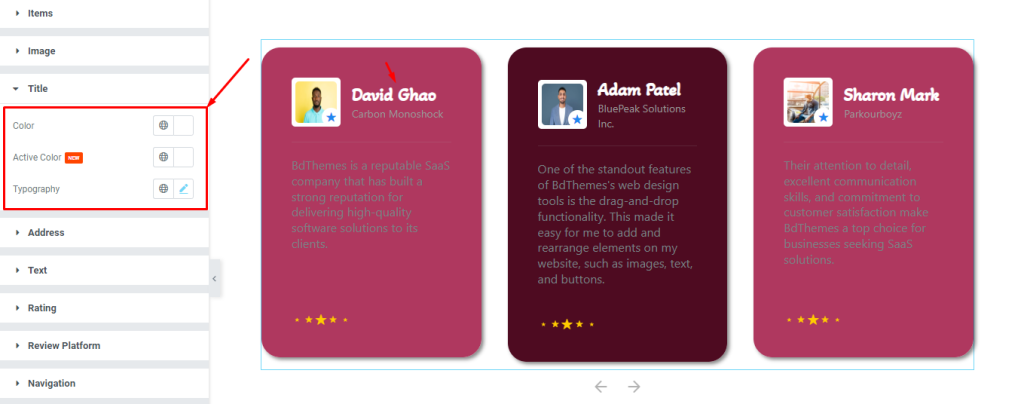
For the title, you can select colors for normal and active modes and use font customizations through typography.
Address section
Go to Style > Address
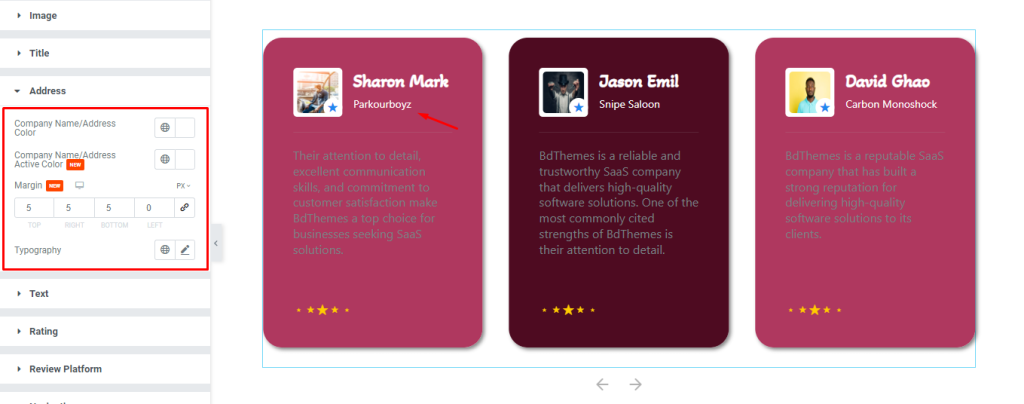
Company name or address is displayed right under the clients testimonials names. This section helps you change the text color of that as well as customize the margin and typography.
Text section
Go to Style > Text
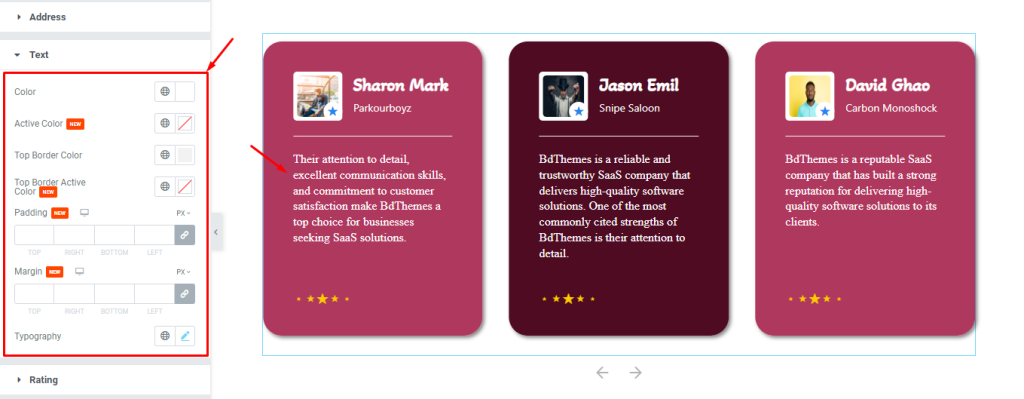
From this section, you can change text color, top border color, and adjust padding & margin for the text area. The typography option is at the bottom.
Rating section
Go to Style > Rating.
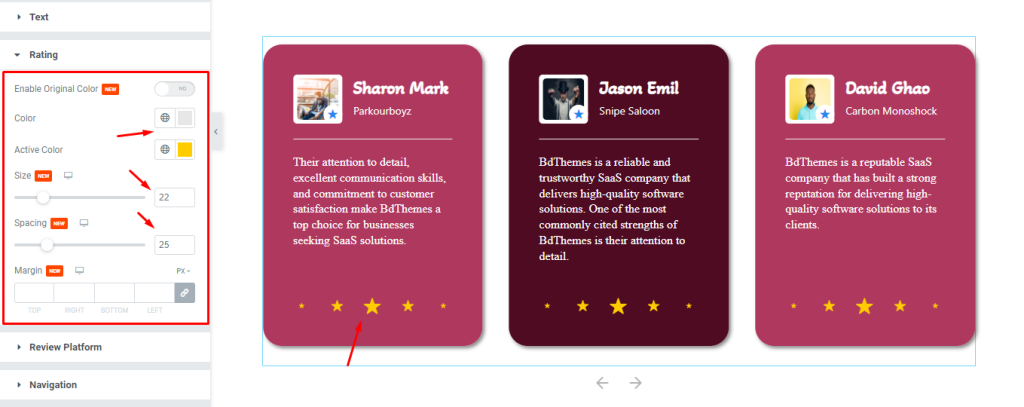
Here, you can easily customize the rating star color, size, and spacing. The rating looks like this because the bullet option is turned on. The top switcher enables the ratings to appear in their original color set by the review platform.
Review Platform
Go to Style > Review Platform
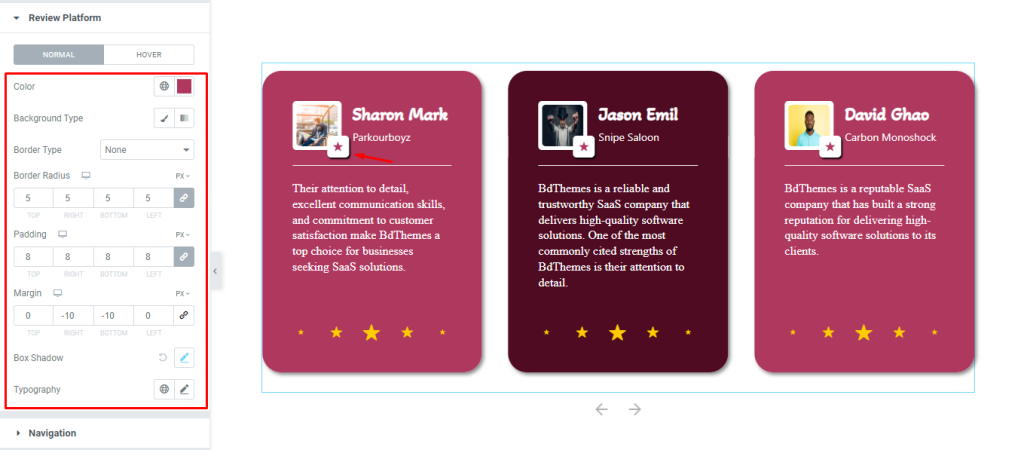
The Testimonial Carousel widget pulls data from the existing testimonial plugin. The review platform icon appears close to the clients testimonials images as identifications of the sources from where the review was collected.
From this section, you can customize the icon color, icon background color, and configure border, border radius, padding, and margin values. Here, we adjusted the margin values to reposition the icon.
With box shadow, you can drop a shadow behind the icon to highlight it even more. To customize the icon size, you need to configure typography.
Navigation
Go to Style > Navigation
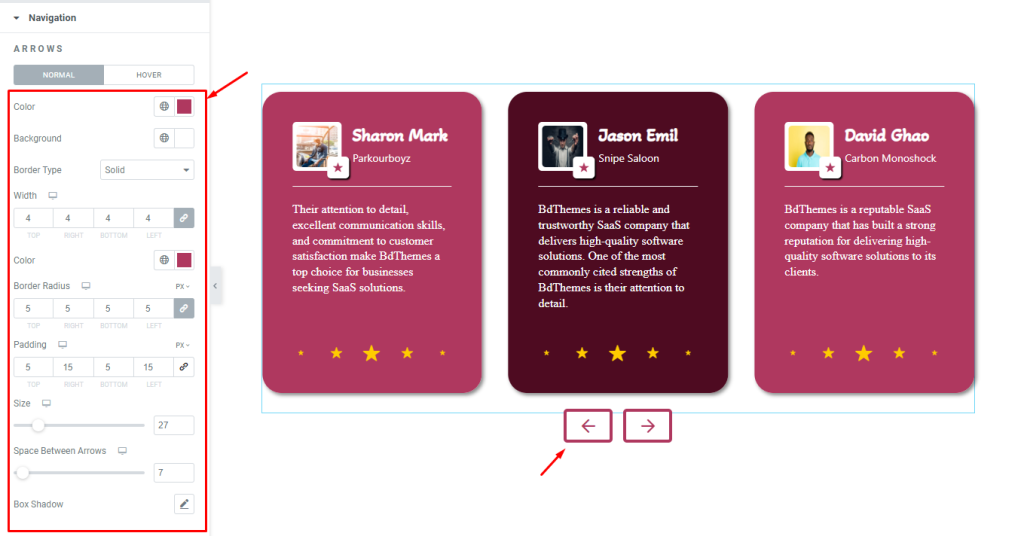
For the navigation part, we selected arrows, and that’s why this section shows controls to customize the arrows appearance.
Here, you can select the arrowhead color as well as the background color, and set a custom border with a custom border width, color, and border radius.
Use padding to adjust the arrow background area and finish it with arrow size and space between scrollbars.
Video Assist
If you want to know more about the widget, you can watch the video on Testimonial Carousel Widget by Bdthemes and also go to our demo page.

