The Reveal Effects Extension is a wonderful feature presented by BDthemes that is a part of Element Pack Pro version 6.0.
Let’s learn how to use this extension on your site.
Enable the Reveal Effects extension
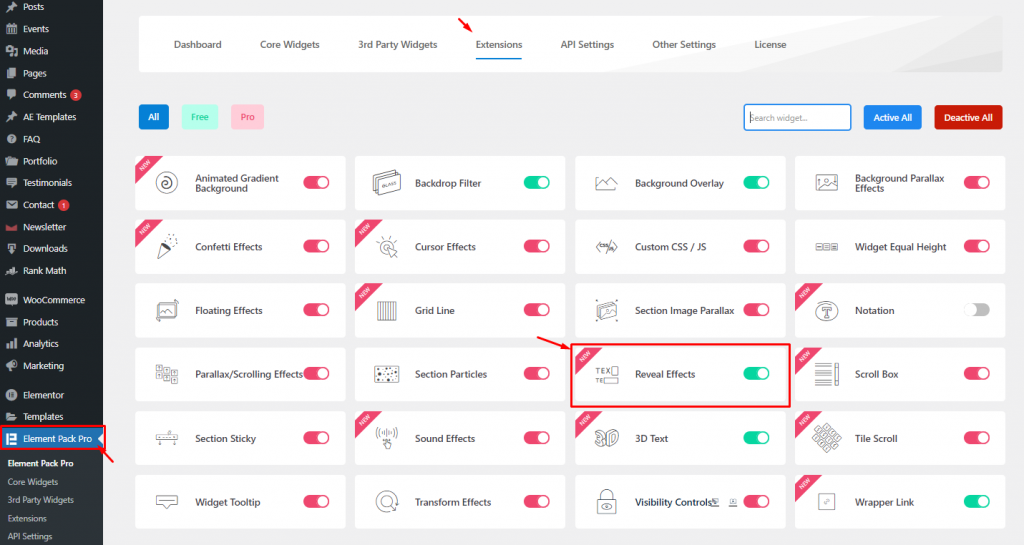
To activate the Reveal Effects feature, you have to enable it first. To do that, go to WordPress dashboard> Element Pack Pro> Extensions. After that, enable the Reveal Effects extension switcher and save settings.
Use the Reveal Effects Extension inside Elementor page editor
Now, go to the target page. First, let’s create a layout where we will apply the reveal effect. Just an image widget along with a heading and text would suffice.
Step-1
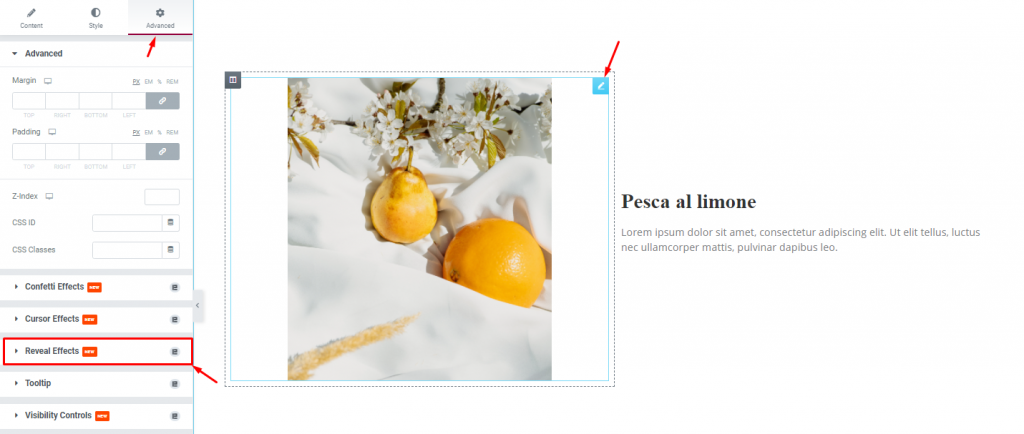
Then, click on the widget editor, then go to the Advanced tab, and find the Reveal Effects section. Now click on it.
Step-2
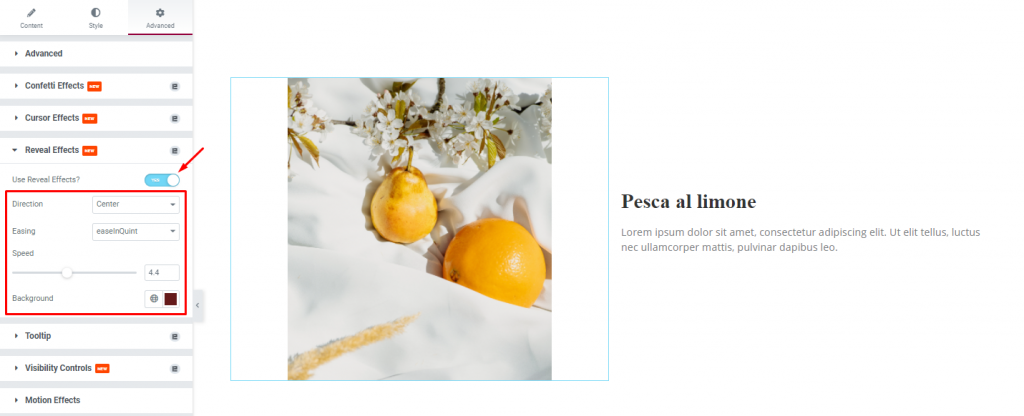
After enabling the ‘Use Reveal Effects?’ switcher, the default effect will be applied to the image automatically. Now it’s time to customize it.
Customize the Reveal Effects with the Advanced tab
Step-1
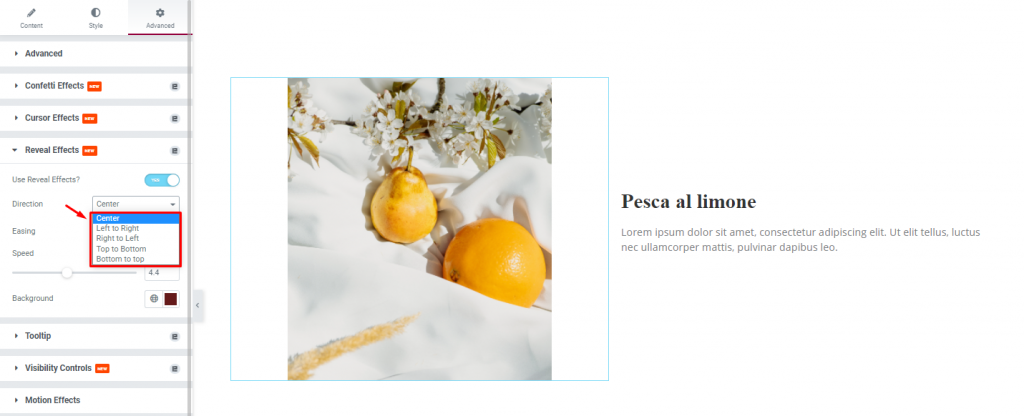
Here, you can choose one among five drop-down options to change the Direction of the effect. The default setting is Center.
Step-2
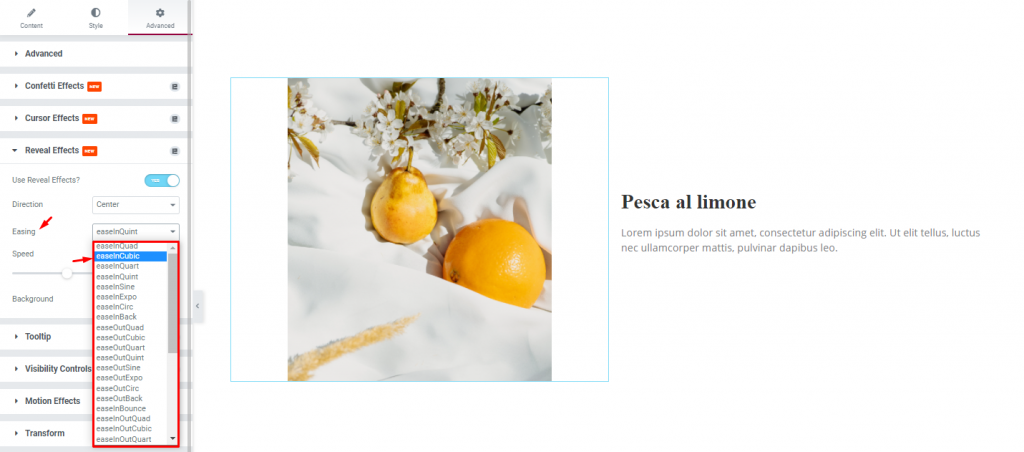
The Easing effect right below lets you pick a transition effect for the reveal effect feature. Here, you can change the Easing effect from the drop-down option. The default setting is easeInOutQuint. You can choose one from several options.
Step-3
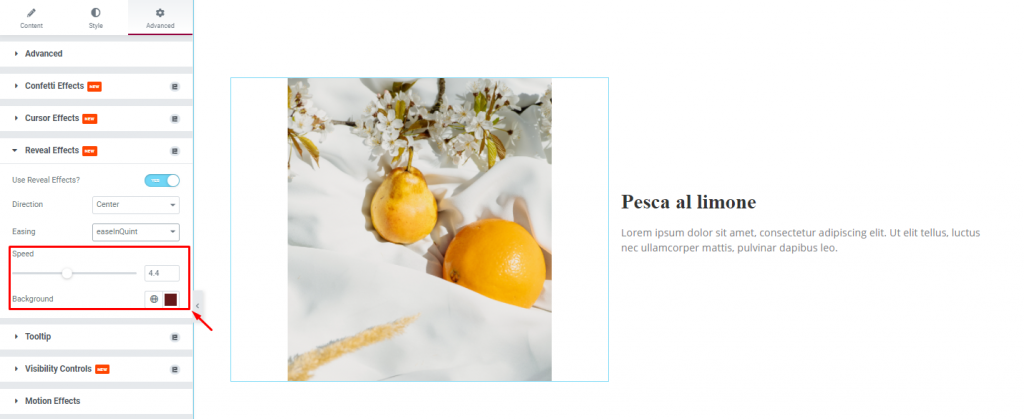
Next, you can set the speed of the transition, and the background color of the effect. For the background color, try to choose a charming and attractive tone.
All done! You have successfully customized the Reveal Effects extension on your webpage.

Now, just relax and enjoy the show.
Video Assist
You can watch this video to learn how to use Reveal Effects Extension in Elementor to get a hands-down experience. You can also visit the demo page for more examples. Hope you can use it on your own.

