The Notation extension is a handy feature presented by BDthemes that is a part of Element Pack Pro version 6.0. It lets you indicate a specific portion of text in various designs to catch the attention of the visitors.
Let’s learn how to use the extension on your site.
Create the Notation layout
Step 1-Prepare the target layout
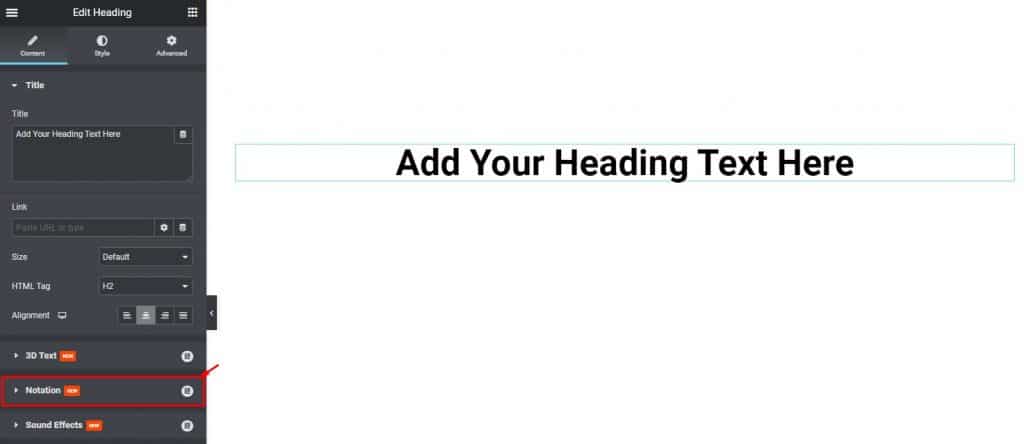
To use the Notation extension on your website, you have to first choose the content you will be applying notation to. Let’s drag a heading widget on the page where we will apply the effect.
As you can see, the notation extension is displayed under the content tab already.
Step 2-Enable the Notation Effects switcher
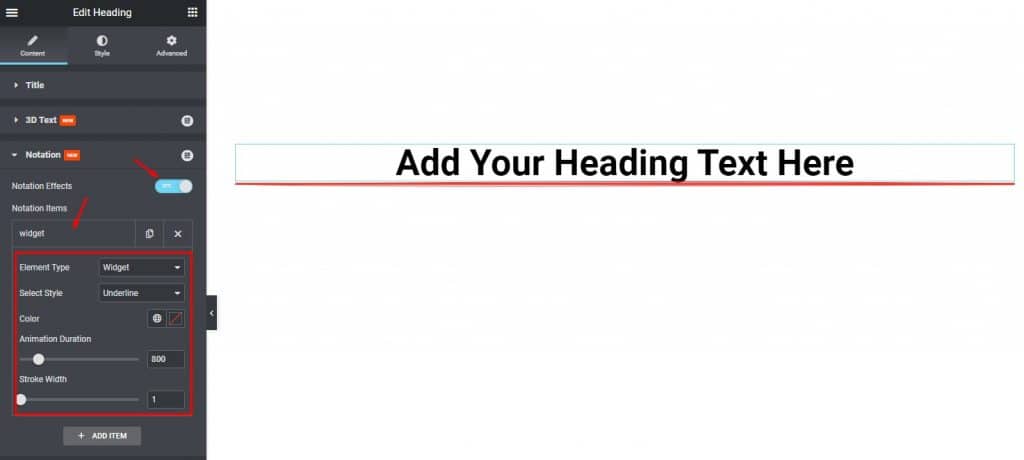
Go to Content> Notation
After going to the Notation section, enable the Notation Effects switcher. Just as you do, you will see a default notation effect taking place under the heading text, and underline to be exact.
Below the switcher, you will see a list of options to further modify the effect. Under each item, there are some options to change the Notation, and a button to add new items.
Here, you can change the Element Type, Select Style, and Color. You can also change Animation Duration, and Stroke Width using the scrollbars.
Customize the Notation in full and specific portion
For the full text
Change Element Type
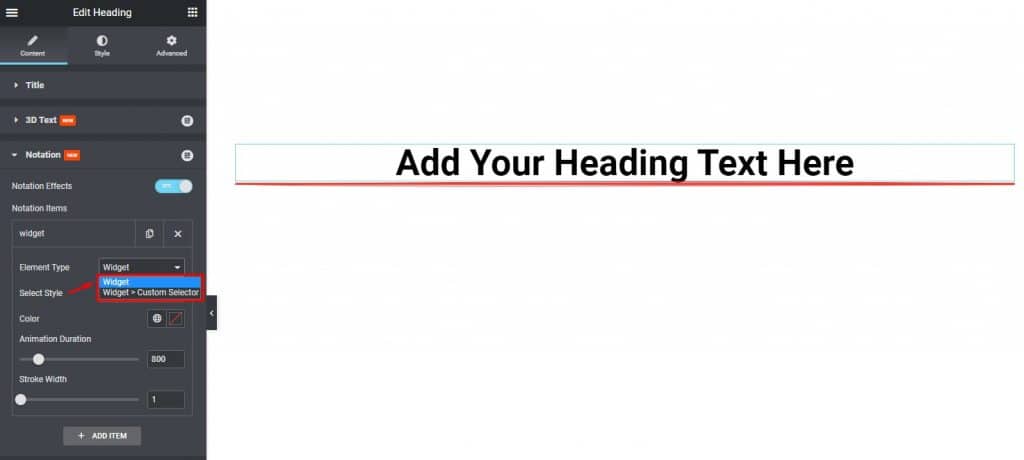
Here, you can change the Element Type as the widget or custom selector. Selecting “widget” means the effect will be applied to the whole widget.
Change the style with Select Style option
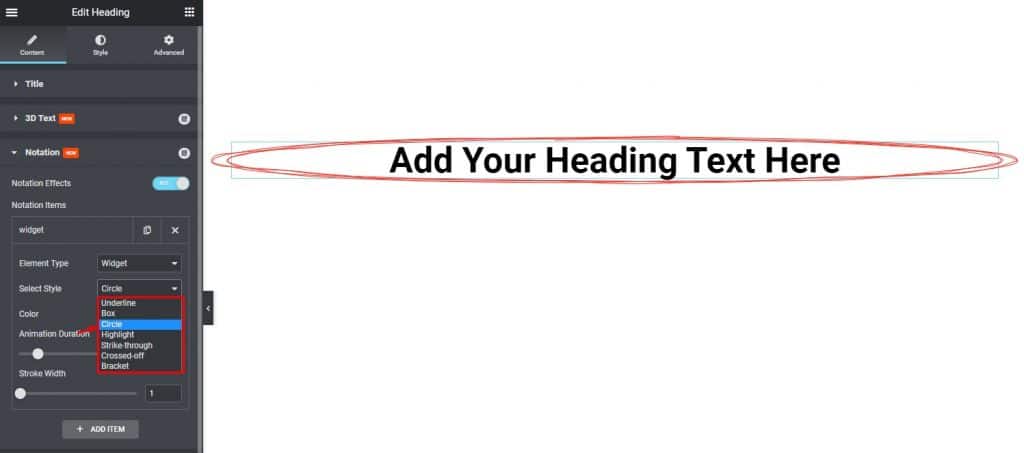
For the notation extension effect style, you will find 7 options listed in this drop-down menu. You can check them one by one until you find the perfect effect style for your website.
Change the Color, Animation Duration, and Stroke Width
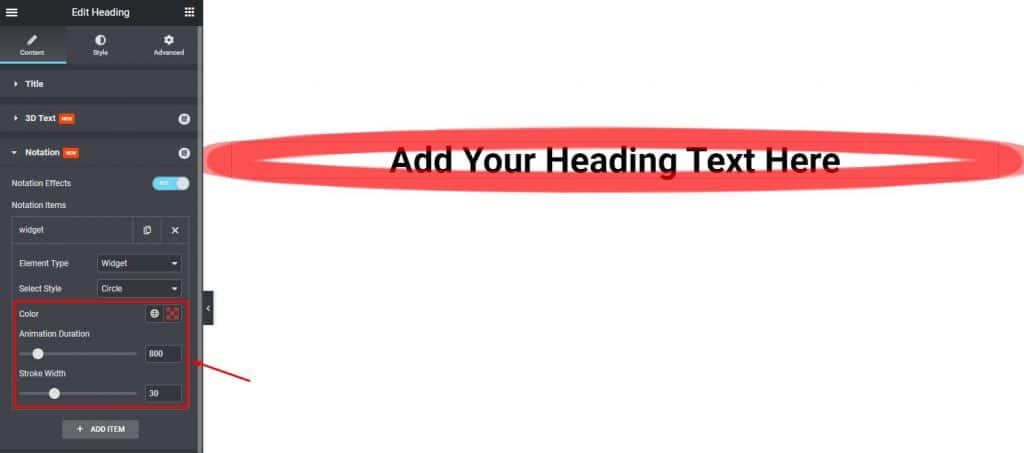
After that, you can change the Color of the Notation. Next, you can also change the Animation Duration, and Stroke Width using the scrollbar. After changing the options, you can see the effects on the page.
For the specific text
Select a specific portion of the text
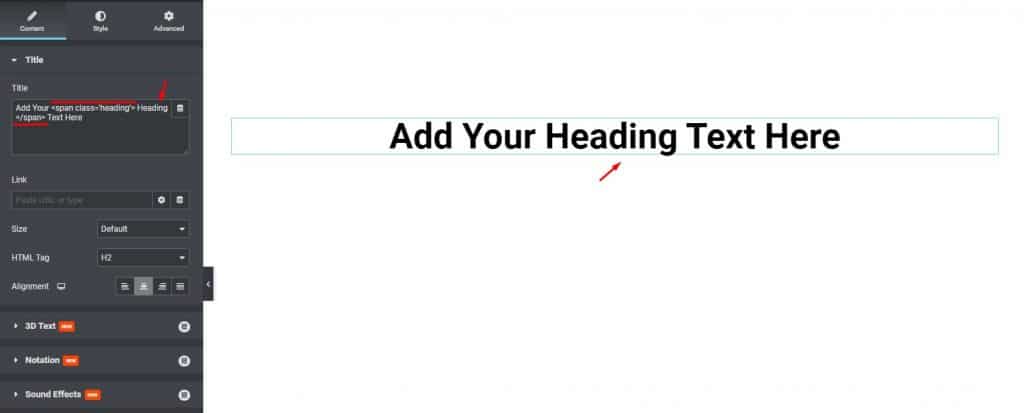
For a custom notation effect, you must define the class for the specific portion of the content to let notation take effect only on that part. Here, let’s assume we want to highlight the “Heading” part of the headline. So, click on the title and assign a class for the selected text.
Change the Element Type and Custom Selector for specific Notation
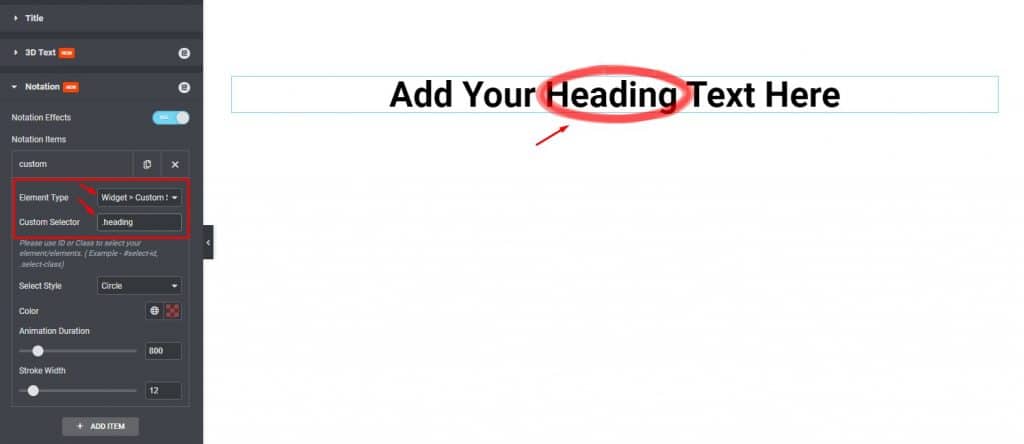
Now, go back to the notation section for the widget.
Here, change the Element Type i.e.: Widget>Custom, and type ‘Heading’ in the Custom Selector field with a (.) as class definer, and notice that only the specific ‘Heading’ text is marked as Notation on the page.
All done! You have successfully used the Notation extension on your website.
Video Link
You can watch this video to learn how to use Notation Extension in Elementor to get a hands-down experience. You can also visit the demo page for more examples. Hope you can use it on your own.

