The Newsletter widget lets you place a form that collects user email for future communications. It is one of the basic features you must have if you are running an eCommerce store.
Let’s see the insides.
Inserting widget

From the widget menu, find and drag-drop The Newsletter widget for Elementor into your page.
Content Tab
This email widget has a single section on the content tab. This section has the base settings.

The option Select Type is set to minimal by default. It will give you a blank field for inserting email address and a subscribe button. There is a scroll bar to adjust the input field spacing.

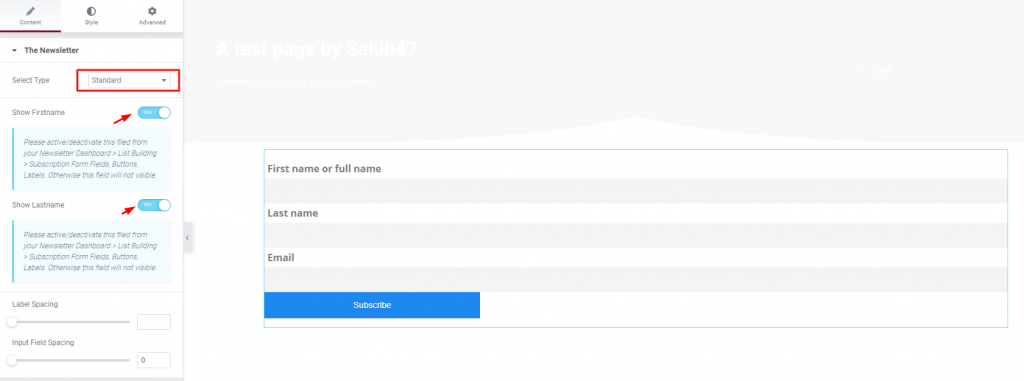
Changing to Standard from the Select Type option gives you additional two switchers. Turning on these switchers will reveal two name options above the email field.
Again, there will be a Label Spacing scroll bar available there.
Style Tab
Like every one of our widgets, we love to describe the Style tab where you get to customize the content itself.
This tab has two sections for the Minimal type and three sections for the Standard type of WordPress newsletter plugin.
Input Labels

Go to Style> Input Labels
You can change the color and typography of the labels from this section. However, this section is visible only for the Standard type.
Input Fields

In this section, you will have a bunch of options like color, border, padding, typography, etc. to customize the input field/fields.
This section is common for both types.
Submit Button

This section lets you change the color, width, border, etc. of the submit button.
Conclusion
Please watch this video to get more visuals on The Newsletter widget, by Bdthemes, and see this demo page for brilliant examples.

