The Layer Slider widget is a multipurpose slider-building tool for WordPress. It’s a plugin that allows you to build custom-tailored sliders with element-element controls.
Let’s see how it works!
Configuring Layer Slider widget
The Layer Slider widget is a premium as well as a 3rd party widget at Element Pack. That’s why you need to separately purchase it and install it. After that, you can use it with our widget.

Step-1
Go to Dashboard> Element Pack> 3rd Party Widgets> and find the Layer Slider widget and install it.
Step-2
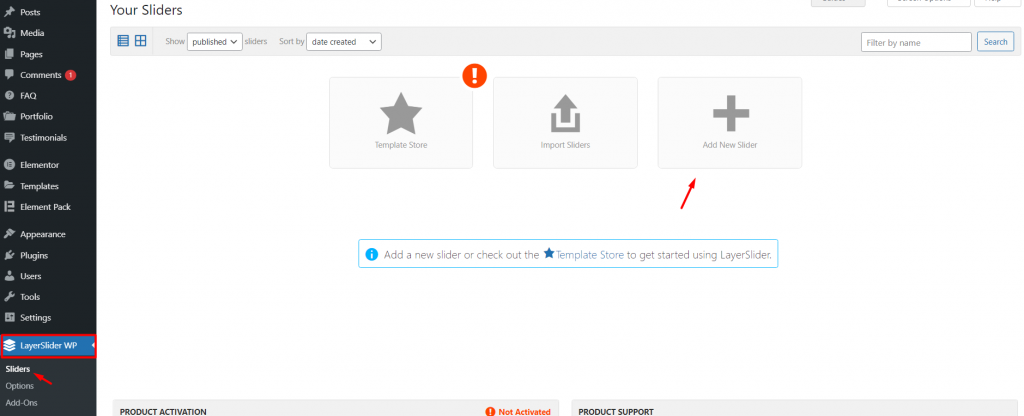
You will see a new tab named LayerSlider WP on your dashboard. Click on that and you will see a new window with lots of information. From there, click on the Add New Slider button on the top position.
Step-3
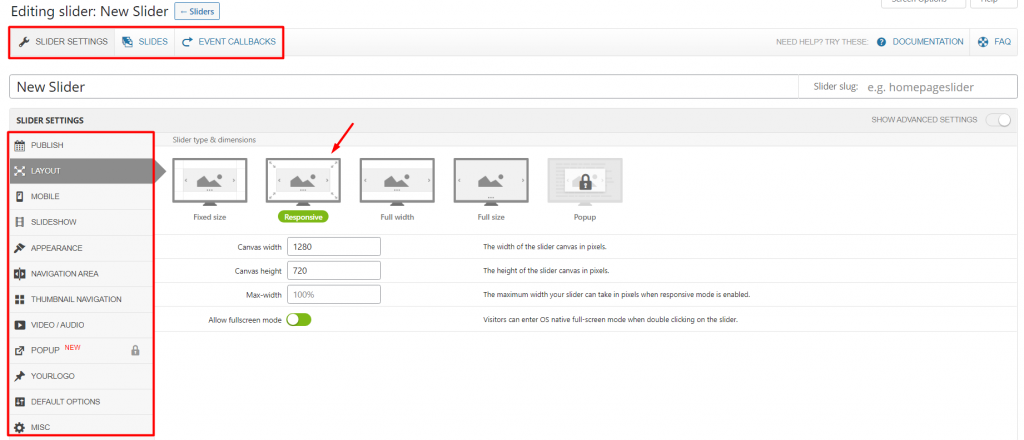
You will be redirected to the slider editor window. On the top-right corner, you can see 3 options. They are,
- Slider Settings: Has base settings for the whole slider including size, navigation, appearance, background, etc.
- Slides: Settings for an individual slide background, adding image, text, button, assets, and adding more slides. You can edit slides with a live-preview window with drag controls for assets.
- Event Callbacks: Log of tracing all changes made within the slider.
Step-4
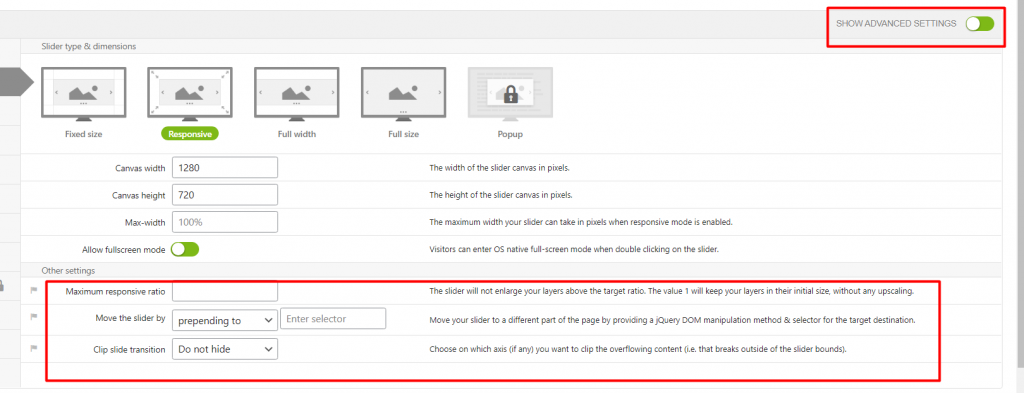
On the Slider Settings tab, you can turn on the Show Advanced Settings button to reveal more options the tab.
Step-5
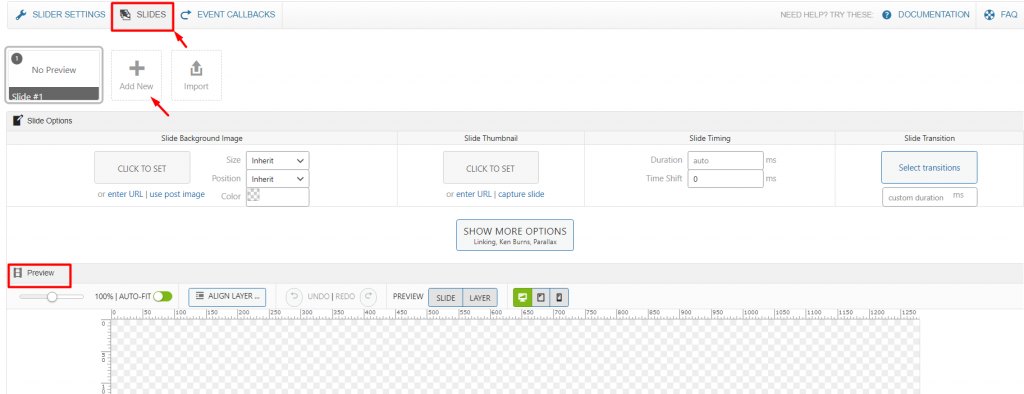
On the Slides tab, you can preview the current slide or add more by clicking the Add New button. The preview section is down below the settings.

Step-6
Let’s go to Slider Settings> Appearance> and add a background image. This image will be displayed over the whole slider.
Step-7
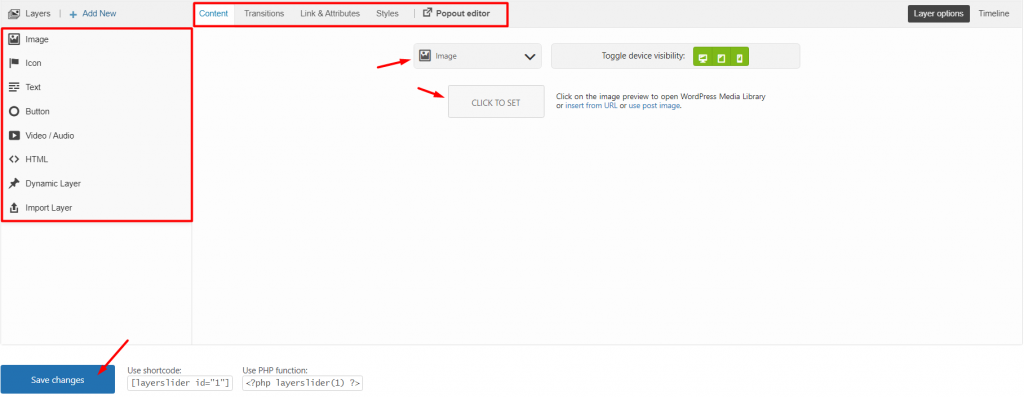
Go to the Slides tab and scroll down below, you will see the Layers option on your left. What it does is lets you add content over your current slide (image, text, button, etc.). The bar on the top is for customizing the layer content. You can select any individual layer and will find similar customizing controls available.
Go ahead and place something you want inside. Then hit Save Changes.
Step-8
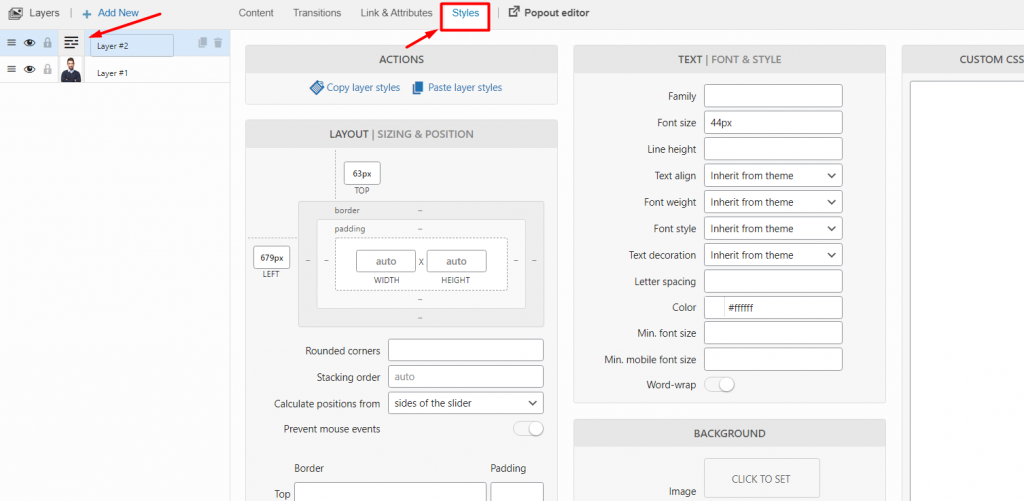
Add a text layer on your current slide and click on the Styles section for customizing its shape, color, typography, etc.
After you are done, save changes and your slider is ready to deploy.
Inserting widget
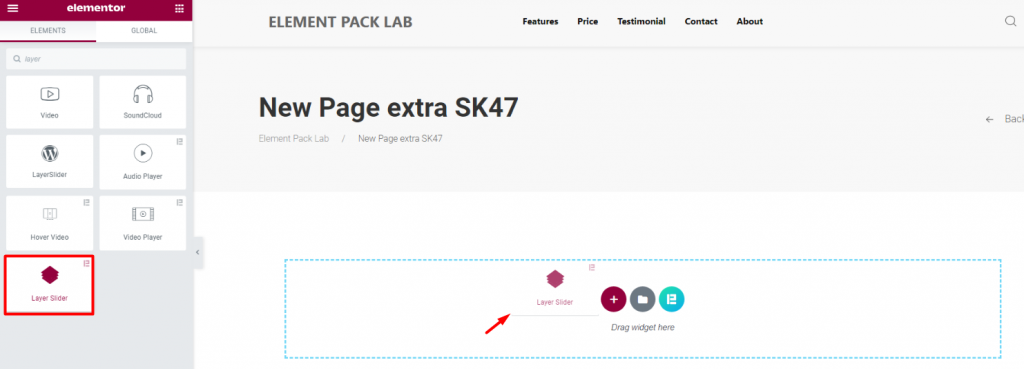
Find the Layer Slider widget from the widget menu and drag it inside your page.
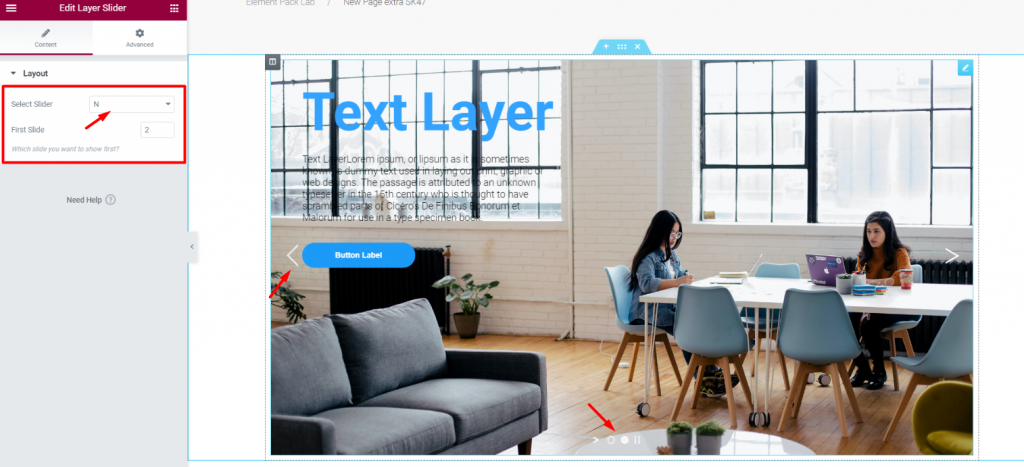
On the Content tab, you can select sliders that you had created from the dashboard.
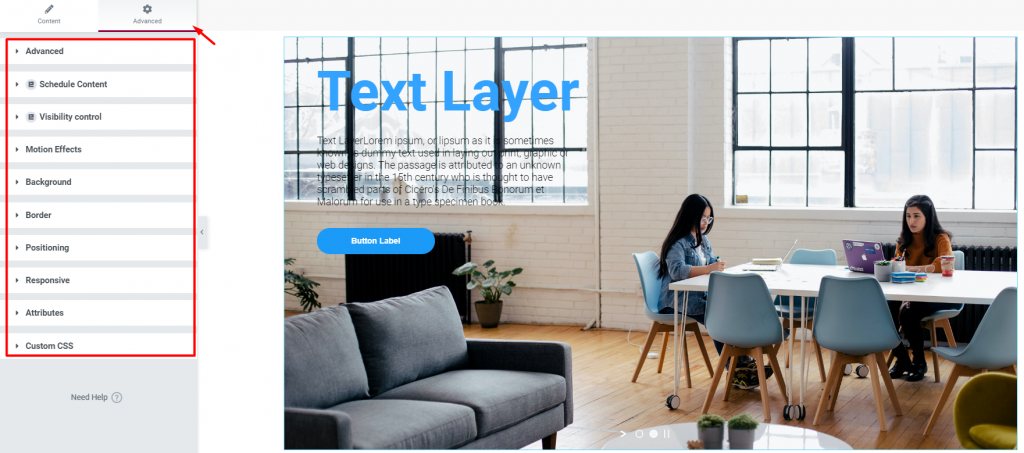
On the Advanced tab, you will see a bunch of options for customizing the slider with various options provided by Element Pack.
Conclusion
Watch this video tutorial about the Elementor Layer slider widget by Element Pack Pro. For more details, see the demo page here.
[Note- on-site video link]

