Florence Grid widget is an excellent WordPress grid plugin brought to you by the brand new Ultimate Store Kit plugin. This widget helps you display your products in a well-arranged manner, and helps you grow your business bigger.
In this tutorial, we will show you how to use this widget.
Let’s get started.
Inserting Widget
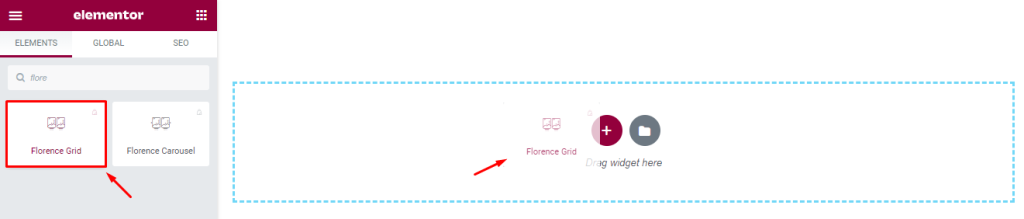
First, go to the widget menu, then search Florence Grid. After that, drag-drop the widget on the page.
Content Tab Customizations
Layout Modifications
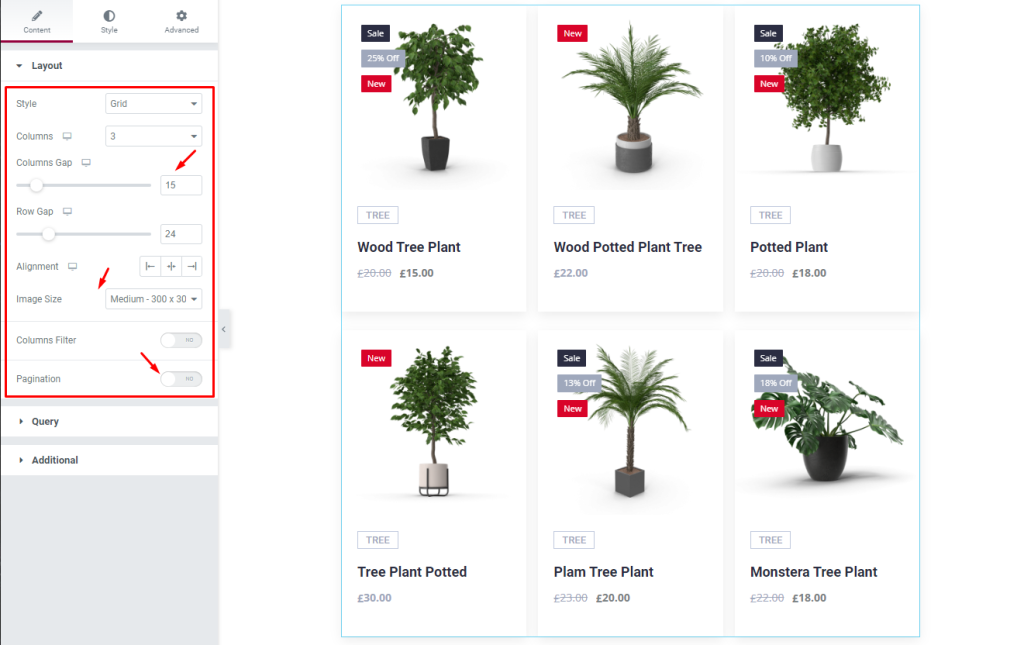
After inserting the widget, we will modify the Layout section. To do that, go to the Layout section under the Content tab. You will see some options here. Now, change the Columns Gap of the items, after that, change the Image Size, then enable the Pagination switcher.
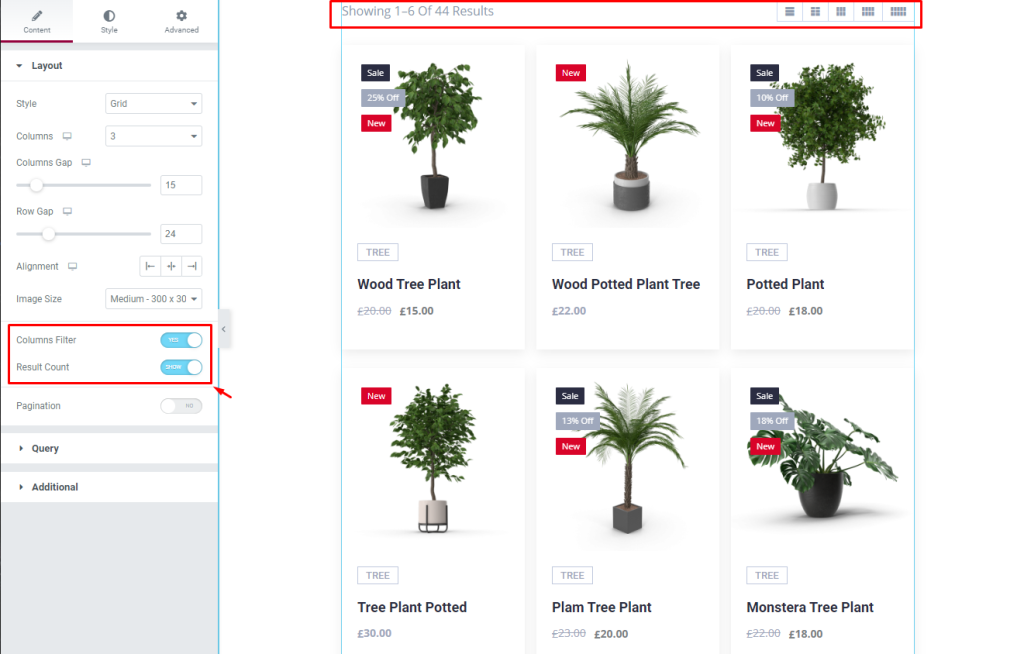
After that, enable the Columns Filter switcher. You will see a result counter on the page. You can filter columns by number here.
Available Query Controls
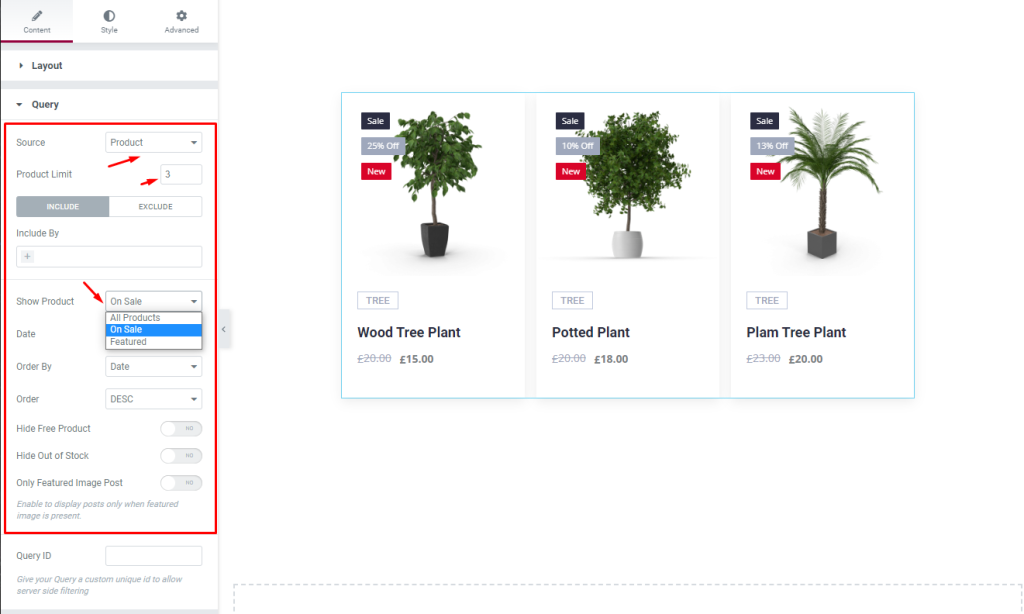
Now, go to the Query section where you can show available products. Here, select Product from the drop-down list in the Source option, then, set the Product Limit by 3, after that, select On Sale from the drop-down menu in the Show Product option.
Additional Layout Settings Customization
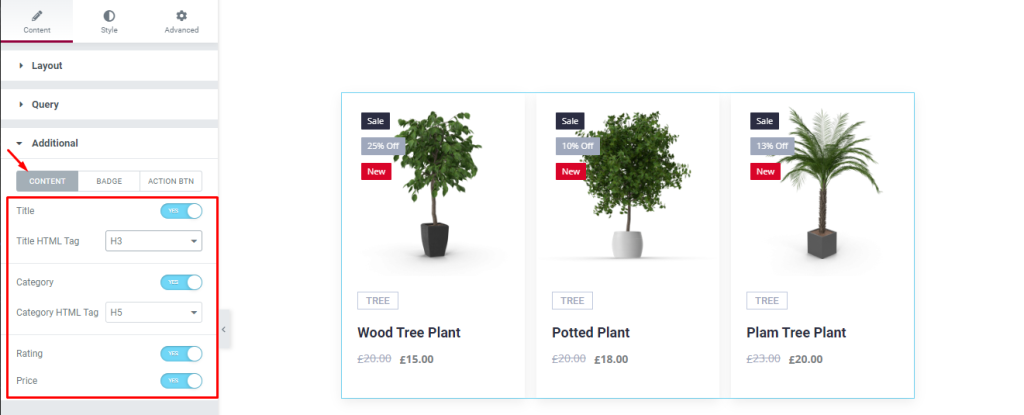
Now, go to the Additional section. Here, for the CONTENT mode, you can see some switchers i.e.: Title, Category, Rating, Price, and drop-down menus. Now, enable the switchers and select options from the drop-down menu.
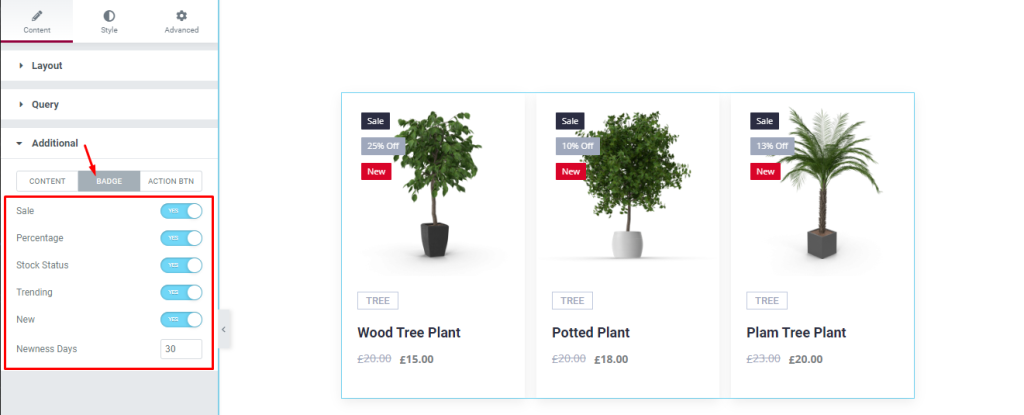
Next, for the BADGE mode, there are also some switchers i.e.: Sale, Percentage, Stock Status, Trending, New, and a field i.e.: Newness Days. Now, enable the switchers and set the Newness Days as 30.
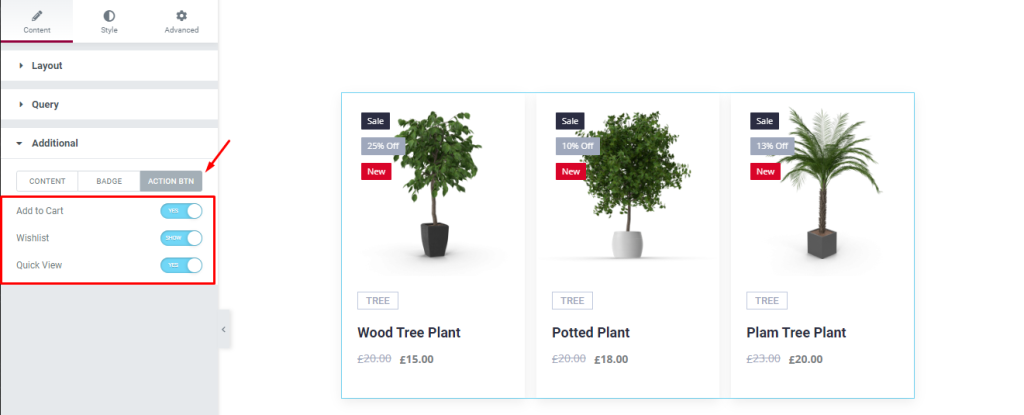
Next, for the ACTION BTN, There are three switchers i.e.: Add to Cart, Wishlist, and Quick View. Now enable them to proceed to the checkout process.
Style Tab Customizations
Items Section Styling
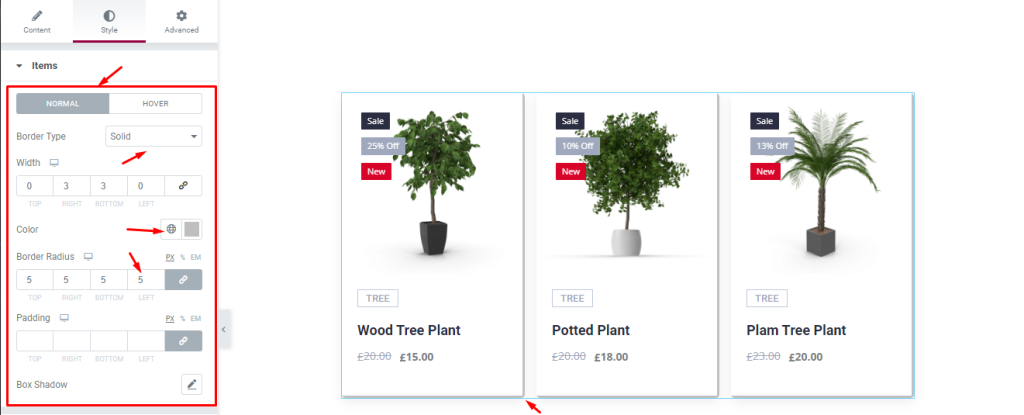
Now, we will customize the Items section with the Style tab. To do that, go to Style > Items. Here, for the NORMAL mode, select a Border, then change the border Color, then set Border Radius, and see what happens on the page.
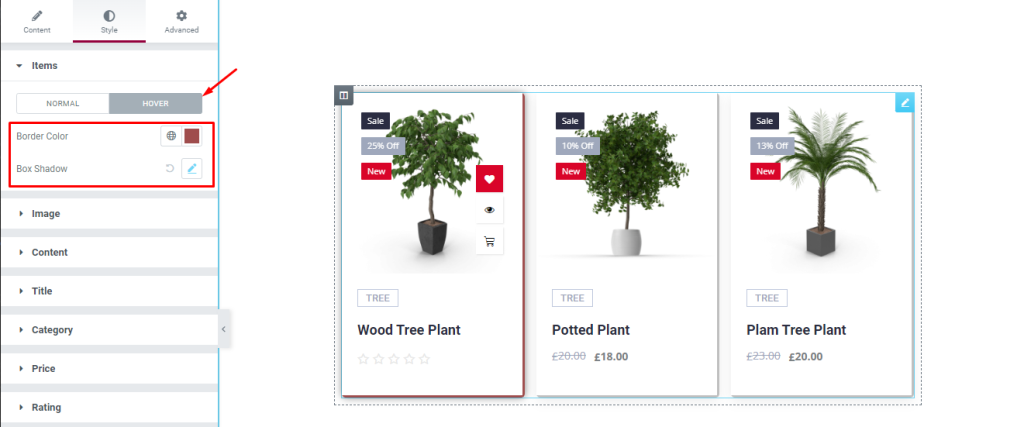
Next, for the HOVER mode, change the Border Color, and set a Box Shadow.
Image Modifications
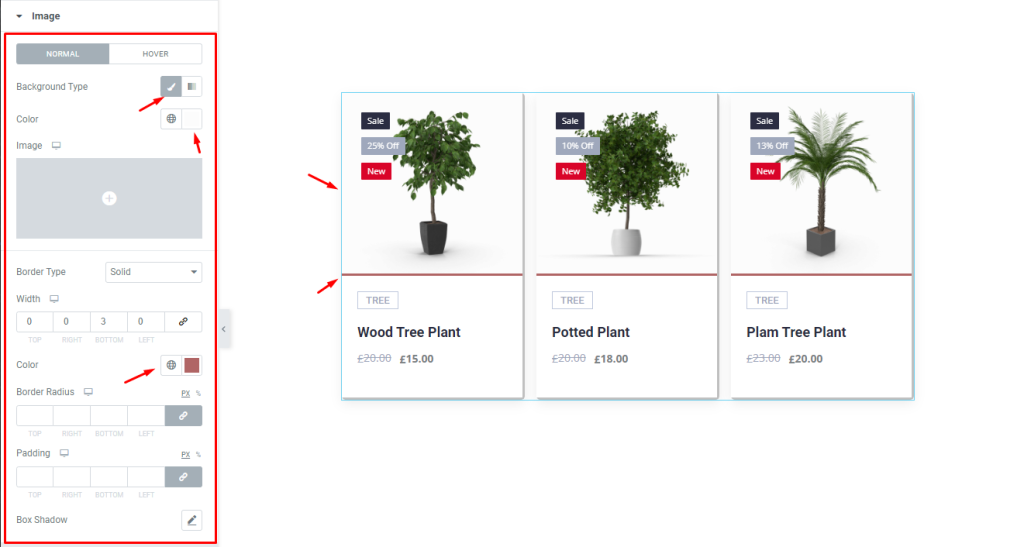
Now, we will modify the Image section. To do that, go to Style > Image. Here, for the NORMAL mode, change the Background Type and Color, then change the Border Color, and see the effect on the page.
Content Customizations
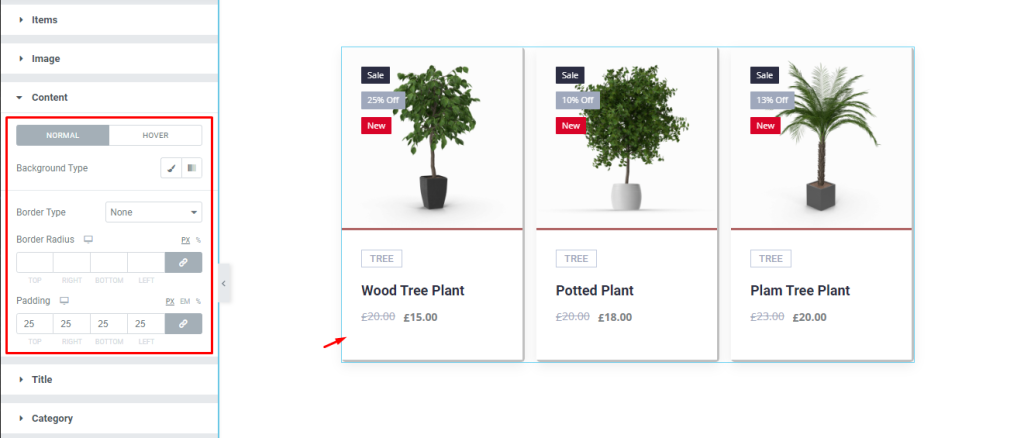
Next, we will customize the Content section. To do that, go to Style > Content. Here, for the NORMAL mode, change the Background Type, then change the Border Type. After that, set Border Radius, and add some Padding to 25. After doing these, see the effect on the page.
Title Appearance Change
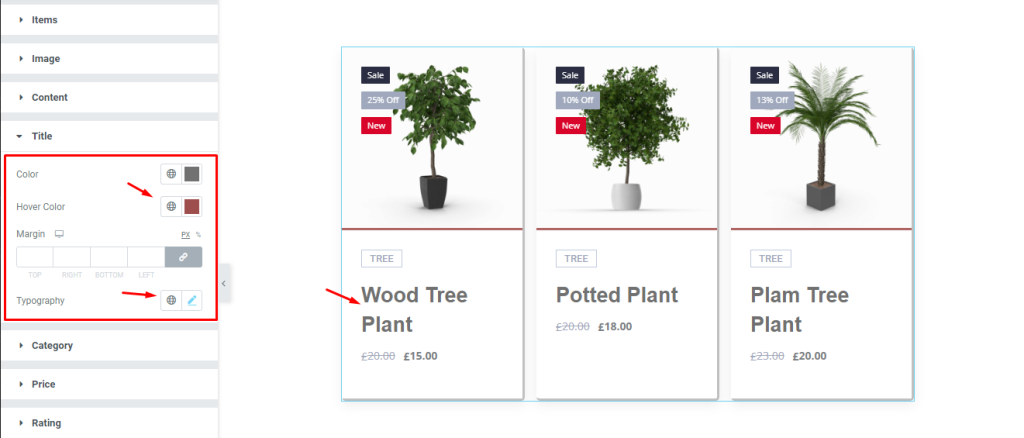
After that, we will customize the Title section. Go to Style > Title. Now, select the Normal Color, then select the Hover Color, and then change the Typography. Now see what happens.
Category Tag Customizations
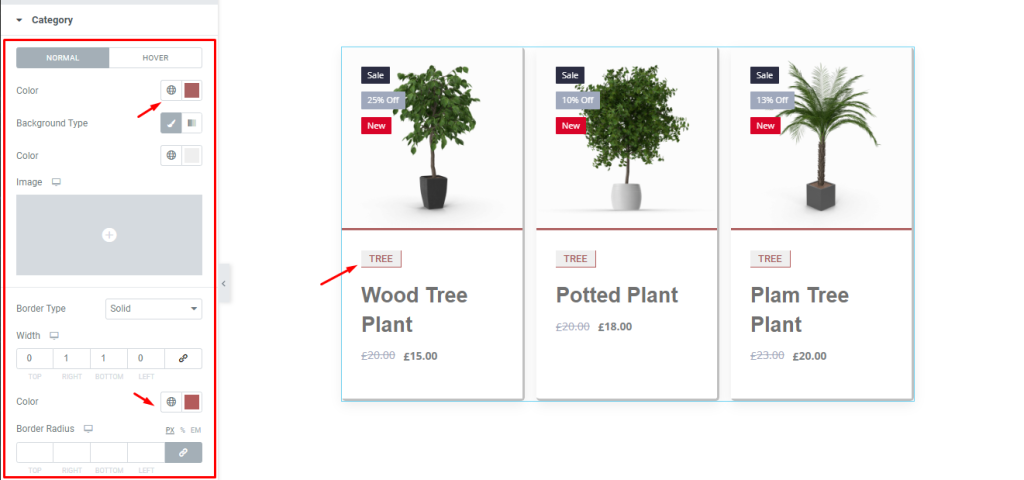
Now, go to Style > Category. For the NORMAL mode, change the Background Color, then change the Border Color.
Pricing Modifications
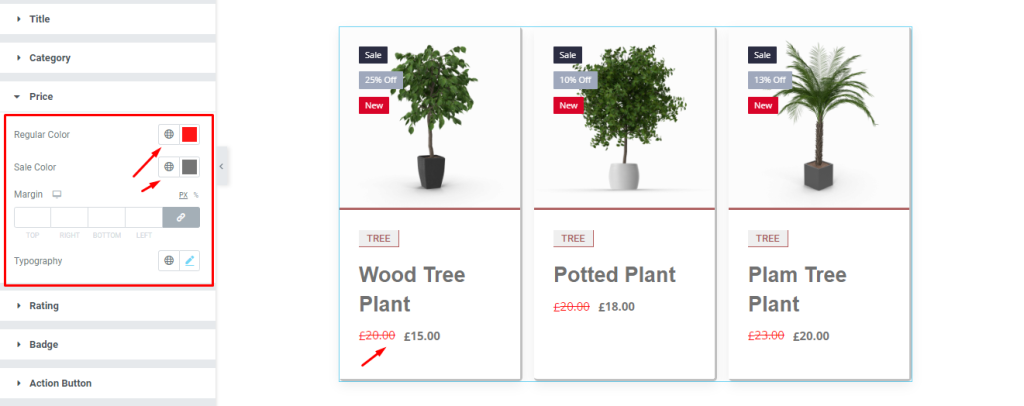
We will now customize the Price section. To do that, go to Style > Price. Here, change the Regular Color and Sale Color, remember to select separate colors for each and see the result on the page.
Rating Badge Customizations
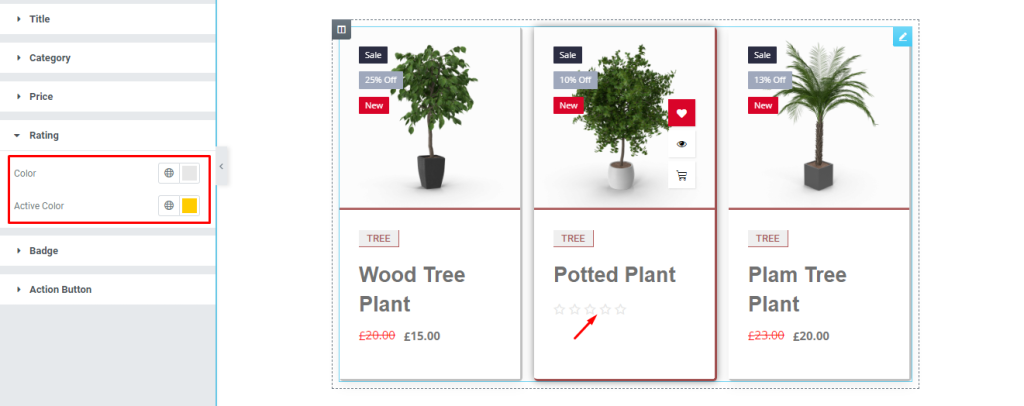
Go to Style > Rating. Here, change the normal Color and Active Color, you need to select separate colors for them. Then, see the result.
Product Badge Customizations
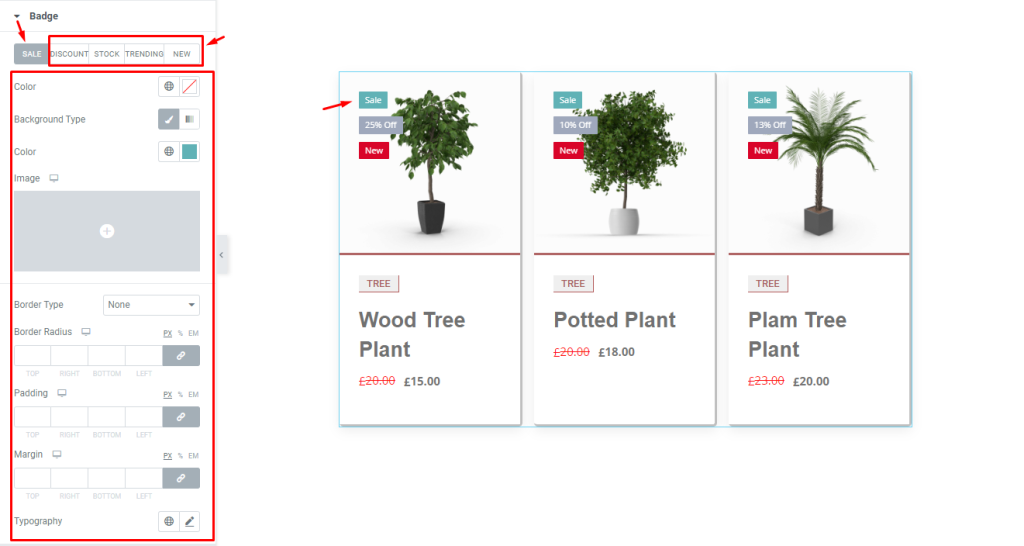
Now, we will customize the Badge section. To do that, go to Style > Badge. Here, you will see 5 modes i.e.: SALE, DISCOUNT, STOCK, TRENDING, and NEW, and some options for them. The options are the same for all modes. For the SALE mode, you can change the options shown here, the same goes for the other modes.
Action Button Appearance Change
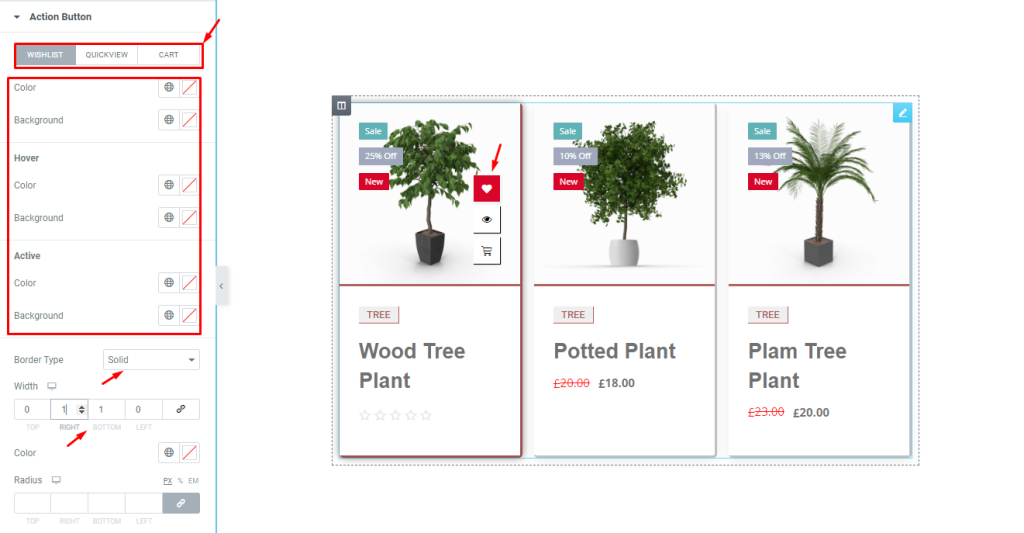
Lastly, time to customize the Action Button. To do that, go to Style > Action Button. In this section, there are three modes i.e.: WISHLIST, QUICKVIEW, and CART. The options are almost the same, just there is a slight change in option in the QUICKVIEW mode. In the WISHLIST mode, change the options as shown, and see what happens on the page.
Video Assist
To know more about this widget, watch this tutorial video attached here. Credit goes to BdThemes. You can also see the demo page to learn more.
Thank you.