The Author widget is a tailor-made element of the Ultimate Post Kit add-on. It lets you display all the post authors around your blogging site. This is a presentation-type tool to showcase authors in the most brilliant way possible.
Let’s have a look at how it works!
Inserting widget

Find the Author widget from the widget menu in Elementor page editor and drag it inside your webpage.
Content tab
The Content tab holds the base settings for the widget and lays the foundation of the layout of the final content. It’s divided into three parts for the Author widget.
Layout
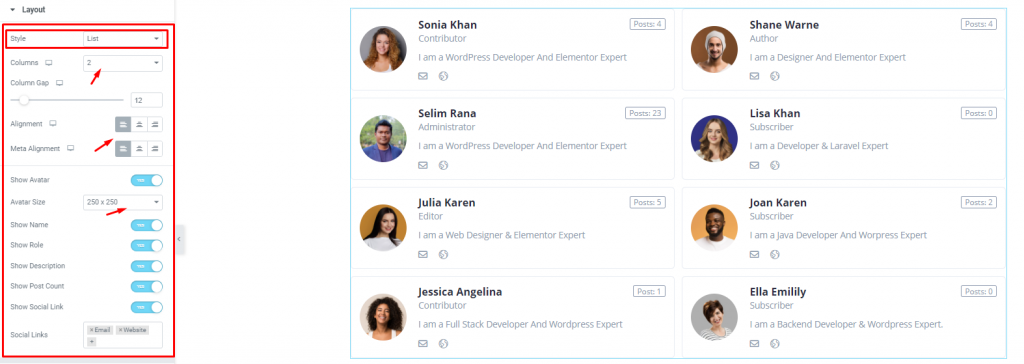
Go to Content> Layout
Author has 2 layout styles, including Grid & List. In the List style, you can select the number of columns on display between 1, 2, & 3. There is a column gap option as well as alignments for the content & meta.
There are a bunch of switchers here that are responsible for showing/hiding items from displaying on the Author profile. The author’s image size is also adjustable.
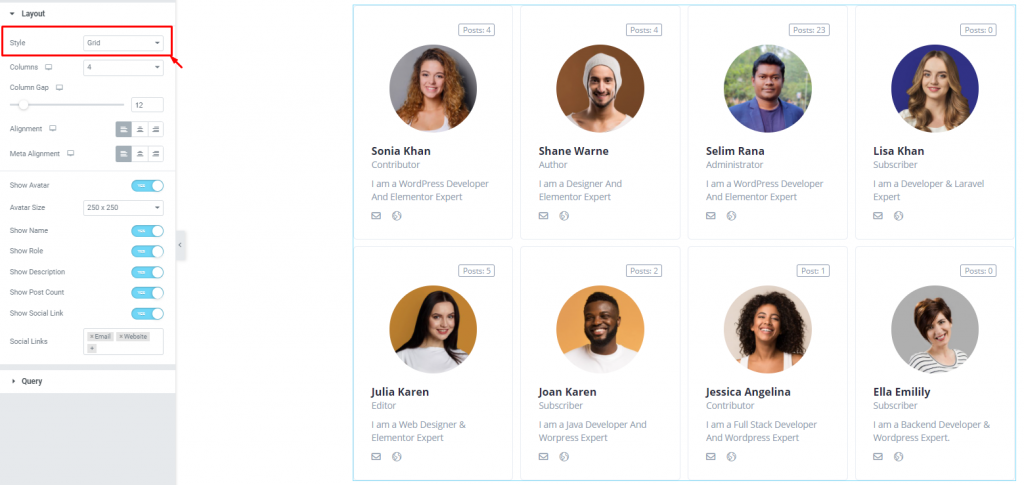
The Grid layout style also has similar options while having more columns on the display for the WordPress Author widget. It is shown by default upon using the Author description widget.
Query

Go to Content> Query
Here, you need to define the number of the author profile shown on display. You can select authors through their roles and specify their display order. However, you can exclude some of the authors by their IDs.
Style tab
The style tab allows you to change or customize the appearance of the Author widget content layout. The options include color settings, borders, paddings, etc.
There are several sections on this tab.
Item
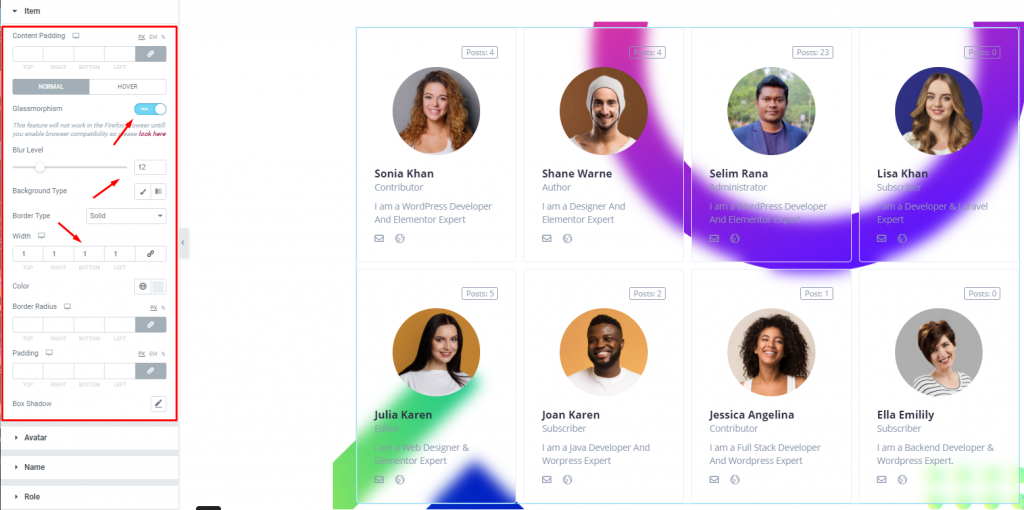
Go to Style> Item
The item section has content padding, glassmorphism, background type & color, border, and box-shadow options for the WordPress Author widget. Turn on the glassmorphism switcher and adjust the blur level to suit your taste.

To make the most out of it, place a suitable background image through Section settings> Style> Background. Once done, then turn on the glassmorphism switcher and see the magic.
Avatar
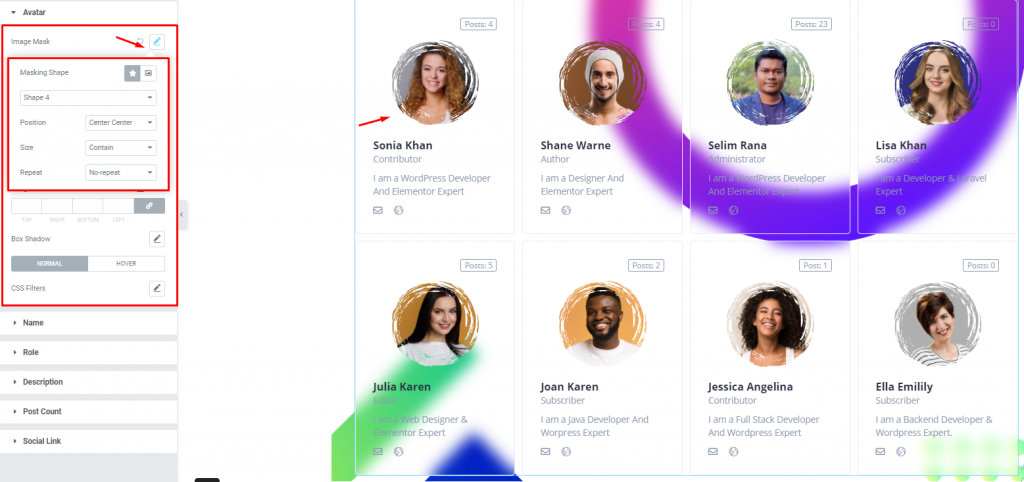
Go to Style> Avatar
This section is for customizing the avatars of your authors. Get it done by selecting an image mask out of 20 unique styles. You can also insert your own custom styles here.
Also, there are border, radius, padding, margin, box-shadow, & CSS filter option available with hover mode.
Name
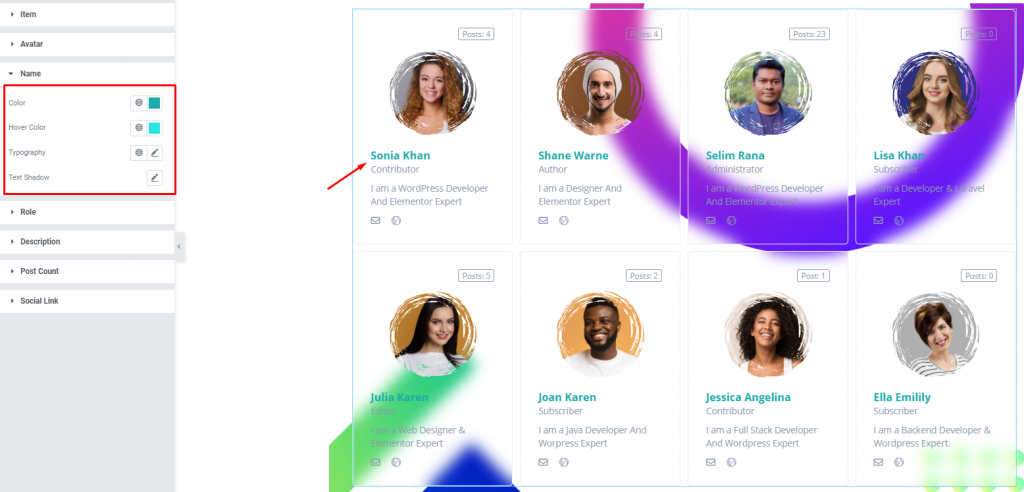
Go to Style> Name
Change color, typography, & apply text shadow to the name of the authors from here.
Role

Go to Style> Role
Each author may have a unique role on your blogging site. It is displayed under the name and is customizable through color, typography, & spacing.
Description

Go to Style> Description
The description text is below the role and you can change its color, typography as well as the spacing.
Post Count
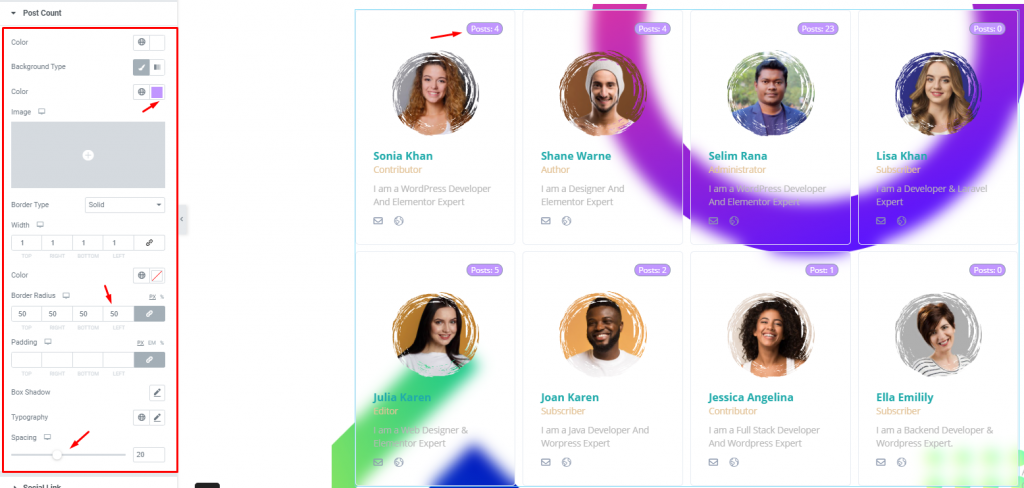
Go to Style> Post Count
You have noticed a post counter displayed above the author image on your top-right side. This little text shows how many posts that specific author has on your blogging site.
Customize it through color, border, radius, padding, shadow, and more. The spacing option is for adjusting its alignment on the author info block.
Social link
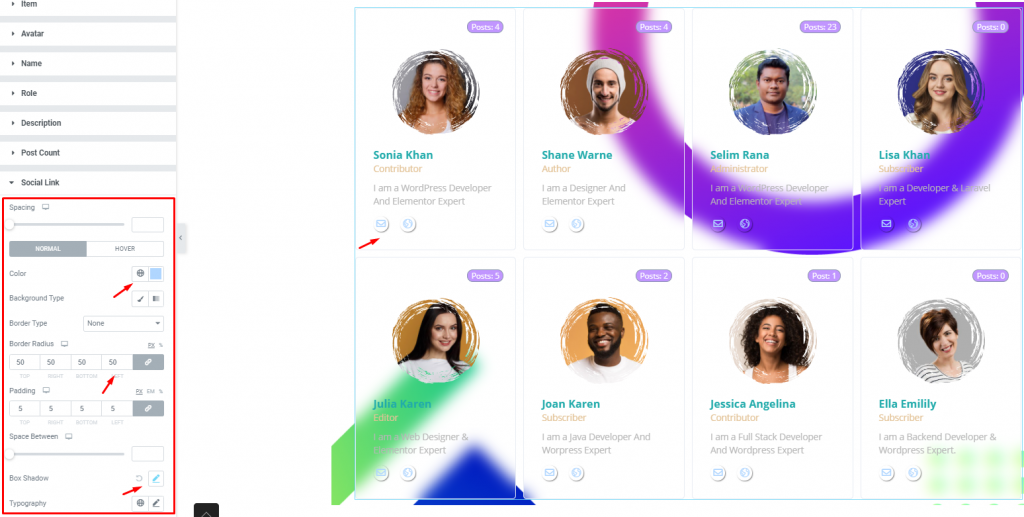
Go to Style> Social link
Social links are necessary to connect and contribute to the broad online community for bloggers. With that in mind, we placed the social link buttons in a suitable position right below the author description text.
Once you get into this section, you can customize the colors, borders, paddings, typography and add box shadows to the link buttons. The color option is available for the hover mode also.
Conclusion
Still, stuck?
Watch this quick video for visual instruction and see the demo page for more examples, provided by Bdthemes.

