In this guide, we’ll cover the AR Viewer plugin for WordPress and its features.
Overview of AR Viewer
The AR Viewer plugin is a powerful tool for WordPress that allows you to integrate augmented reality (AR) into your web projects. It utilizes the capabilities of the Model Viewer, a library designed for rendering 3D models on the web.
Key Features
- Dynamic Viewing: AR Viewer provides a dynamic viewing experience, enabling users to interact with 3D models in real time.
- Panning and Staging: The plugin supports advanced features like panning and staging, allowing users to manipulate the model’s position and view it from different angles.
- Augmented Reality: Integrate AR seamlessly, bringing virtual objects into the real world through your device’s camera.
How to Get Started
- Check Out Model Viewer: To understand the full potential of the AR Viewer plugin, visit the Model Viewer website. It provides comprehensive examples and documentation that will help you get familiar with the features and capabilities of the Model Viewer library.
- Install the Plugin: Download and install the AR Viewer plugin into your project. Follow the installation instructions provided in the plugin’s documentation.
- Configure Your Viewer: Customize the AR Viewer settings according to your project’s requirements. This may include setting up the model file, adjusting the staging and panning options, and enabling AR mode.
- Integrate into Your Website: Embed the AR Viewer into your website by adding the necessary HTML and JavaScript code. The plugin’s documentation will guide you through the process, ensuring a smooth integration.
- Test and Publish: Test the AR Viewer on different devices to ensure compatibility and performance. Once you’re satisfied with the setup, publish your website and let users experience the augmented reality features.
By following these steps, you can leverage the AR Viewer plugin to create immersive and interactive 3D experiences on your website. For a deeper dive into the technical details and advanced features, be sure to explore the Model Viewer website.
The AR Viewer plugin offers three types of support: Shortcode, Elementor, and Divi. In this section, we’ll focus on integrating and using AR Viewer with Elementor.
Overview of Elementor Integration
Elementor is a popular page builder for WordPress, enabling you to create custom layouts and designs without coding. Integrating AR Viewer with Elementor allows you to add interactive 3D models and AR experiences to your website easily.
Steps to Integrate AR Viewer with Elementor:-
- Install the AR Viewer Plugin
- First, ensure that the AR Viewer plugin is installed and activated on your WordPress site. You can find and install it from the WordPress plugin repository.
- Add AR Viewer to Elementor
- Open the page or post where you want to add the AR Viewer using the Elementor editor.
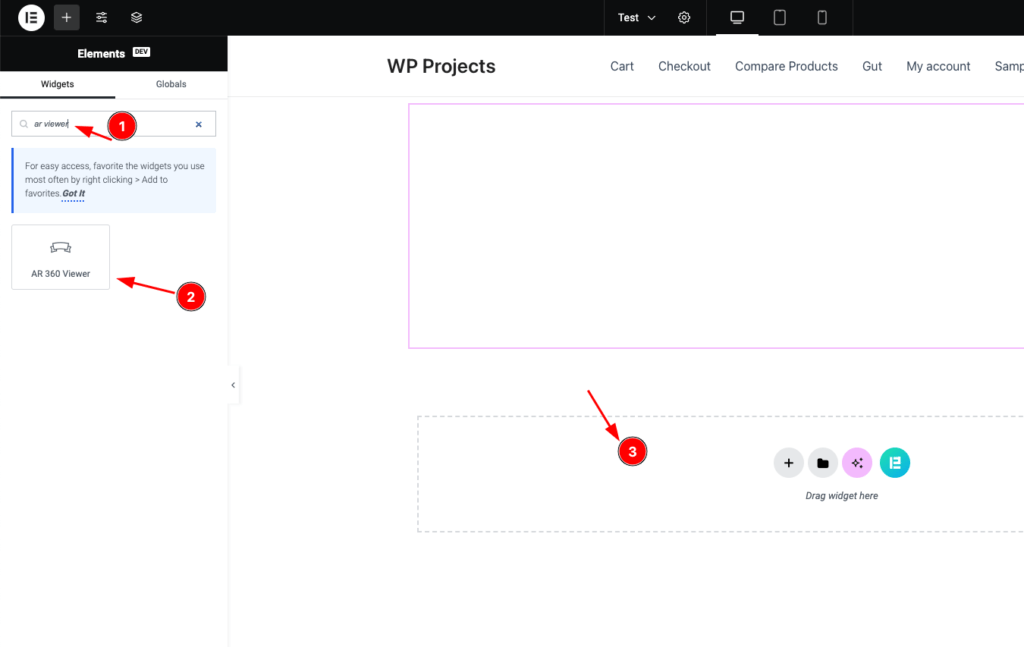
- In the Elementor panel, search for the AR Viewer widget. If you don’t see it, ensure that the AR Viewer plugin is compatible and correctly integrated with Elementor.

- Drag and Drop the AR Viewer Widget
- Drag the AR Viewer widget from the Elementor panel and drop it onto the desired section of your page.
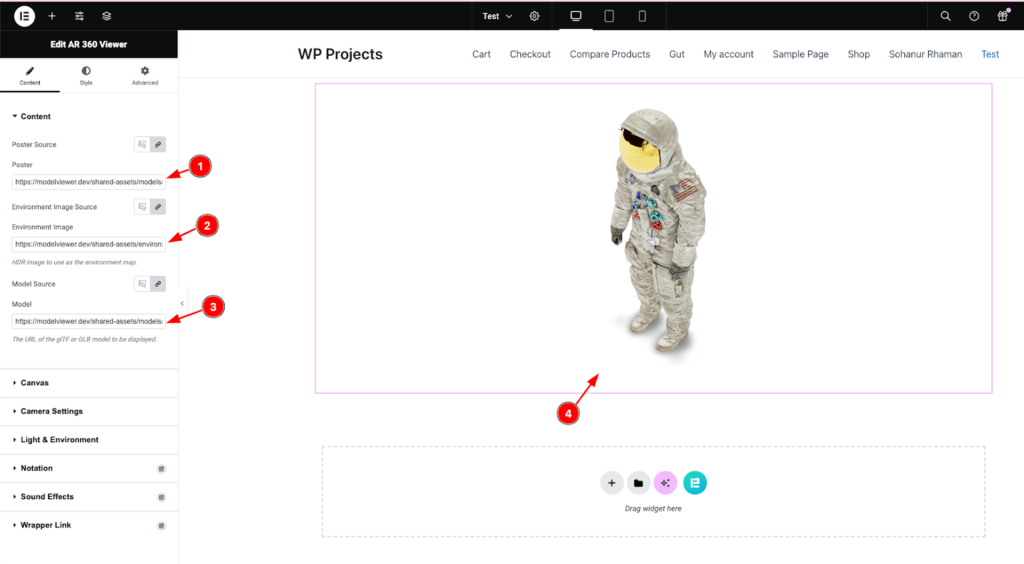
- Configure the widget settings, such as selecting the 3D model file, adjusting the AR settings, and customizing the viewer’s appearance.
- Customize the AR Viewer
- Use Elementor’s design tools to customize the appearance and behavior of the AR Viewer. You can adjust dimensions, add animations, and style the widget to match your website’s design.
- Configure advanced settings like panning, staging, and enabling AR mode to enhance the user experience.

- Preview and Publish
- Once you’ve customized the AR Viewer, preview the page to ensure everything looks and functions as expected.
- Make any necessary adjustments and then publish the page to make the AR Viewer live on your website.
Benefits of Using AR Viewer with Elementor
- User-Friendly Interface: Elementor’s drag-and-drop interface makes it easy to add and customize the AR Viewer without any coding knowledge.
- Customizable Design: Tailor the appearance of the AR Viewer to match your website’s style and branding.
- Interactive Experience: Enhance user engagement by providing an immersive and interactive AR experience.
By following these steps, you can seamlessly integrate and use the AR Viewer plugin with Elementor, bringing augmented reality features to your WordPress website effortlessly.
How to Use AR Viewer with Shortcode
In addition to Elementor and Divi, the AR Viewer plugin can be used with shortcodes, offering a flexible and straightforward way to add AR content to your WordPress site. Here’s how you can use the AR Viewer shortcode to integrate 3D models and AR experiences.
Overview of Shortcode Integration
Shortcodes are a powerful feature in WordPress that allow you to embed dynamic content into posts, pages, and widgets with minimal effort. The AR Viewer shortcode provides an easy method to add and configure 3D models and AR functionality directly within your content.
Example Shortcode
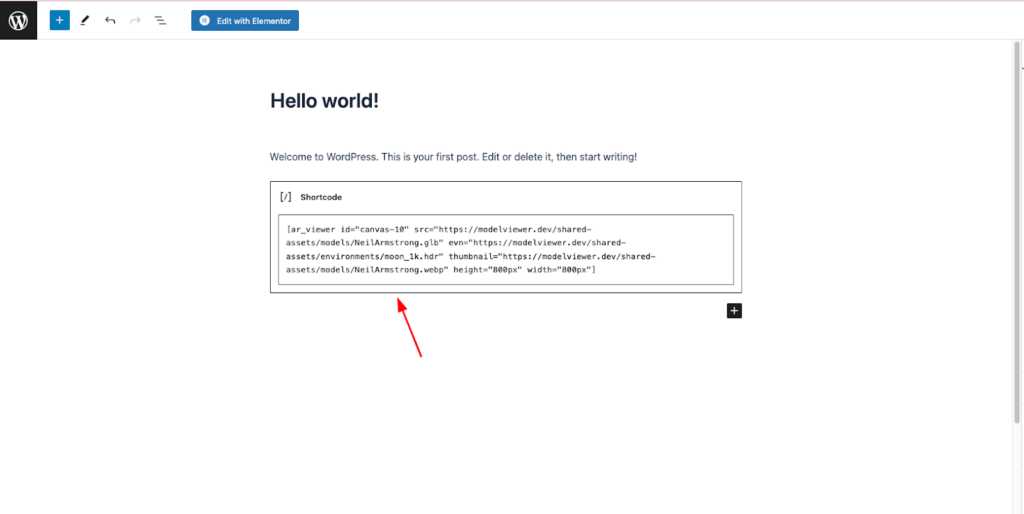
Below is an example of an AR Viewer shortcode:
[ar_viewer id="canvas-10" src="https://modelviewer.dev/shared-assets/models/NeilArmstrong.glb" evn="https://modelviewer.dev/shared-assets/environments/moon_1k.hdr" thumbnail="https://modelviewer.dev/shared-assets/models/NeilArmstrong.webp" height="800px" width="800px"]Steps to Use the AR Viewer Shortcode
- Insert the Shortcode into Your Content
- Navigate to the post, page, or custom post type where you want to add the AR Viewer.
- Switch to the text editor mode if you are using the classic editor, or use a shortcode block if you are using the Gutenberg editor.
- Copy and paste the AR Viewer shortcode into the desired location within your content.


- Configure the Shortcode Attributes
- id: A unique identifier for the AR Viewer instance.
- src: The URL of the 3D model file (in .glb format).
- evn: The URL of the environment file (in .hdr format) to set the scene lighting.
- thumbnail: The URL of the thumbnail image to display before the model loads.
- height: The height of the AR Viewer frame (e.g., 800px).
- width: The width of the AR Viewer frame (e.g., 800px).
- Preview and Publish
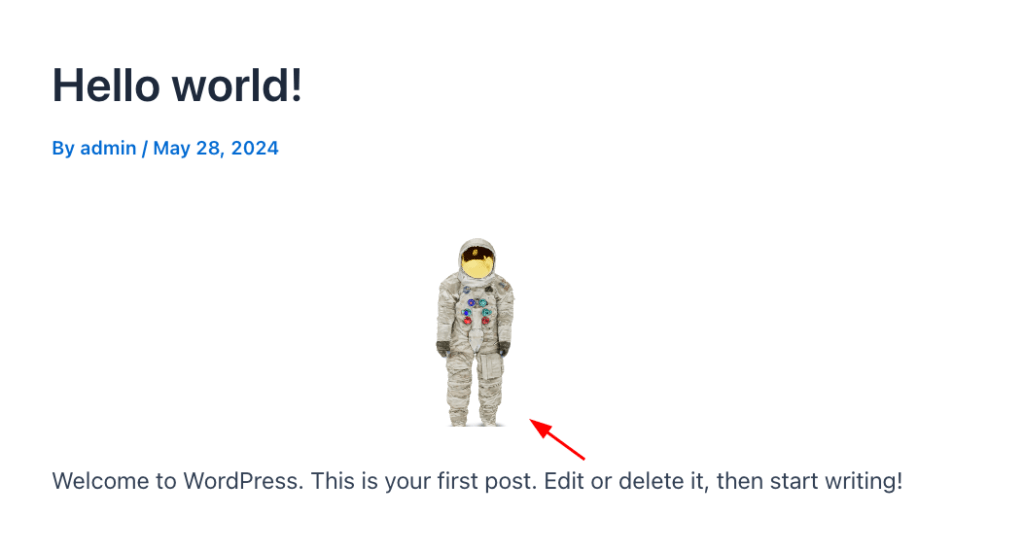
- After inserting and configuring the shortcode, preview the post or page to ensure the AR Viewer appears and functions as expected.
- Make any necessary adjustments to the shortcode attributes.
- Publish or update the post or page to make the AR Viewer live on your site.
Benefits of Using the AR Viewer Shortcode
- Simplicity and Flexibility: Shortcodes offer a quick and easy way to add AR content without needing to use a page builder.
- Compatibility: Works seamlessly with the classic editor, Gutenberg editor, and custom post types.
- Customization: Customize the appearance and behavior of the AR Viewer by modifying the shortcode attributes.
By using the AR Viewer shortcode, you can efficiently add and configure 3D models and AR experiences within your WordPress content, providing an engaging and interactive experience for your visitors.
