In this documentation, we will discuss the customization of the Weather block, brought to you by Zoloblocks.
Set the Weather API KEY First
To use the Weather widget, you need to set the API KEY first. Follow the steps to set the API Key.
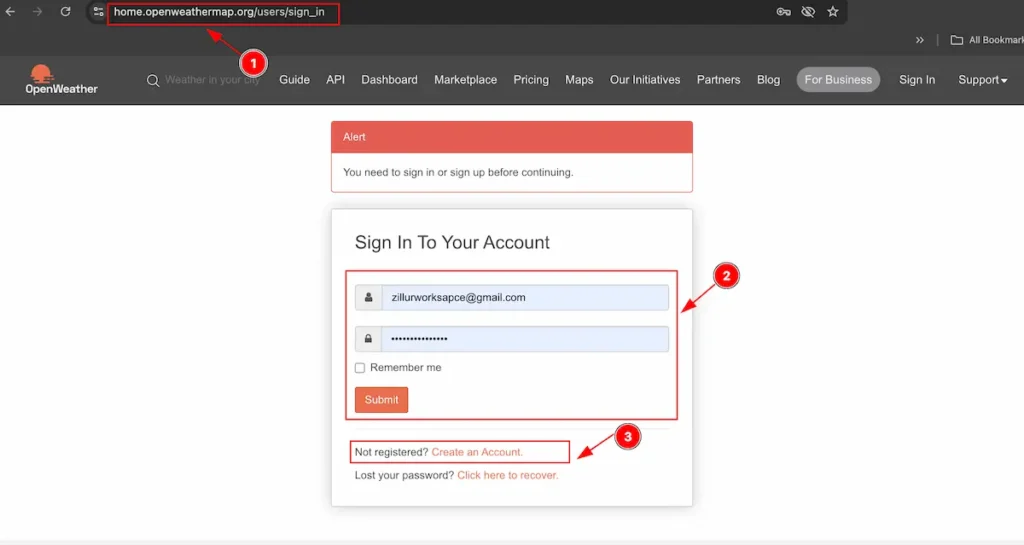
- Navigate to the Open Weather link.
- The Sign In form appear, If you have an account please enter the credentials and hit the Submit Button.
- If you don’t have an account please Create an Account first.
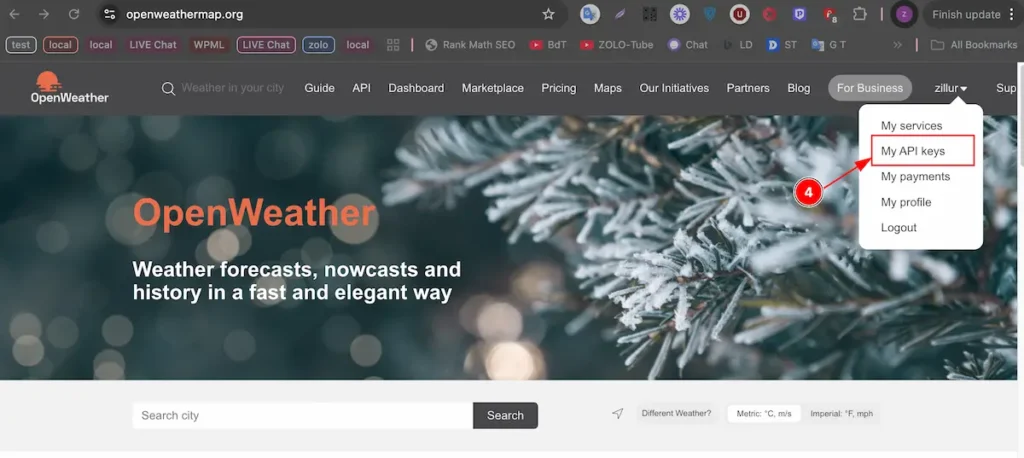
After successfully login to the Dashboard.
- Click on the Profile and Dropdown will appear select the ” My API Keys ” section.
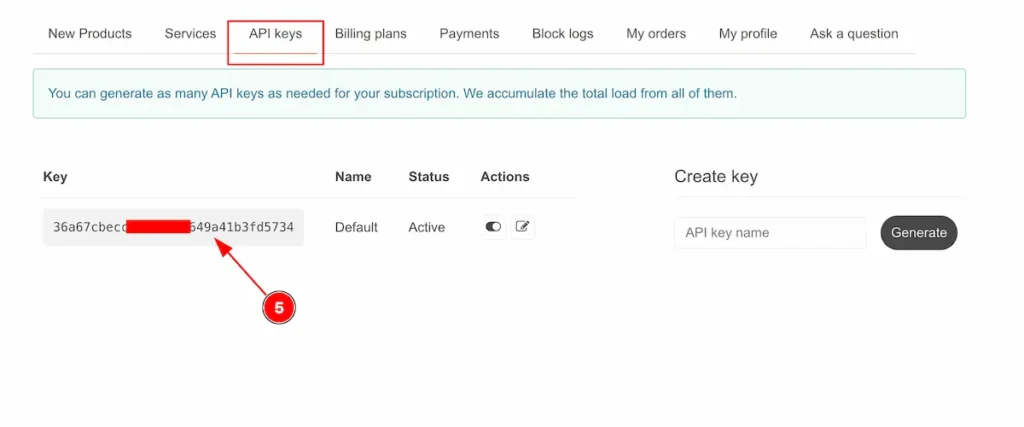
- There will visible the API Key. Select and Copy the API KEY.
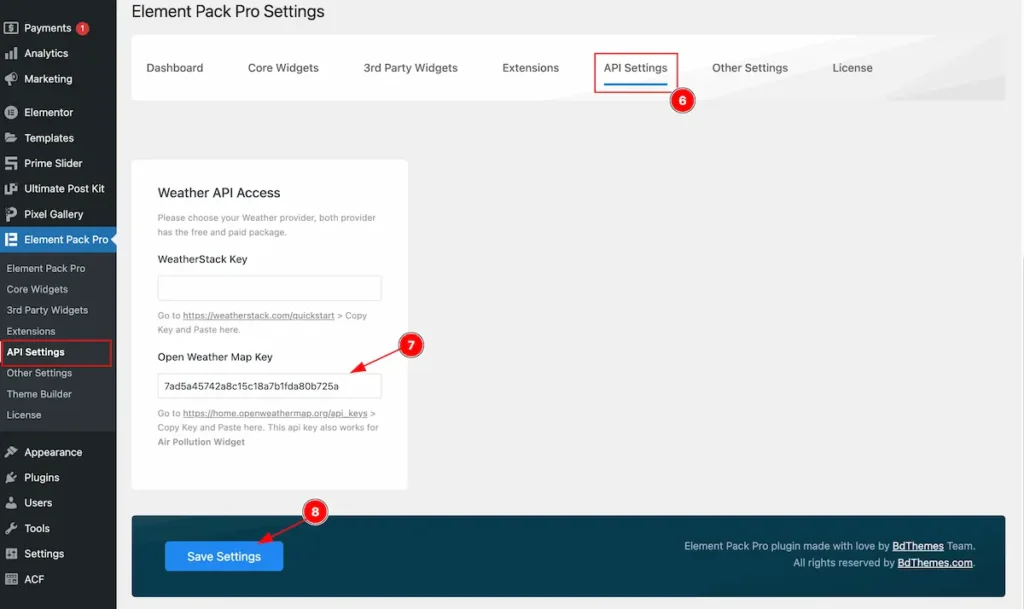
- Go to Element Pack Pro Dashboard and Navigate to the ” API Settings ” tab and find the ” Weather API Access “.
- Put the Open Weather Map Key input fields.
- Hit the ” Save Settings ” button to make the changes.
Insert Weather Widget

- Search by the widget name ” Weather “. The search relevant widget will appear.
- Select the “Weather” widget make sure top right corner logo of Element Pack.
- Drag and Drop on the Editor page.
Content Tab Customizations
Weather Section
Go to Content > Weather
Select API

- Select the API from the selector the ” Open Weather Map “.
- The weather will appear according to the API Key.
Layout

- Simple: Select the Simple layout and the layout will appear.
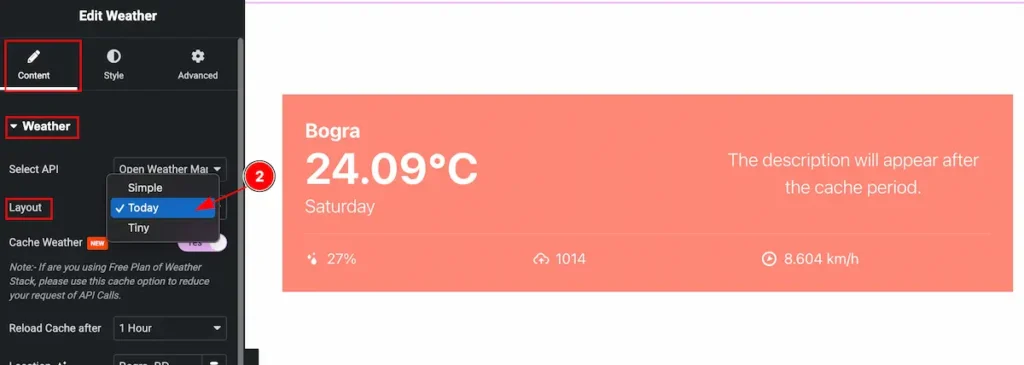
- Today: Select the ” Today ” layout and the layout will appear it appear all the details according to it.

- Tiny: Select the ” Tiny ” layout for showing the less info of weather.
Cache
Set the caching feature for the weather. It will display the weather according to the cache.
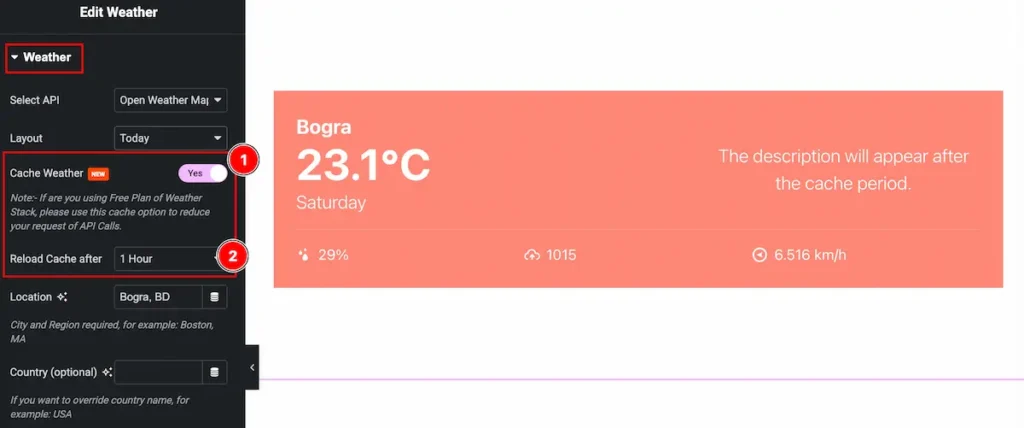
- Cache Weather: Enable the switcher and it will appear the cache the weather.
- Reload Cache after: Set the time for showing the weather info after certain of period.
Set City & Country
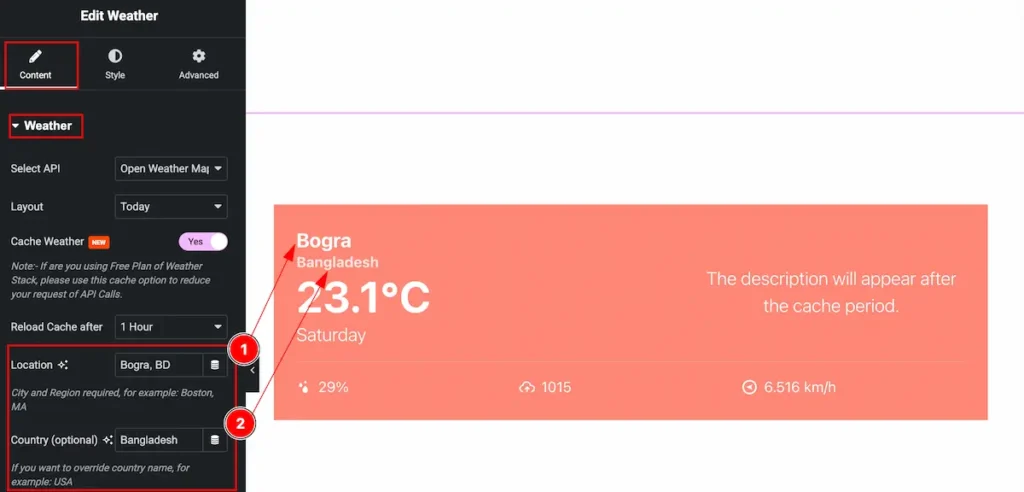
- Location: Set the location the ” city ” name and weather info will appear according to the city. E.x: Bogra, BD
- Country ( Optional ): Set the Country to override the country name.
Set Units
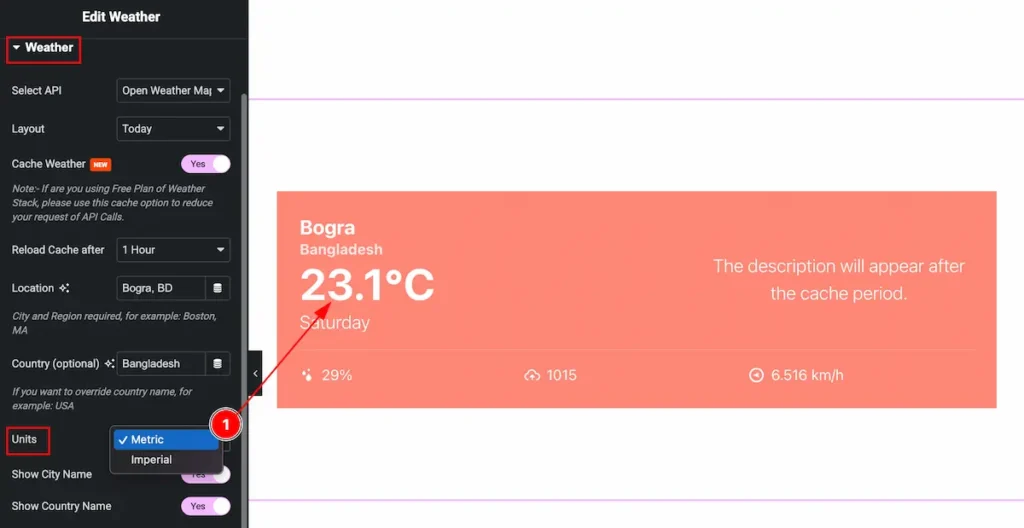
- Metric: Select the Metric to show the info in metric. The measure will appear on Celsius.
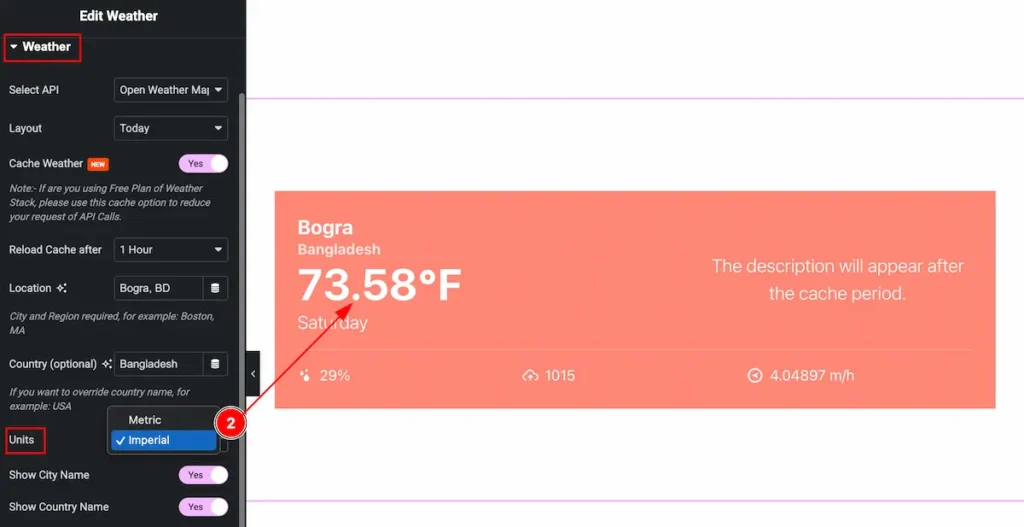
- Imperial: Select the Imperial to show the info in metric. The measure will appear on Fahrenheit.
Controls
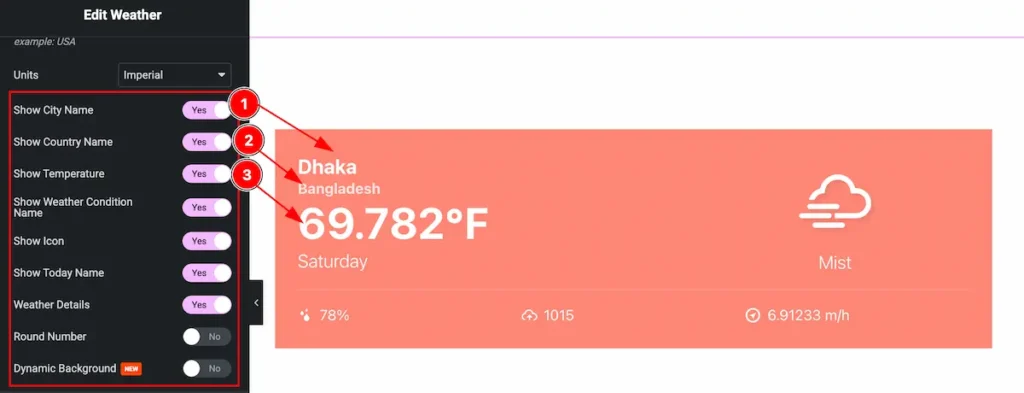
- Show City Name: Enable the switcher to show the City Name.
- Show Country Name: Enable the switcher to show the Country Name.
- Show Temperature: Enable the switcher to show the Temperature.
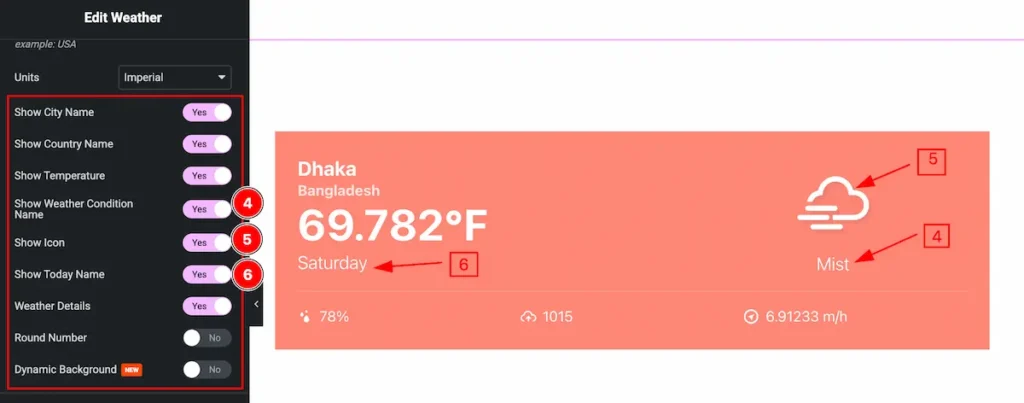
- Show Weather Condition Name: Enable the switcher to show the Weather Condition Name. E.x.: Mist, Rain, Sunny, Fog, Cloud etc.
- Show Icon: Enable the switcher to show the Icon.
- Show Today Name: Enable the switcher to show Today day.
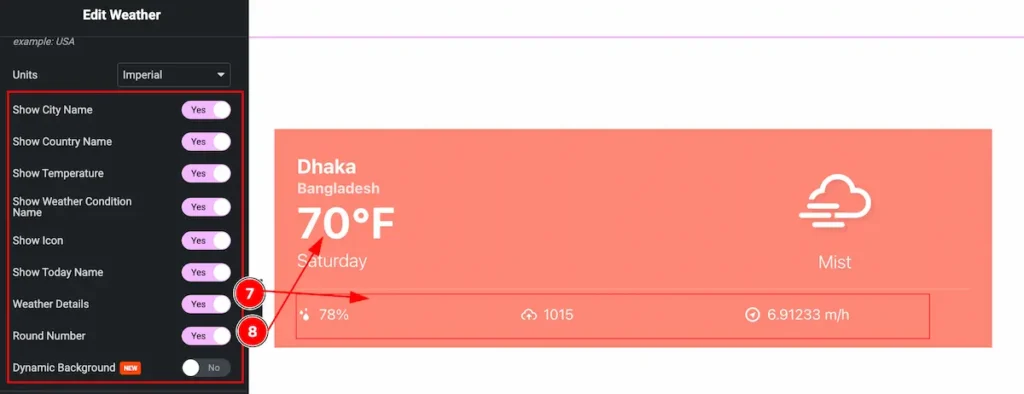
- Weather Details: Enable the switcher to show all the details info, e.x.: Wind, Visibility etc.
- Round Number: Enable the switcher to show the round number of the temperature.
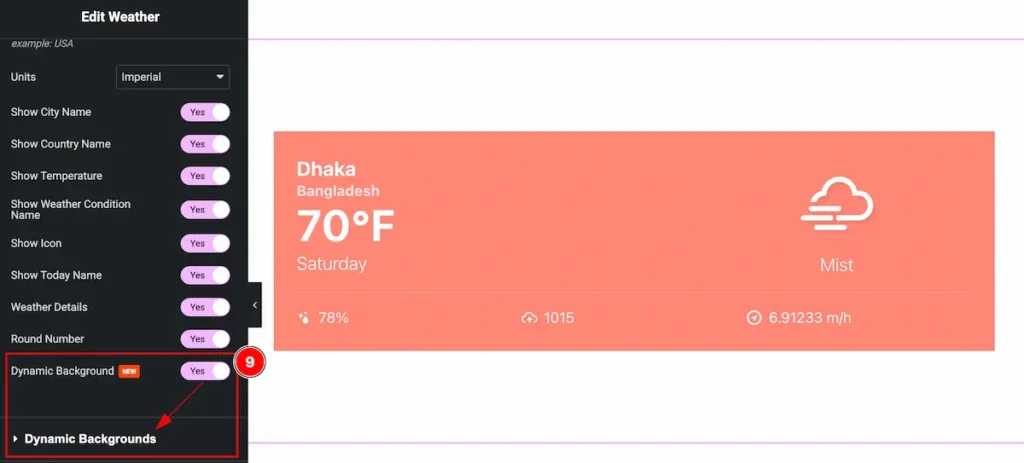
- Dynamic Background: Enable the switcher to show the dynamic background. It will open a Dynamic Background section.
Dynamic Background
Go to Content > Dynamic Background
Dynamic Background is a magical feature, It will change the background accordion to the weather condition. First set the Background for all condition. Available condition are Sunny, Cloudy, Rain, Mist, Snow, Fog.
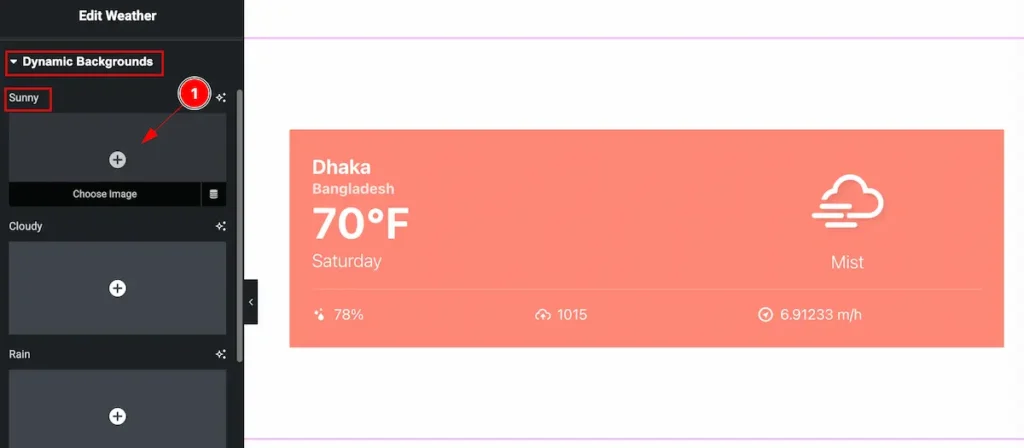
- Sunny: Select sunny section and click on the Choose Image, It will navigate to the media and select it.
SUNNY
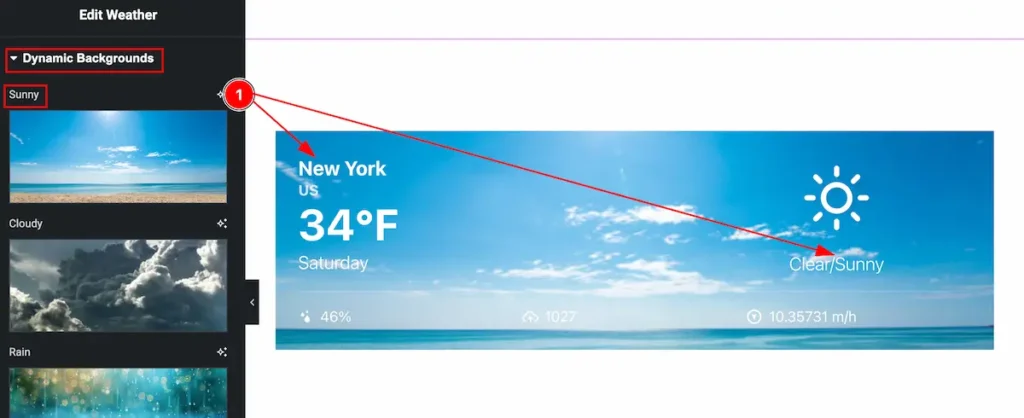
- The Sunny background will appear according to the condition of the City. Here appear sunny according to New York city.
CLOUDY
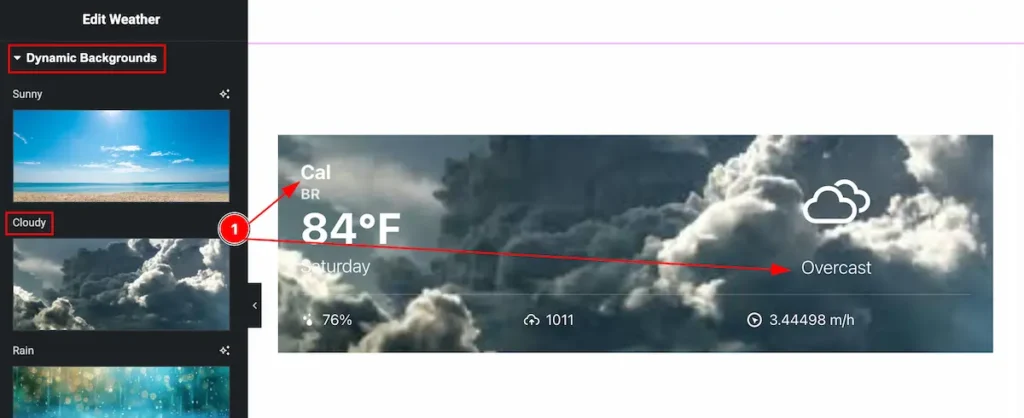
- The Cloudy background will appear according to the condition of the City. Here appear Cloudy according to Cal city.
RAIN
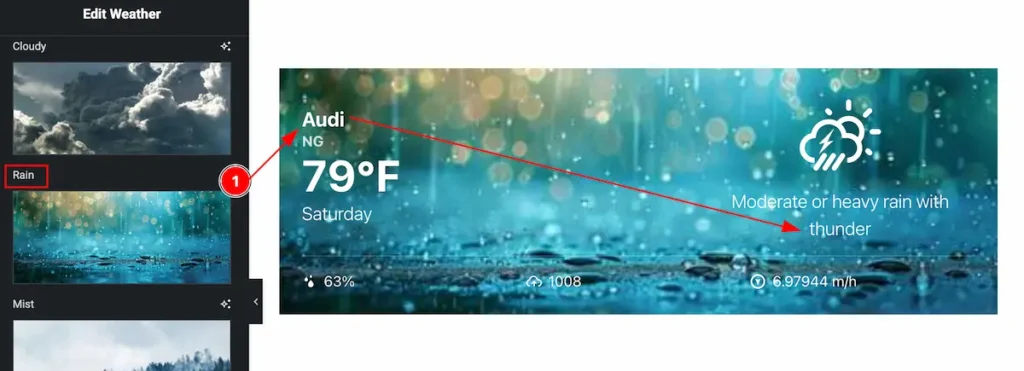
- The Rain background will appear according to the condition of the City. Here appear Rain according to Audi city.
MIST
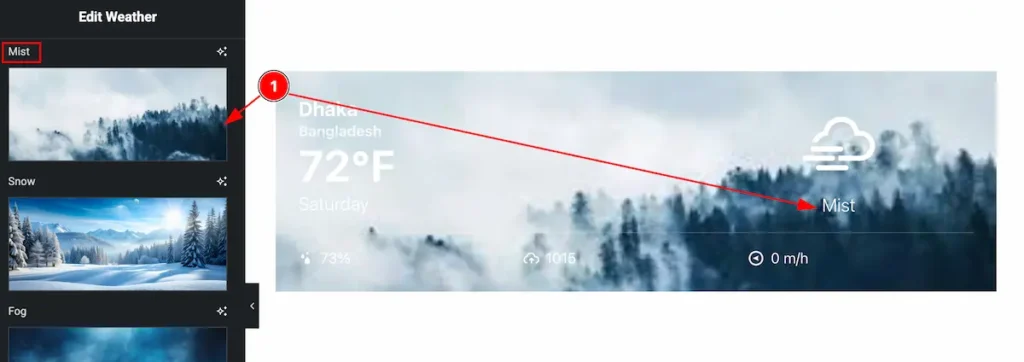
- The Mist background will appear according to the condition of the City. Here appear Mist according to Dhaka city.
Style Tab Customization
Weather Section
Go to Style > Weather
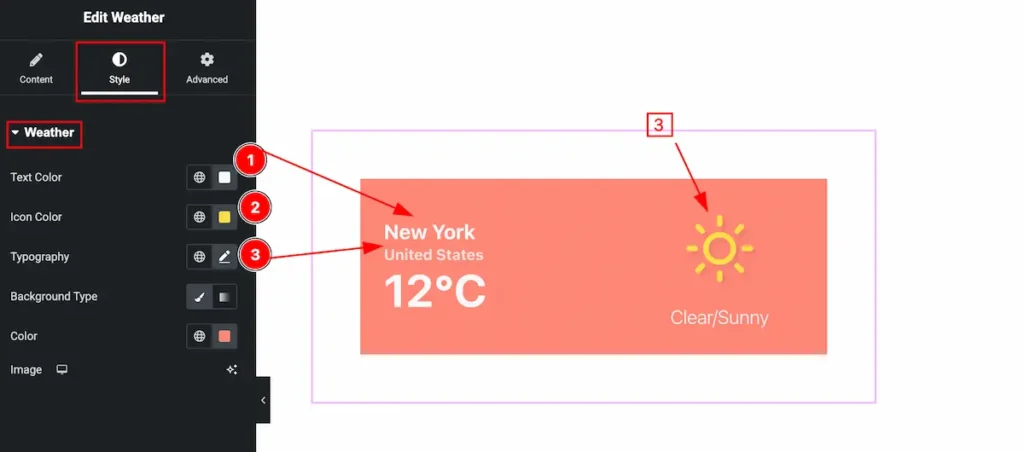
- Text Color: Set the text color for the weather section.
- Icon Color: Set the Icon color for this.
- Typography: Set the typography for the text.
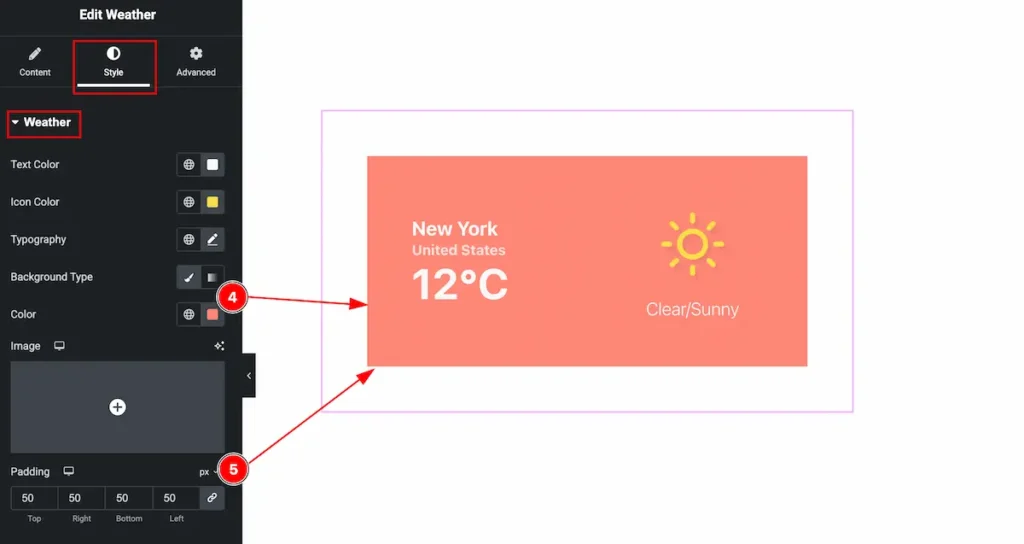
- Background Color: Set the background color for the weather section.
- Padding: Set the padding for this.
Location Section
Go to Style > Location
City Name
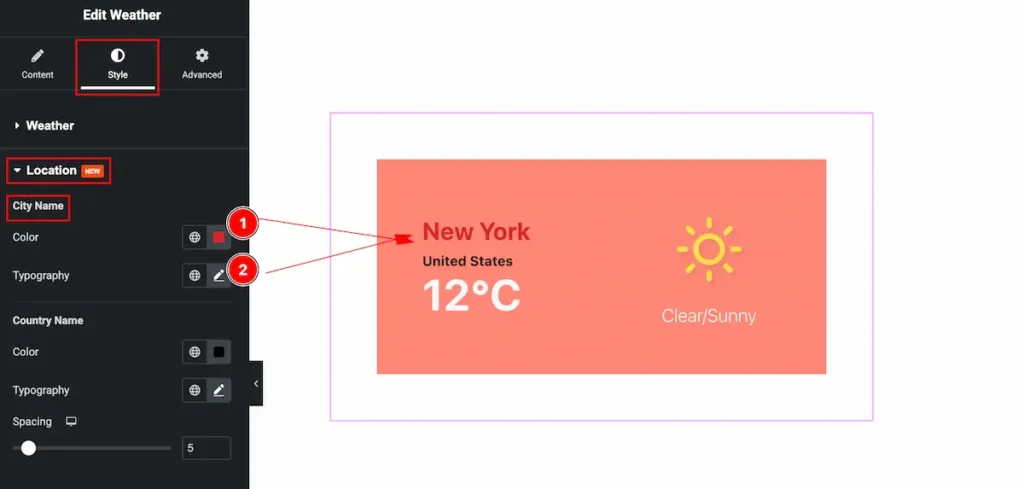
- Color: Set the color for the city name.
- Typography: To set the typography, click on the Edit icon. This will open the controls, allowing to adjust features like Text Size, Weight, Transform, Text Decoration, Line Height, and Word Spacing.
Country Name
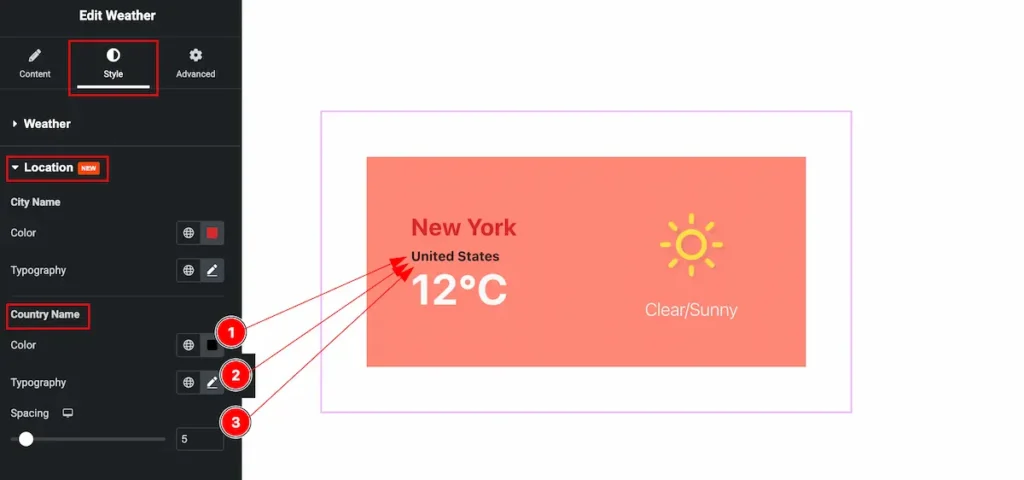
- Color: Set the color for the country text.
- Typography: To set the typography, click on the Edit icon. This will open the controls, allowing to adjust features like Text Size, Weight, Transform, Text Decoration, Line Height, and Word Spacing.
- Spacing: Set the spacing for the Country text.
Temperature Section
Go to Style > Temperature
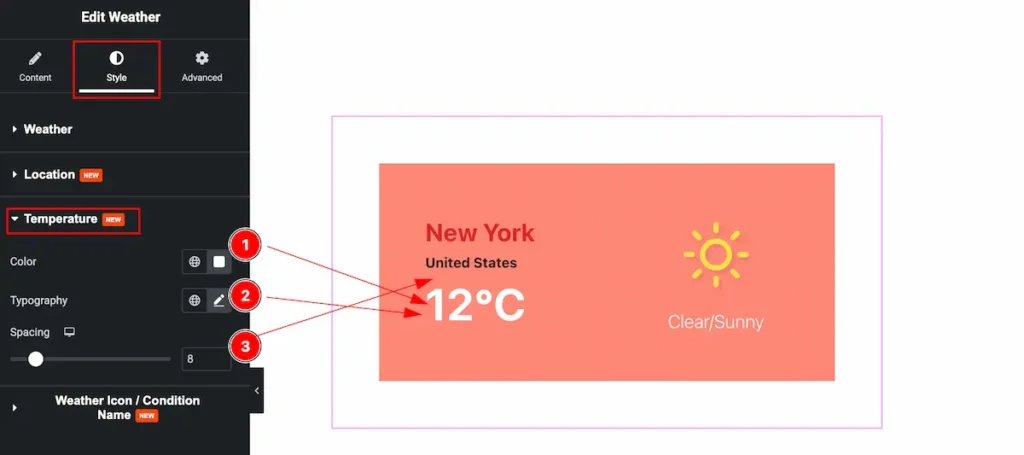
- Color: Set the color for the templarature.
- Typography: To set the typography, click on the Edit icon. This will open the controls, allowing to adjust features like Text Size, Weight, Transform, Text Decoration, Line Height, and Word Spacing.
- Spacing: Set the spacing from top.
Weather Icon / Condition Name
Go to Style > Weather Icon / Condition Name
Weather Icon
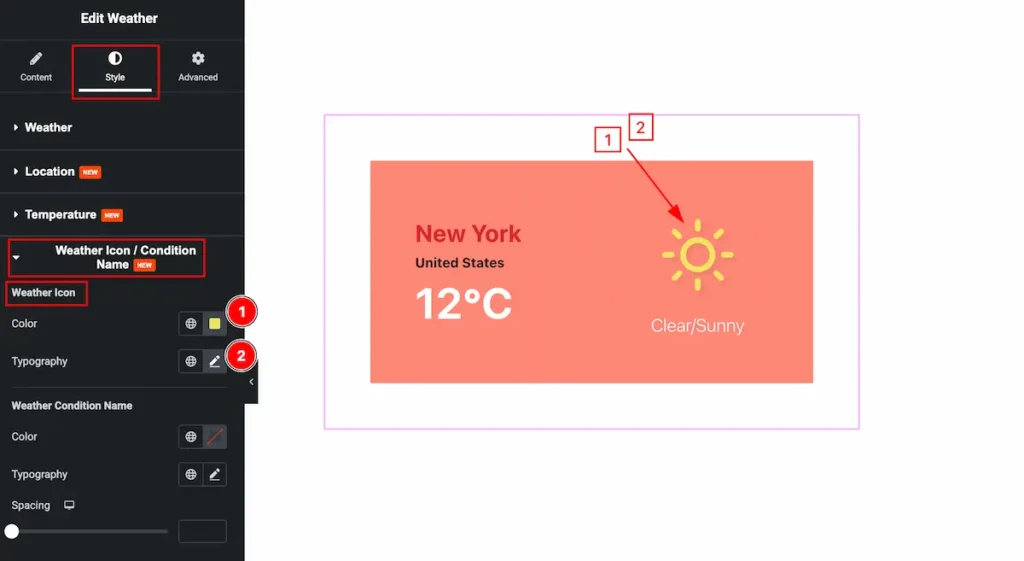
- Color: Set the color for the weather icon.
- Typography: The typography size will change the Size of the Weather Icon.
Weather Condition Name
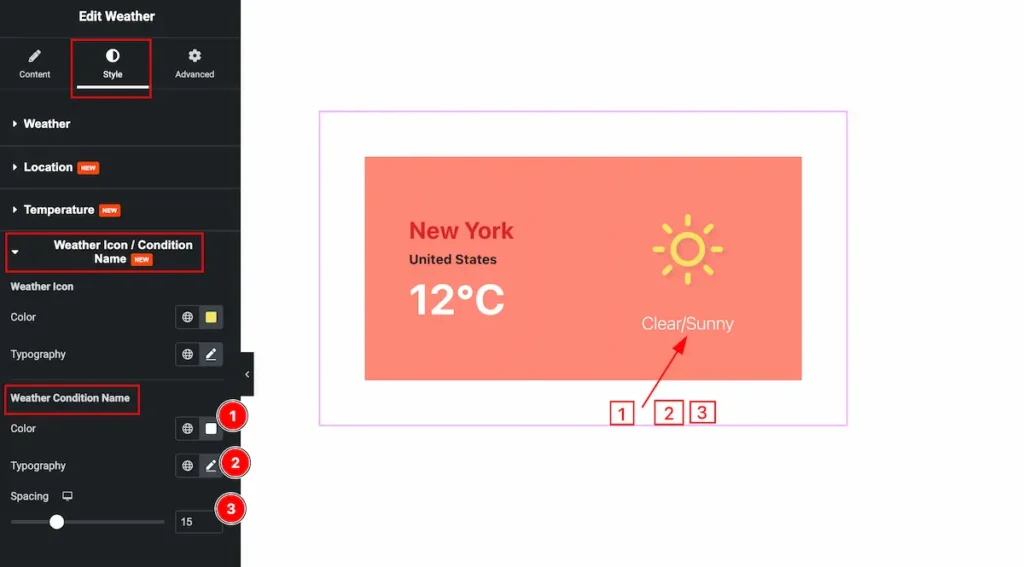
- Color: Set the color for the weather condition name.
- Typography: Set the typography for condition name.
- Spacing: Set the spacing of it. The space add from top.
Video Assist
Please check the Demo of Weather Widget.
Thanks for being with us.