Visibility Control allows you to control the visibility of certain elements/content on a web frontend. You can use it to display content only to specific users, like an administrator, or restrict the visibility for specific users.
The use cases of Visibility Control surpass any current feature within the Elementor page builder environment. Because of that, this tutorial document will be extended to match the features of the Visibility Control extension.
Activating Visibility Control Extension
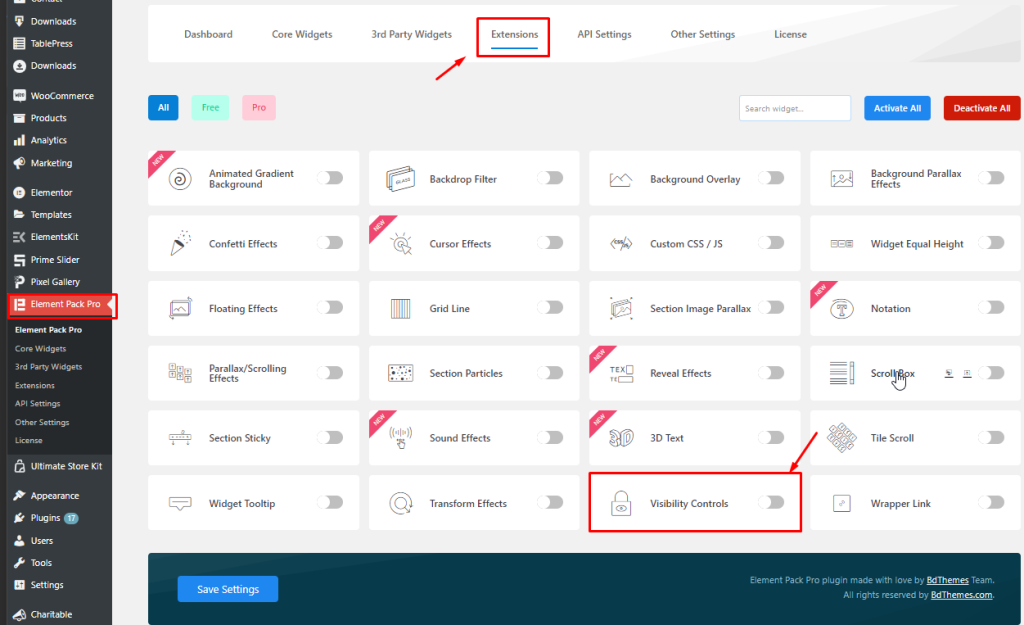
Go to Element Pack Pro > Extension and find Visibility Control. You can also search it there by name, specifically “Visibility Control.”
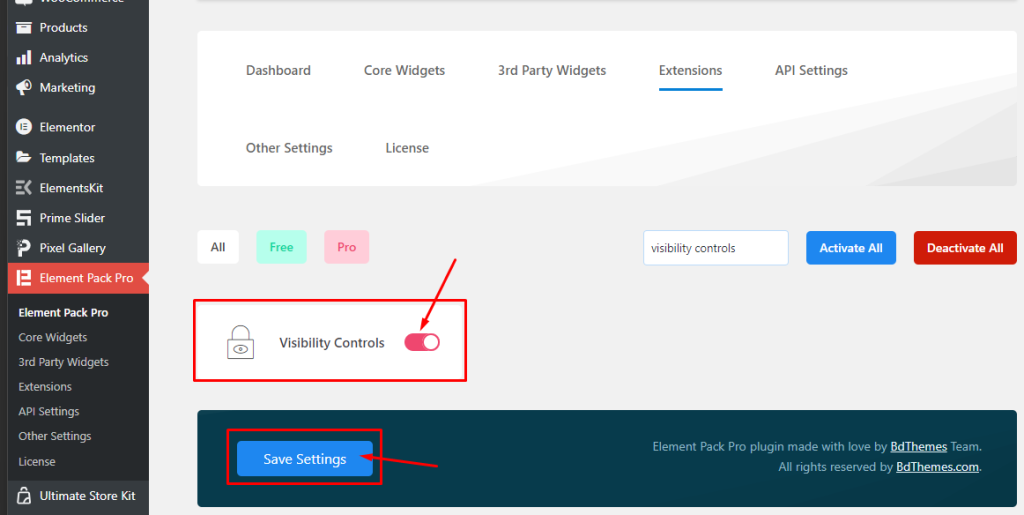
Then click on the switcher of the Visibility Control widget, and it will be activated. Click on the Save Settings button to apply the changes.
Where to find the Extension
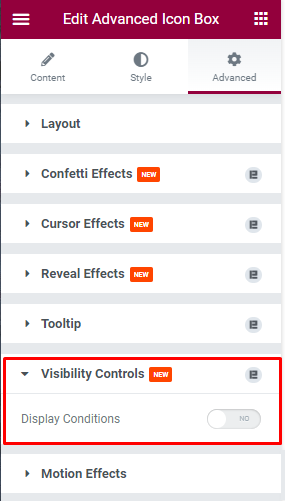
Activating the Visibility Control extension makes the feature appear within all pages, posts, sections, and widgets inside Elementor. Just create any container and go to Advanced Tab and find Visibility Controls.
Overview of Visibility Controls
Let’s examine the contents of the visibility control widget. We will talk about the features included in it and the types of tasks that can be performed with them.
Typically, it remains in an inactive state.
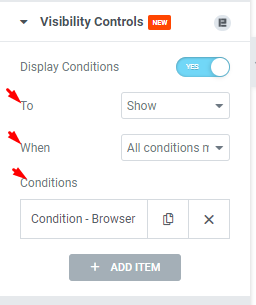
Click on the Display Conditions switcher to activate the visibility controls. Then, you can see additional controls popping up in the menu.
As you see in the screenshot, there are three controllers To, When, and Conditions.
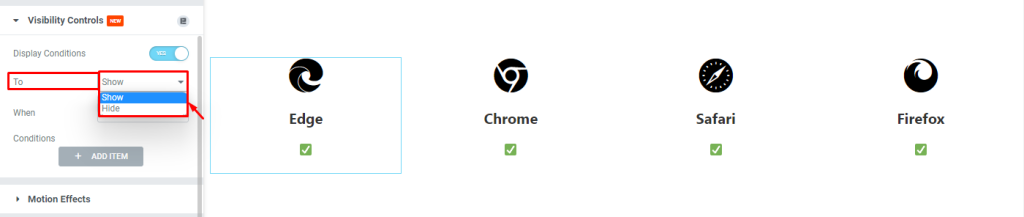
Take a look at “To” function
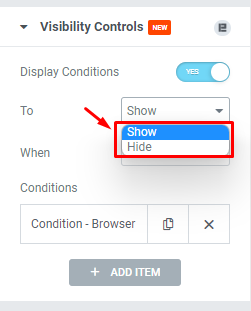
The To function can either “Show” or “Hide” content. The impact is selected by the options.
Take a look at “When” function
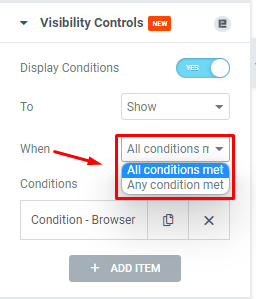
Here:-
“All conditions met” means that it will function when all requirements inside the Conditions part are fulfilled.
“Any condition met” means that it will operate if any requirement under the Conditions part is met, without the need to meet specific requirements.
Note:- There is no limitation on the number of conditions to be applied to content.
Explore the Conditions part
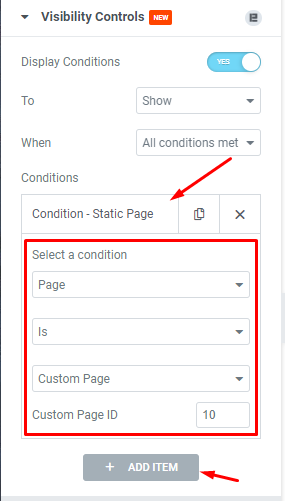
You can add conditions by clicking the Add Item button. Each condition box contains 3 options inside.
- Select a condition field
- Is or Is Not field
- Specific condition protocol field
From the 1st field, you need to select the type of condition you want to apply. Then from the 2nd field, selecting Is means the content is visible if the condition in the 3rd field is fulfilled, and Is Not means the content is visible if the condition in the 3rd field is not fulfilled.
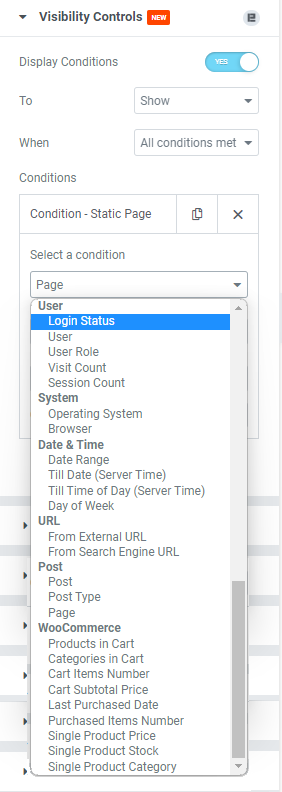
There are a good number of options that you can choose from the conditions. The conditions are further divided into sections based on the type of the condition. Let’s explore these-
- User
- Login Status:- Show/hide content if the visitor is logged in or not.
- User:- Show/hide content by selecting specific users.
- User Role:- Show/hide content by specified user roles (i.e. Subscriber, Editor, Author)
- Visit Count:- Show/hide content for the specified number of visits on that page.
- Session Count:- Show/hide content for the specified number of sessions done on that page.
- System
- Operating System:- Show/hide content based on the OS used by the visitors (i.e. Windows, Mac)
- Browser:- Show/hide content based on the browser used by the visitors (i.e. Edge, Chrome)
- Date & Time
- Date Range:- Show/hide content for the specified date range by the attached calendar.
- Till Date (server time):- Show/hide content until the specified date. In the case of Show, it will show the content till the date and then hide it. In the case of Hide, it will hide the content until the date and then show it. The time/date is based on the Server time/date.
- Till Time of Day (server time):- Show/hide content until the specified time of a date. Similar to Till Date.
- Day of Week:- Show/hide content for the specified day/s of the week. (i.e. only show content on Sunday and Monday while hiding for the rest of the days)
- URL
- From External URL:- Show/hide content for specified external links to the content.
- From Search Engine URL:- Show/hide content for specified Search Engines (i.e. Google, Bing)
- Post
- Post:- Show/hide content (i.e. global content like header, menu, etc.) for certain posts.
- Post Type:- Show/hide content (i.e. global content like header, menu, etc.) based on post type (i.e. posts, pages, products, etc.)
- Page:- Show/hide content (i.e. global content like header, menu, etc.) based on page type (i.e. homepage, 404 page, etc.)
- WooCommerce
- Products in Cart:- Show/hide content (globally or within the cart page) based on the products added to the cart. (i.e. hide formal pants if a user puts denim pants in the cart)
- Categories in Cart:- Show/hide content (globally or within the cart page) based on the product categories added to the cart. (i.e. hide shirts when a user puts pants category product in the cart)
- Cart Items Number:- Show/hide content (globally, on a specific page, or within the cart page) based on the number of items added to the cart. (i.e. show Buy-One-Get-One-Offer if a user puts 3 products in his cart)
- Cart Subtotal Price:- Show/hide content (globally, on a specific page, or within the cart page) based on the subtotal price of products within the cart. (i.e. hide shipping cost if the subtotal price goes above $300)
- Last Purchased Date:- Show/hide content based on the last purchased date for users. The condition can be applied to show offers or new products when all/specific users return to purchase again after a particular purchase date. (i.e. show a 50% discount offer for users that had purchased before 1st March)
- Purchased Items Number:- Show/hide content based on the number of items purchased by all/specific users. (i.e. show a BOGO-deal for users who had purchased 5 items together)
- Single Product Price:- Show/hide content based on the price of a single product. (i.e. hide a product if the single product price is below $20)
- Single Product Stock:- Show/hide content based on the available stock of a single product. (i.e. hide a product if the single product stock is below 2)
- Single Product Category:- Show/hide content based on the category of the single product. (hide a product category from displaying using this condition)
Now, let’s explore the application of each option category so we can have a better understanding of how Visibility Controls work.
Application of User Login condition under User category
To demonstrate the User Login condition, let’s again pick two widgets or content inside separated containers. (in the case of configuring visibility conditions on individual widgets, no separate container is needed)
Step 1
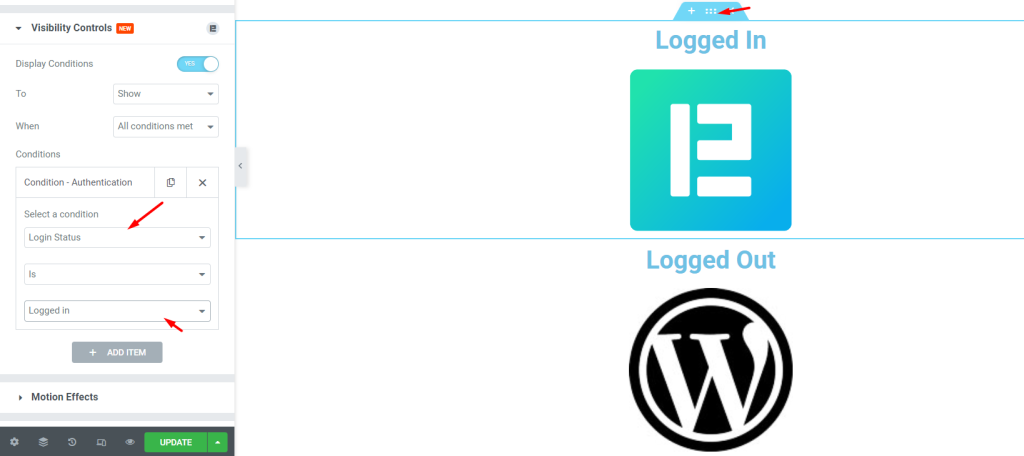
Let’s open the feature section and select Login Status from the Select a Condition option. The 2nd field should display Is and the 3rd field should display Logged In. This means if the user is logged in, the condition is true and the user will see the content. Otherwise, he won’t.
Step 2
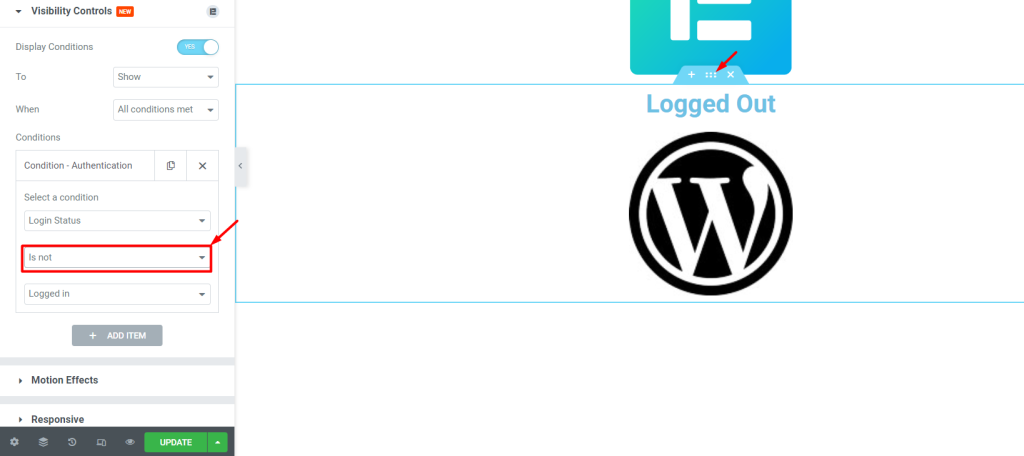
For the second container, go for the same settings but change the 2nd field to Is Not. That means if the user is not logged in, the condition is true, and the user will see the content. On the other hand, the logged-in users won’t see the content.
Step 3
Try out the link in two different environments. One for logged-in users and the other for visitors or logged-out users.
Logged In case
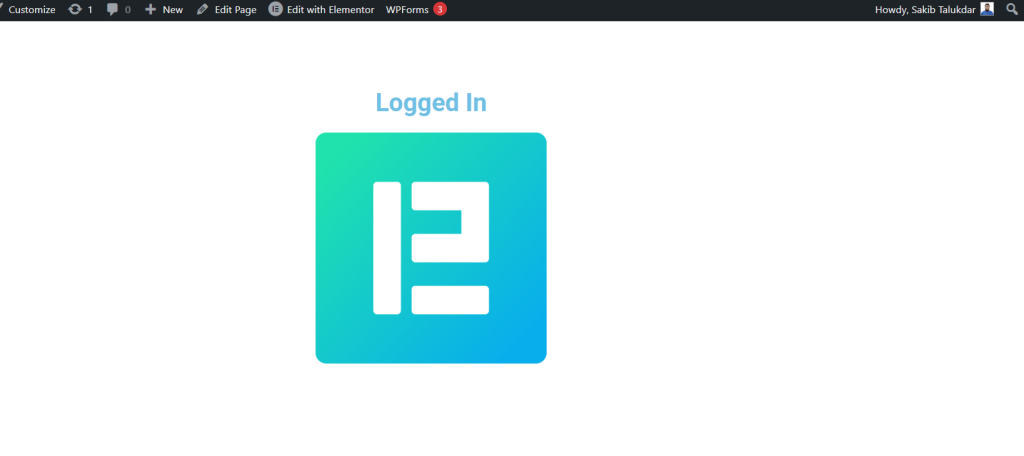
Only the content from the first content is visible.
Logged Out case
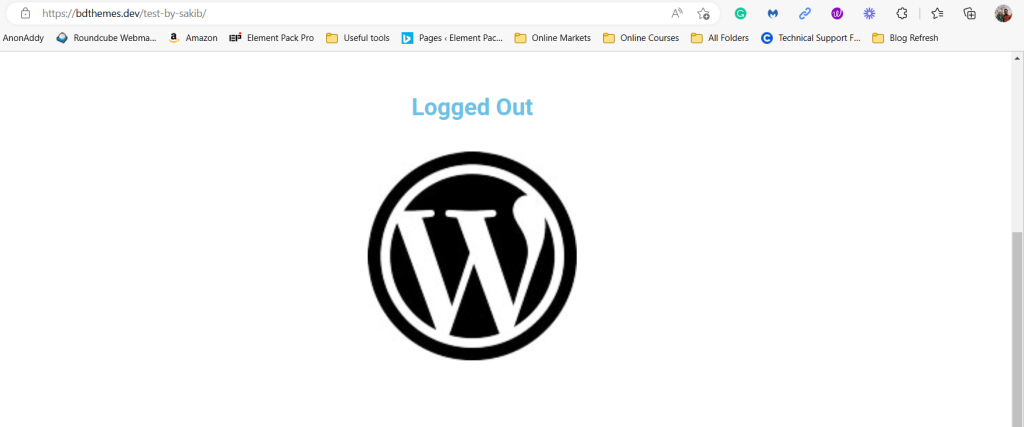
Only the content from the second container is visible.
Within the same category, you can trigger visibility controls based on the number of visits by a user or sessions (login/logout session) by a user.
Note:- We have demonstrated the conditions for Show option. You can reverse the settings and apply the conditions on Hide option.
Application of Browser condition under System category
Step 1
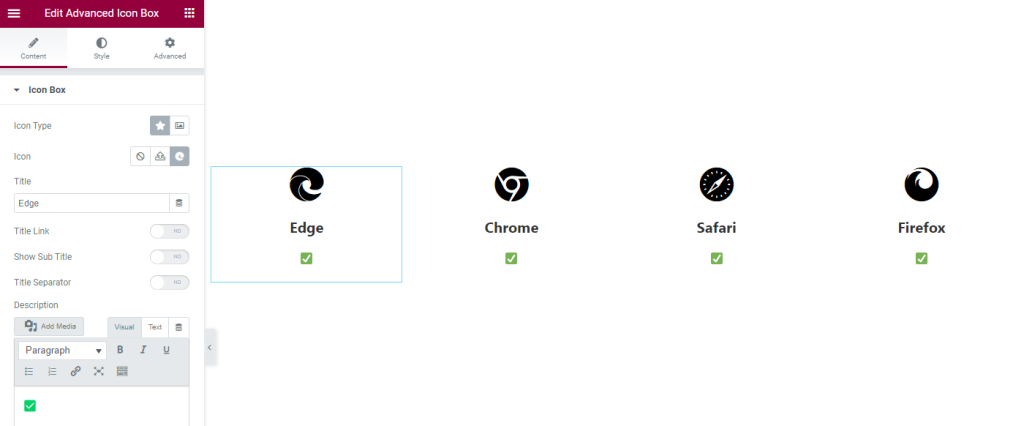
We have inserted the Advanced Icon Box widget 4 times to create 4 logos for the presentation of the browser condition to demonstrate Visibility Control.
Please choose the widget/content you want for this part.
Step 2
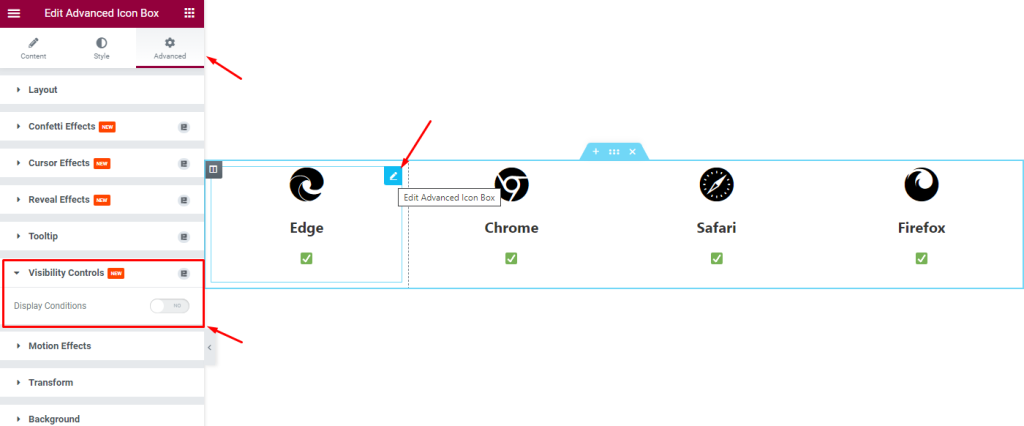
Click on the content/section/widget and go to Advanced> Visibility Controls.
Step 3
Turn on the Display Conditions switcher. Let’s select show for the To option.
Step 4
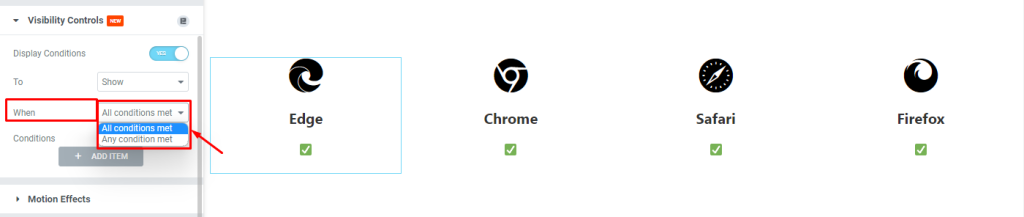
Let’s select All Conditions Met for When option.
Step 5
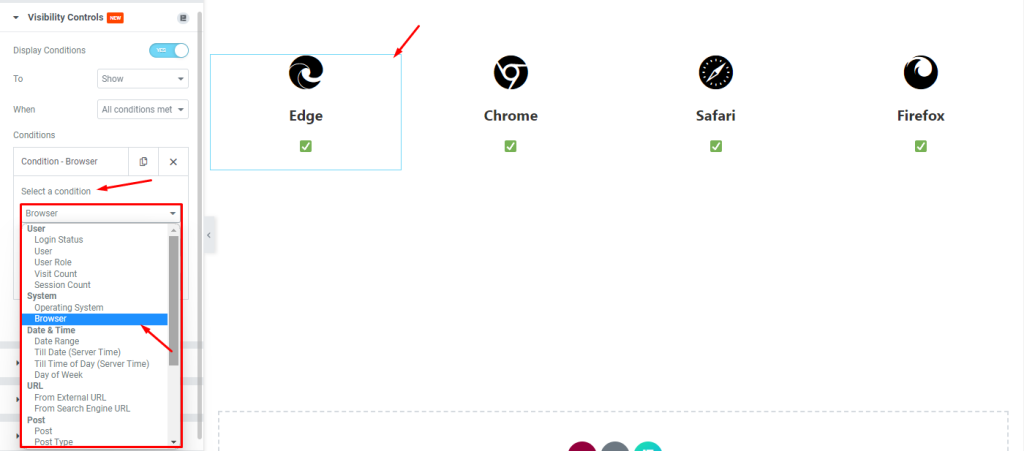
Let’s choose Browser under the System category from the Select a Condition field.
Step 6
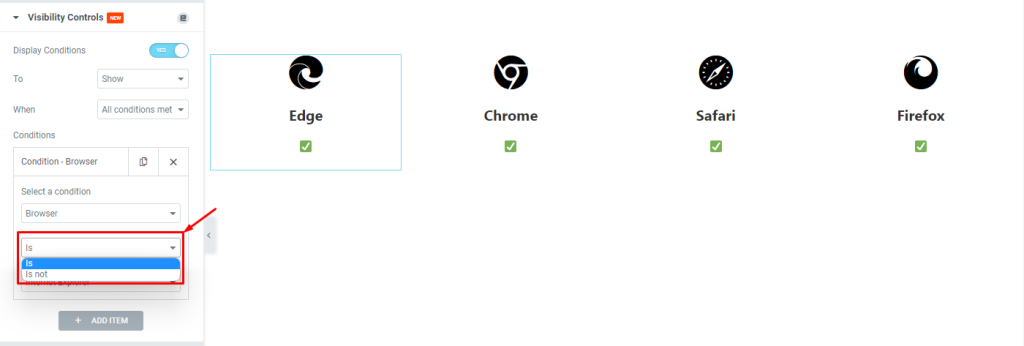
Then select Is from the options as we want this condition to apply if the condition in the 3rd field is true.
Step 7
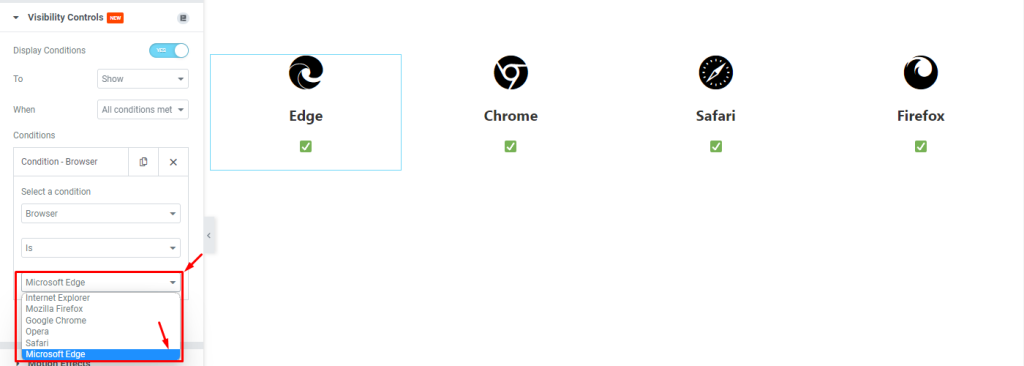
Then from the 3rd field, let’s select Microsoft Edge as the browser condition for the first content/icon on display.
Following the steps from Step 2 to Step 7, please create browser conditions for the rest of the content/icon based on their perspective names.
Step 8
Now, publish the page/post and copy the link. Then open the link in different browsers to see the effects.
Chrome
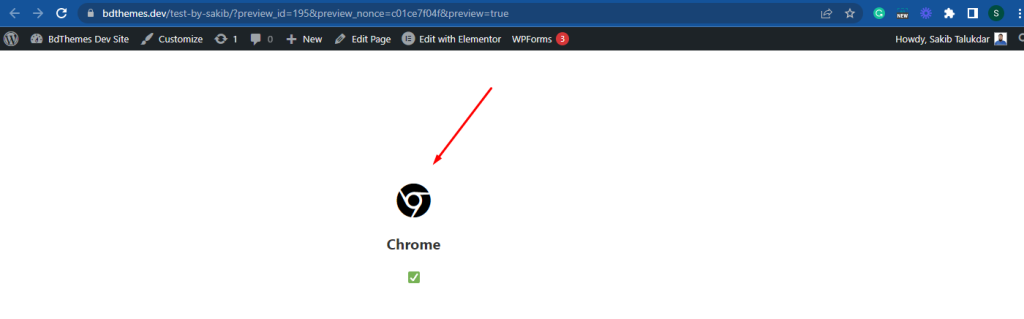
In Chrome, we can only see the icon that was configured to open in the Chrome browser.
Edge
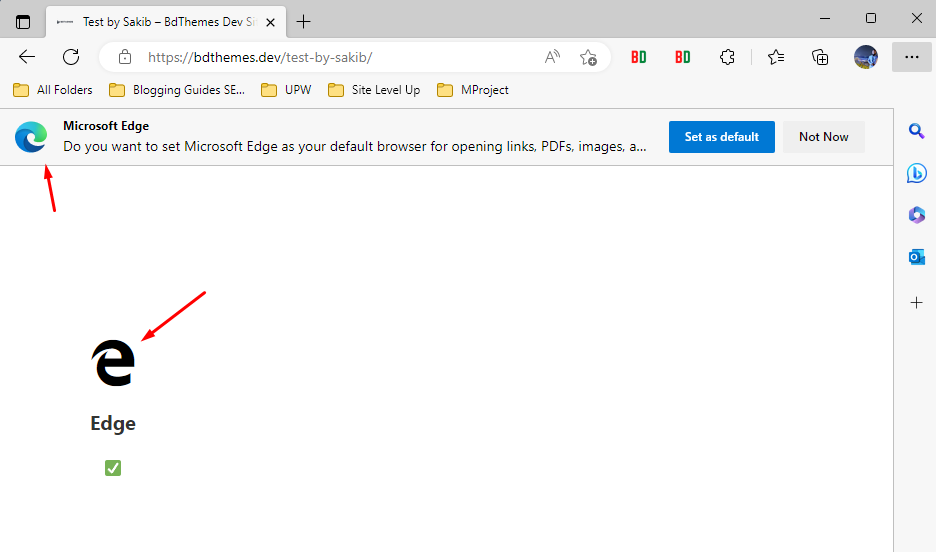
In Edge, we can see similar results. Only the logo with Microsoft Edge condition is visible on display.
Video Assist
You can follow this video tutorial which will help you a lot. Watch the video now.