This documentation provides comprehensive insights into the Install and Activate Element Pack Pro process step by step.
Download Element Pack Pro
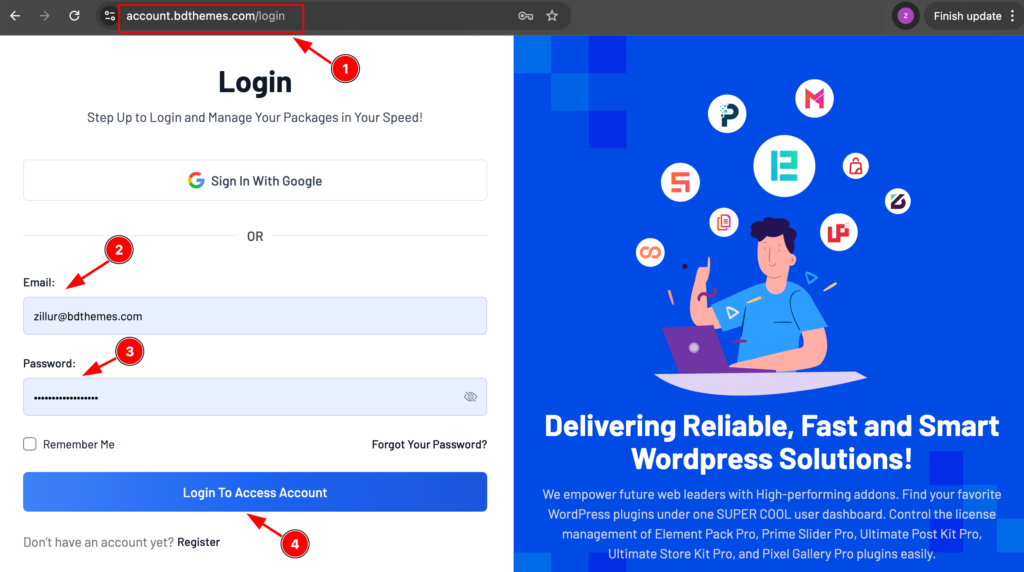
- Go to the link accounts.bdthemes.com
- Enter the Purchase email ( The email used for purchasing the Element Pack Pro ).
- Enter the password.
- Click on the ” Login To Access Account “ button to login to your license managements dashboard.
After successfully login, you will see the dashboard.
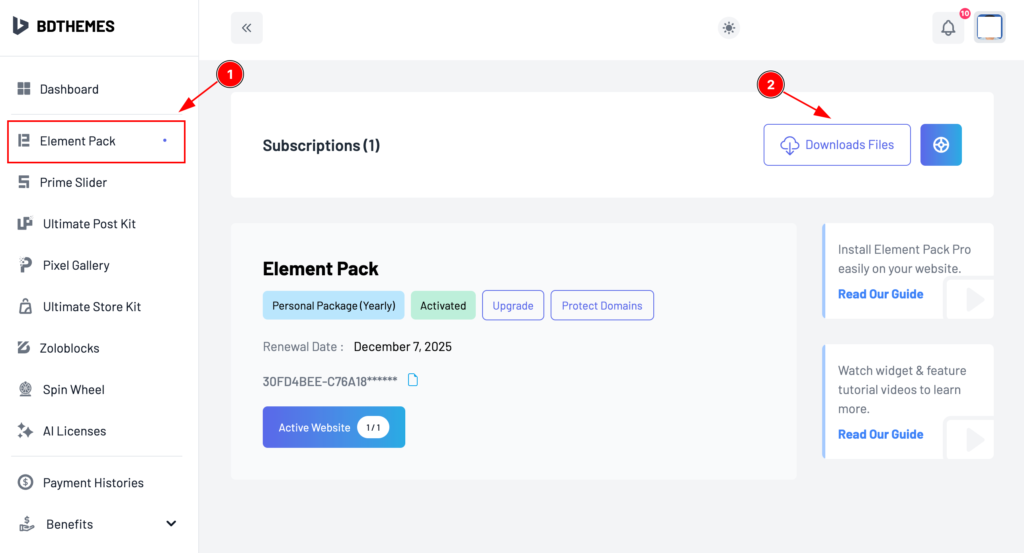
- Select the “ Element Pack Pro ” tab from left side bar. It will appear the Element Pack Pro information.
- Find the ” Download Files ” button on the right top side and click on it.
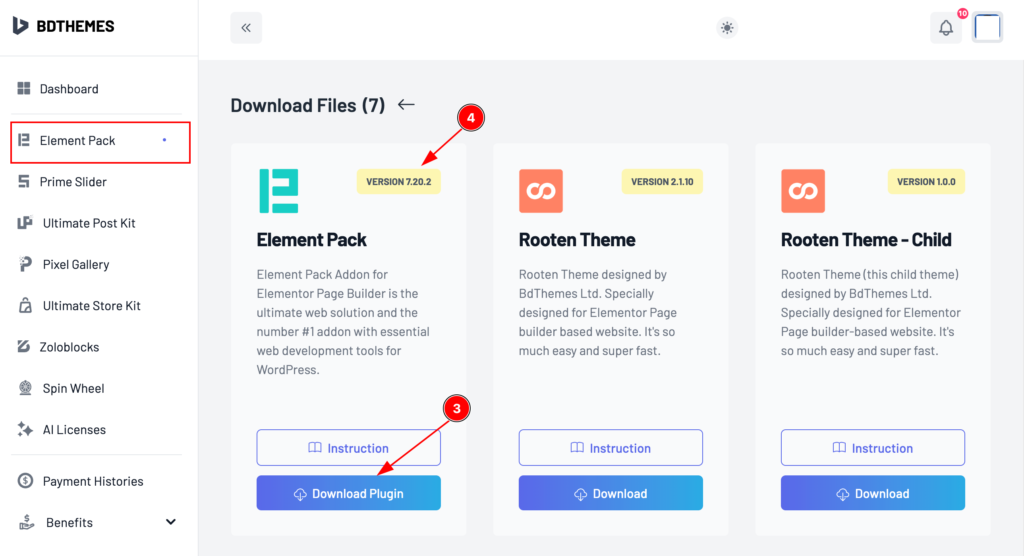
- Now you will see the Element Pack Pro plugin just click on the ” Download Plugin ” button and it will start to download.
- Top right corner the latest version will appear there.
Install & Activate Element Pack Pro
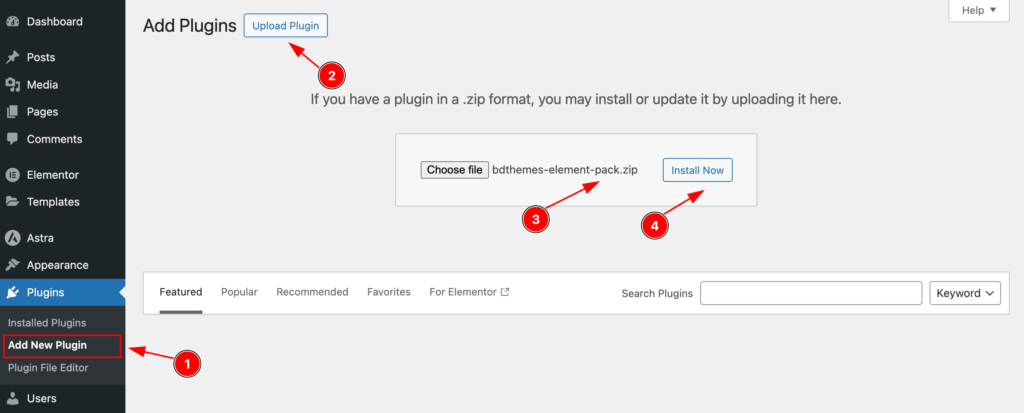
- Navigate to the Plugins tab and click on the ” Add New Plugin “.
- Click on the ” Upload Plugins ” button and it will appear a file box.
- Choose file from desire location and the file name will appear ” bdthemes-element-pack.zip “.
- Then click on the ” Install Now ” button.
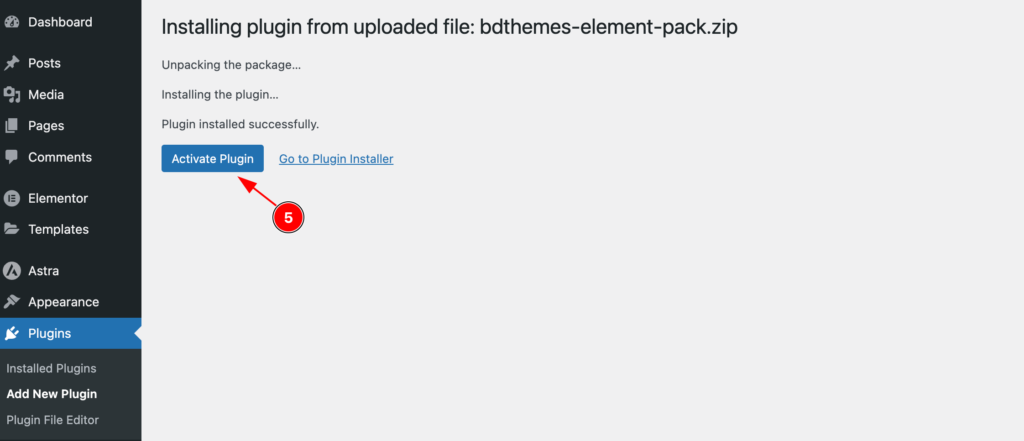
- After completing installation the ” Activate Plugin ” button will appear and click on it to activate the Element Pack Pro plugin.
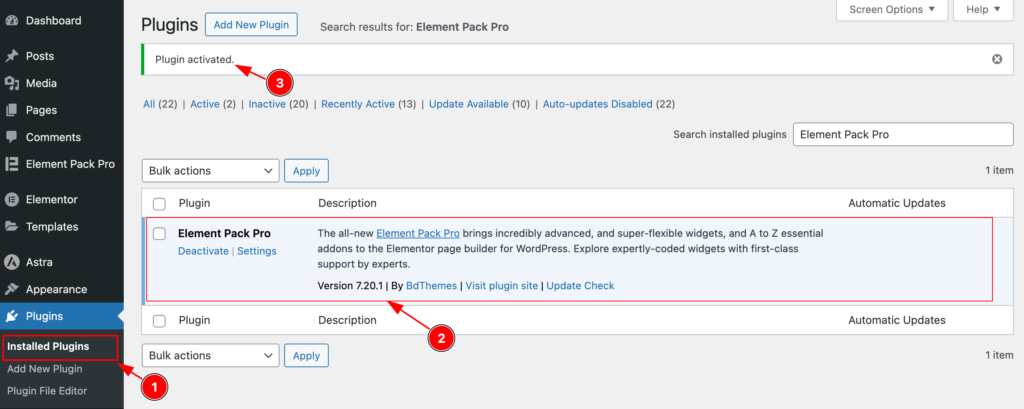
- Go to Installed Plugins section under Plugins Tab.
- Check the Element Pack Pro plugin are activated.
- The notification appear on the top, Please ” Plugin activate “.
Activate the License Key
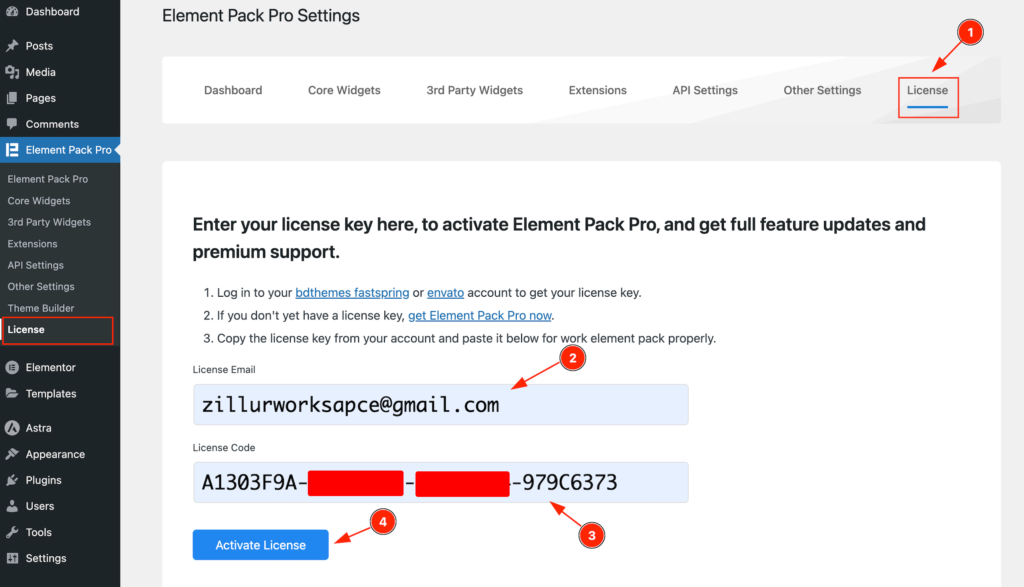
- On WordPress Dashboard Navigate to Element Pack Pro from the sidebar menu and Go to License navbar.
- Enter the Email of your purchase package.
- Enter the License key.
- Click on the ” Activate License ” button to activate the license key.
Confirm License Activation
After Successfully Activating the License key.

- Navigate to ” License ” nav bar.
- The License Information appear.
| Status | Valid License ( It means license is okay ) |
| License Type | Package Name and Type ( Yearly or Lifetime ) |
| License Expired on | License expiry date will appear. |
| Support Expired on | Support expire date will appear. |
| License Email | License email will appear. |
| Your License Key | The license key will appear. |
- ” Deactivate License ” button to deactivate the license key.
Activate Core Widgets
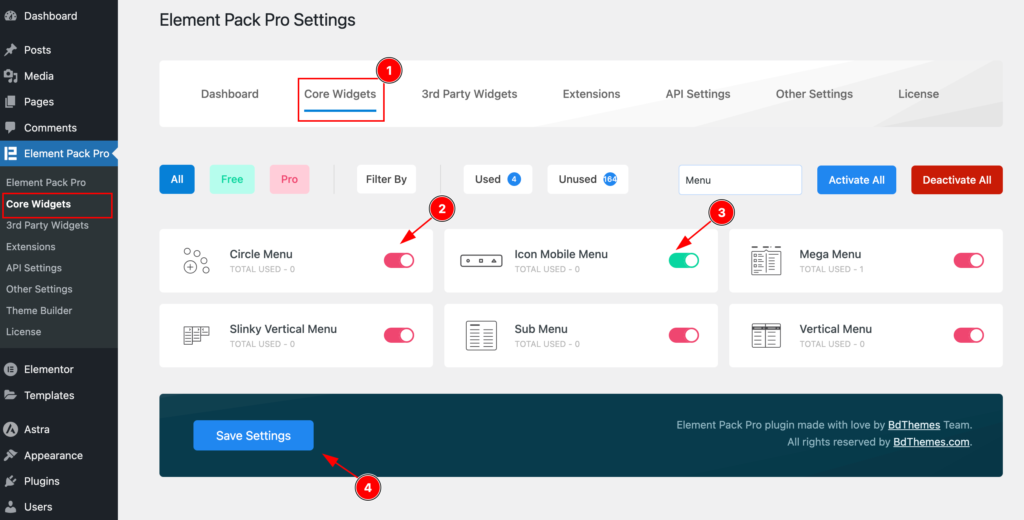
Activate widgets of Element Pack Pro,
- Navigate to the ” Core Widgets ” tab and core widgets will appear.
- Enable the switcher to activate The Red Color represents the Pro Widgets.
- Enable the switcher to activate The Green Color represents the Free Widgets.
- Click on the ” Save Settings ” button to make changes.
Note: Don’t forget to click on the ” Save Settings ” button after activating/deactivating widgets.
Categories Widgets
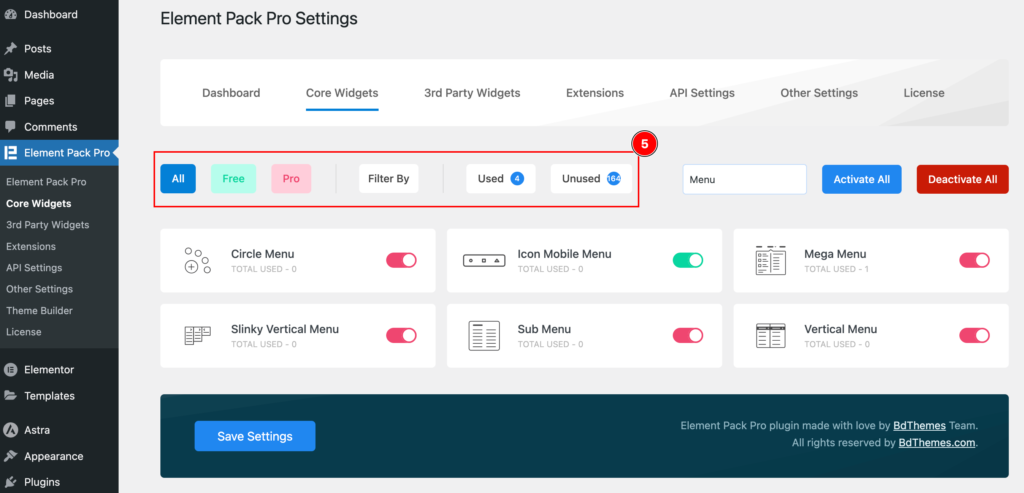
- Category tabs are to easily find by it’s category.
| All | All the widget will appear Free & Pro. |
| Free | Free widgets will appear only. |
| Pro | Pro widgets will appear only. |
| Filter By | New, Gird, Tabs, List Carousel, Slider, Timeline, Template Builder, Others |
| Used | Used widgets appear. |
| Unused | Unused widgets appear. |
Search by Widget Name
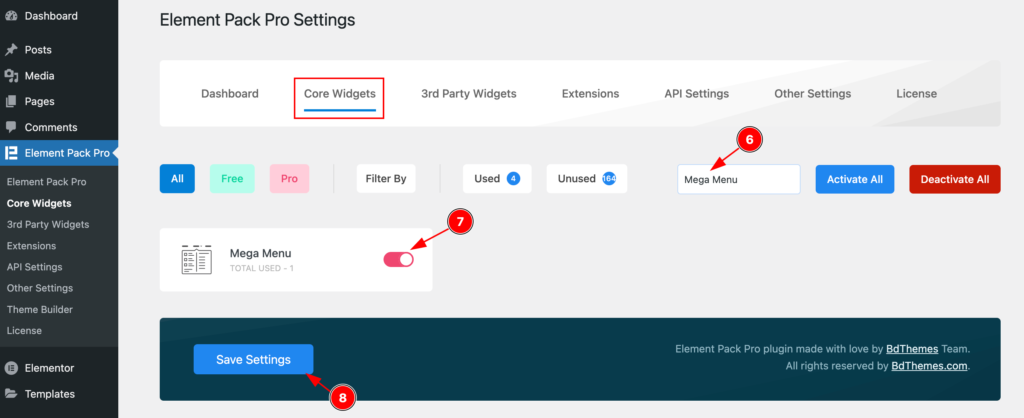
- Search by the name ( e.g: ” Mega Menu ” ) and it will appear the available widgets.
- Enable the ” Mega Menu ” switcher and activate it.
- Activate/Deactivate then click on the ” Save Settings ” button.
Activate All Widgets once
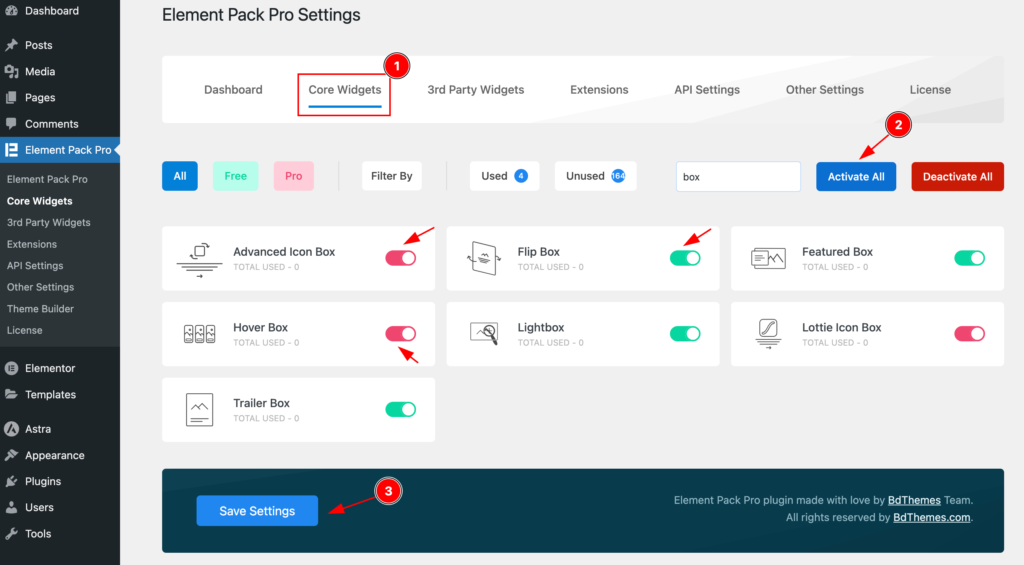
To activate all the widgets at once,
- Go to desire tab (e.g.: Core Widgets ).
- Click on the ” Activate All ” button on the category tabs right after the nav bar. It will activate all the widgets.
- click on the ” Save Settings ” button to data save successfully.
Deactivate All Widgets once
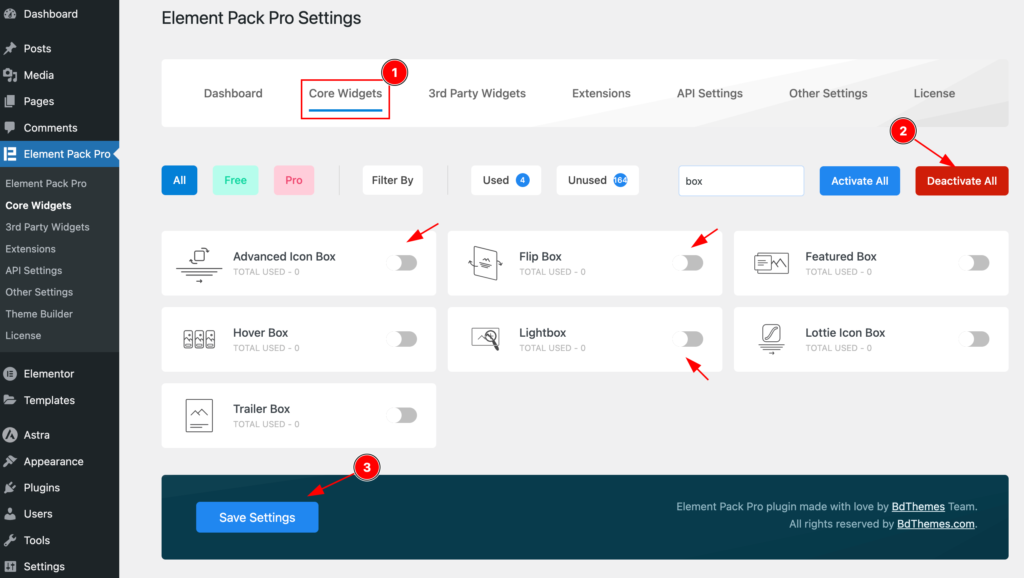
To deactivate all the widgets at once,
- Go to desire tab (e.g.: Core Widgets ).
- Click on the ” Deactivate All ” button on the category tabs right after the nav bar. It will deactivate all the widgets.
- Click on the ” Save Settings ” button to data save successfully.
3rd Party Widget
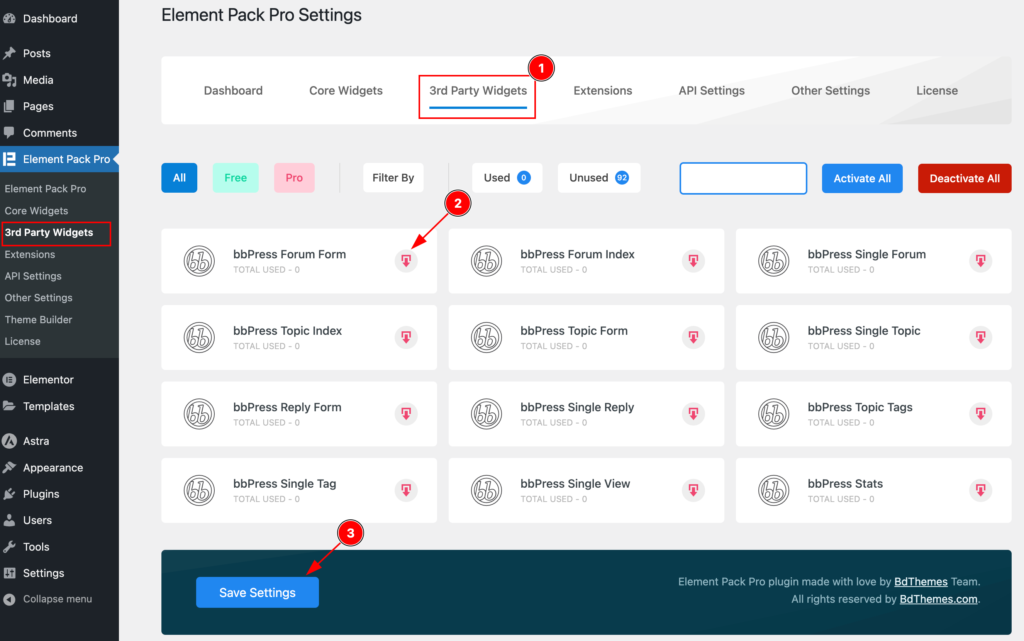
First, Activate the 3rd Party Widgets
- Please navigate to the “ 3rd Party Widgets ” tab , The 3rd party widget will appear on there.
- Click on the ” Download Icon” and the relevant plugin will be download. Then activate the plugin.Extension
- Hit the ” Save Settings ” button to data save successfully.
Extension

To Activate the Extension follow this,
- Go to Extension nav bar and enable all the widgets switcher.
- Click on the ” Save Settings ” button to data save successfully.
API Settings
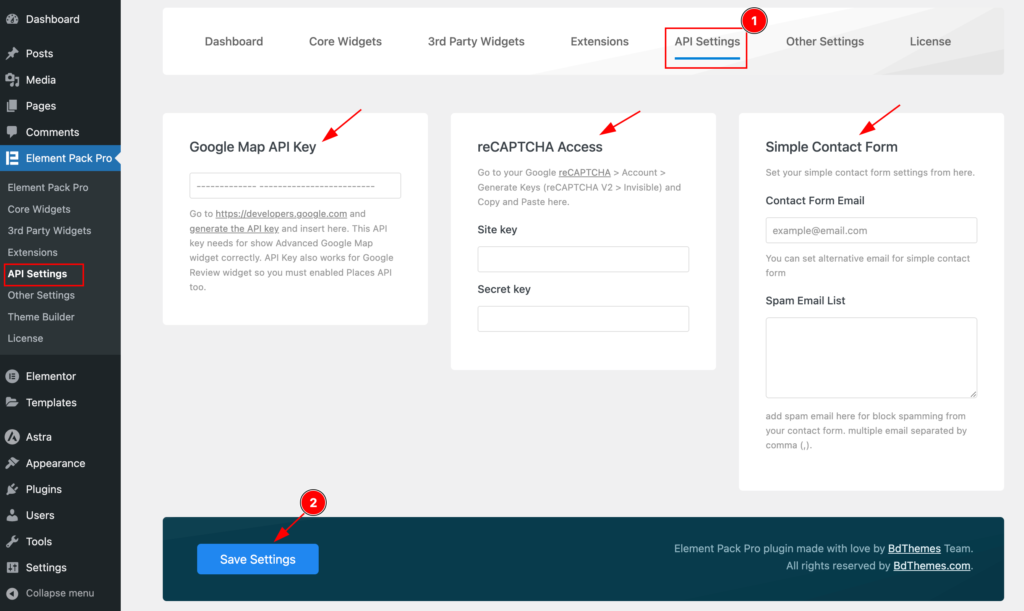
To Set API Key follow this,
- Go to API Settings nav bar. Several option for the API Settings. E.G.: Google Map API Key, reCAPTCHA Access, Simple Contact Form.
- Click on the ” Save Settings ” button to data save successfully.
Other Settings
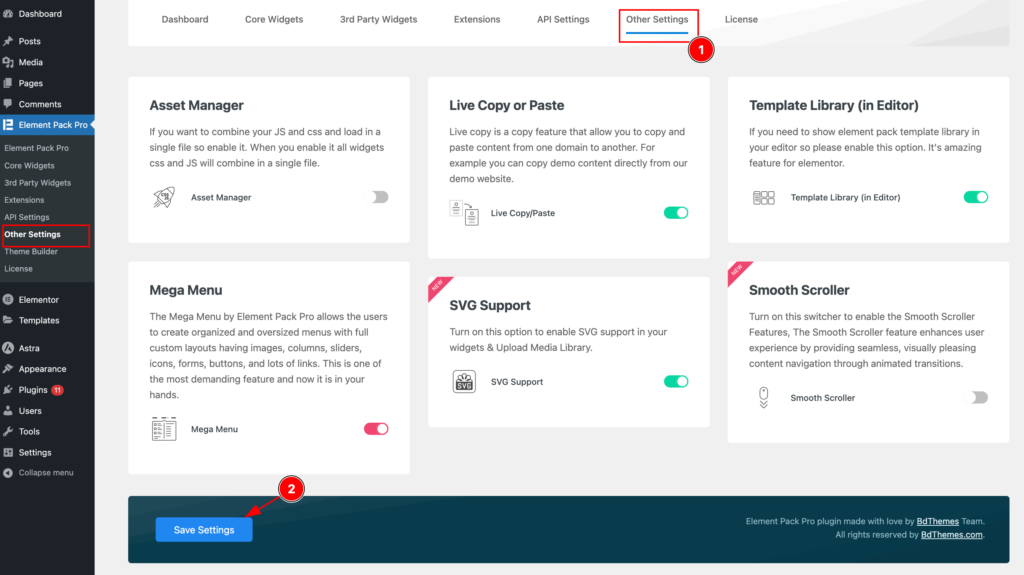
User interactive feature by activating from other Settings.
- Go to Other Settings nav bar.
- Asset Manager: Enable it to optimize the JS AND CSS loading.
- Template Library: Enable it to show the Template library on the Editor page.
- Live Copy or Paste: Enable to use magic feature to live copy and paste the widgets/templates.
- Mega Menu: Enable it to show the mega menu.
- SVG Support: Enable it to show the SVG Support.
- Smooth Scroller: Enable it to scroll smoothly on the website page.
etc.
- Click on the ” Save Settings ” button to data save successfully.
Video Assist
By following the instruction you will be able to download and activate the Element Pack Pro and it’s widgets.
Thanks in advance.