In this documentation, we will discuss the installation of Testimonials Plugin and Data on the Testimonial plugins. Use of Testimonial Widgets – 3rd Party widgets of Element Pack.
Download Testimonial Plugin
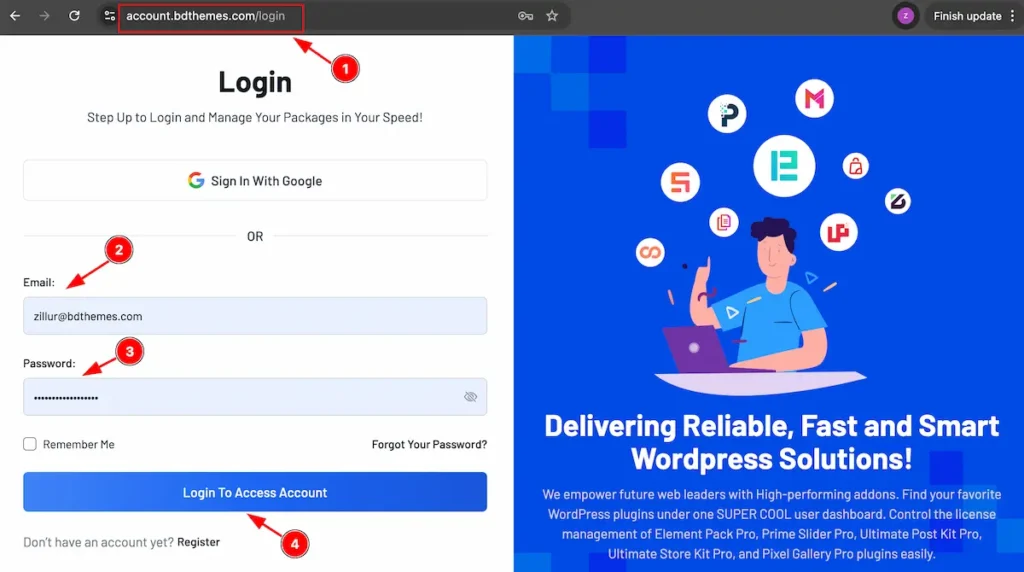
- Go to the link accounts.bdthemes.com
- Enter the Purchase email ( The email used for purchasing the Element Pack Pro ).
- Enter the password.
- Click on the ” Login To Access Account “ button to login to your license managements dashboard.
After successfully login, you will see the dashboard.
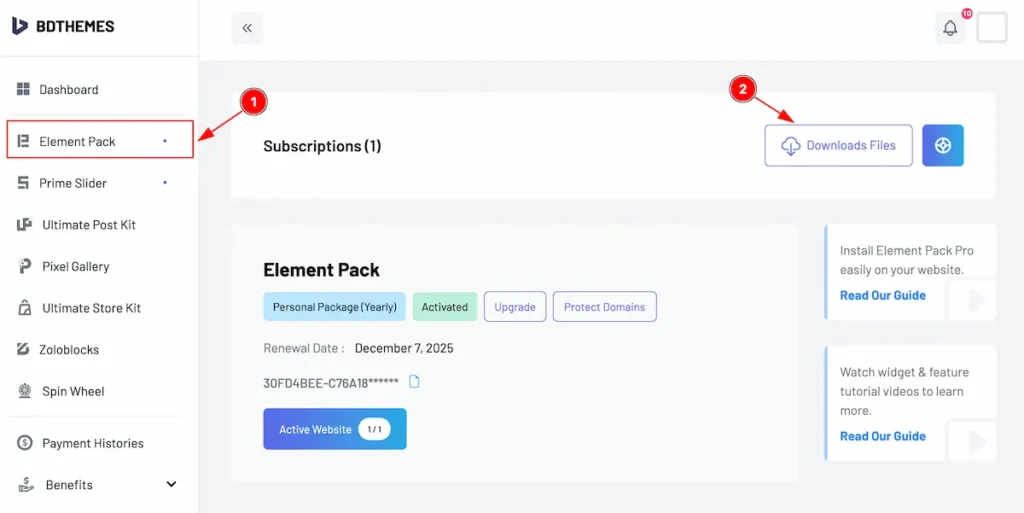
- Select the “ Element Pack ” tab from left side bar. It will appear the Element Pack information.
- Find the ” Download Files ” button on the right top side and click on it.
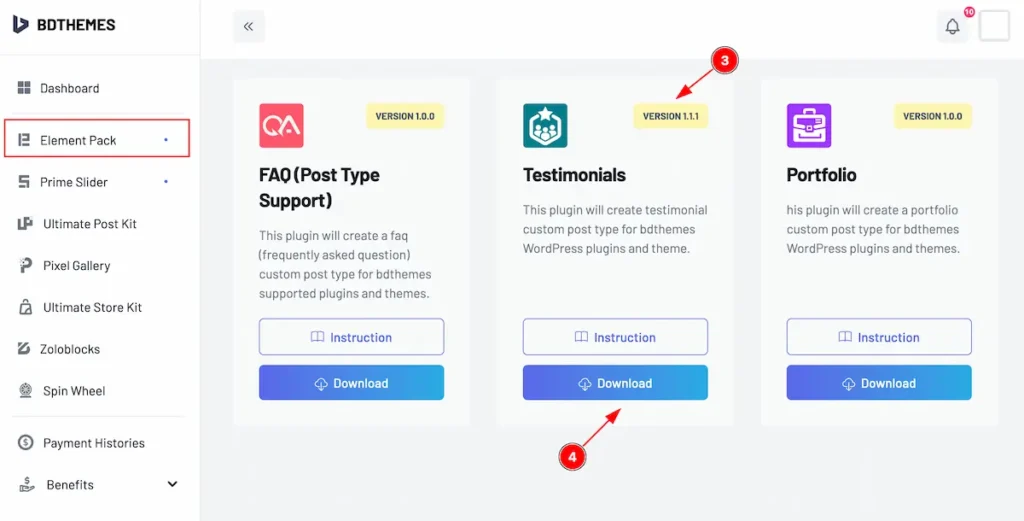
- Top right corner the latest version will appear there.
- Now you will see the Testimonials plugin just click on the ” Download ” button and it will start to download.
Install & Activate Testimonials
After login to your WordPress dashboard follow this,
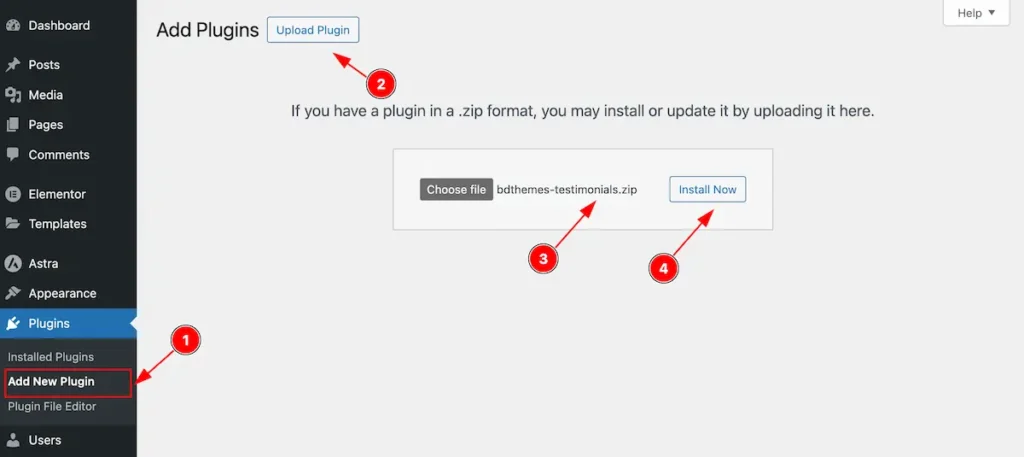
- Navigate to the Plugins tab and click on the ” Add New Plugin “.
- Click on the ” Upload Plugins ” button and it will appear a file box.
- Choose file from desire location and the file name will appear ” bdthemes-testimonials.zip “.
- Then click on the ” Install Now ” button.
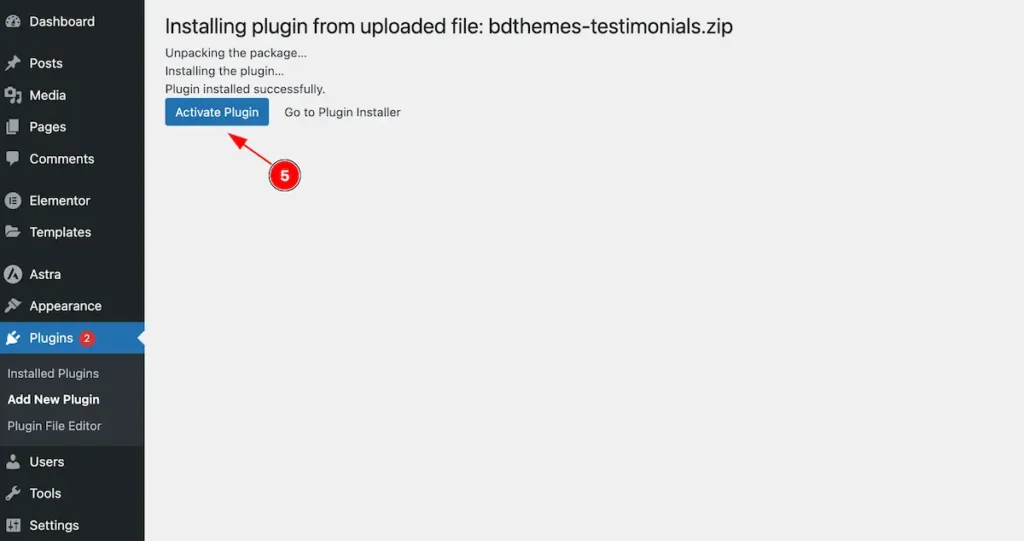
- After completing installation the ” Activate Plugin ” button will appear and click on it to activate the Testimonials plugin.
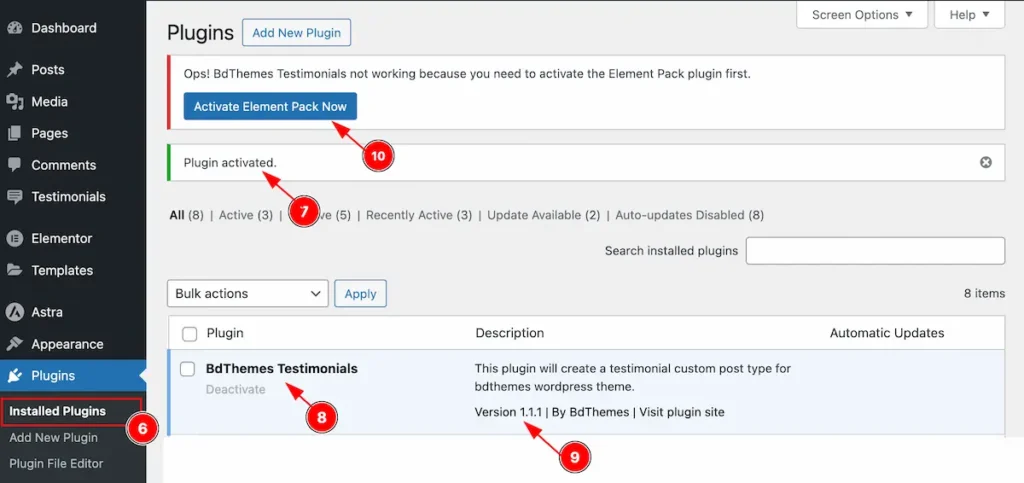
- Now Navigate the Install Plugins section on Plugins tab.
- ” Plugin Activate ” successful message will appear.
- The Plugin is activate and it will appear on Installed plugins tab.
- Check the version which is your current version.
- Waring message will appear to Activate Element Pack Pro, If the Element Pack Not activate on there.
Note: Must Installed and Activate the Element Pack Plugin to work with Testimonials.
Add New Testimonial
Navigate to the Testimonial tabs from WP Dashboard to Add New Testimonial items,
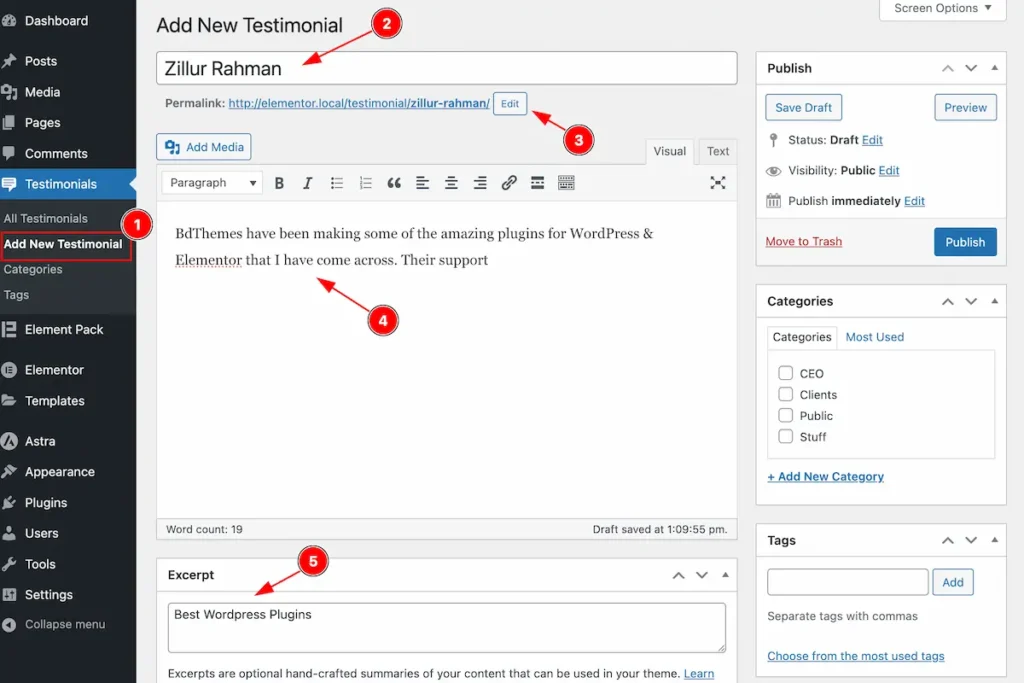
- Navigate to ” Add New Testimonial ” tabs section.
- Enter Customers Name on the customer tabs.
- Permalink will appear according to customer name fields.
- Add description of the testimonials.
- Set the Excerpt for the items.

- Need to fill the Additional Information for this section.
| Field Name | Description |
| Email Address | Enter the Email address. |
| Company Name/Address | Enter Company name or address. |
| Designation | Set the designation. |
| Rating | Set Rating for testimonial. |
| Review Platform | Select review platform( e.g.: Self, G2, Google, Trustpilot ). |
| Review Link | Enter the review link for the items. |
- Featured Image: Set the featured image for testimonials.
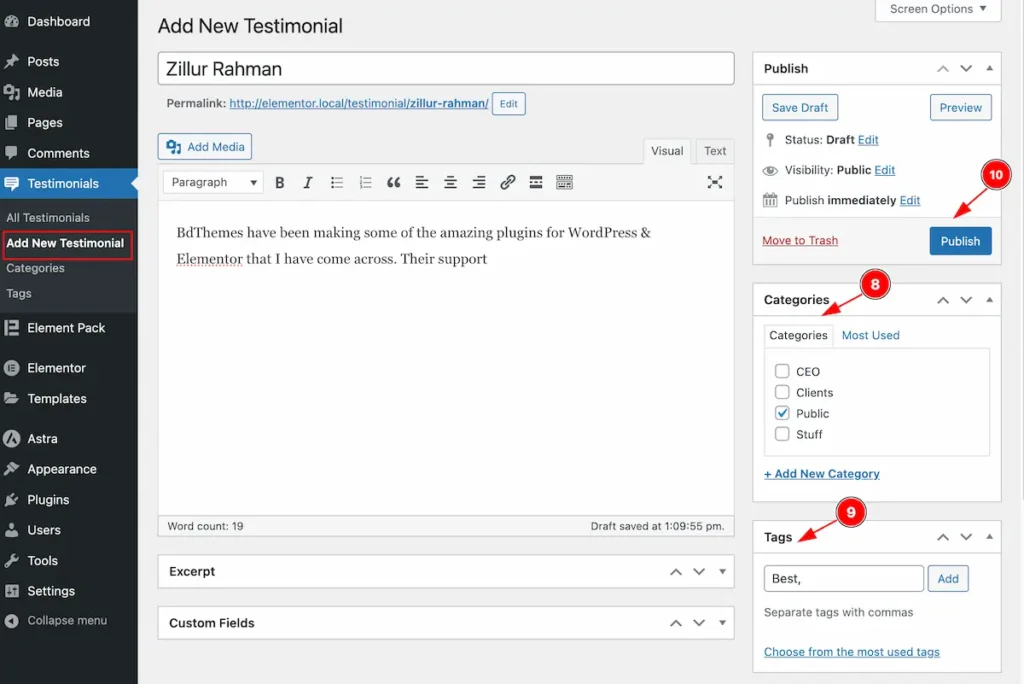
- Categories: Set the category for the testimonial items.
- Tags: Set the tags for the testimonial items.
- Click on the “Publish” button to publish it.
Show All Testimonials
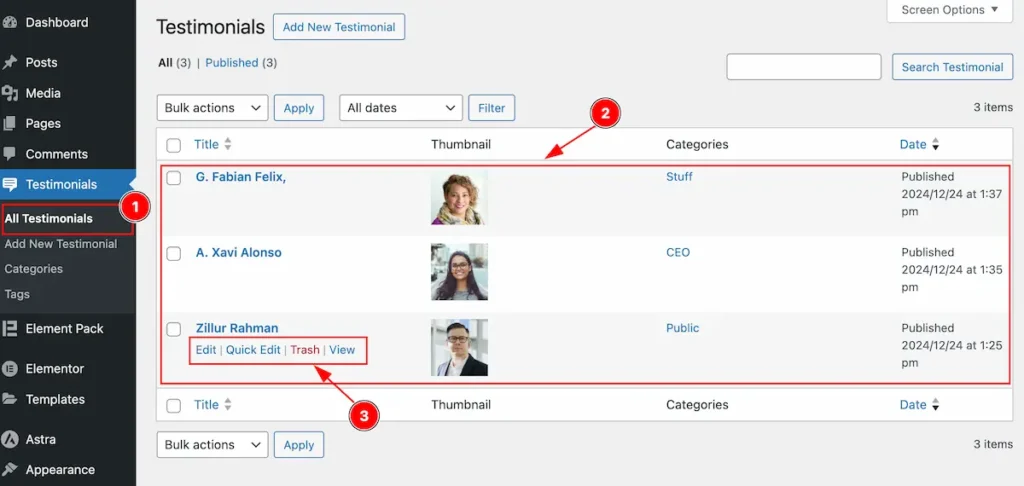
Navigate to Testimonials to check all added items.
- Navigate to ” All Testimonials ” tabs.
- It will appear all the testimonials items.
- Hover over items and all the ” CRUD ” options will appear. It can be Edit, Quick Edit, Trash, View.
Add New Category
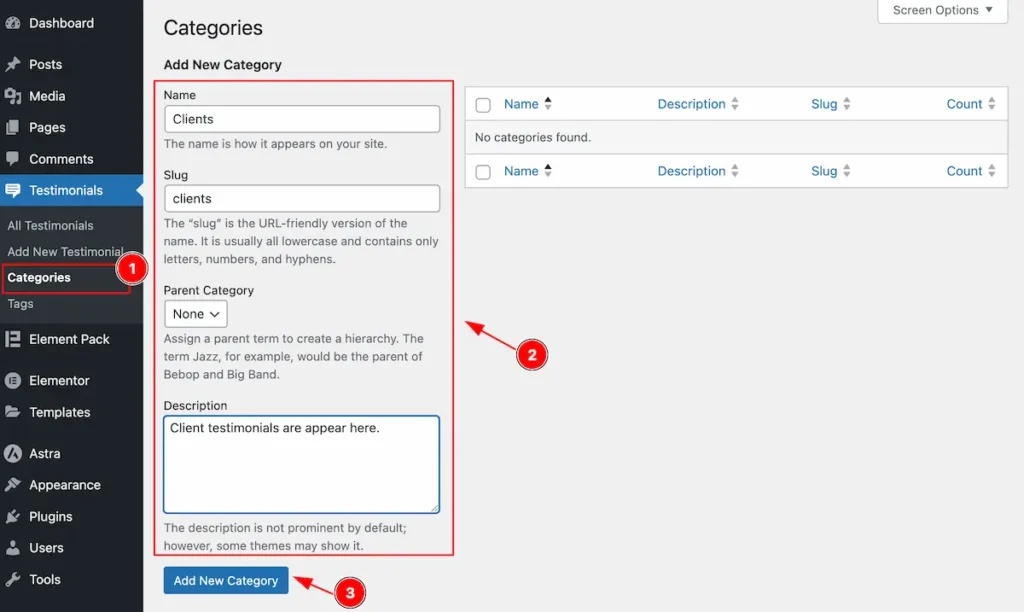
Navigate to the Testimonials tabs from WP dashboard.
- Now Navigate to the ” Categories ” tab.
- Add New Category fields will appear.
| Fields Name | Description |
| Name | Enter Category Name. |
| Slug | Set slug for category. |
| Parent Category | Select the Parent Category or it will appear as parent. |
| Description | Set the description for the category. |
- Now Click on the ” Add New Category ” button to add new category.
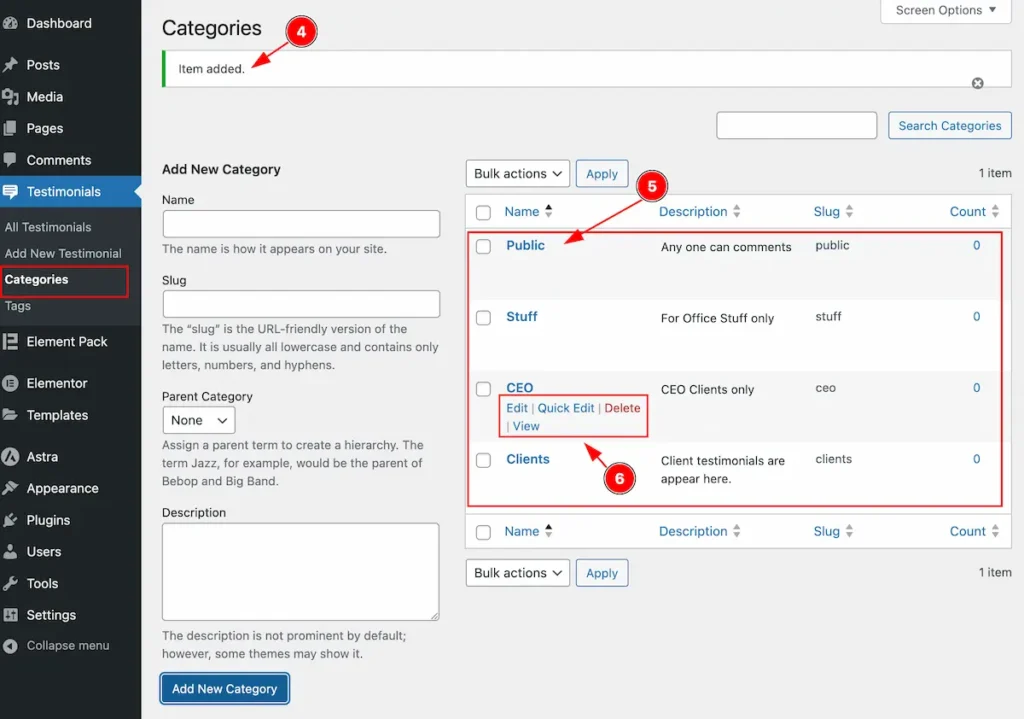
- Success Message will appear after adding new items.
- All the items will appear on the categories tab.
- Hover over items and all the ” CRUD ” options will appear. It can be Edit, Quick Edit, Trash, View.
Add New Tags
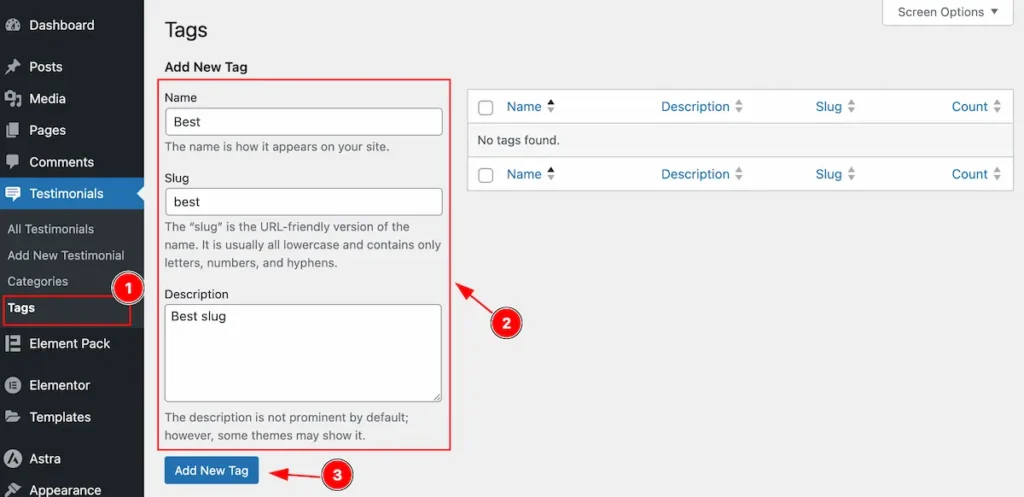
Navigate to the Testimonials tabs from WP dashboard.
- Now Navigate to the ” Tags ” tab.
- Add New Tag fields will appear.
| Fields Name | Description |
| Name | Enter Category Name. |
| Slug | Set slug for category. |
| Parent Category | Select the Parent Category or it will appear as parent. |
| Description | Set the description for the category. |
- Now Click on the ” Add New Tag ” button to add new tag.
Use of Testimonial Widgets
By following the instruction you will be able to activate and add Testimonial items.
Thanks in advance.