Do you know how to take advantage of Element Pack Pro White Label Branding for your WordPress website? While it’s a premium feature that comes with the agency package of the plugin, many of you asked us to show the right methods of activating this feature.
Again, we were still developing this feature until recently and we made sure to make it work now. Anyway, let us show you how exactly you can use the White label branding option for Element Pack Pro.
What is White Label Branding for a WordPress plugin?
White Label Branding is a feature that allows a person to rename and rebrand a product as his/her own. It enables you to hide the identity of the product and show it as your own to the visitors. It helps increase your brand values with the consent of the manufacturer of the product.
Element Pack Pro offers White Label Branding with the Agency Package, Developer Package, Extended, and Appsumo Tier-3 licenses. With this feature, you can change the name of our product, hide it from the dashboard, or vanish the license with a few clicks.
By using Element Pack Pro White Label, you can claim to be the developer of the plugin on your website and preserve your brand value in front of your audience.
What’s Possible with White Label?
You can do these below things through White Label-
- You can change the Product Name to your own name.
- You can change the Product logo to your own logo.
- You can hide the license tab section from the Element Pack plugin dashboard.
- You can hide the whole Element Pack plugin dashboard.
How to activate White Label Branding?
So, let’s see how to activate the White Label Branding on Element Pack Pro easily step by steps.
Activate The License key
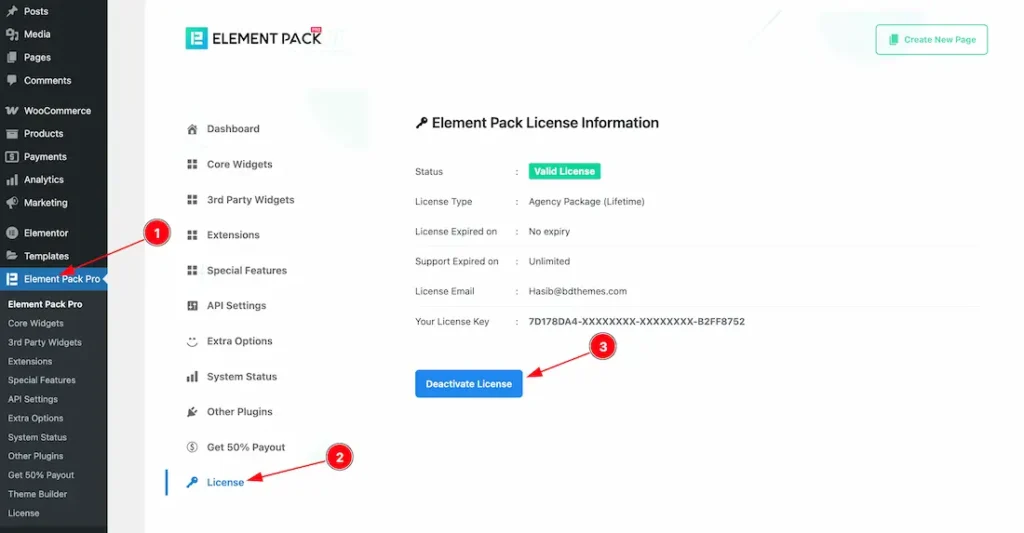
After Installing the plugin, just acitvate the plugin with your license key. For that, Just follow the below instructions-
- Go to WP dashboard > Element Pack Pro plugin dashboard.
- Click over the license tab option.
- Keep your email and license key and hit the activate button.
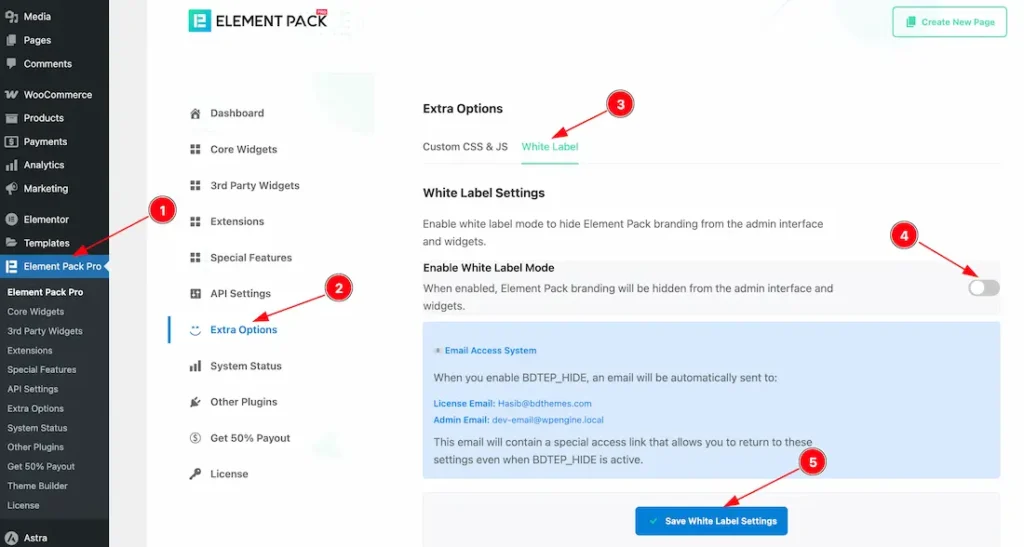
After activating the license key, just follow the below steps-
- Go to WP dashboard > Element Pack Pro plugin dashboard.
- Click on the Extra Options tab.
- Go to the White Label Tab section.
- Enable the White Label Mode switcher button.
- Hit the Save White Label Settings button.
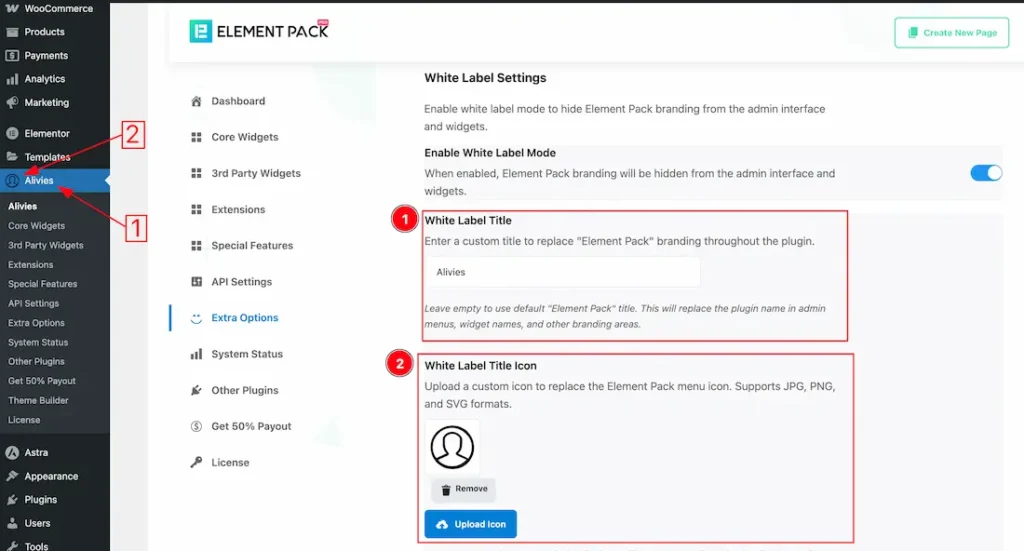
After enabling the White Label Mode switcher button, you will get the below options to make the white label.
1. White Label Title: You can change the white label title to your own brand name instead of Element Pack Pro. For example, here we set the Title name – Alivies. You can choose your title name.
2. White Label Title Icon: From Here you also can change the Title icon instead of the Element Pack Pro icon that you prefer. Right now, it support JPG, PNG, and SVG.
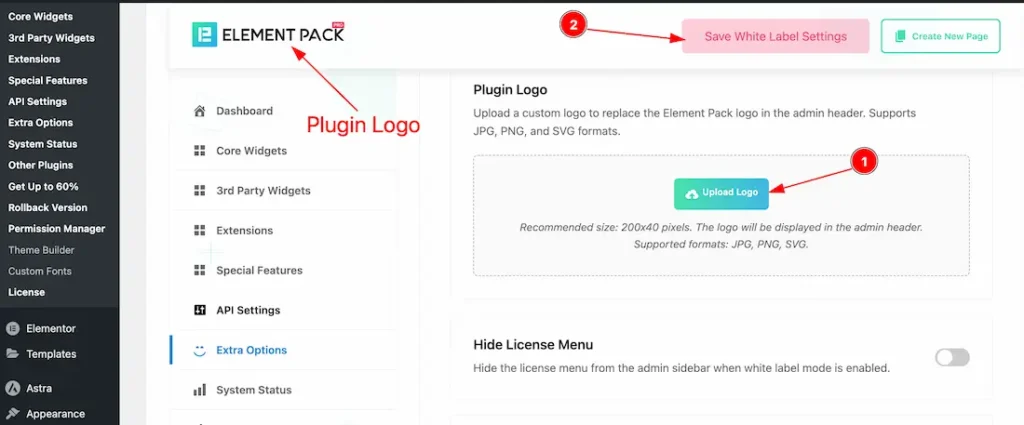
You can change the plugin logo from here. Just follow the below steps-
- Click on the upload logo button and select your preferred plugin logo.
- After that, just click on the save button.
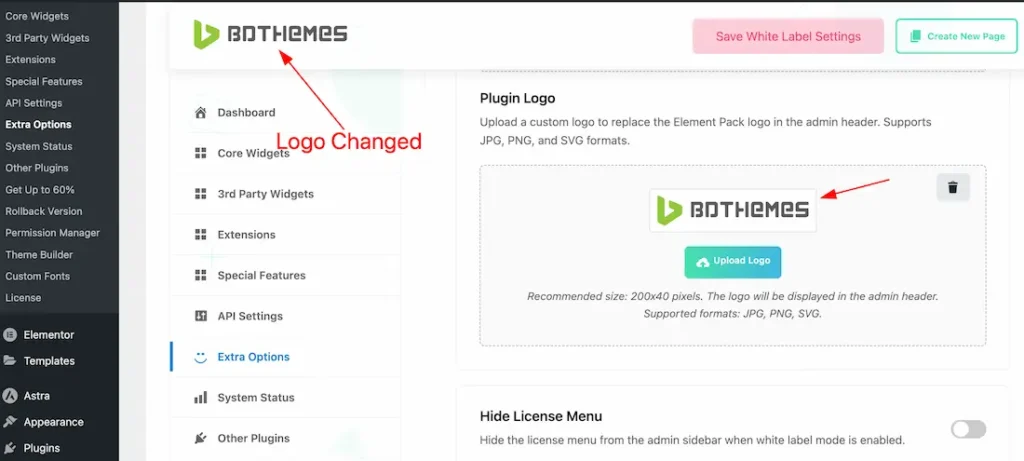
After doing it, your plugin logo will be changed as like the above demo screenshot.
Before Enabling the Hide License Menu
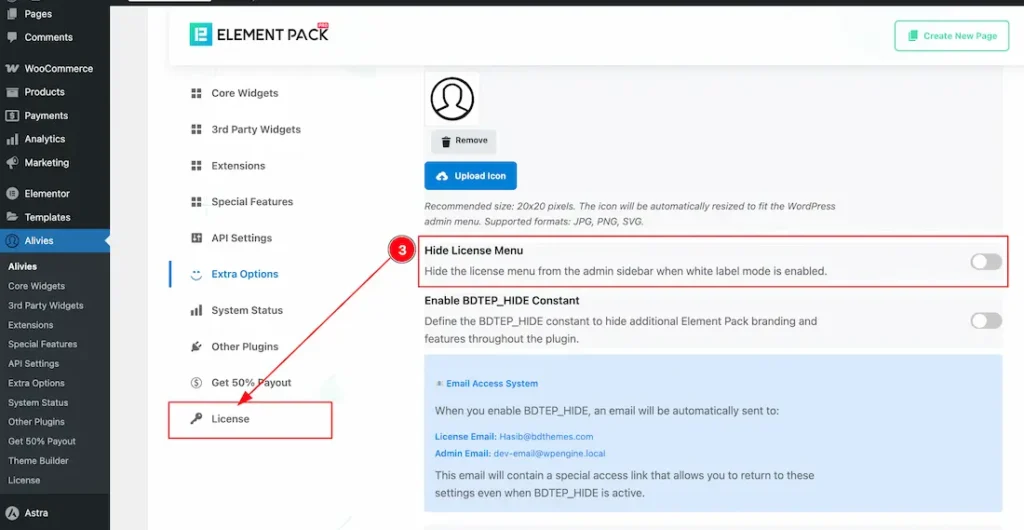
3. Hide License Menu: If you enable the hide license menu switcher button, then the license tab will disappear from the plugin dashboard.
After Enabling the Hide License Menu
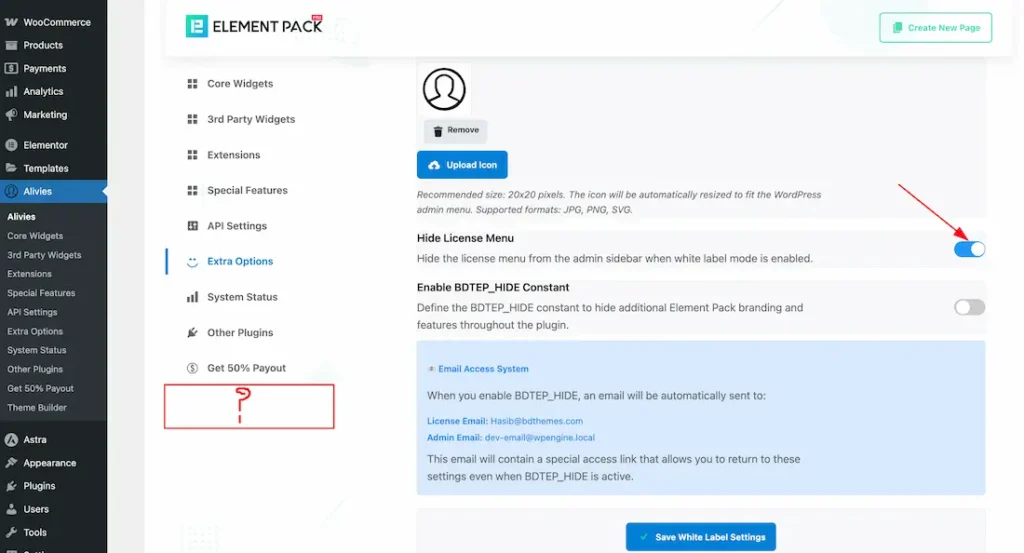
After enabling the hide license menu switcher button, the license tab disappear from the dashboard.
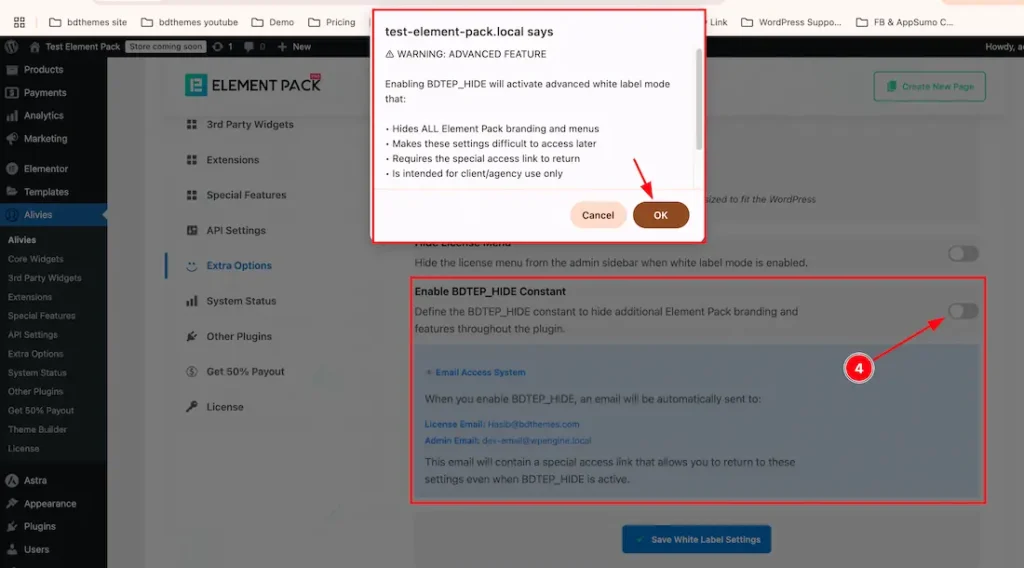
4. Enable BDTEP_HIDE Constant: If you enable the BDTEP_HIDE Constant switcher button, then the Element Pack Pro whole dashboard will disapear from WP dashboard but the plugin will appear only the plugin dashbaord. Please see the below screenshot-
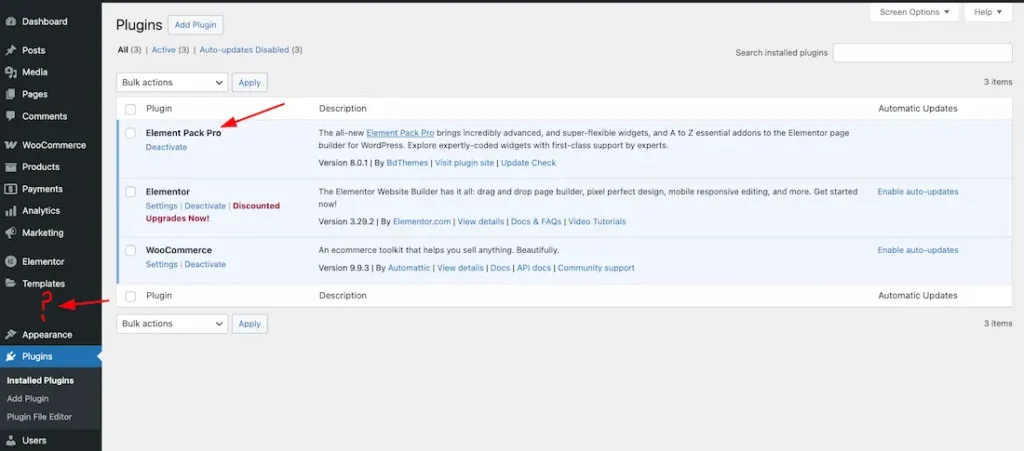
After Enabling the BDTEP_HIDE Constant Switcher Button
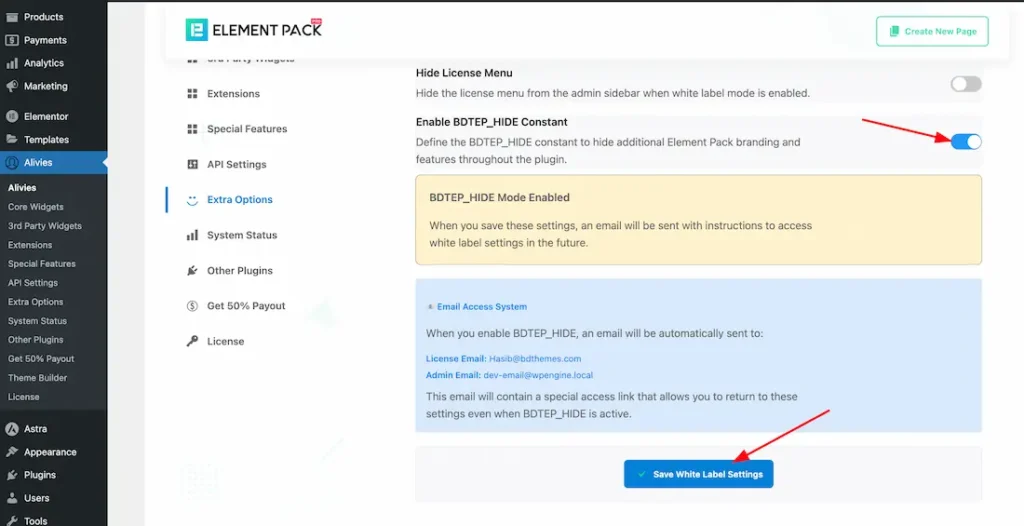
After Enabling Enabling the BDTEP_HIDE Constant switcher button, you will get the final notification message and click the ok button to continue the process.
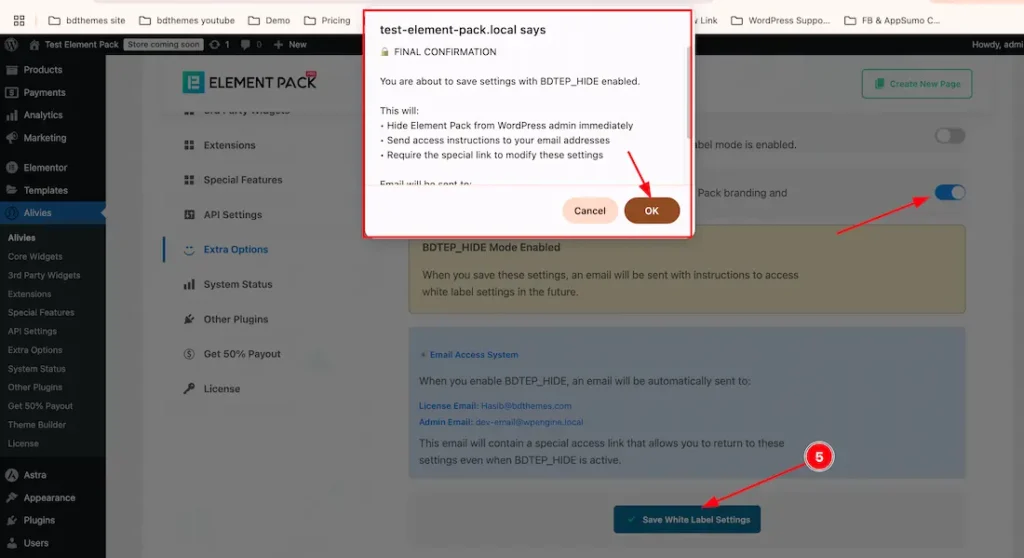
5. Save White Label Settings: Click the ‘Save White Label Settings’ button to apply and store all your white label customizations.
Note: To get the confirmation email, Please setup the SMTP to your WP.
Alternative Way to Enable White Label Using Custom Code
Step-1: Find the Wp-Config.php file from local/FTP
First of all, you need to access the local files of your website in order to get a hold of the Wp-Config.php file.

To enable White Label, you must follow our code structure and make changes to the Wp-config.php file. Once you find it inside your localhost or web FTP, click open the file.
Step-2: Inject the White Label code
Next, you have to go to the end of the codes in the Wp-config.php file and paste the following code just above the “Absolute Path Directory” line.
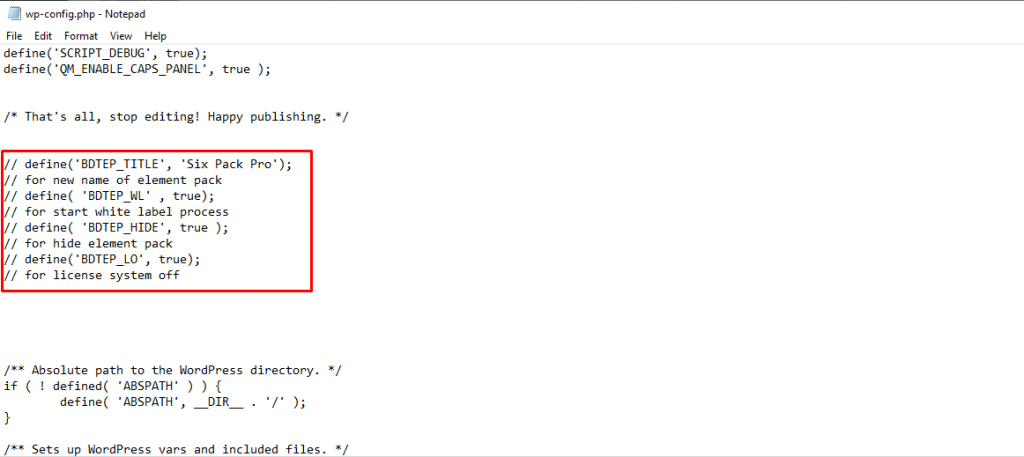
As you can see, we have added the codes with a double slash to prevent them from executing right now. The code lines are-
define('BDTEP_TITLE', 'New Name');
// for new name of element pack
define( 'BDTEP_WL' , true);
// for start white label process
define( 'BDTEP_HIDE', true );
// for hide element pack
define('BDTEP_LO', true);
// for license system of
Now, remove the double slash from the code lines (not the string) one by one and see its effect.
Step-3: See the White Label code effects
The first line of the code lets you change the name of our plugin into something you prefer. This change happens within your dashboard.
Normally, you will see the name Element Pack Pro on your WordPress dashboard.
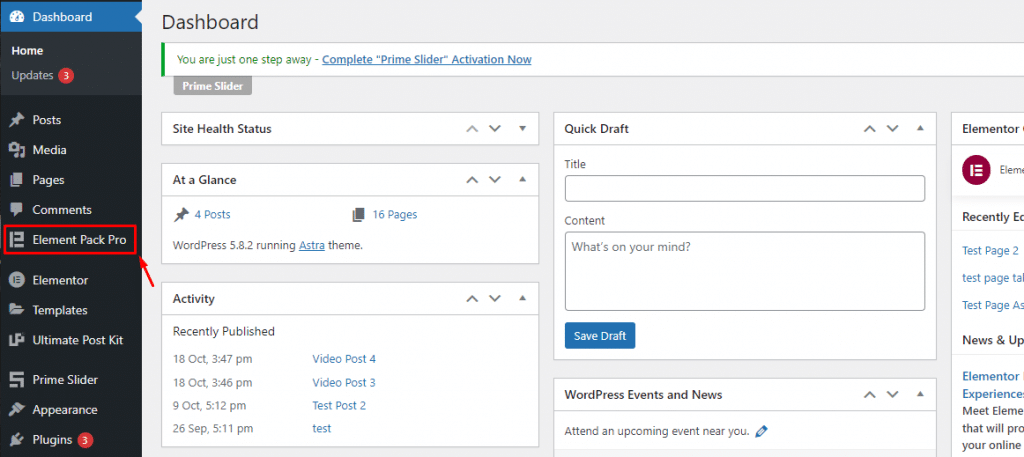
By changing the name from the White Label code, the displayed name in the dashboard will be changed.
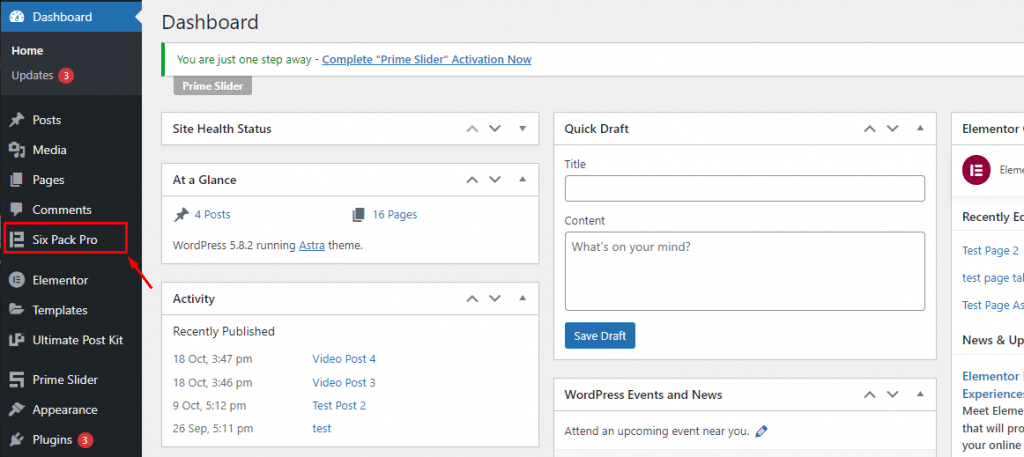
Like how we made it into Six Pack Pro ????
It’s easy!
Step-4: Hide Element Pack Pro from dashboard or hide license
You can hide our plugin from your WordPress dashboard completely without stopping its function. This will require the execution of the second line of the code that is “define( ‘BDTEP_WL’ , true);”
Note, you have to insert your license key along the second line of code.
Once done, you can execute the third code-
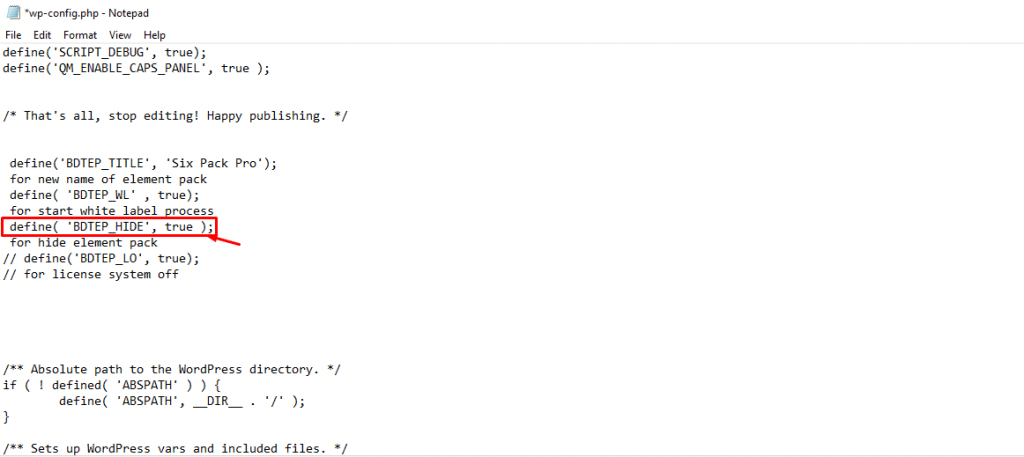
This will completely hide Element Pack Pro from your WordPress dashboard but nothing on the inside will change.
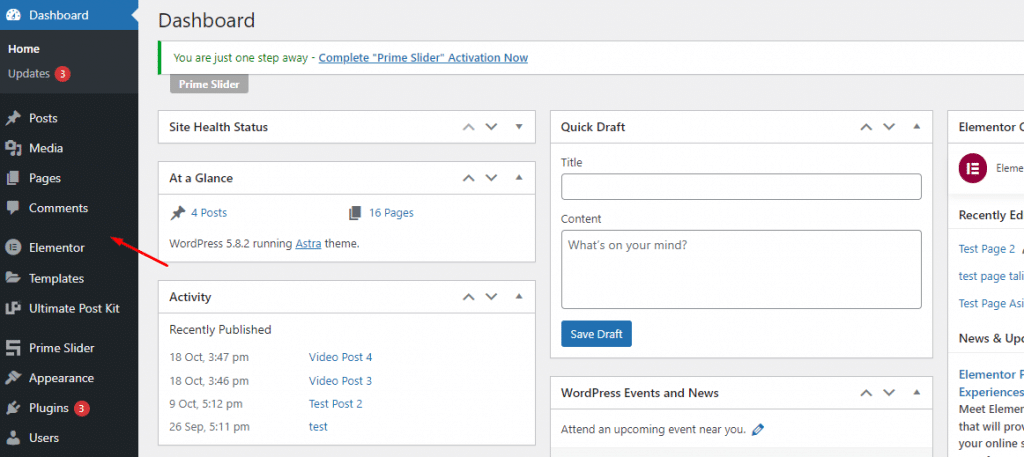
See, there’s no plugin dashboard there anymore.
Similarly, the fourth code line can hide your license information completely from the product menu.
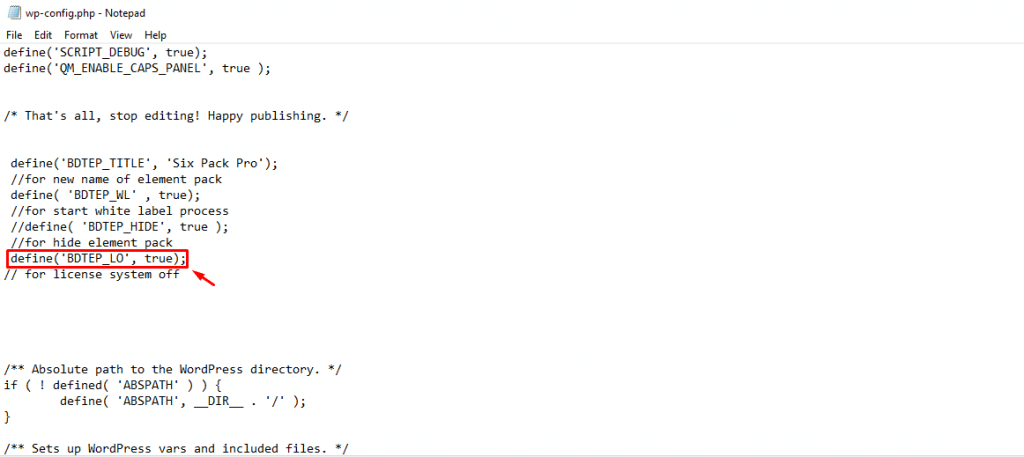
It’s the marked code or the 4th line of the code.
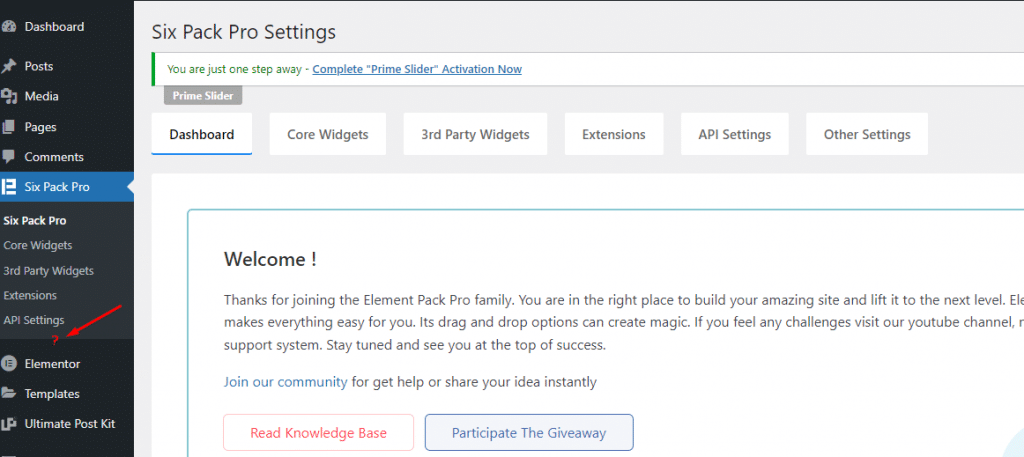
See how the license section on the dashboard became invisible. This helps you present our product with your brand stamp by not showing the license info at all.
Improvements along the way
We are making more improvements to our White Label Branding feature in the next update to help you take more advantage of this system. We appreciate your patience in getting the world’s most powerful web development plugin for Elementor page builder, the Element Pack Pro.
Please read our privacy policy to learn about the boundaries of the White Label feature and other vital information about Element Pack Pro.
Video Assist
I hope the video will help you to learn more about the White Label feature.
Thanks for staying with us.

