The Elementor Confetti Effects Extension is an innovative feature presented by your favorite Element Pack Pro plugin. By using the Confetti Effects extension, you can add all kinds of celebration poppers to your call-to-action buttons, sections, pages, and anywhere on the site.
That means you can use the Confetti Effects Extension on your whole page, sections, Specific widgets, or Specific Elements.
This document will help you get the full picture of the confetti effect feature.
Enabling The Elementor Confetti Effects Extension
As the Confetti Effects is an extension of Element Pack Pro, you will find it inside the Extensions tab inside Element Pack Pro under your WordPress dashboard. Here, you also can search for the Confetti Effects Extension using the search box.
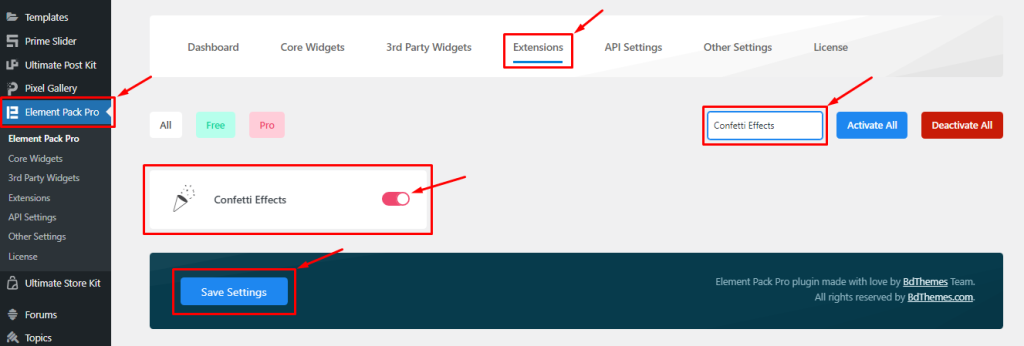
Then enable the extension switcher and hit the Save Changes button. Now, you can access the feature from the Elementor editor page.
Start With Any Widget Or Design
To start with the feature, let’s first take an existing design or widget inside the page. This is for a better understanding of the functions of this feature. However, you can still activate the Confetti Effects on a blank section too.
Here, we went with a set of widgets for demonstration:- an image widget, header, text editor, and a button.
Now, let’s begin the demonstration.
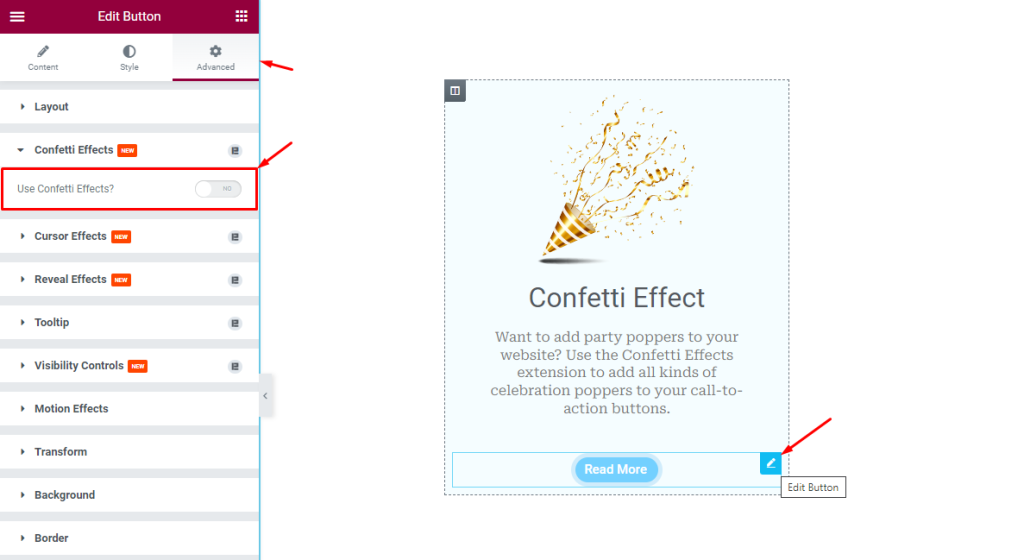
First, click Edit Advanced Button and go to Advanced Tab> Confetti Effects.
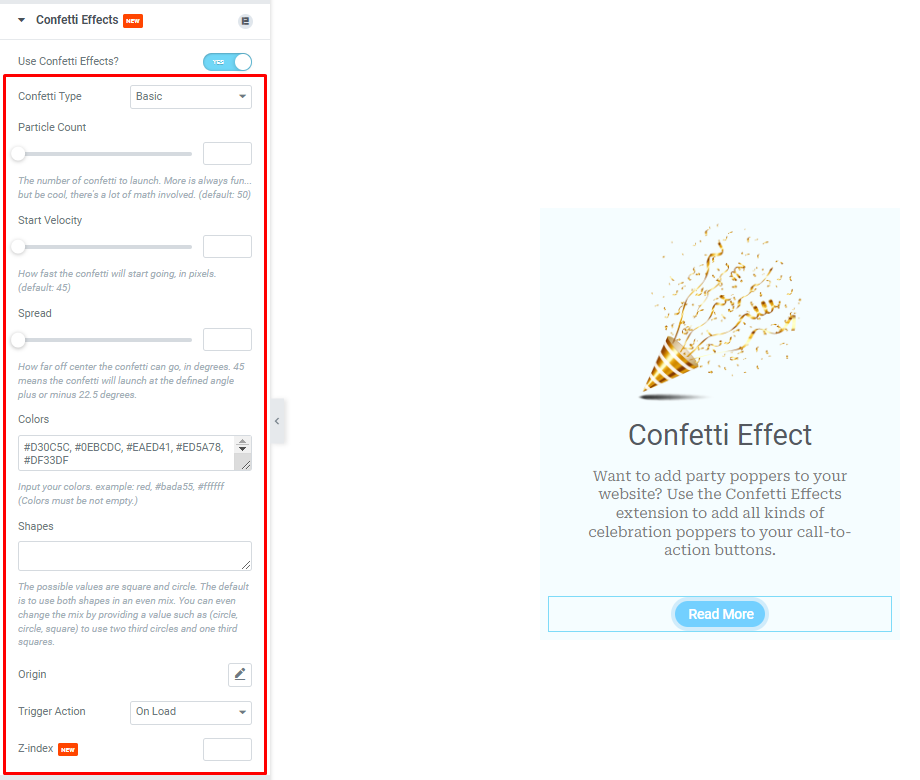
After Enabling the Confetti Effects Switcher Button, here you will see a bunch of controls (Confetti Type, Particle Count, Start Velocity, Spread, Colors, Shapes, Origin, Trigger Action, and Z-index). All these options will let you create different styles of confetti effects easily.
Let’s take it step-by-step.
Step-1
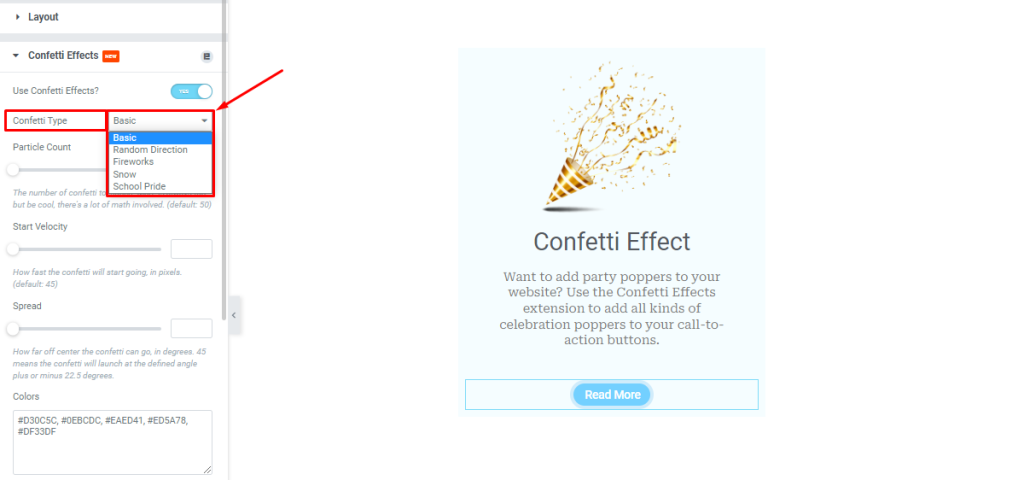
Clicking the Confetti Type, you will see Five effect styles.
Basic:- Creates a uni-directional confetti effect (example).
Random Direction:- Random directional confetti effect every time (example).
Fireworks:- Circle popping confetti effect over the whole screen (example).
Snow:- Snowflake-style confetti effect on the whole screen (example).
School Pride:- Particles showering from two middle points (left & right side) of the screen (example).
All 5 confetti types have unique presentation styles and some of them have additional controls to further customizations.
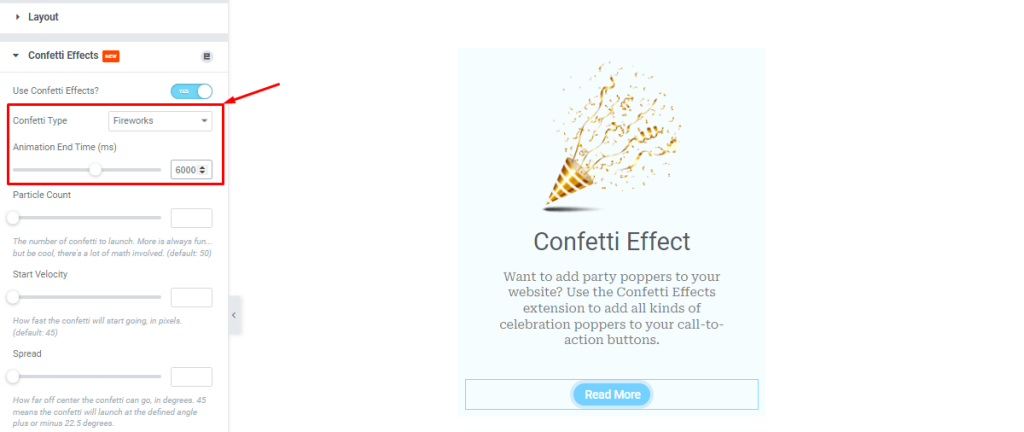
For example, if you select (Fireworks, Snow, or School Pride) Type then you will see another Animation End Time control, otherwise, the Animation End Time controls will remain invisible. The Animation End Time option lets you determine the end time for the confetti effect (time counts as milliseconds).
Step-2
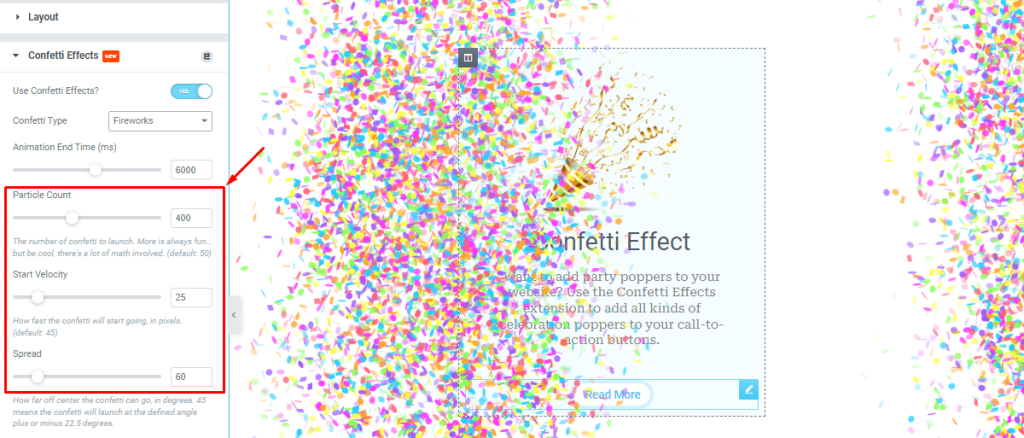
Below, you can set the Particle Count, Start Velocity, and Spread as per your demand.
You can set any number of Particle Counts. Each time the effect triggers, it will create the specified number of particles as confetti. Start Velocity is for controlling the speed of transition. And Spread determines how much area the particles will cover in degrees.
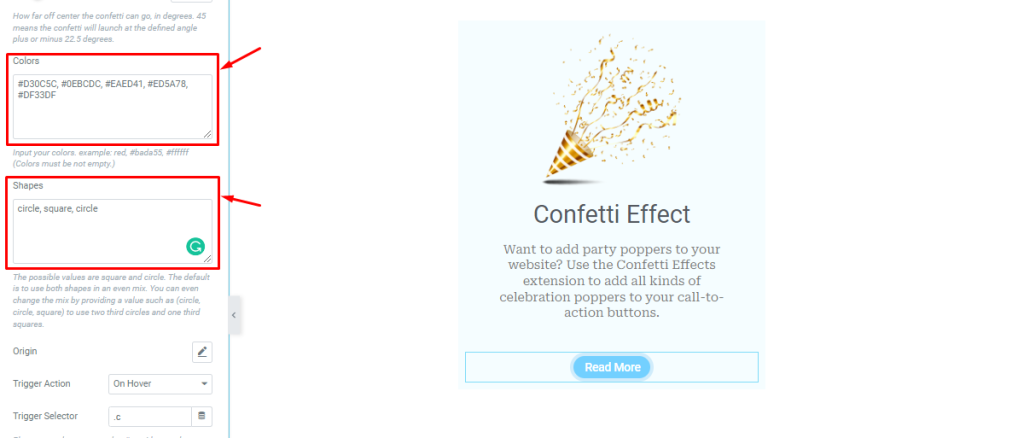
Below, you will find two fields named Colors and Shapes. The colors field lets you select the confetti particle colors by inserting their respective color codes. You will find these color codes over the internet as these are the standard ones.
Step-3

In the update version 7.5.4 we added the Shape Type options for the Confetti Effects extension. Here you will find the Shape Type (Basic, Emoji, and SVG Path), and Scalar options. if you select the Shape Type Basic then you will show the same screen as in the above screenshot.
Step-4
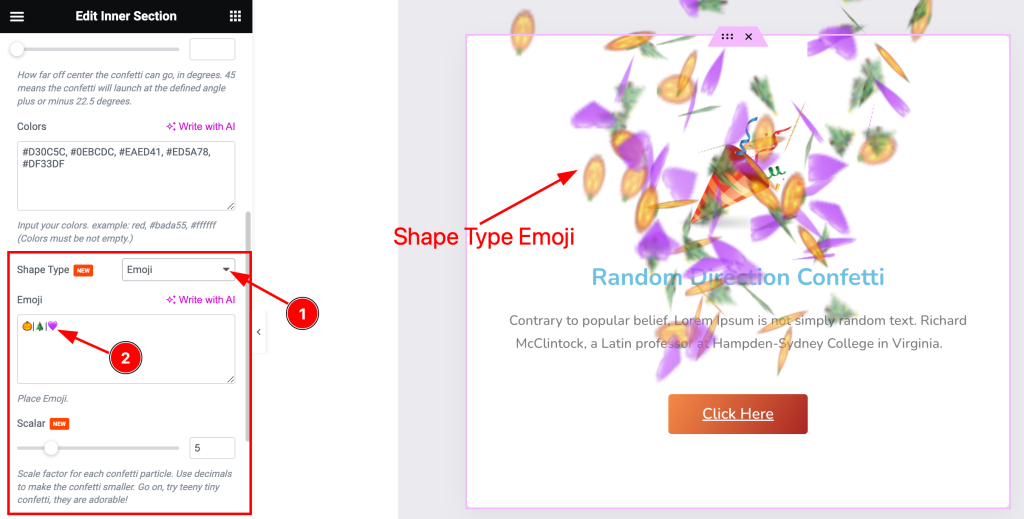
Here you can easily select the Shape Type Emoji and set the Emoji as in the above screenshot.
Step-5
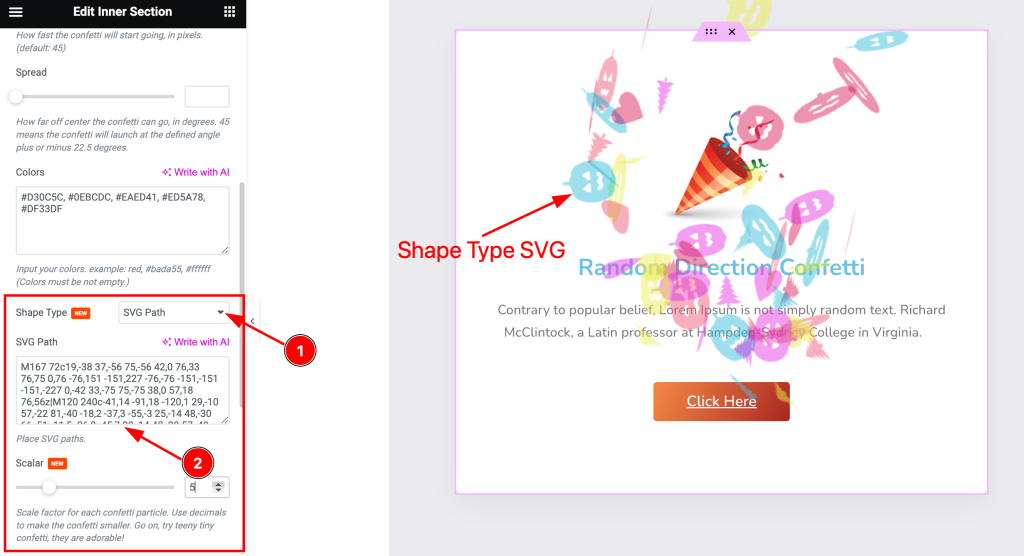
if you select the Shape Type SVG then you will find the SVG Path option as in the above screenshot.
Step-6
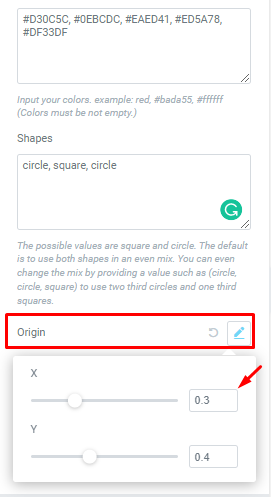
The Origin control helps reposition the confetti using the X & Y offset scrollbars.
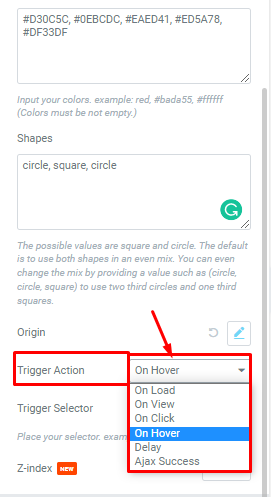
The Trigger Action option lets you select how the confetti effect will occur upon certain actions. You can select On Hover, On Load, On View, On Click, On Hover, Delay, and Ajax Success.
Each trigger action functions separately to add the desired action effect.
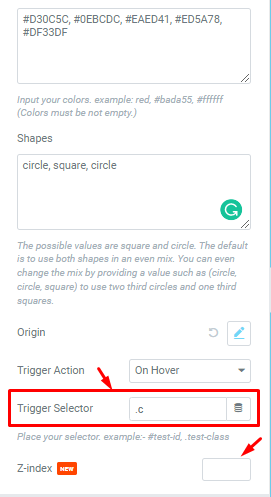
The Trigger Selector field lets you insert a CSS ID/Class to connect the trigger (i.e. button, section, text, anything) to the confetti effects extension to apply the effect.
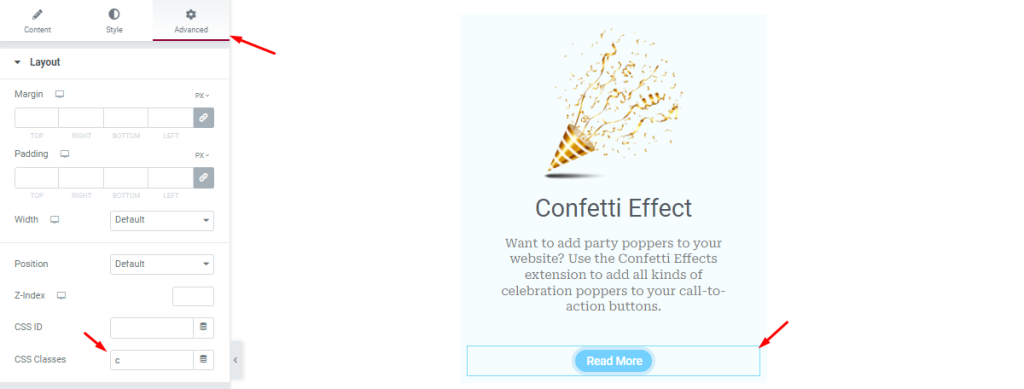
In the image above, we added a CSS Class to the button and then inserted the Class code in the Trigger Selector field.
With the Z-index value, you can determine the element priority to show the effect over other elements.
Now, please customize the confetti effects extension as per your needs and let your visitors/users enjoy the view.
Possible use cases:- Highlighting offers, celebrating successful sign-in, reaching a certain topic, opening a certain page, and more followed by your imagination.
Video Assist
Watch this quick video to learn more about the Confetti Effects Extension.
Thanks for staying with BdThemes.