Charitable Campaigns widget is designed to help to make campaign events easily and effectively. This widget is dedicated to our users, upholding charitable events online.
This tutorial will show you the proper way of using this widget step by step. Let’s start!
Attention!
Charitable Campaigns widget requires you to put data manually from your WordPress Dashboard.
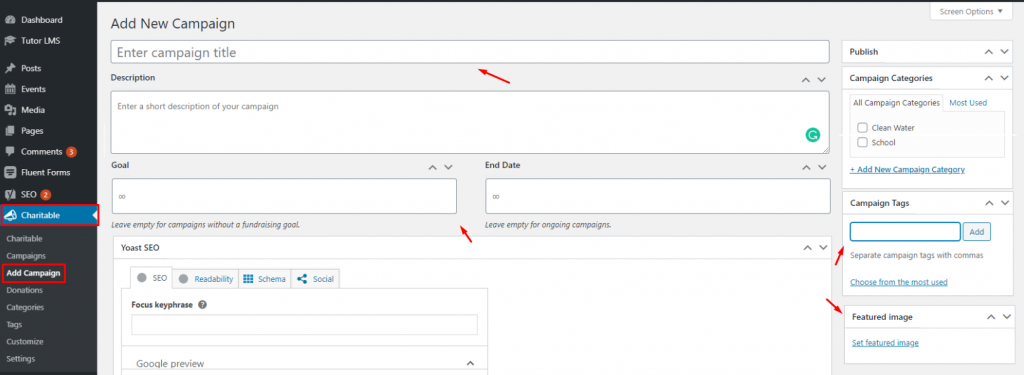
Simply, go to Dashboard> Charitable> Add Campaign.
The field you are seeing now has areas to put the title, description, goal (amount), date, and feature image. By filling in all these required data, you can create a donation campaign quickly.
Inserting Widget

Find the Charitable Campaigns widget from the widget menu and drag it inside your page.
Note: This widget is a part of our Element Pack 5.6.0 update. If you are not seeing it inside your inventory, make sure to upgrade to our latest version.
Content Tab
The Content tab holds all the basic settings that help you create your choice of blocks inside the webpage.
This widget has one section for the content tab and that is the Charitable Campaigns section. Let’s see what you can do with it.

First, you need to choose what type of donation campaign you want to run from the Campaign menu. Note that this menu has several options inside.
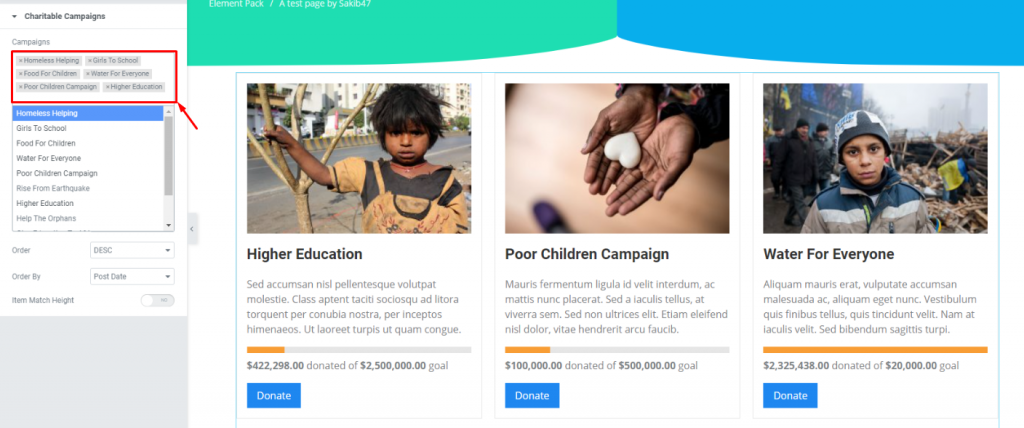
You can select one or many options together. The campaigns will pile up in rows and columns.
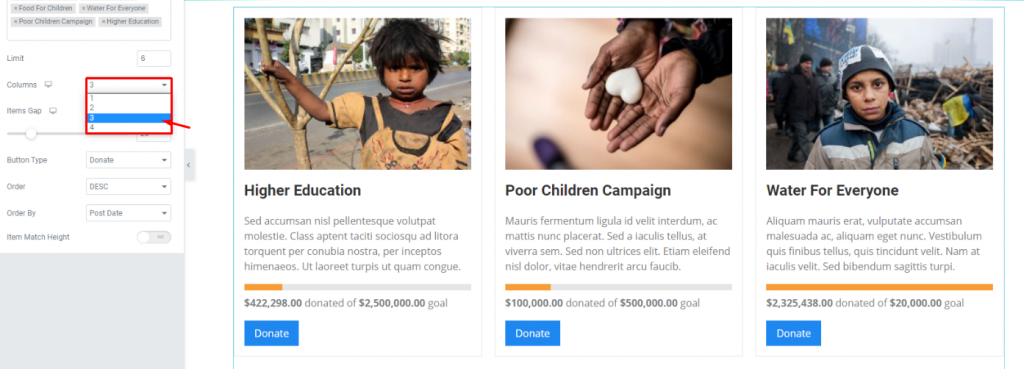
However, up to 4 columns can be selected from the Column menu.
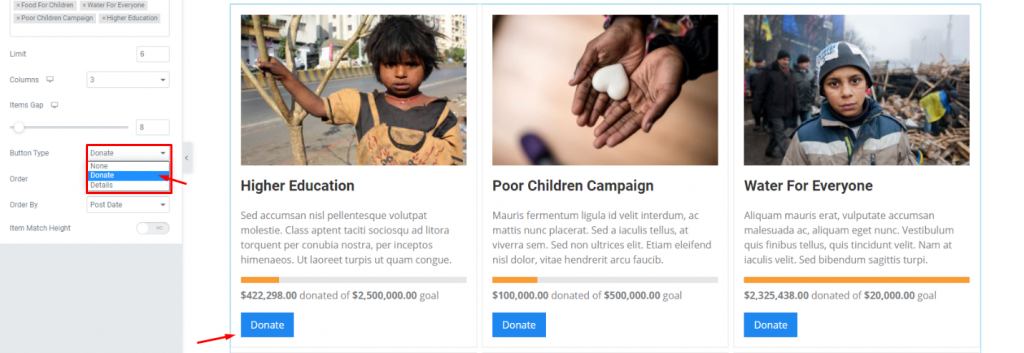
You can run your campaigns in 3 different ways. Depending on what you choose for the Button Type option, your campaign will be directed accordingly for the WordPress donation plugin. The option lets you choose from None, Donate, and Details.
{we are moving on with the Donate option}

Move on to the Order By menu and choose from Post date, Popular, and Ending options and set the campaign order.
Style Tab
Style tab lets you add colors, text formats, spacings, borders, etc. to your content. This is a crucial part of customizing your campaign to catch more attention from the visitors.
This tab has several sections commanding several parts of the content. Watch carefully.
Items
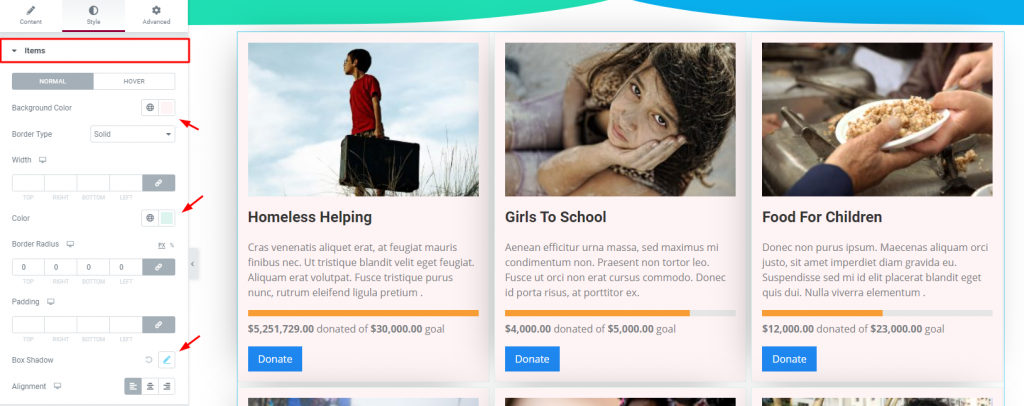
Go to Style> Items
Changing the background color of the full campaign is possible with the Items section. This also includes the border, drop shadow, and content alignment.
Image

Go to Style> Image
The Image section does not let you change the image, instead, it lets you add borders, spacing, padding, and box-shadow to it.
Note: These are the feature images we had placed from the Dashboard menu.
Title

Go to Style> Title
Set the Title color, spacing, as well as typography for all of your campaigns from one section.
Progress bar

Go to Style> Progress Bar
Change the color of your campaign’s Progress Bar from this section. Try to put a color that catches attention fast.
Button
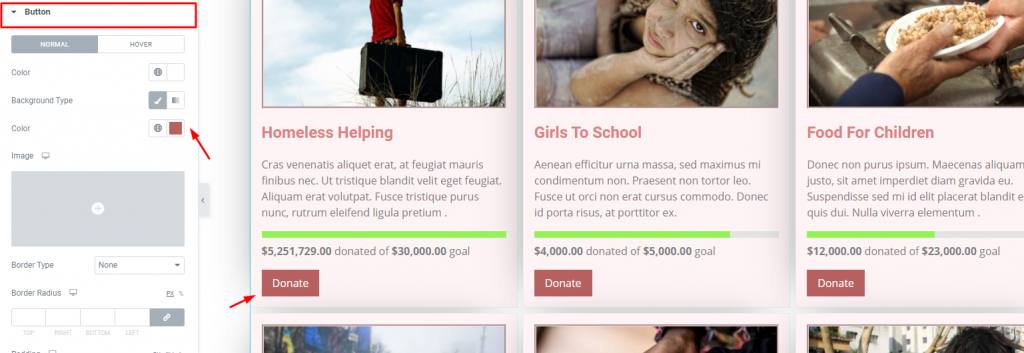
Lastly, you can change the appearance of the Button appearing on all of your campaigns here. The color option works both for normal and hover.
Conclusion
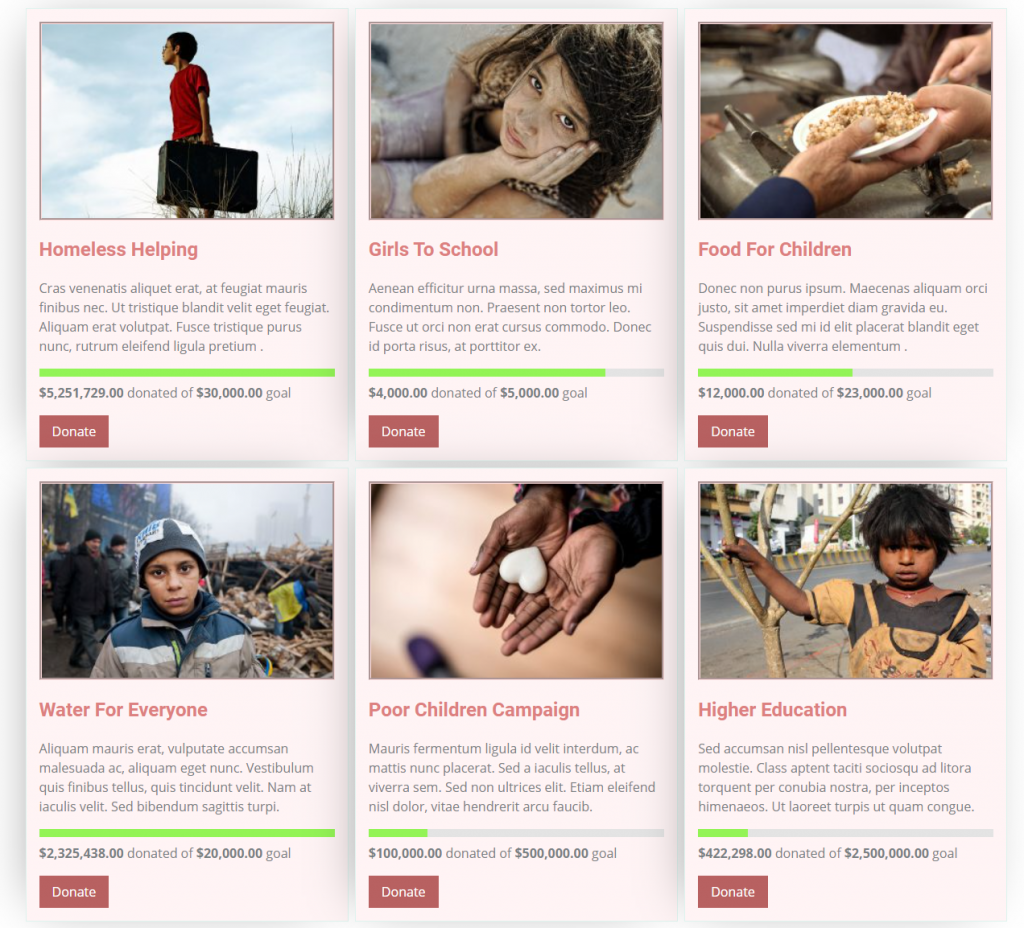
If you are still unsatisfied/unsure about using/customizing the Charitable Campaigns widget, please see the demo page here, provided by Bdthemes.
For more information, check out our video tutorial.
Thanks for staying up. Hope you have gained enough info today.

