Calendly widget for Elementor is a popular online appointment scheduling software that helps you arrange meetings without any back & forth email communication. To use this software, you need to be redirected to external sites. It has a non-customizable interface and a limited number of themes. But, no more.
With the Calendly widget, you can doc this software inside your webpage and have a fully functional system. Also, get the privilege of customizing it according to your taste.
In this tutorial, let us show you how you can use it and customize it.
Inserting widget

Find the Calendly widget from the widget menu and drag it inside your webpage.
Content tab
First of all, to use this widget, you must visit the official website Calendly.com and sign up using your personal information.

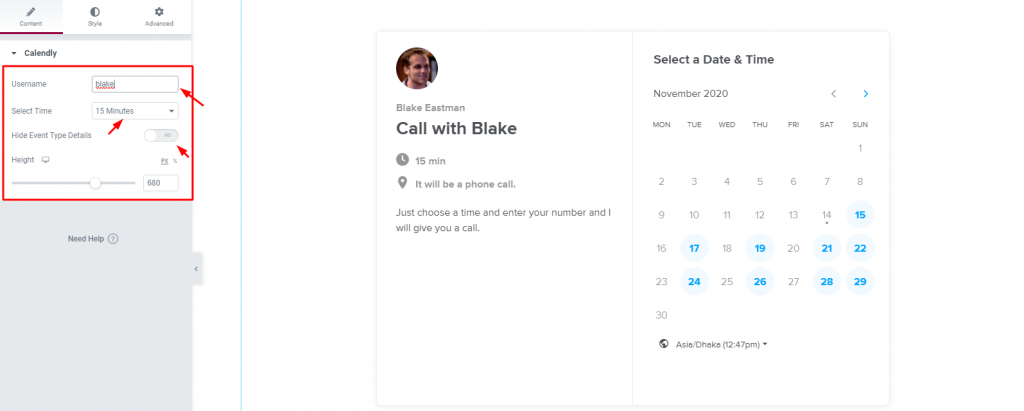
Now, from the single section of the content tab, insert the username that you used when signed up on the top blank field. You will see an interface similar to that in the image above.
The left-side part of the display interface shows your name, avatar, and small details. The right-side part has a full calendar, marking on and off days of your business.
From the Select Time option, you have to specify the meeting time duration.
Clicking on the Hide Event Type Details switcher will hide the left-side panel from the viewers.
Style tab

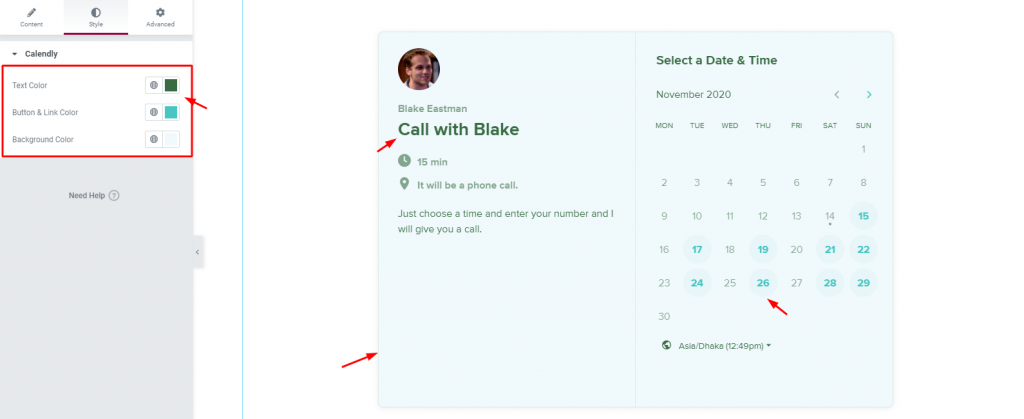
On the Style tab, you can change the text color, button & link color, and background color.

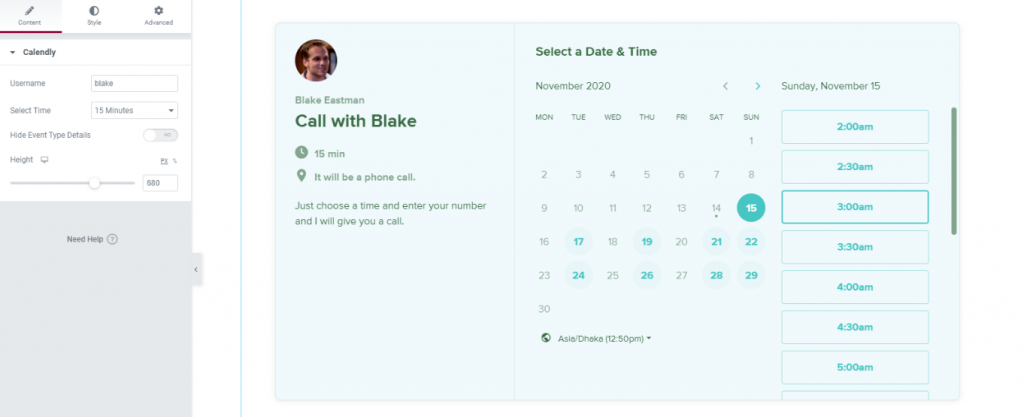
However, clicking on a date/button will unfold the third panel on the right side, where your visitor can pick a time for the meeting.
Conclusion
Watch this video to get more visuals on the Calendly widget by Bdthemes and visit this demo page for more examples.
Thanks for staying up.

