The Brand Grid widget is a fully customizable grid box presented by BDthemes and it is a part of the Element Pack Pro. It helps you showcase your items in grid view.
Now, let’s learn how to use the Brand Grid widget on your site.
Inserting the widget

To insert the widget on your page, just type ‘Brand Grid’ in the search box, and drag-drop the widget in the text area.
Customize the Brand Grid layout using Content tab
From the content tab, you can customize the main layout of the widget to make changes to the final output.
Customize Brand Items
Step-1
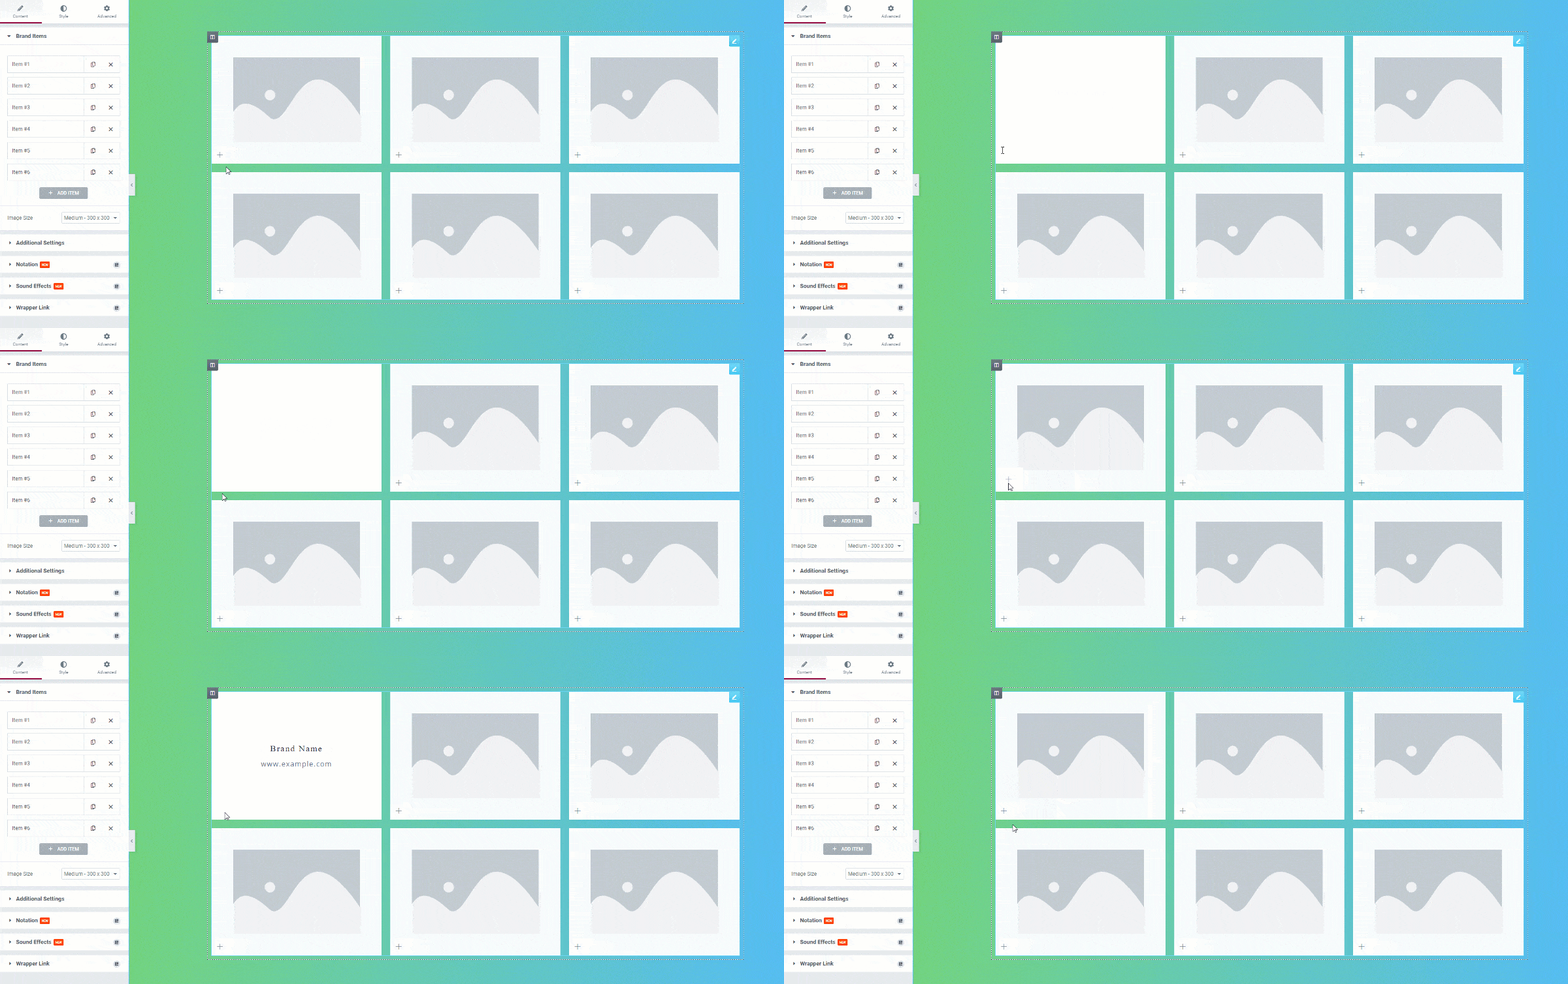
This is the default view of the Brand Grid widget. The grid shows some boxes with an icon for each one. Hovering on the icon on the 1st item, you can see the Brand Name and URL in the popup.
Step-2
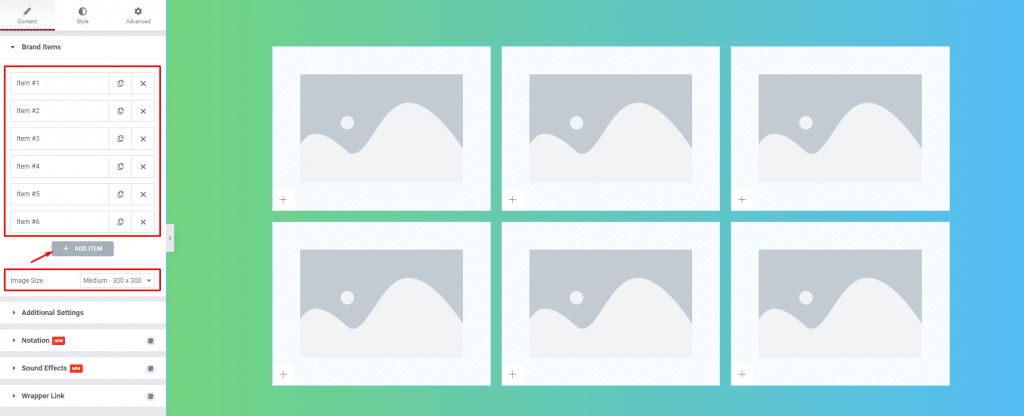
Notice that there is an item list on your left and the Image Size option in the Brand Items section. Here, you can add more items by clicking on the Add Item button.
Step-3
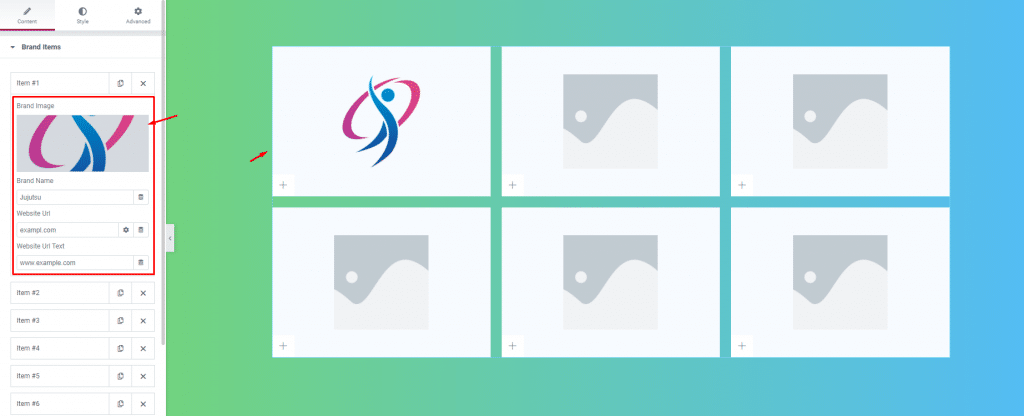
Clicking on an item will give you an image field, brand name, URL, and URL text field. You can insert your brand image by selecting the image field and inserting images from your media library.
Step-4
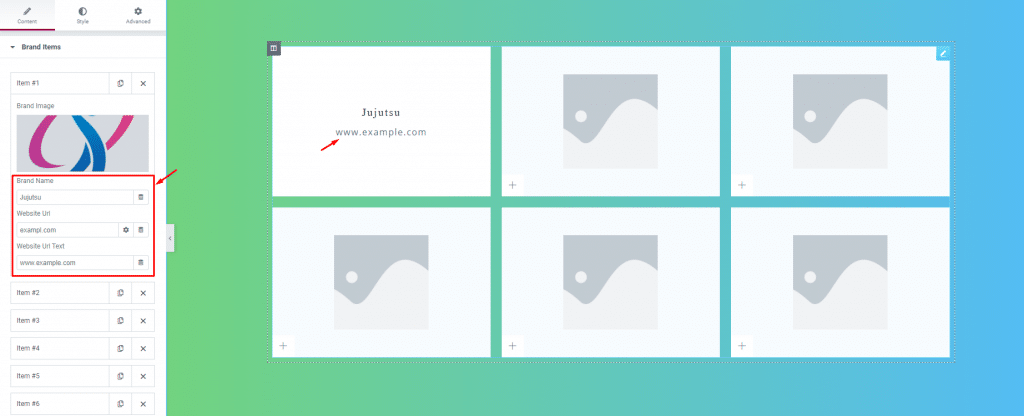
After that, you can change the Brand Name, provide your Website URL, and Website URL Text in the fields. These are visible in the popup that reveals when you hover over the icon in the Brand Grid widget.
More changes from the Additional Settings section
Step-1
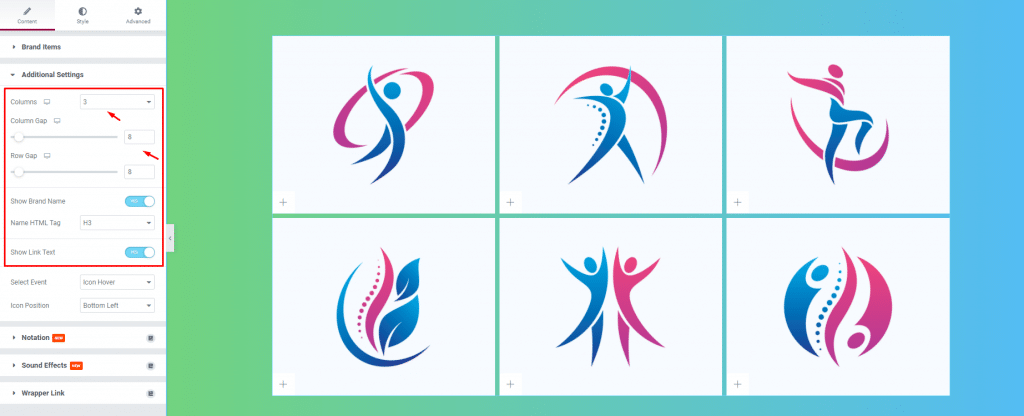
Go to Content> Additional Settings
Here, you can set the number of columns to show as well as configure the gap between the columns and rows using the scrollbars.
You have the opportunity to show or hide the Brand Name and Link Text by enabling or disabling the switchers.
Step-2
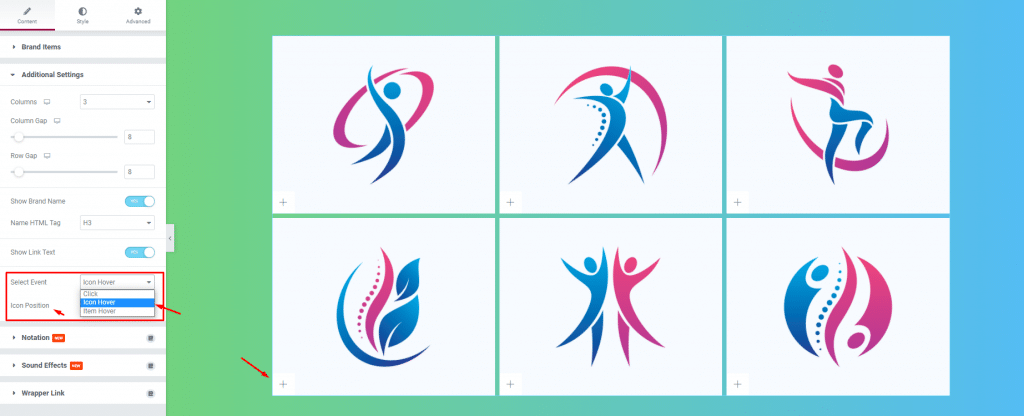
After that, you can configure the icon event and position. To do that, select an event from the Select Event option and a position from the Icon Position option. Note that event means the popup trigger method of the Brand Grid widget.
Customize the Brand Grid with the Style tab
When you obtained the right grid layout for your website, it is time to customize the appearance to match your theme or taste.
Appearance Customization of Items
Step-1
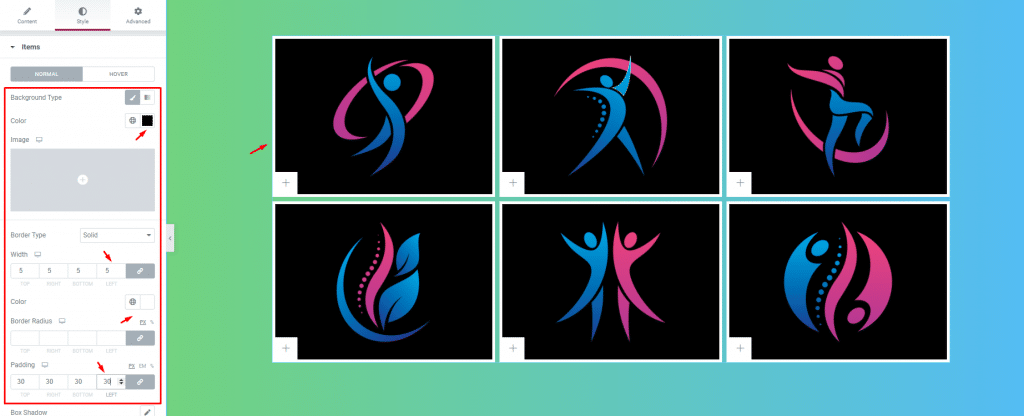
Go to Style> Items
Here, you can customize the Brand Grid items as a whole through the background color, border, padding, and box shadow. Notice that there are two modes for the background color; Normal and Hover. First, customize the Normal mode by changing the background color, a thin border with, setting a border color, and adding some Padding.
Step-2
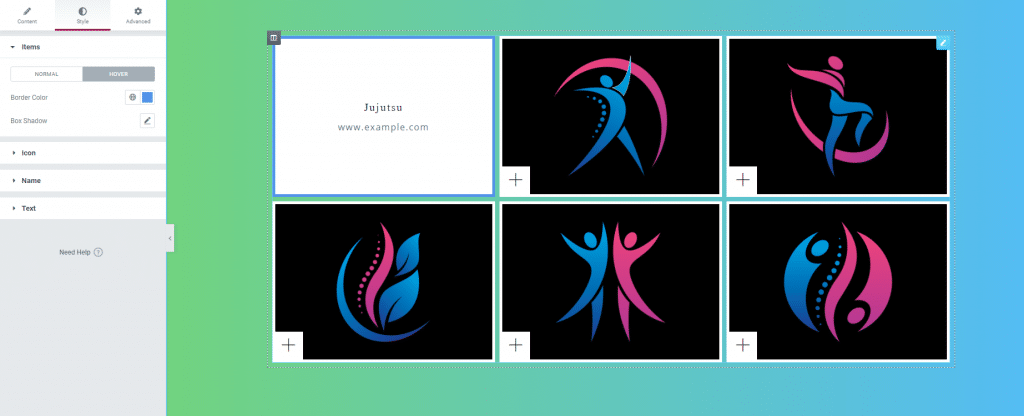
Next, for the Hover mode, set the border color and see the effect by hovering on the icon.
Customize the popup Icon
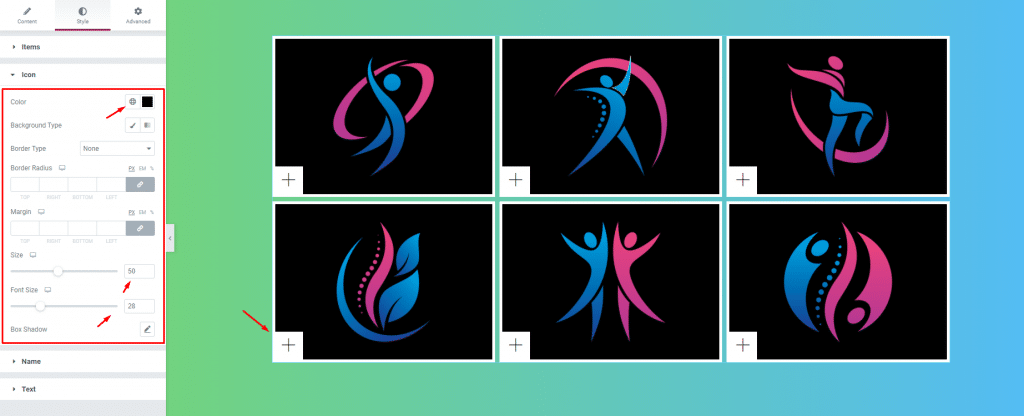
Go to Style> Icon
Next, you can change the color of the Icon and then change the Size and Font Size using the scrollbars below. Additionally, you can add a border on the icon as well as use the margin field to reposition the icon.
Change the Name style
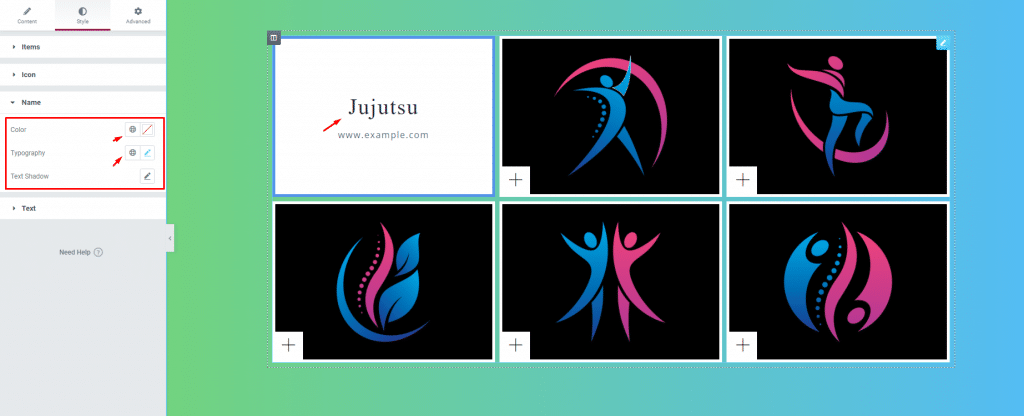
Go to Style> Name
Let’s customize the Name by changing the text color and Typography. You can add text shadow if you like for the Brand Grid widget.
Customize the URL Text
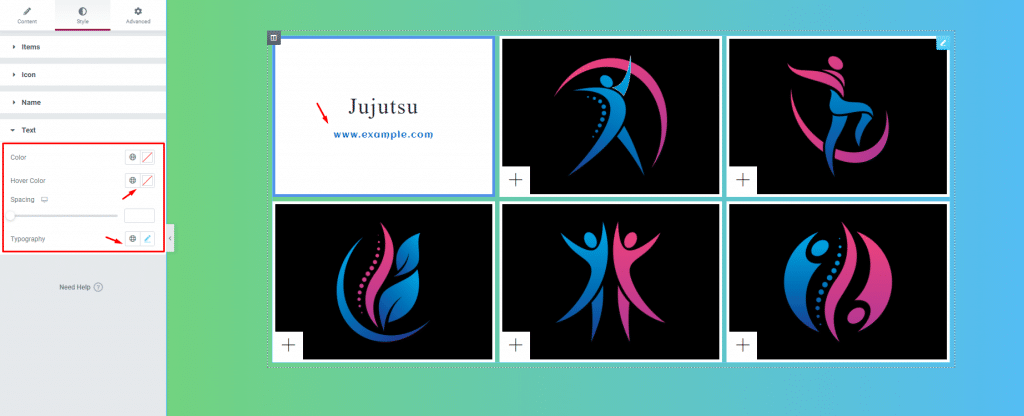
Go to Style> Text
Lastly, you can change the text Color, Hover Color, spacing, and Typography for the URL text that is below the brand name.
Good job! You have customized the Brand Grid widget on your website.
Video Assist
You can watch the tutorial and learn more about the topic. Our Demo Page will help you also.
That’s all for the widget. Thanks.

