In this documentation, we will discuss the customization of the Advanced Heading widget by Element Pack Pro.
Inserting the Advanced Heading widget

Open your page in Elementor editor, search by the widget name, and then drag-drop it on the page.
Work with Content Tab
Heading section
Go to Content > Heading
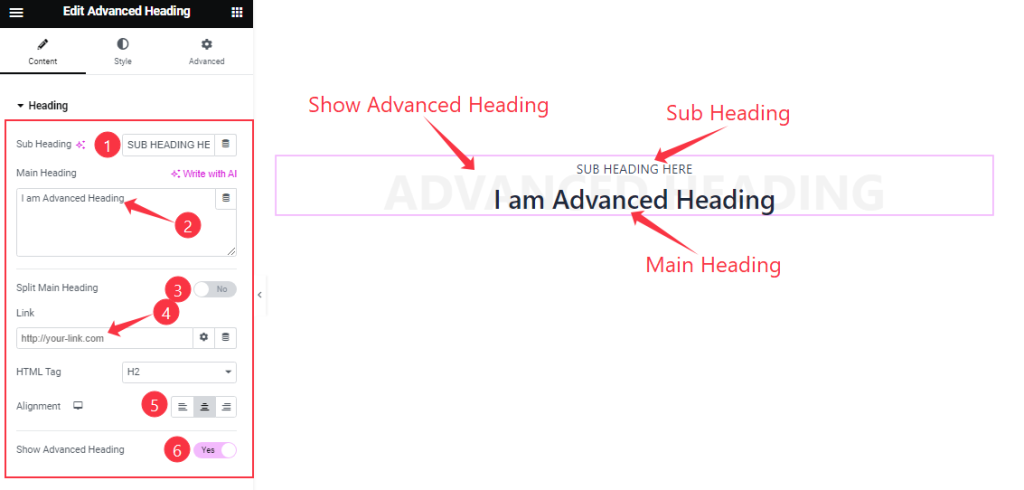
Find the Sub Heading, Main Heading, Split Main Heading, Link, HTML Tag, Alginment, and Show Advanced Heading options.
Advanced Heading section
Go to Content > Advanced Heading
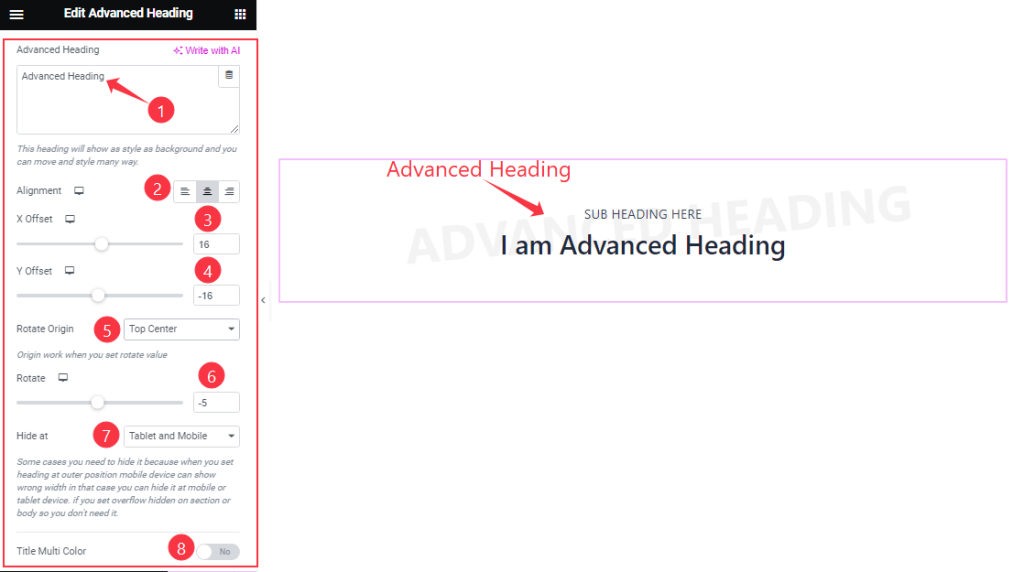
Find the Advanced Heading, Alignment, X Offset, Y Offset, Rorate Origin, Rorate, Hide At, and Title Multi Color options.
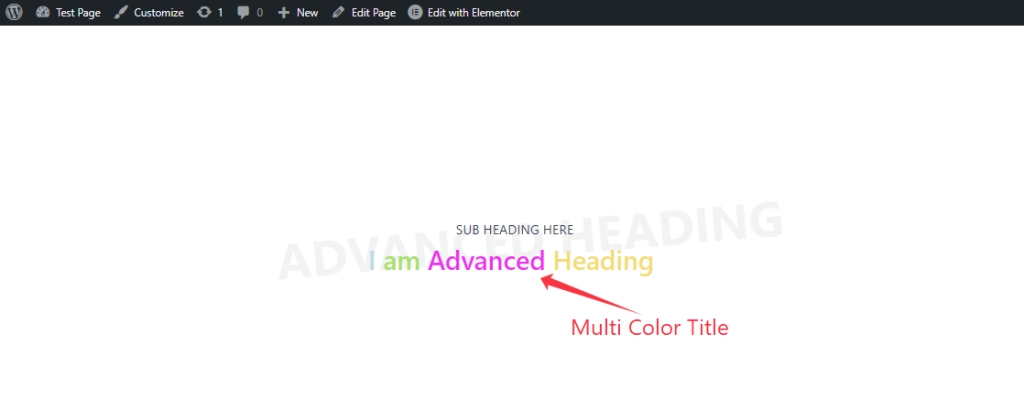
When the Title Multi Color option is on, the title turns out like the screenshot above.
Work with The Style Tab
Sub Heading section
Go to Style > Sub Heading
Step-1
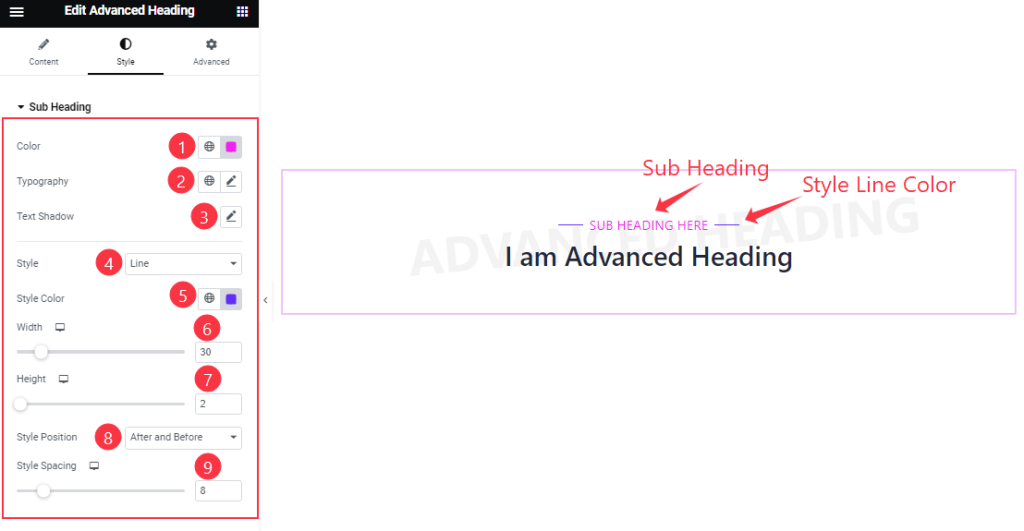
Find the sub heading Color, Typography, Text Shadow, Style, Style Color, Width, Height, Style Position, and Style Spacing options.
Step-2
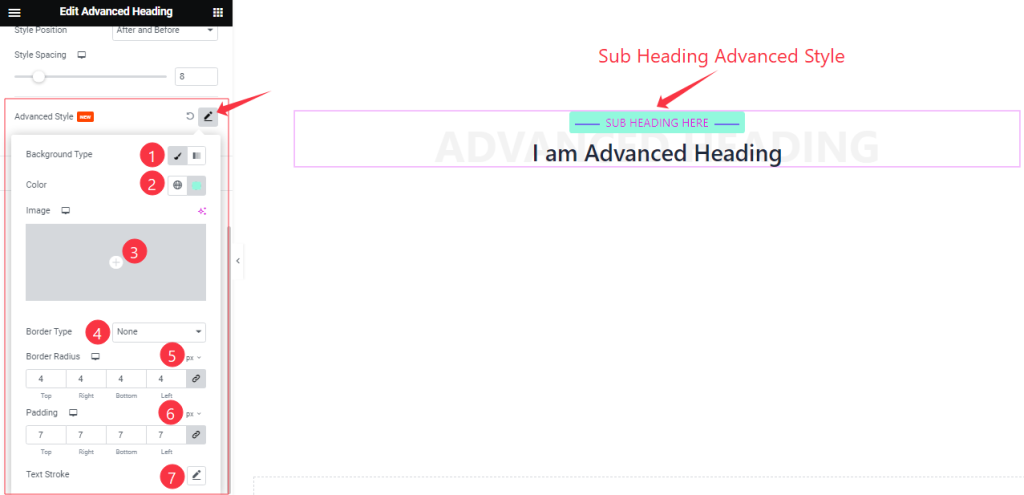
Here Find the Background Type(Classic, Gradient), Color, Image, Border Type, Border Radius, Padding, and Text Stroke options.
Main Heading section
Go to Style > Main Heading
Step-1
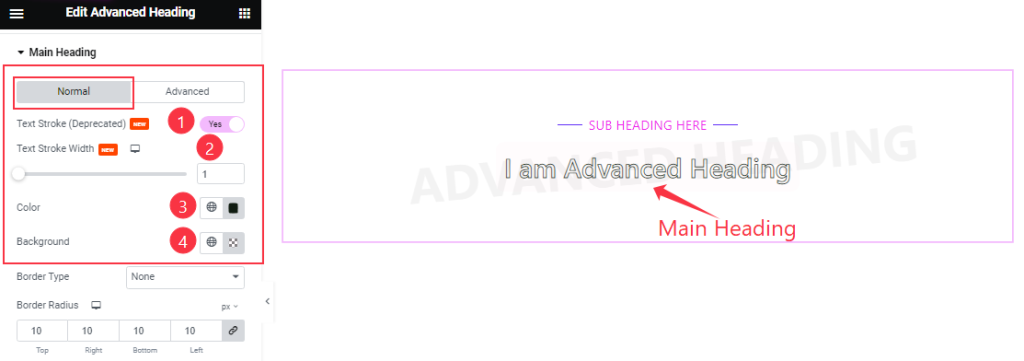
Find the Text Stroke (Deprecated), Text Stroke Width, Color, and Background color options in Normal mode.
Step-2
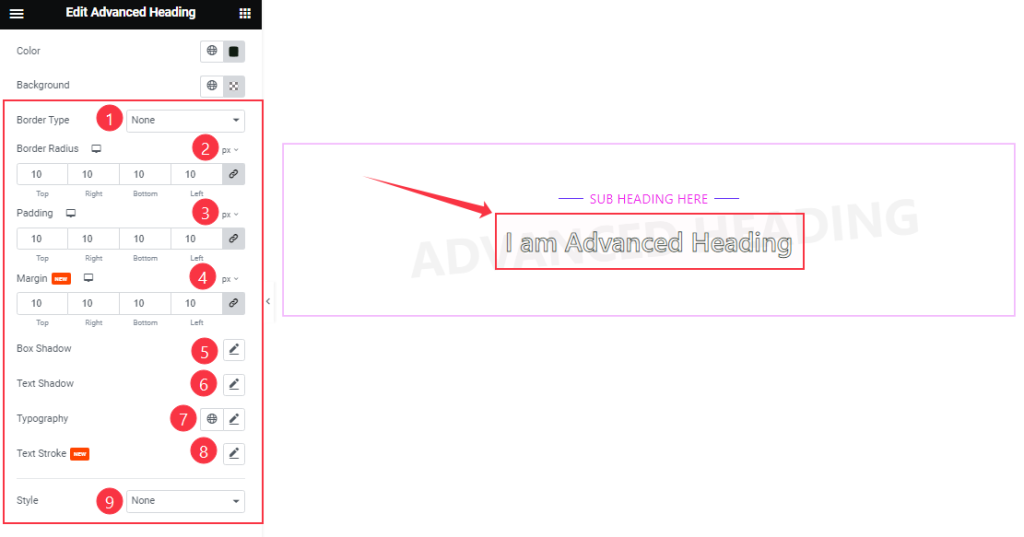
Also find the Border type, Border Radius, Padding, Margin, Box Shadow, Text Shadow, Typography, Text Stroke, and Style (none & Line) options.
For Line Style, find the Style Color, Width, Height, Style Position, and Style Spacing options.
Step-3
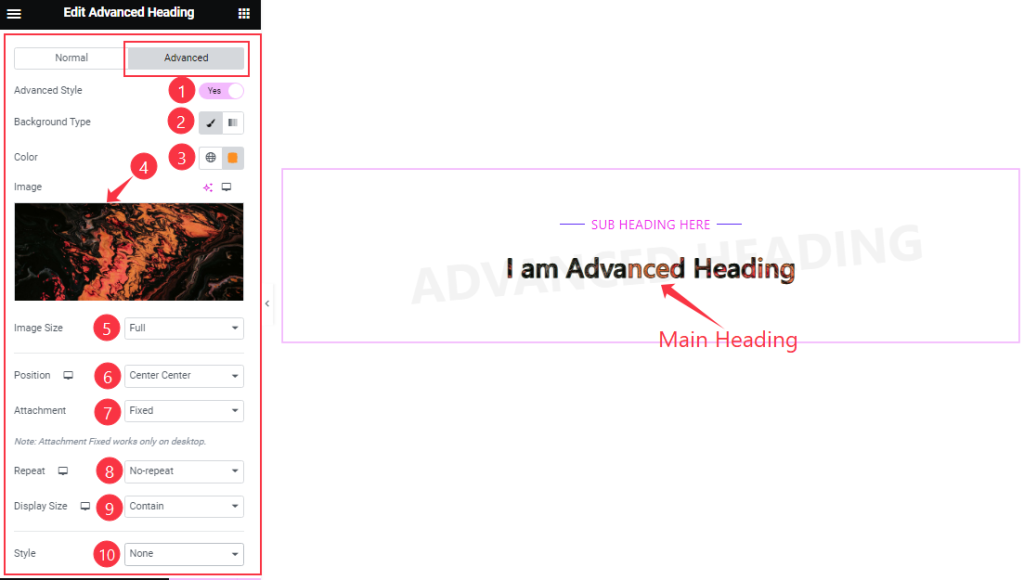
For Advanced mode, find the Advanced Style, Background Type, Color, Image, Image Size, Position, Attachment, Repeat, Display Size, and Style options.
Advanced Heading section
Go to Style > Advanced Heading
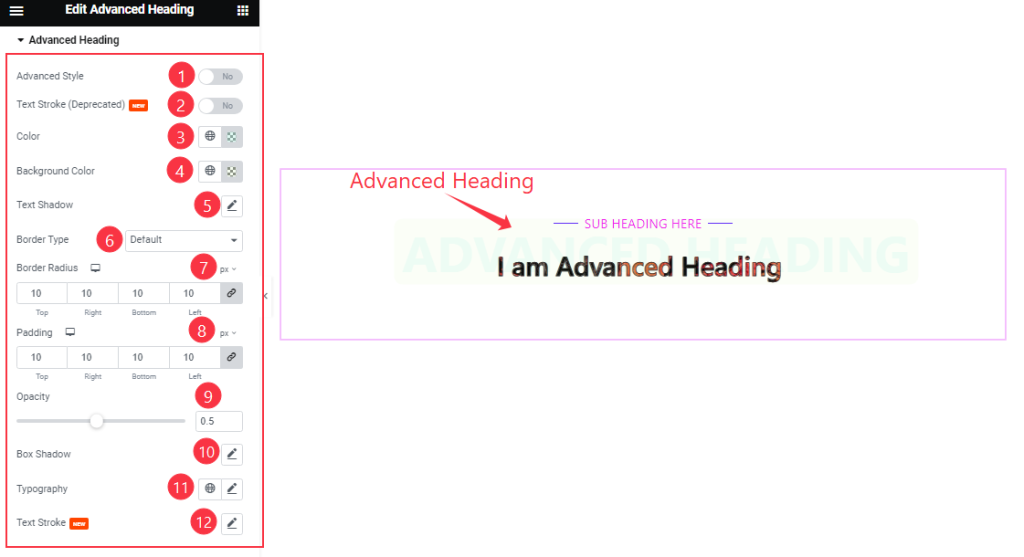
Find the Advanced Style, Text Stroke (Depricated), Color, Background Color, Text Shadow, Border Type, Border Radius, Padding, Opacity, Box Shadow, Typography, and Text Stroke options.
Video Assist
You can see this quick video to learn about the Advanced Heading widget. Please visit the demo page for examples.
Thanks for staying with us.
