The Charitable Donors widget helps you create a showcase for your charitable campaigns, highlighting your valuable donors, and run all kinds of fundraising activities.
Let’s see how to use and customize the widget in this tutorial.
Inserting widget

Find the Charitable Donors widget from the widget menu and drag-drop it inside your page.
Content tab

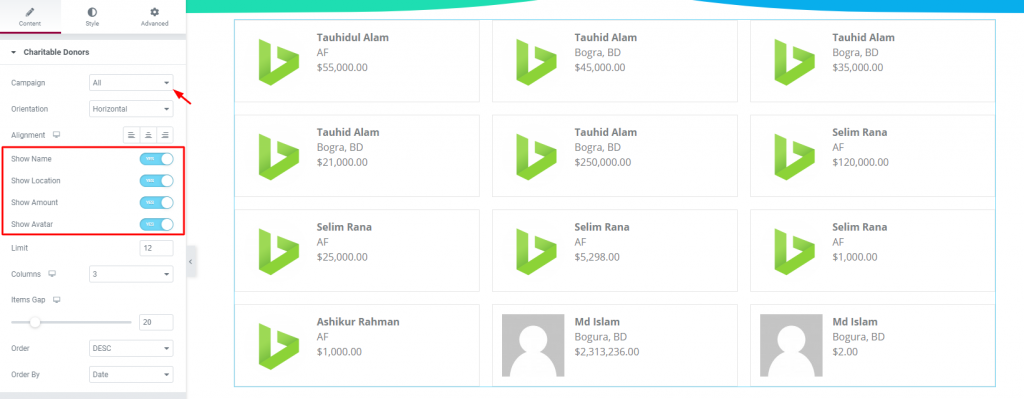
The Content tab holds all the basic settings that will help you create your required displays. From the top, several switchers show/hide corresponding contents on the screen.
The menu Campaign is set to All by default, showing the whole donor list for all of your campaigns.

You can click it and select an individual campaign for the display.
Also, you can change the content alignment, orientation, limit, etc. from this tab.
Now that your basic layout is ready, let’s head to styling it.
Style tab
The Style tab has several sections covering different parts of the content. Let’s see them in an ascending way.
Items

Go to Style> Items
From this section, you can basically change the color, border of the whole content field. Just take the image above as an example of how it’s done.
Avatar

Go to Style> Avatar
Either image or logo, whatever identifies the donor’s identity, can be customized in this section. Create borders, add paddings, or even drop a box shadow to highlight the avatars of the digital fundraising campaigns.
Name

Go to Style> Name
You can color the names and adjust spacing from this section. Make sure to get a good font format from the typography.
Location

Go to Style> Location
Same control as before but for the location text.
Amount

Go to Style> Amount
Same control as the previous one but for the amounts.
Conclusion
Watch this video to get more visuals on the Charitable Donors widget by Bdthemes and check out this demo page for more examples.
Thanks for staying up.


