
The Tile Scroll extension from Element Pack Pro makes it possible to design your section background with a flashy-looking image gallery and not use any widget space on the front. This is a new feature brought to you by BdThemes, your trusted web solution company.
Let’s see how this feature works.
Setting up the section in Elementor Page Editor
To use Elementor Tile Scroll, you need to create the section where you are going to apply the feature. Let’s create one right now.
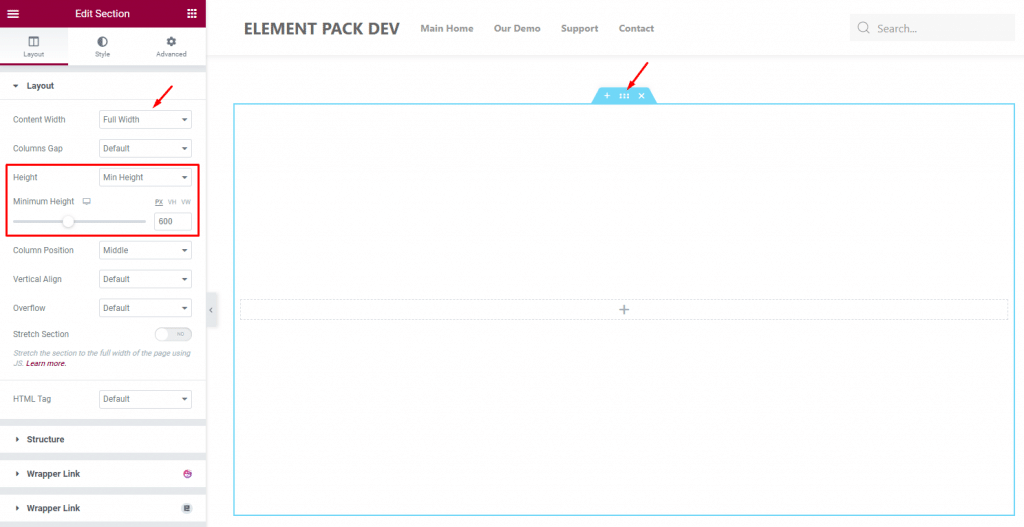
Inside the Elementor page editor, create a single section and go for the Settings by clicking the icon on the top. Then from the Layout, set the section width to full and use a minimum height. Keep in mind that these steps are not required for the feature to work. We simply did it to let you see the Tile Scroll background more clearly.
Then, let’s go for a custom background for the section.
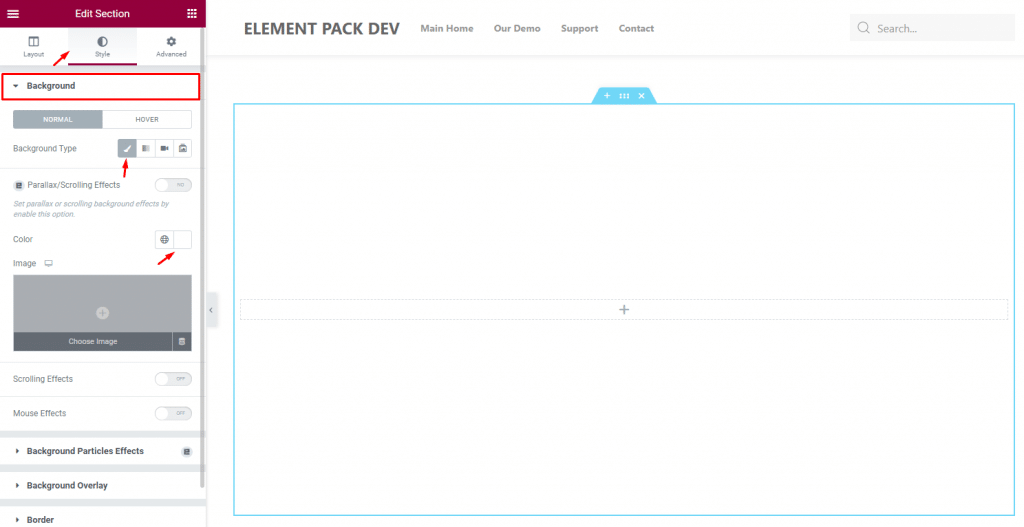
For that, go to the Style tab and look into the background section. Just apply white color for the background.
Now, let’s go find the tile scroll option.
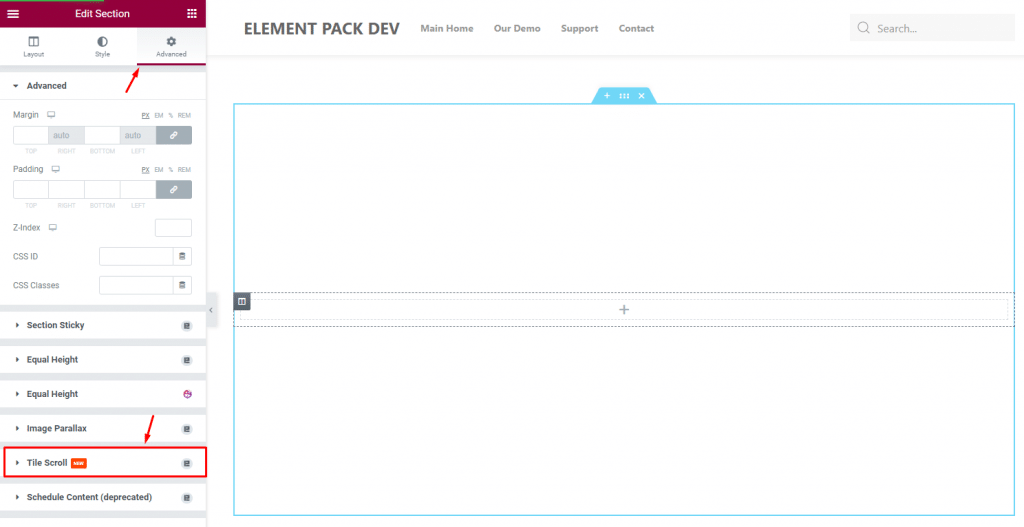
Go to the Advanced setting tab and find the Tile Scroll section below. Don’t forget that you would need to activate this feature from Dashboard> Element Pack Pro> Extensions to use it, or the section will not be visible.
Once you turn on the switcher, the options inside the Elementor Tile Scroll extension will reveal.
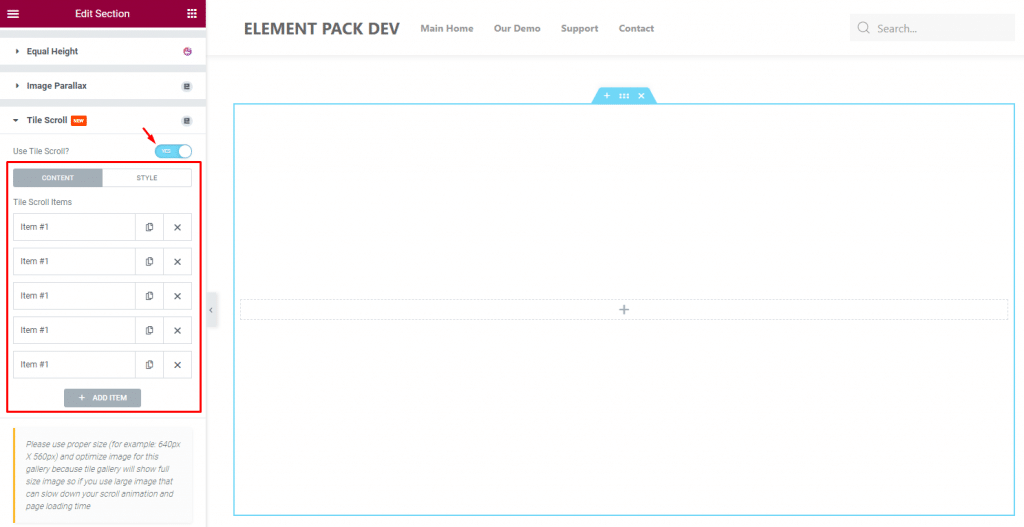
You can see two subsections Content & Style there coupled with a bunch of items inside the former. Now, let’s see the insides.
Tile Scroll Extension configurations
The extension mainly places image galleries in a stripe pattern on your display. The more the items, the more stripes you will get to place on the screen. By default, all the items aka image galleries are empty.
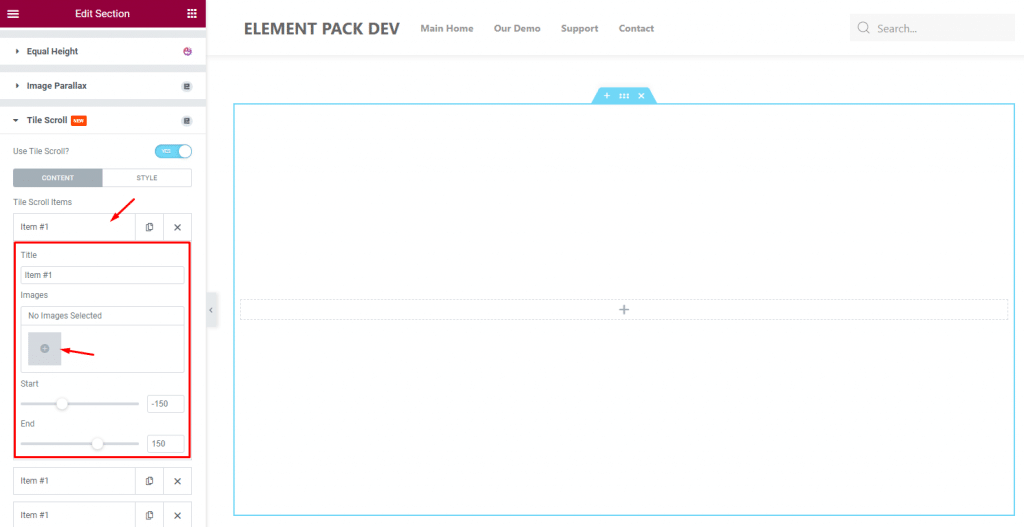
Clicking on an item will reveal the inside where you get to change the name of the item, select images, and adjust the start-end positions.
Now, click on the images icon.
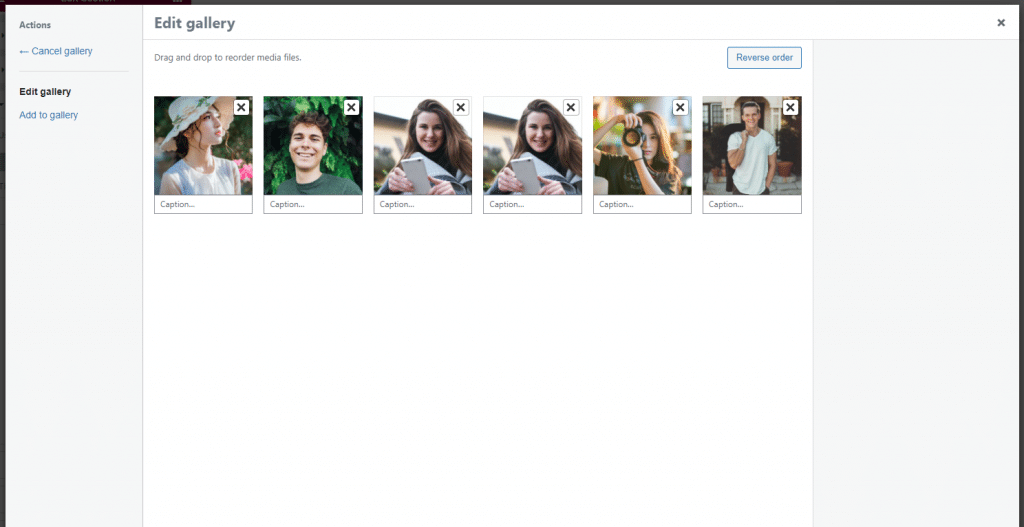
Now select the images you want to display in the first tile. There’s actually no limit to the number of images you should select. But, it’s best to go for 6 at least so you get a nice view every time you scroll.
You can see the image listed inside the image gallery option.
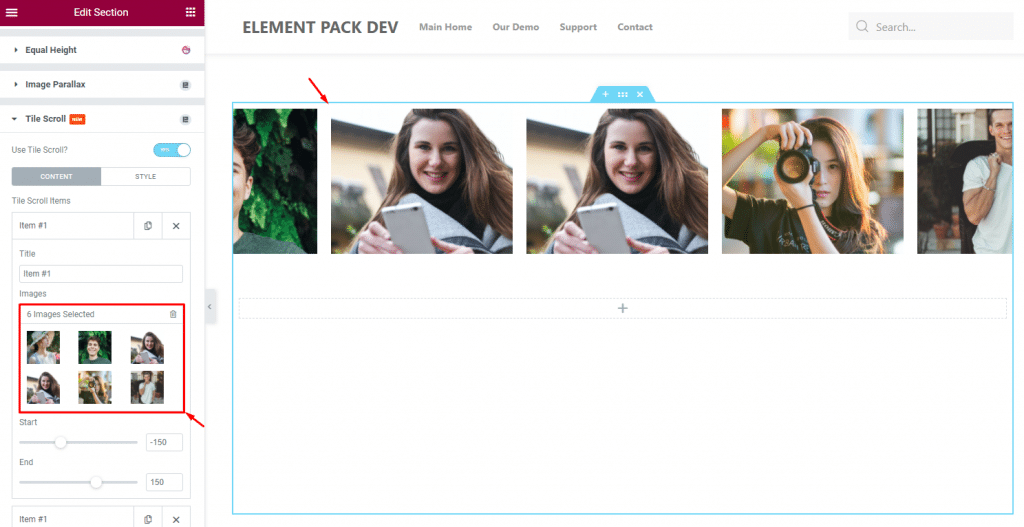
The option will show the number of images you have inserted. It’s showing six as we entered six images for the first tile of the Tile Scroll extension.
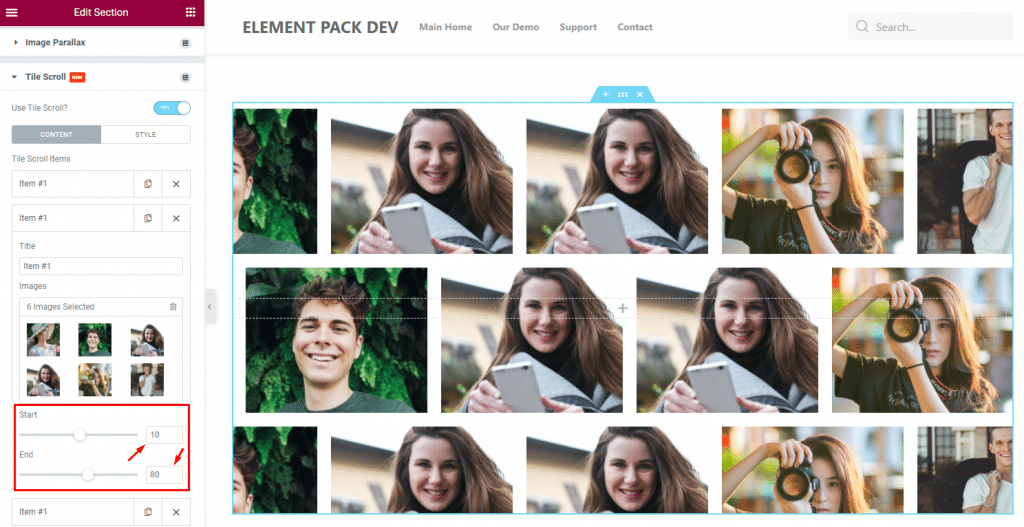
Then just fill more tiles with images and use the options below to set up the start and end frames. We just copied the first one and adjusted the start-end scroll bars to apply a different effect.
Style part of the Tile Scroll Extension
In fact, the tile scroll extension provides both vertical scroll animation and horizontal scroll animation. Both appear as the background of the section without affecting the widget area.
Once you go to the Style subsection, you can see the option to change the alignment style of the extension.
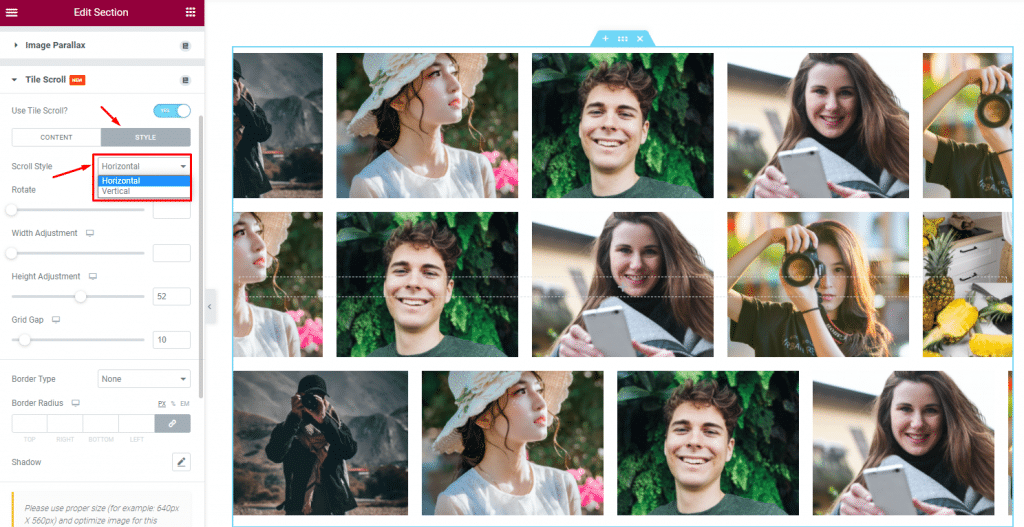
For this tutorial, we decided to go with the Horizontal scroll style. Just after that, we rotated the background to make it appear in a more awesome way.
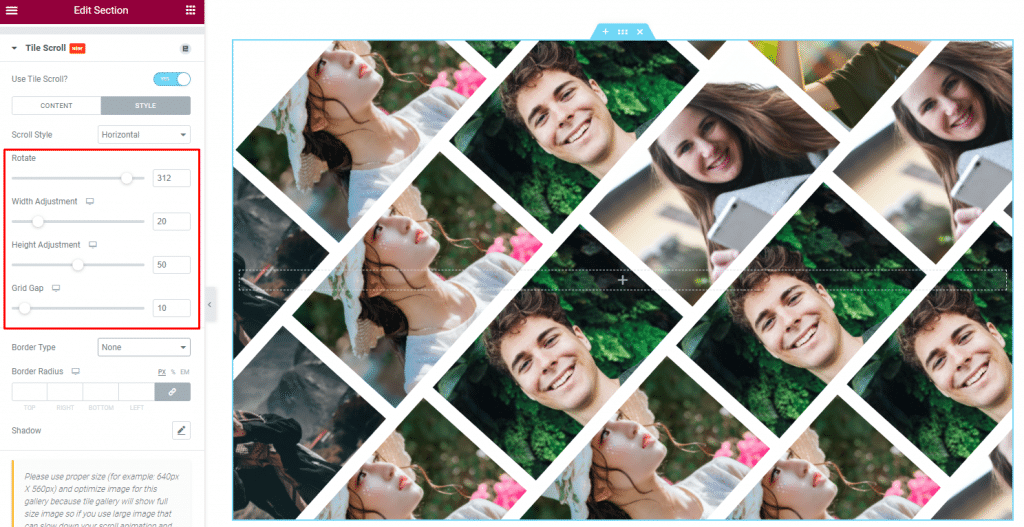
Just simply play with the rotate option to do that. The width adjustment is for stretching the images sideways and the height adjustment option is for stretching the images along their heights. You can minimize the images or maximize their size using these two options.
Again, you can change the grid gap to increase or decrease the image gaps as you like. There are also border options for the vertical scroll that you can use to make them appear more dynamically.
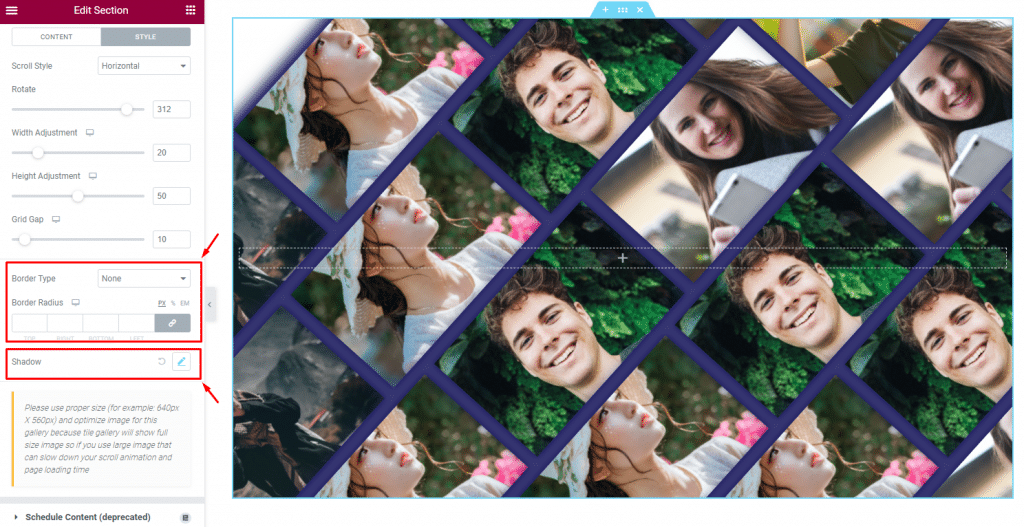
Lastly, you can use box-shadow to add a different effect on the tile scroll background. The last option can also cover the whole background with the shadow and create a new level of a background of its own.
Finally, you can just throw anything on top of the background and make it look perfect. Just like how we added a title on the screen.

This is how you can easily create awesome-looking sections without needing a second widget for the background.
Conclusion
You can watch this video to get the whole picture with explanations and see this demo page for live examples.
Thanks for staying up!