

The Offload Media feature in Sigma Media Manager allows you to store and serve your WordPress media files from external cloud storage services instead of your local server. By offloading media files such as images, videos, documents, and other uploads to cloud storage, you can reduce server load, improve website performance, optimize storage usage, and enhance media delivery speed. In this documentation, we will guide you through the complete process of setting up and using the Offload Media feature in Sigma Media Manager.
Configuring Settings for Offload Media
The Offload Media feature is a Pro feature of the Sigma Media Manager plugin, which means you need to install and activate the Pro version on your WordPress site. Simply follow the documentation to know how to install and activate the Pro plugin to start using this feature.
Set Up the Offload Media Feature
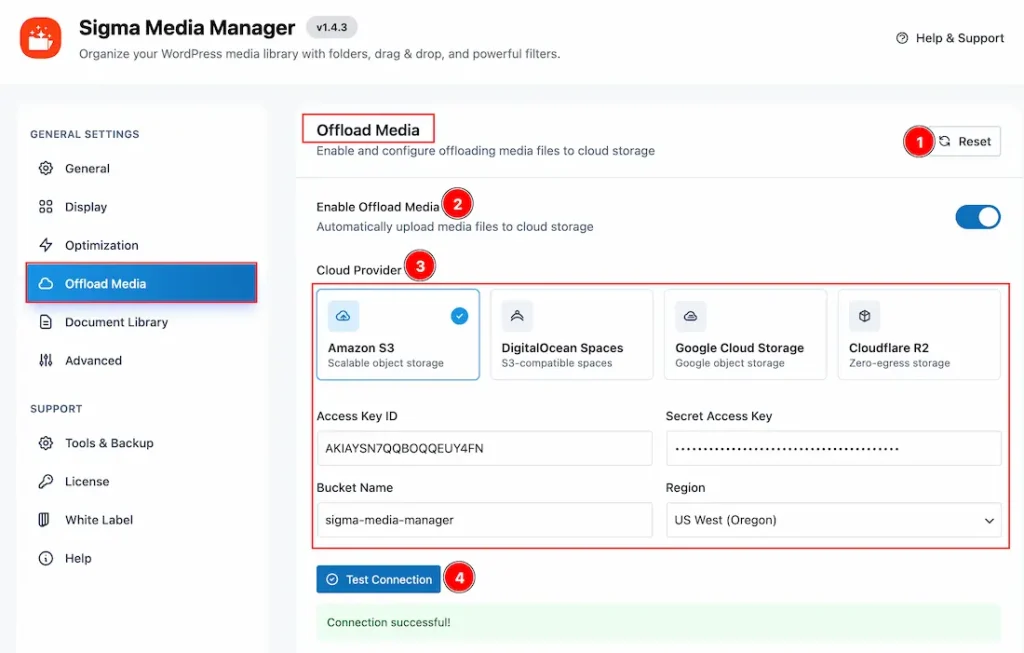
Before using the Offload Media feature, you need to configure the required settings first. To do this, navigate to WP Dashboard > Settings > Sigma Media Manager > Offload Media Settings. From there, you’ll be able to access and customize all the available settings related to the Offload Media feature according to your requirements.
Let’s take a look at the available options:
1. Reset: Click this button to restore all modified settings back to their default values.
2. Enable Offload Media: Enable the switcher to automatically upload media files to your cloud storage provider.
3. Cloud Provider: Choose your preferred cloud storage provider from this field. The available providers are Amazon S3, DigitalOcean Spaces, Google Cloud Storage, and Cloudflare R2. For this example, we have selected Amazon S3. Below are the required fields you need to complete the connection:
- Access Key ID: Enter your cloud storage access key.
- Secret Access Key: Enter your cloud provider’s private authentication key.
- Bucket Name: Enter the storage bucket/container where your media files will be uploaded.
Note: Make sure the bucket is publicly accessible so your audience can view the media files. - Region: Enter the server region where your bucket is hosted.
These credentials allow Sigma Media Manager to securely connect your WordPress website with the selected cloud storage service.
4. Test Connection: After entering all the required details, click the Test Connection button to verify whether the connection with your cloud provider is working correctly. If everything is configured properly, a success message will appear confirming the connection.
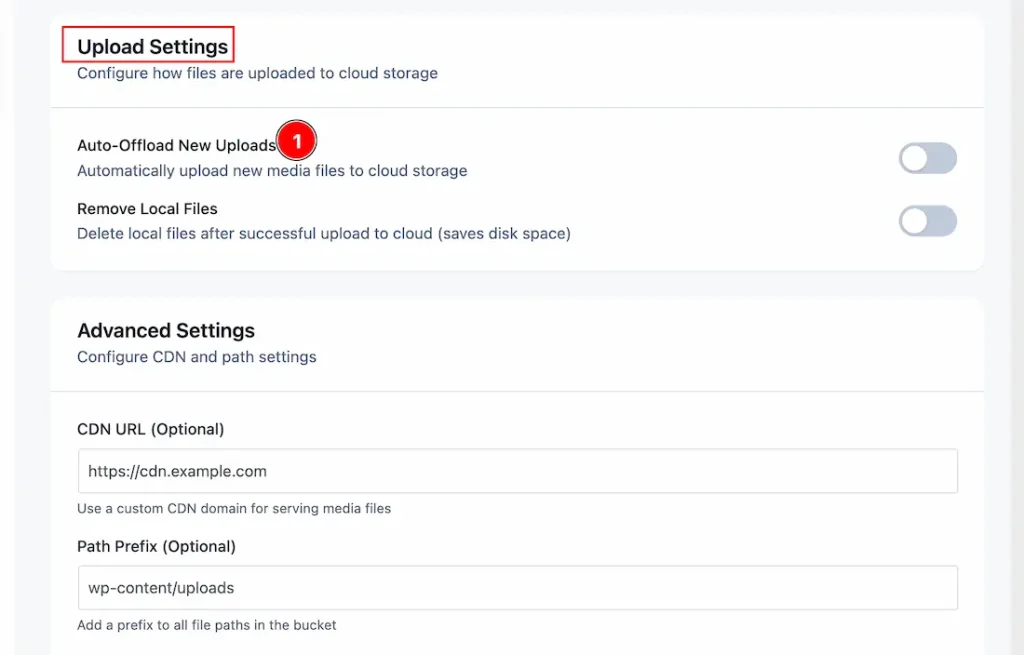
Now, let’s move to the Upload Settings:
1. Auto-Upload New Uploads: Enable the switcher to automatically upload newly added media files to your connected cloud storage. Once enabled, any media file uploaded to your website will be automatically offloaded to the selected cloud provider.
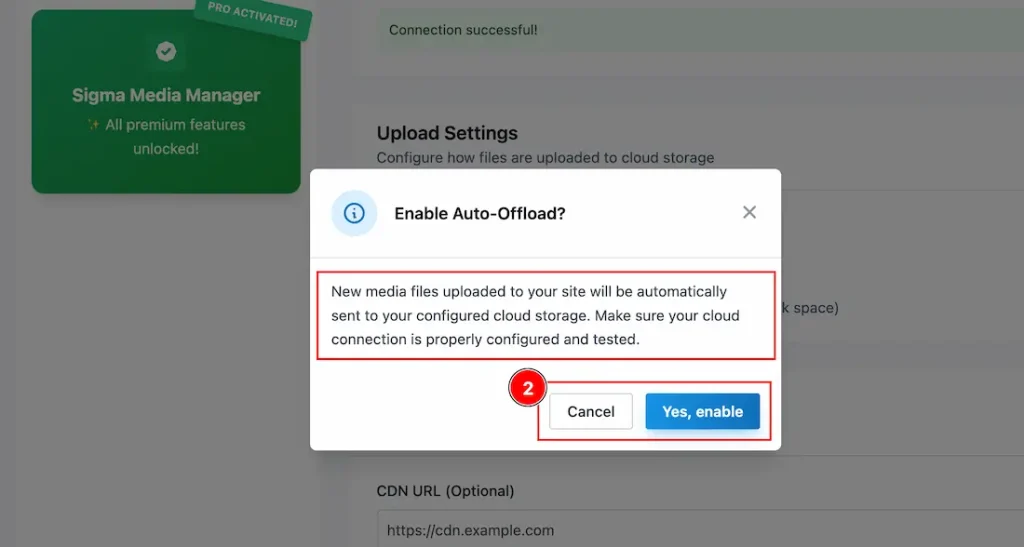
2. A confirmation pop-up will appear asking whether you really want to enable the Auto-Offload feature. Since this is an important setting, please review it carefully, as all newly uploaded media files will be automatically offloaded to the connected cloud storage provider. From the pop-up, you can choose to either enable the Auto-Offload feature or cancel the action.
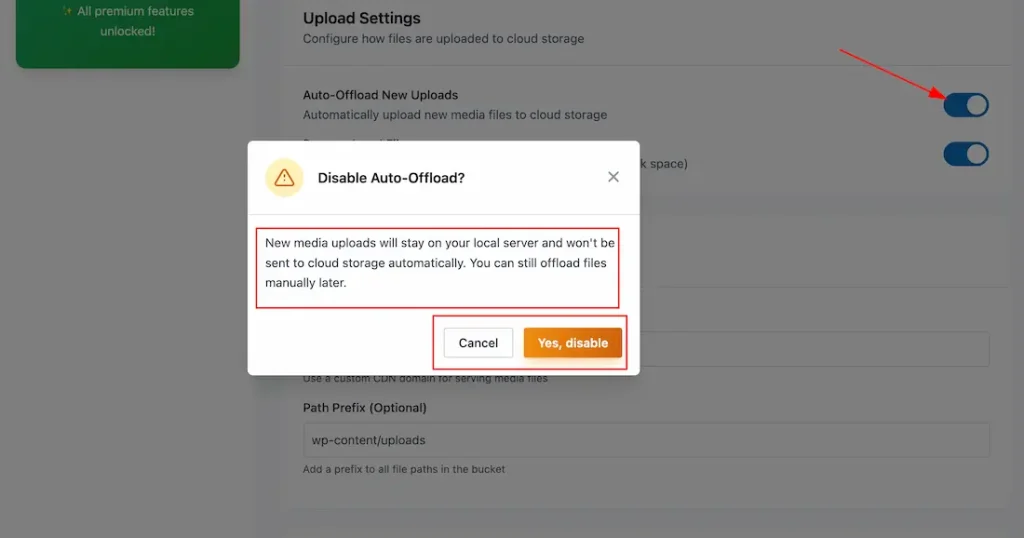
When you attempt to disable the Auto Offload feature, a confirmation pop-up will appear asking you to verify your action. If you confirm the prompt, automatic media offloading will be disabled. If you cancel the action, the feature will remain enabled.
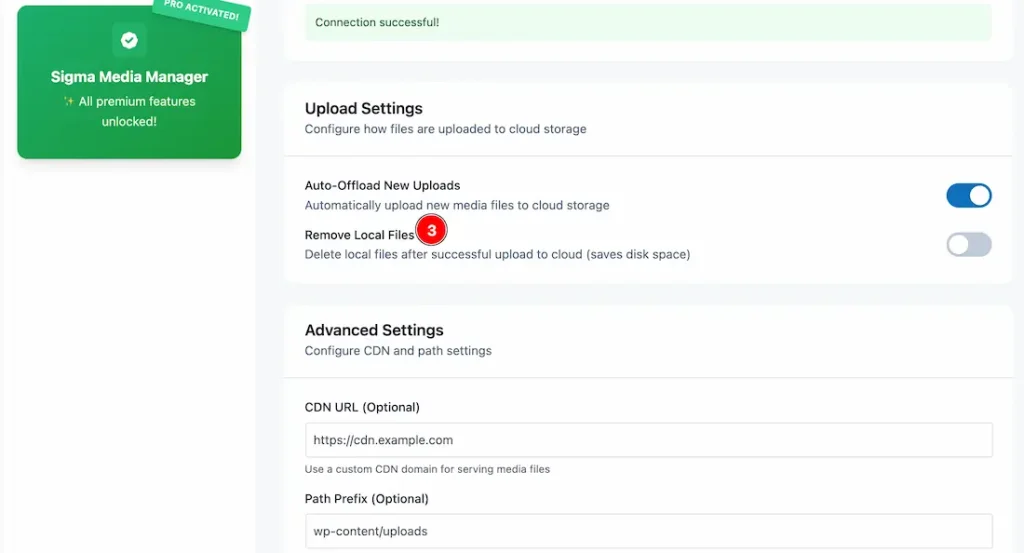
3. Remove Local Files: Enable the switcher to automatically delete local media files after they have been successfully uploaded to the cloud storage. This helps save server disk space.
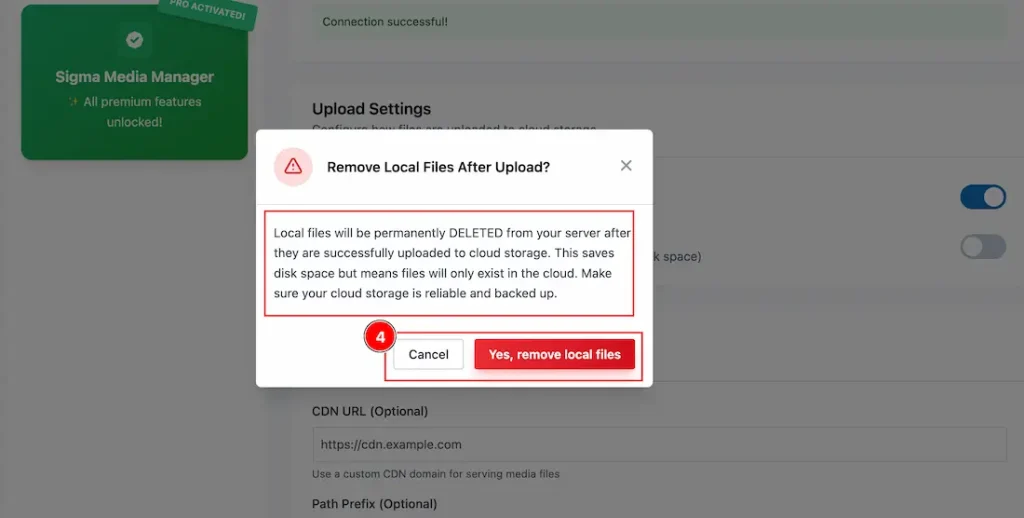
4. After clicking the switcher to enable the Remove Local Files option, a confirmation pop-up will appear. This pop-up will ask you to confirm whether you want to permanently remove local files from your server after they have been successfully uploaded to cloud storage. Enabling this option helps save server disk space, but the files will then exist only in the connected cloud storage.
Note: Before enabling this option, we strongly recommend ensuring that your cloud storage service is reliable and properly backed up.
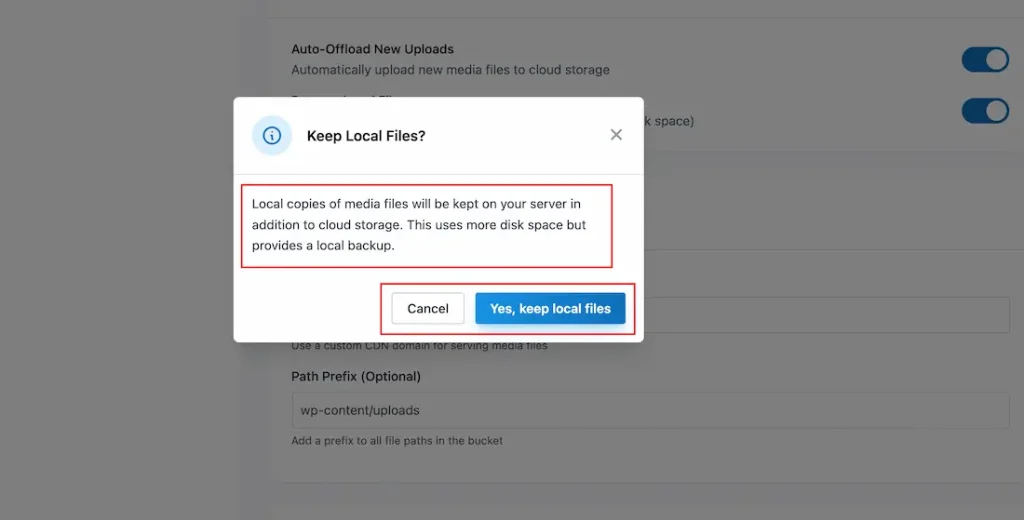
When you attempt to disable the Remove Local Files option, a confirmation pop-up will appear asking you to verify your action. If you confirm the prompt, the feature will be disabled, and your media files will remain stored locally on the server. If you cancel the action, the Remove Local Files feature will remain enabled.
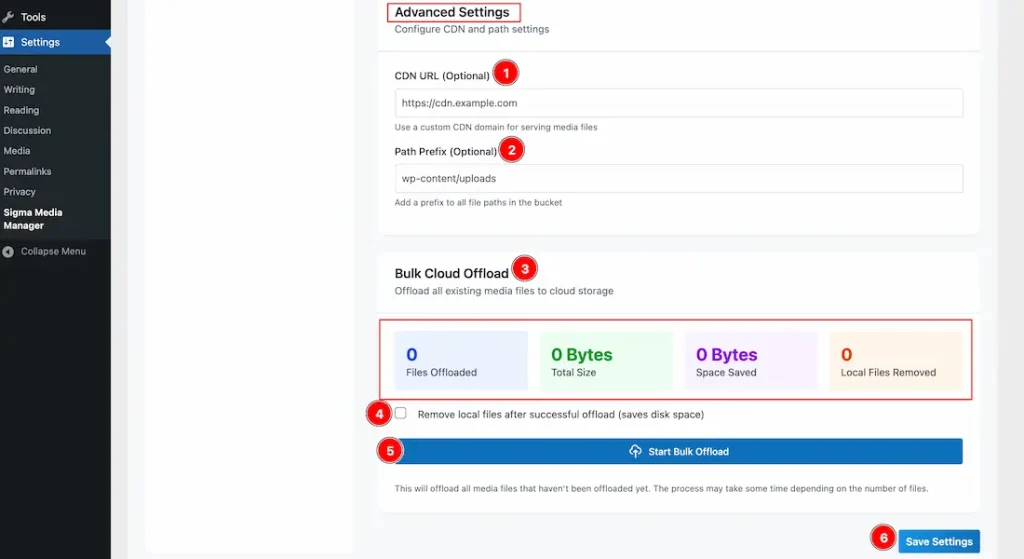
Now, let’s move to the Advanced Settings of the Offload Media feature:
1. CDN URL (Optional): You can add a custom CDN domain in this field to serve your media files through a Content Delivery Network.
2. Path Prefix (Optional): Use this option to add a custom prefix to all file paths stored in the cloud bucket.
3. Bulk Cloud Offload: This section provides an overview of your offloaded media files. Here, you can view information such as:
- Total number of offloaded files
- Total size of offloaded items
- Amount of server space saved
- Number of local files removed after offloading
4. You can enable this option to automatically remove local files after they are successfully offloaded to the cloud. (Please refer to the Remove Local Files option in the Upload Settings tab for more details.)
5. Start Bulk Offload: Click this button to begin bulk offloading your existing media files to the selected cloud storage provider.
6. Save Settings: Make sure to click the Save Settings button to apply and store all the changes you have made.
How to use the Offload Media feature in Media Manager
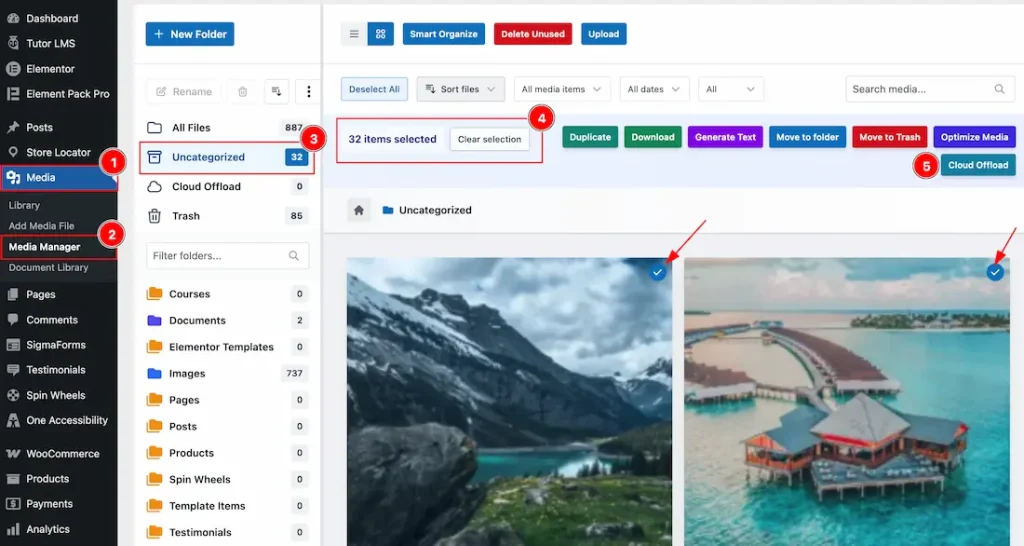
- Navigate to WP Dashboard > Media.
- Click on the Media Manager tab to open the Sigma Media Manager dashboard.
- Select the folder you want to offload to your cloud storage provider. In this example, we have selected a folder named Uncategorized.
- Click on Bulk Image and select the images you want to offload. In this example, all images inside the folder have been selected, meaning a total of 32 images are ready for offloading. A checkmark icon will appear on each selected image, indicating that it has been successfully selected for the bulk offload process.
- Cloud Offload: Click on the Cloud Offload button to begin offloading the selected images to your connected cloud storage provider.
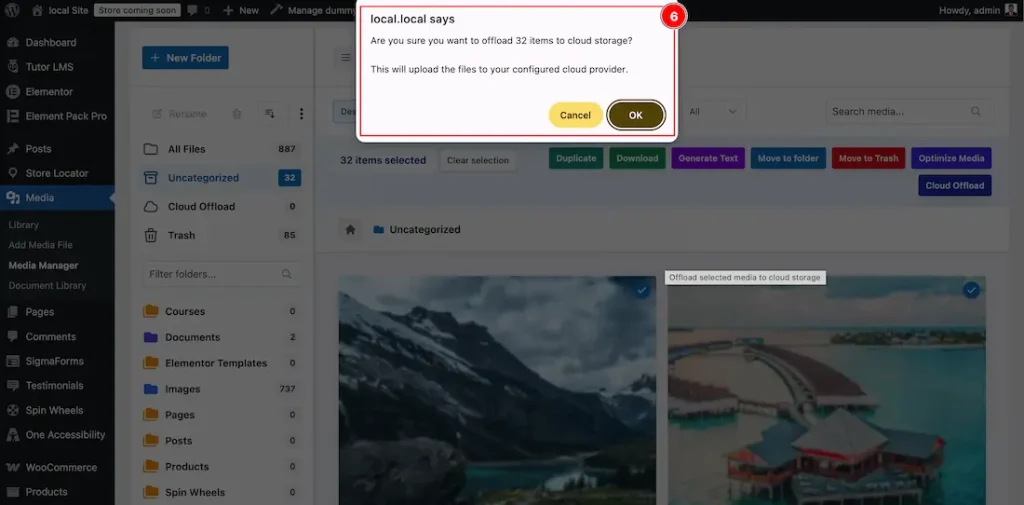
6. After clicking on the Cloud Offload button, a pop-up will appear to confirm if you want to proceed with the offload.
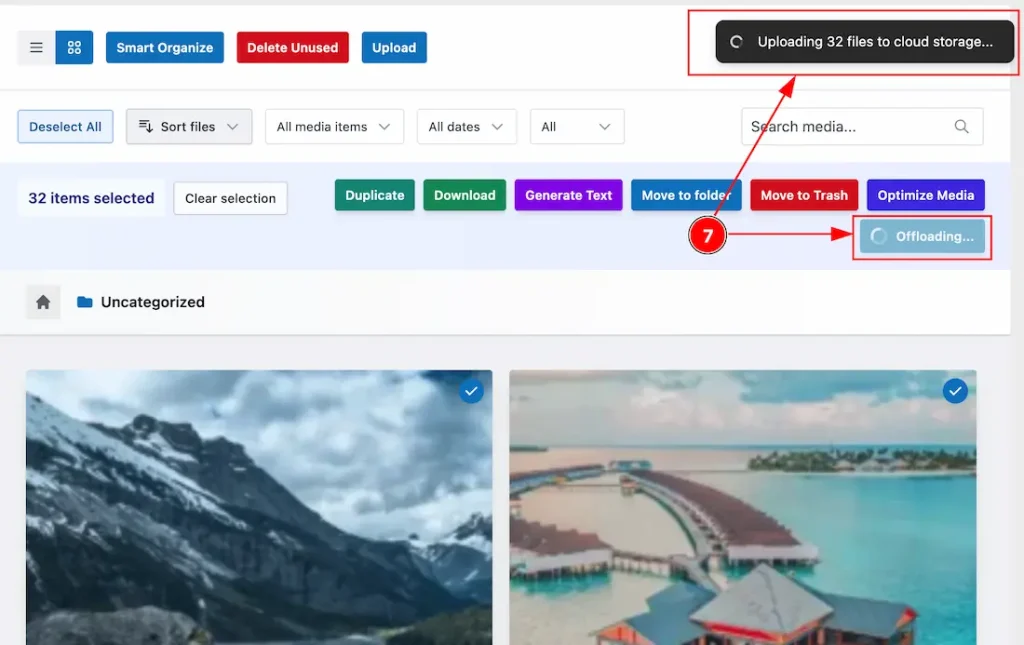
7. After providing confirmation, you can see that the offload process has started.
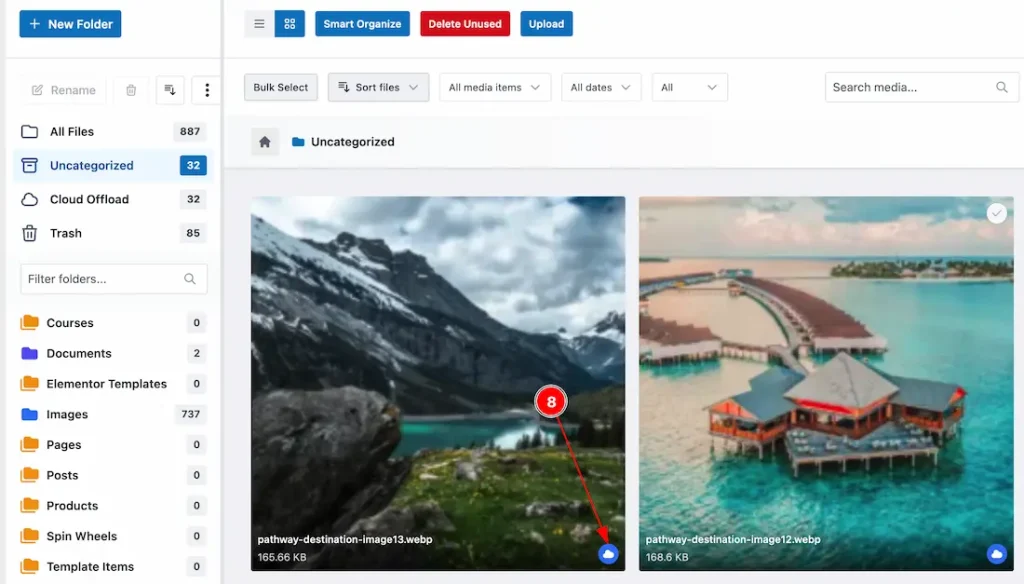
8. After a successful offload, your media files will display an icon indicating that the process has been completed. This confirms that the files have been successfully uploaded to cloud storage and are now stored in the cloud.
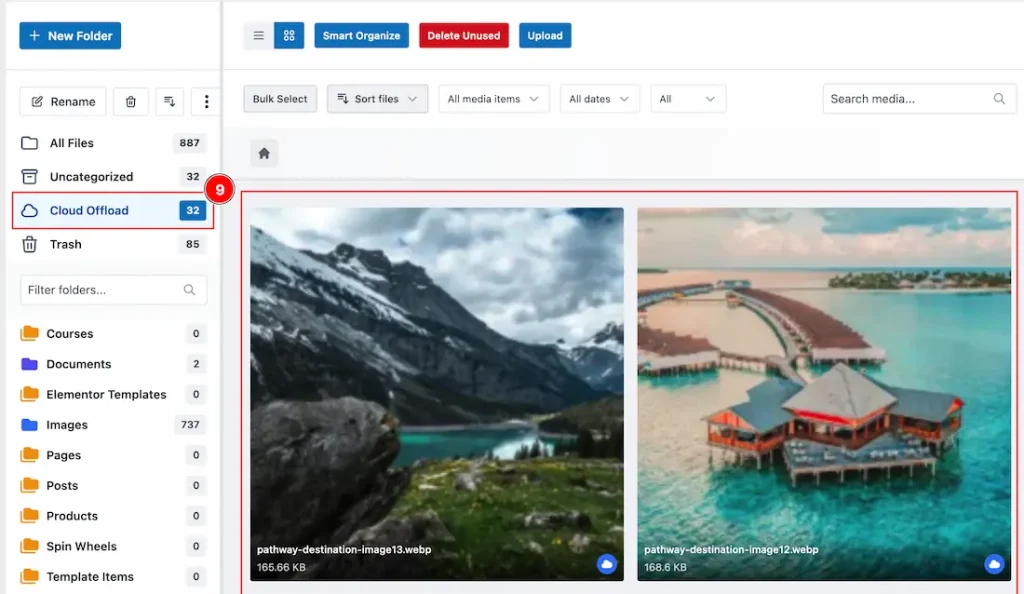
9. Now, click on the Cloud Offload folder, and here you can see the media files that have been offloaded successfully.
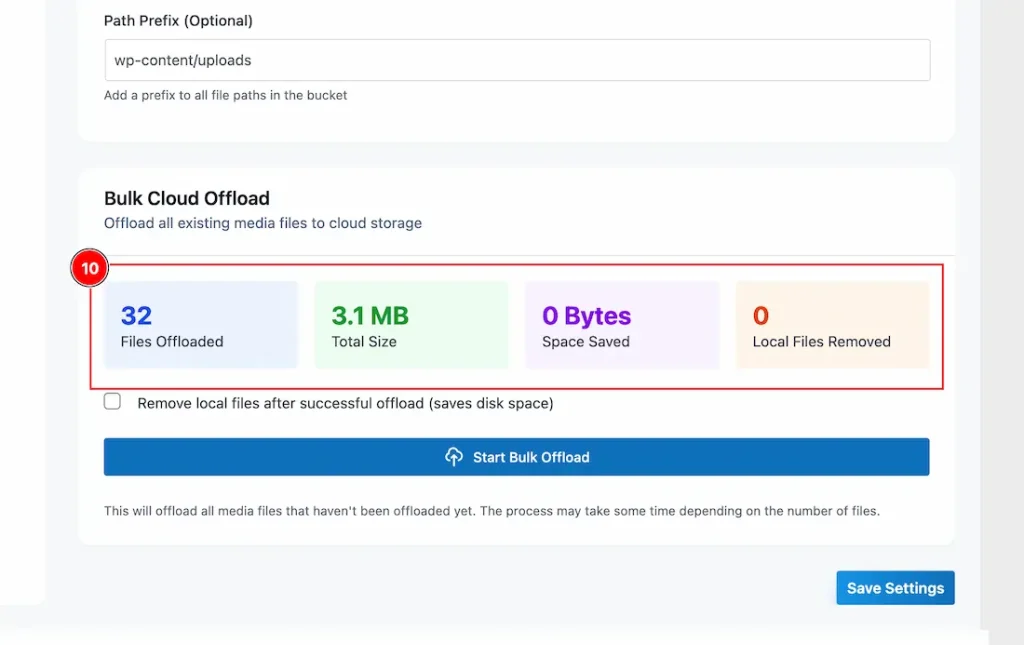
10. Now, to check the information of the offload, you can navigate to Settings > Sigma Media Manager > Offload Media > Bulk Cloud Offload.
All done, you have successfully offloaded your media to your cloud.
Video Assist
The video will come soon. If you want, you can try the Pro plugin features directly from here.
Thanks for staying with us.