

The Edit Image feature is a feature of the Sigma Media Manager plugin that allows you to edit and enhance images directly within your WordPress dashboard. It includes essential editing tools such as Crop, Resize, Rotate & Flip, Filters, Adjustments, and Annotate & Draw, along with an AI-powered assistant for advanced enhancements like Upscaling, Colorization, Restoration, and Sharpening. With real-time preview and one-click saving, you can quickly optimize and customize images without using external editing software. In this documentation, we will guide you through the complete process of the Edit Image feature in Sigma Media Manager.
How to find the Edit Image feature
To find the Edit Image feature, follow these steps:
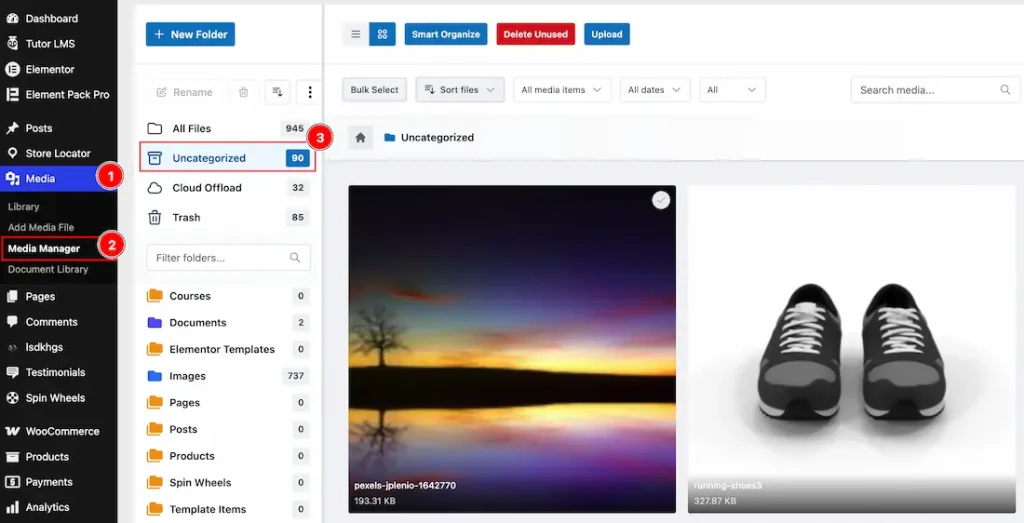
- Navigate to WP Dashboard → Media.
- Open the Media Manager tab located inside the Media section.
- Select any folder to view its media files.
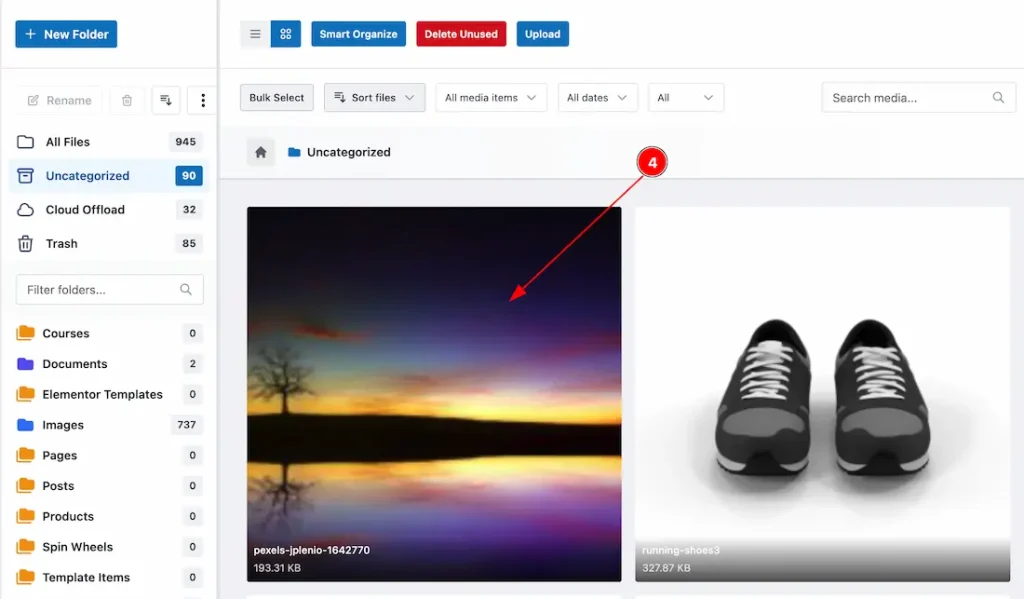
4. Click on any image that you want to edit.
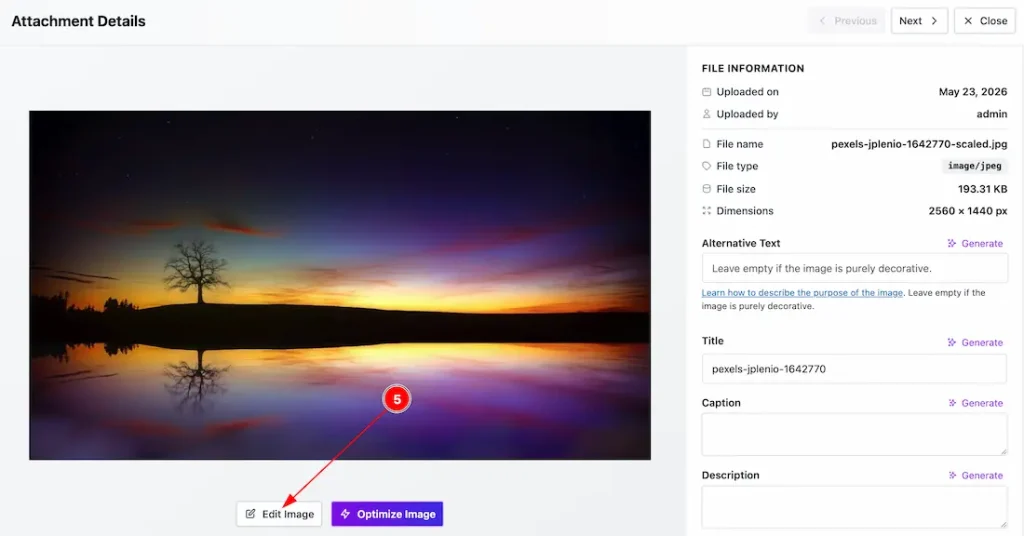
5. After clicking on the image, a lightbox will appear with the image, and below the image, you can see the Edit Image button.
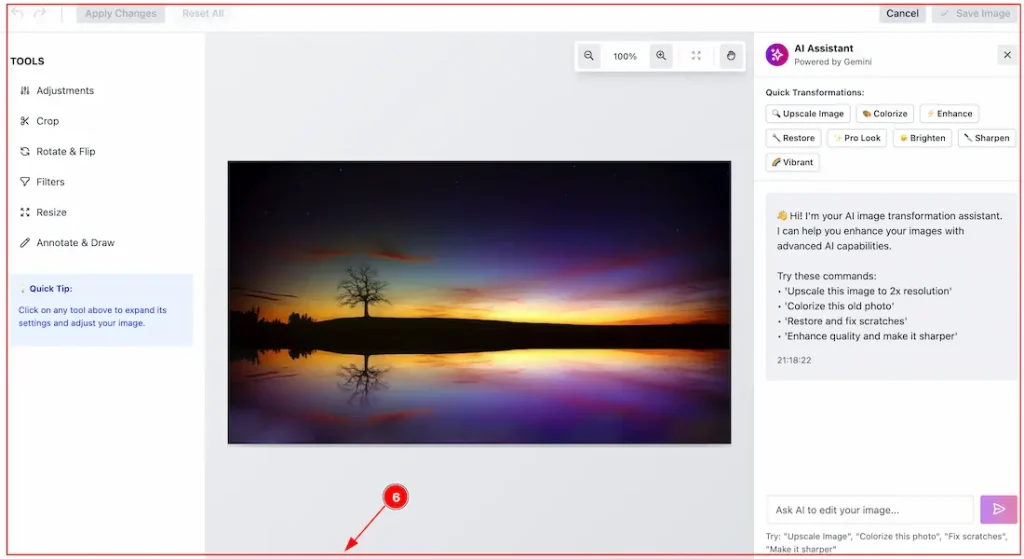
6. Now, you will see this dashboard, which is prepared for editing your image.
How to Customize the Edit Image Feature
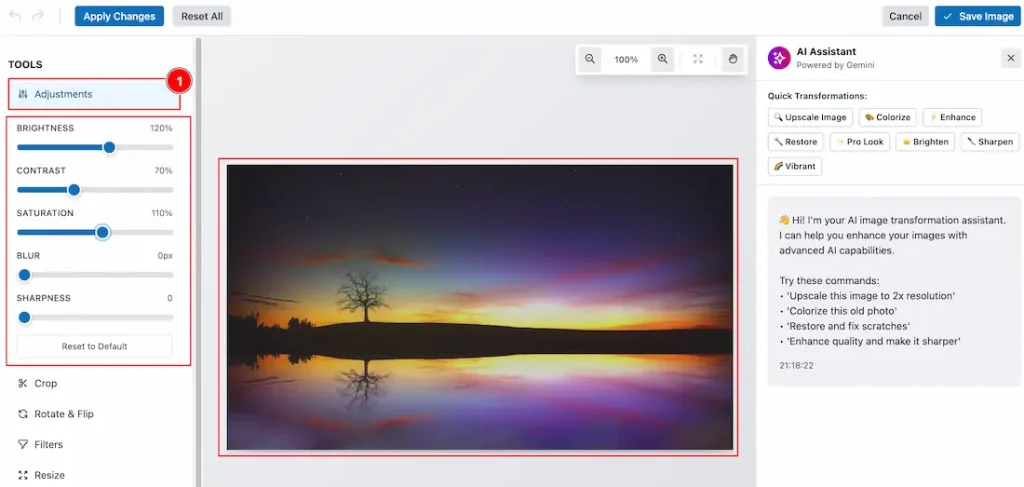
Now, let’s see what tools we have on the left side to edit the image –
1. Adjustments: In this tool, you will get more options such as Brightness, Contrast, Saturation, Blur & Sharpness to edit your selected image. Let’s see how each option works –
- Brightness – This option adjusts how light or dark the image appears.
- Contrast – This option controls the difference between the bright and dark areas of the image.
- Saturation – You can increase or decrease the intensity and richness of image colors.
- Blur – You can soften image details and reduce sharp edges for a smoother look.
- Sharpness – Enhances edge clarity and makes image details appear more defined.

2. Crop: You can crop the image as per your need with this option. After selecting the area, just click on Apply Changes to confirm the cropping order.
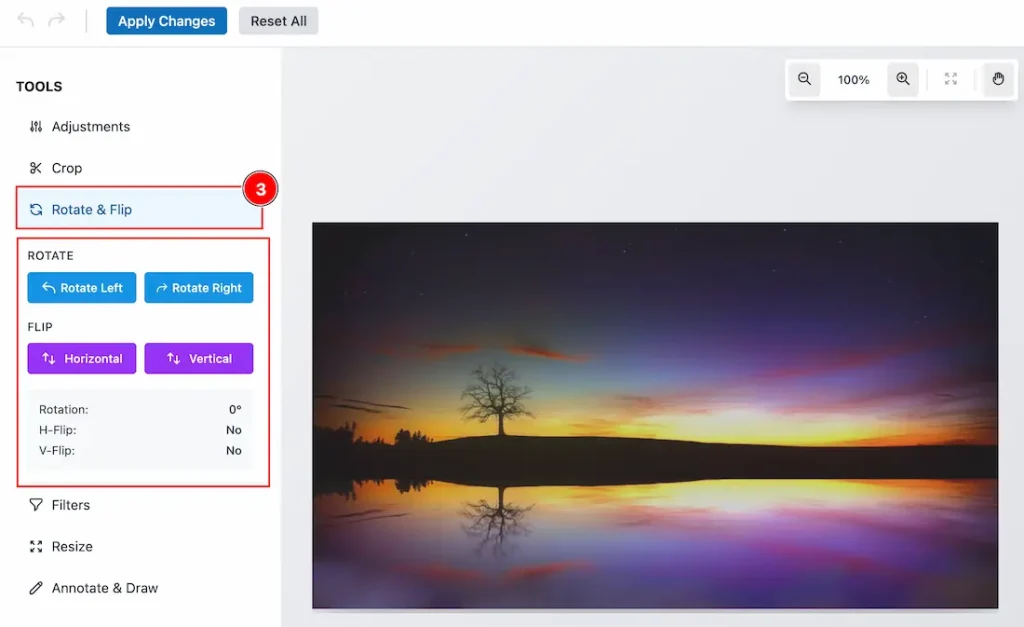
3. The Rotate & Flip option allows you to change the image orientation by rotating or mirroring it. Now let’s see what we have on the rotate and flip option –
- Rotate Left – You can rotate the image 90° counterclockwise each time you click.
- Rotate Right – You can rotate the image 90° clockwise each time you click.
- Flip Horizontal – You can mirror the image left to right (creates a horizontal reflection) with this option.
- Flip Vertical – You can mirror the image top to bottom (creates an upside-down reflection) with this option.
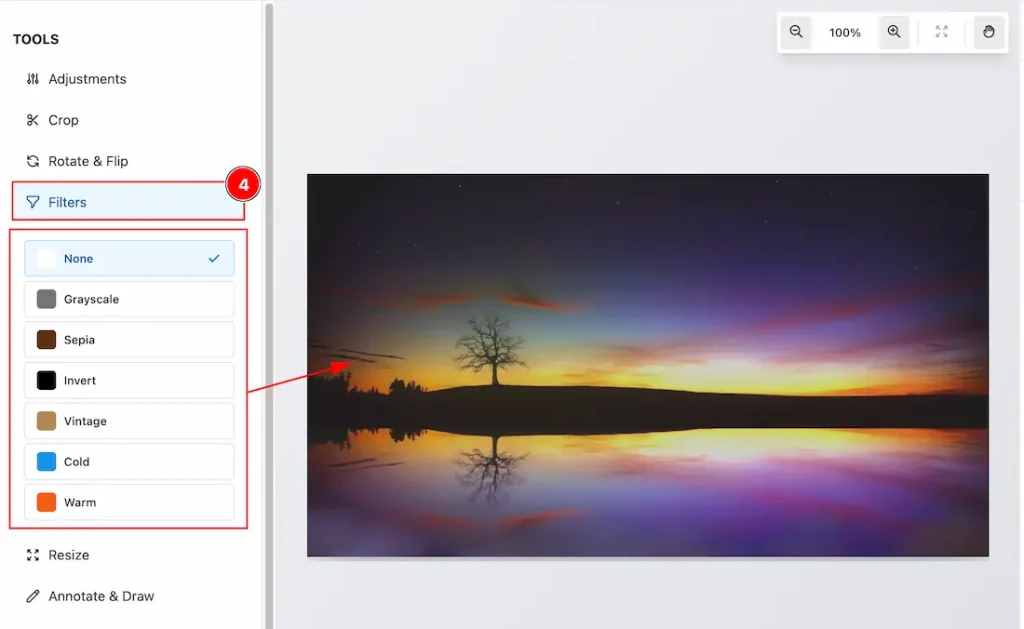
4. Filters: The Filters option allows you to apply predefined visual effects to change the overall color tone and appearance of the image with a single click. The available filter options are –
- None – Keeps the original image without any filter applied.
- Grayscale – Converts the image to black and white.
- Sepia – Applies a warm brown tone for a classic look.
- Invert – Reverses all colors to their opposite values.
- Vintage – Adds a faded, retro-style color effect.
- Cold – Applies cool blue tones to the image.
- Warm – Enhances warm tones like red, orange, and yellow.
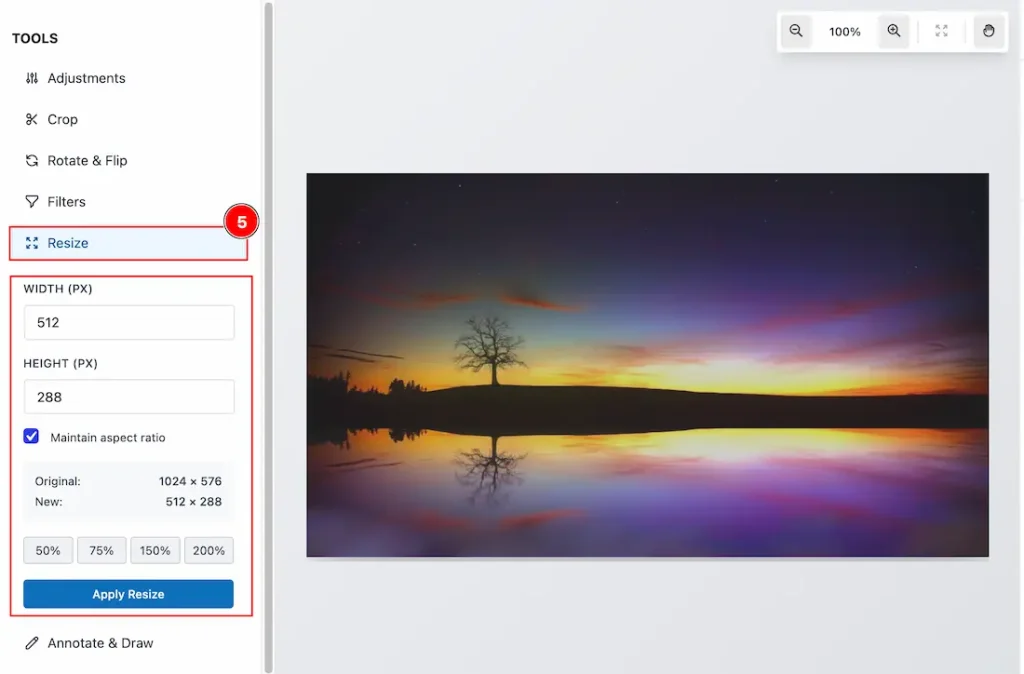
5. Resize: This option allows you to change the image dimensions by entering a new width and height in pixels, with an option to maintain the aspect ratio to prevent distortion, view the original and new sizes for comparison, use preset percentage buttons for quick scaling (50%, 75%, 150%, 200%), and apply the changes by clicking Apply Resize to update the image size.
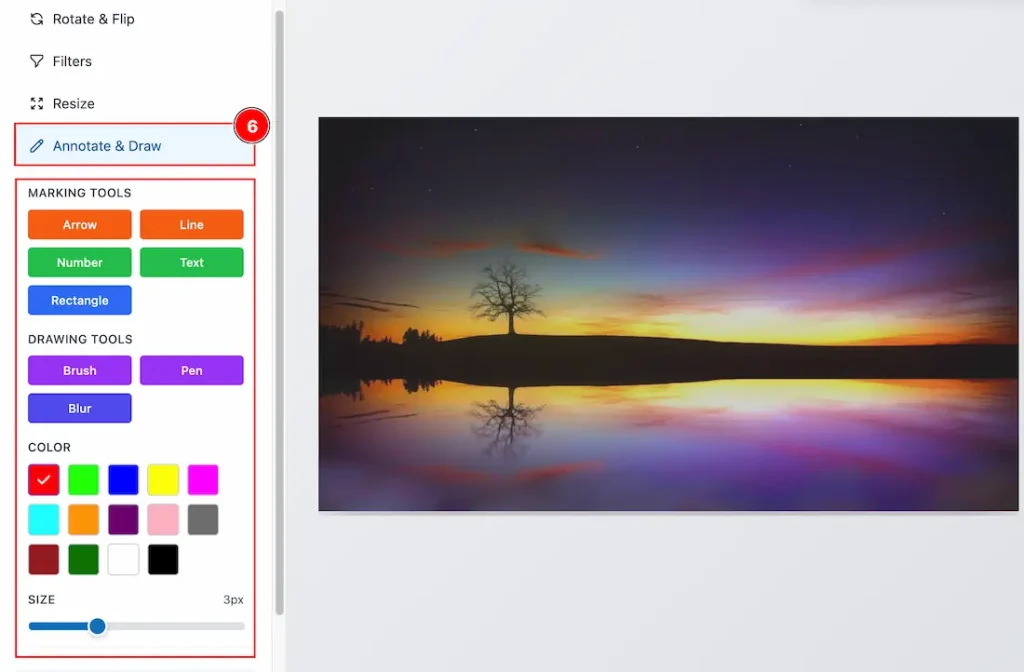
6. Annotate & Draw: The Annotate & Draw option allows you to add visual markings to the image using tools like Arrow, Line, Number, Text, and Rectangle for highlighting content, as well as Brush, Pen, and Blur for freehand drawing or concealing areas, with customizable color selection and adjustable stroke size to control the appearance of your annotations before saving the changes.
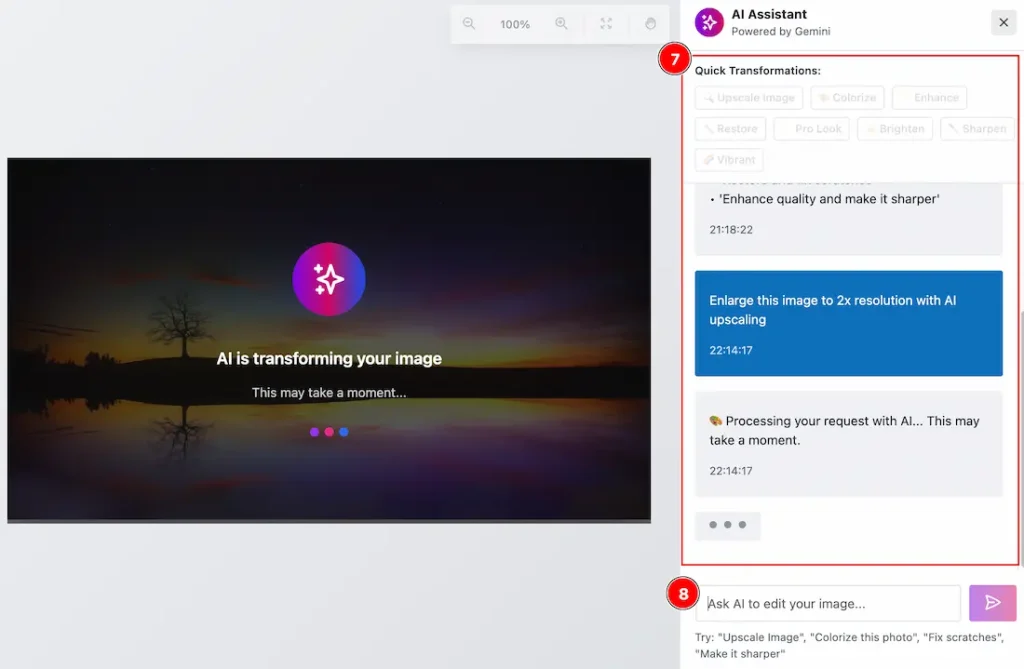
7. AI Assistant: Now, let’s move to the Right side of the Edit Image dashboard, and here you will get a special feature that will allow you to edit your image with AI. Just enter your prompt and see the changes.
8. This is the field where you can enter your prompt.
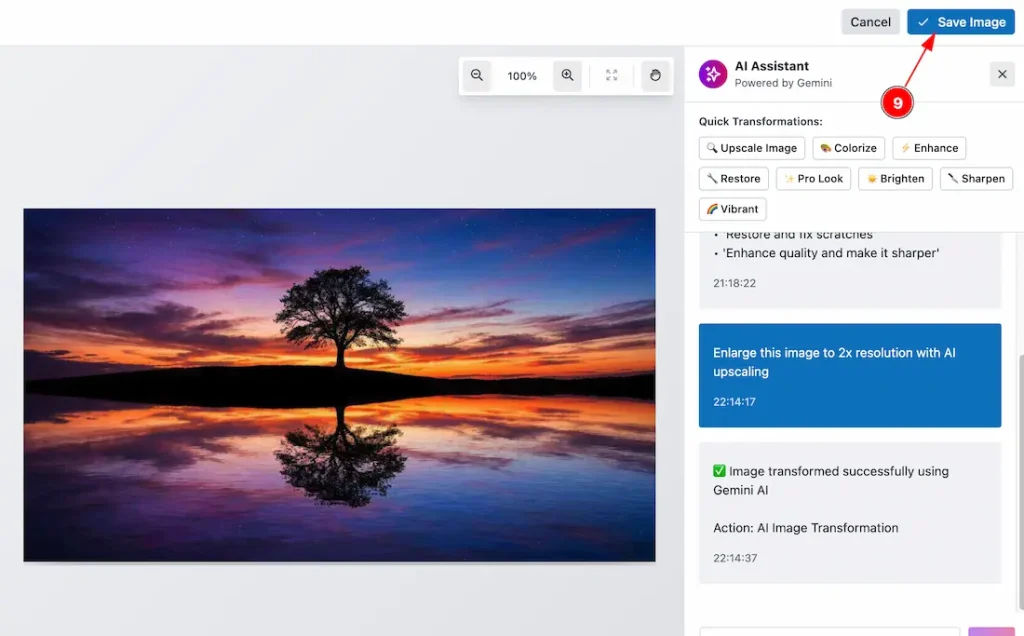
9. After completing editing your image, now click on the save image button on the top right corner, and the image will be saved.
All done, you have successfully edit you image within the Sigma Media Manager Dashboard.
Video Assist
The video will come soon. If you want, you can try the Pro plugin features directly from here.
Thanks for staying with us.