

In this documentation, we will guide you through the Image Optimization and resize feature of Sigma Media Manager, helping you understand how to configure and use it effectively. Throughout this guide, we’ll cover how to compress and optimize your images, convert formats (such as JPG/PNG to AVIF), and reduce file sizes while maintaining quality, so you can improve your website performance and manage your media library more efficiently.
Configuring Settings for Image Optimization
The Image Optimization feature is a Pro feature of the Sigma Media Manager plugin, which means you need to install and activate the Pro version on your WordPress site. Simply follow the documentation to know how to install and activate the Pro plugin to start using this feature.
Let’s Describe the Image Optimization & Resize Settings
Image Optimization
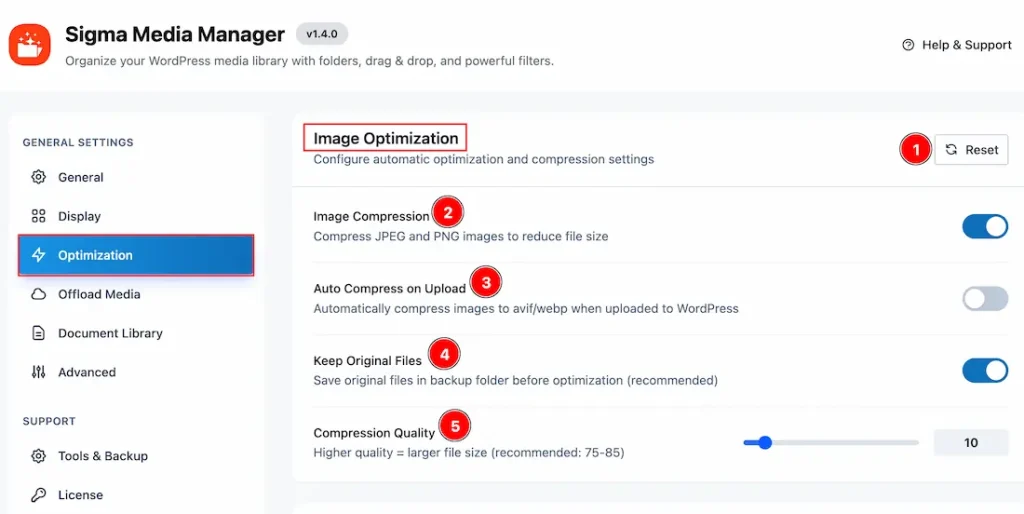
Before using the Image Optimization feature, you need to configure the required settings first. To access the settings, follow these steps:
Go to WP Dashboard > Settings > Sigma Media Manager > Optimization Settings. From here, you can configure all the settings related to Image Optimization.
Let’s take a look at the available options:
1. Reset: You can click on this button to reset the settings that you have already changed to come back to the default settings.
2. Image Compression: Enable the switcher to compress the JPEG and PNG images to reduce file size.
3. Auto Compress on Upload: Enable the switcher to automatically compress images to Avif/WebP when uploaded to WordPress.
4. Keep Original Files: Enable the switcher to save original files in the backup folder before optimization.
5. Compression Quality: You can adjust the compression quality of the images with this option. You can get a good result when you set the percentage to 75-85.
Resize Options
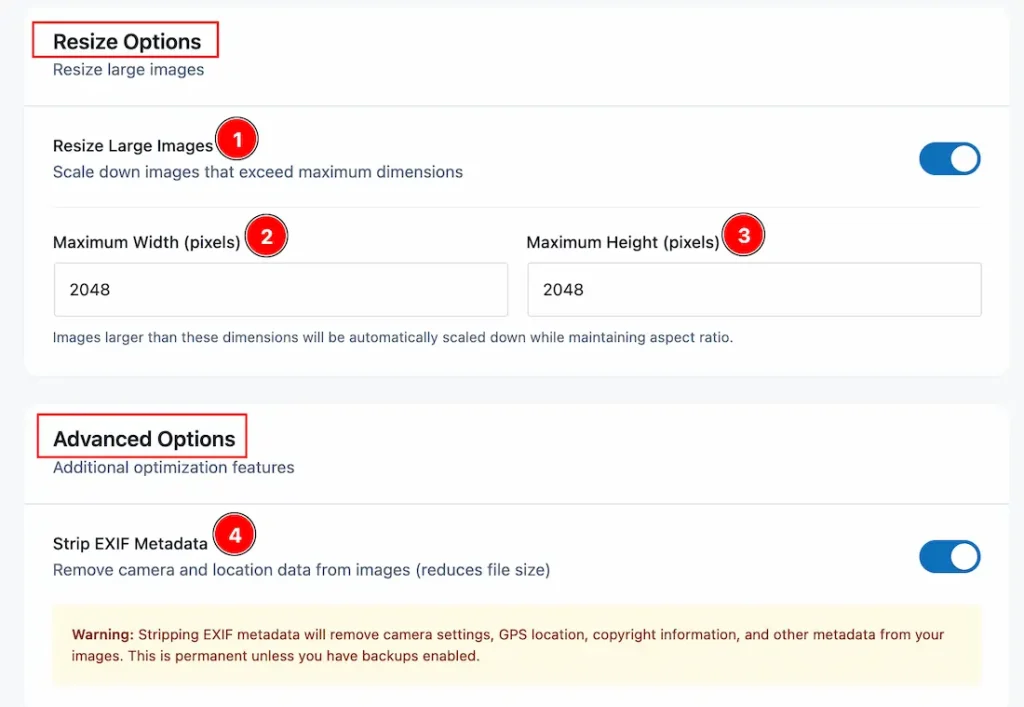
1. Resize Large Images: Enable the switcher to scale down images that exceed maximum dimensions.
2. Maximum Width (pixels): You can adjust the maximum width value of the image, which is the limit and by crossing it the image will automatically scale down while maintaining the aspect ratio.
3. Maximum Height (pixels): You can adjust the maximum height value of images, which is the limit and by crossing it, the image will automatically scale down while maintaining aspect ratio.
4. Strip EXIF Metadata: Enable the switcher to remove camera and location data from image and reduce file size. Please note that it’s a permanent solution, so make sure to keep a backup if needed.
How Image Optimization Works
On Single Image
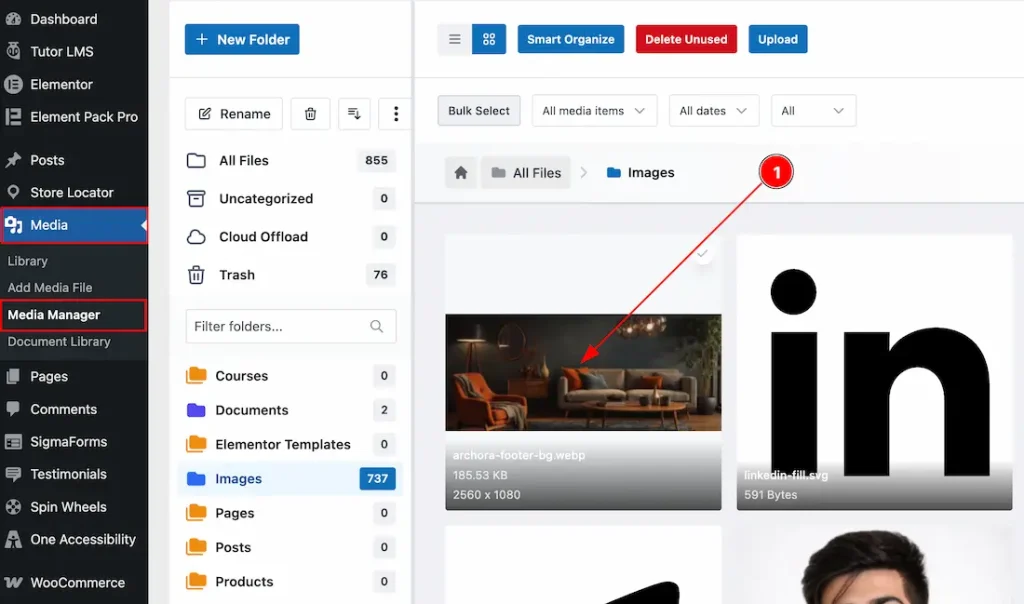
1. After configuring the Image Optimization settings, navigate to WP Dashboard > Media > Media Manager. Here, you will find the Media Manager Dashboard, where all your media files are organized. From there, select the image that you want to be optimized.
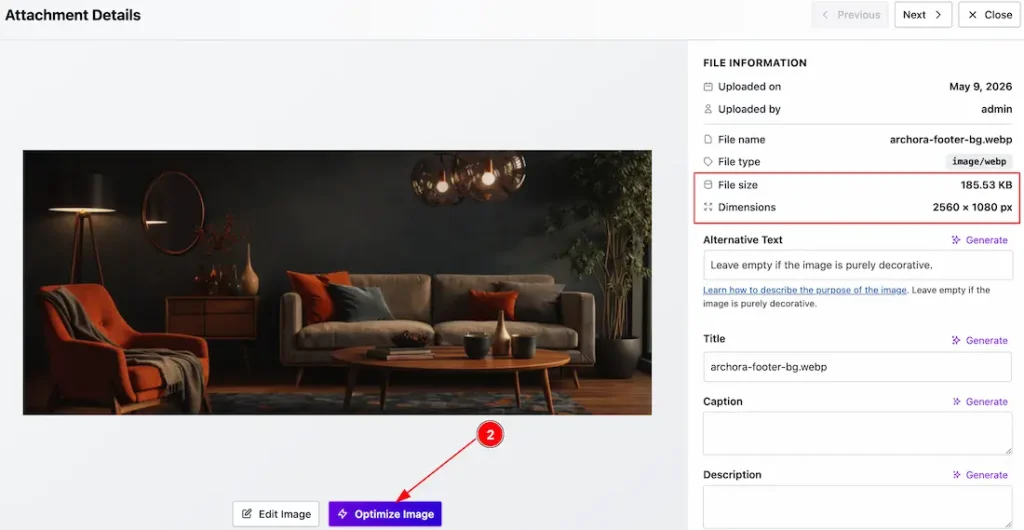
The selected image will open in a lightbox, where you can view the image information, including the file size & dimensions.
2. Now, below the image, you will get to see the Optimize Image option. Click on it to optimize the image.
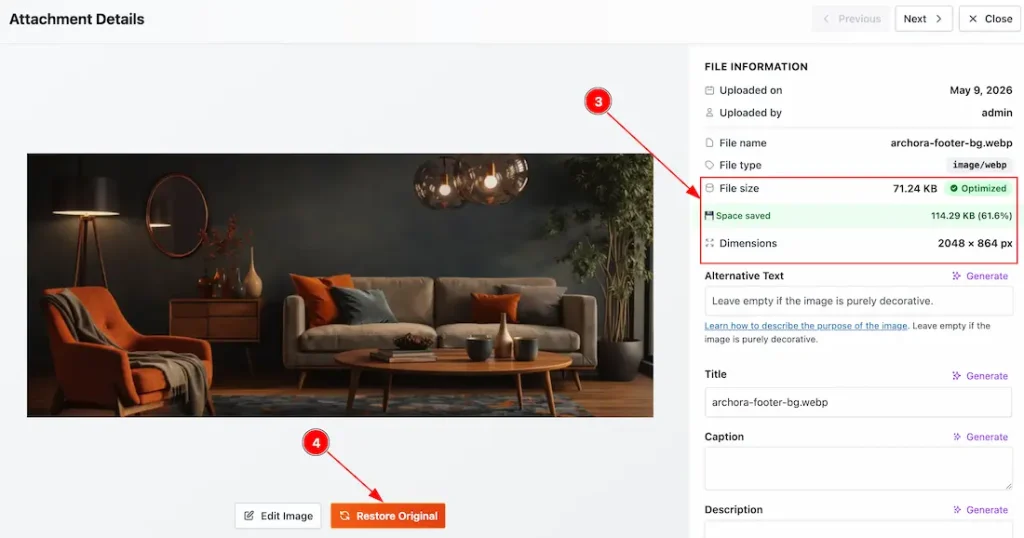
3. In this field, you can see the optimized file size & dimensions of the image.
4. By clicking on this button, you can restore the image to it’s original format that previously was. Please note that you need to enable Keep Original Files in the settings first to get this option.
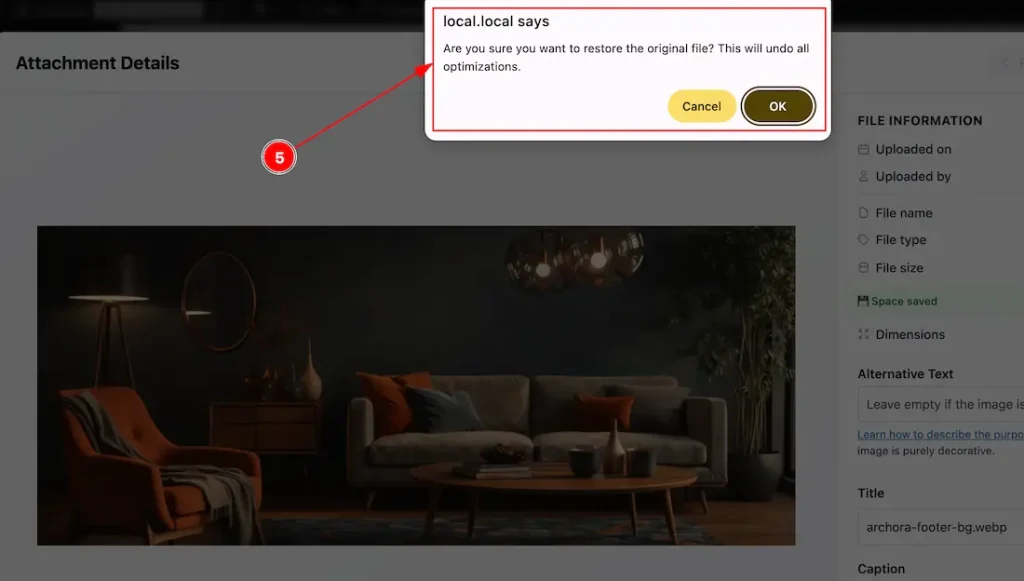
5. After clicking on the Restore Image button, a notice will appear to confirm if you want to restore the image, click ok to continue.
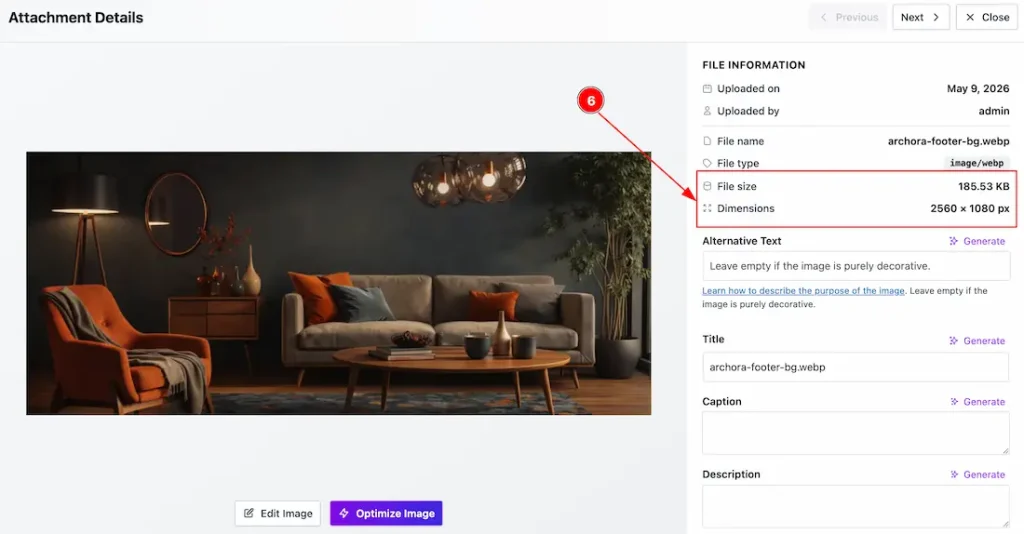
6. After restoring the image, you can now see the file size and dimensions again, which came back to the original status.
On Bulk Images
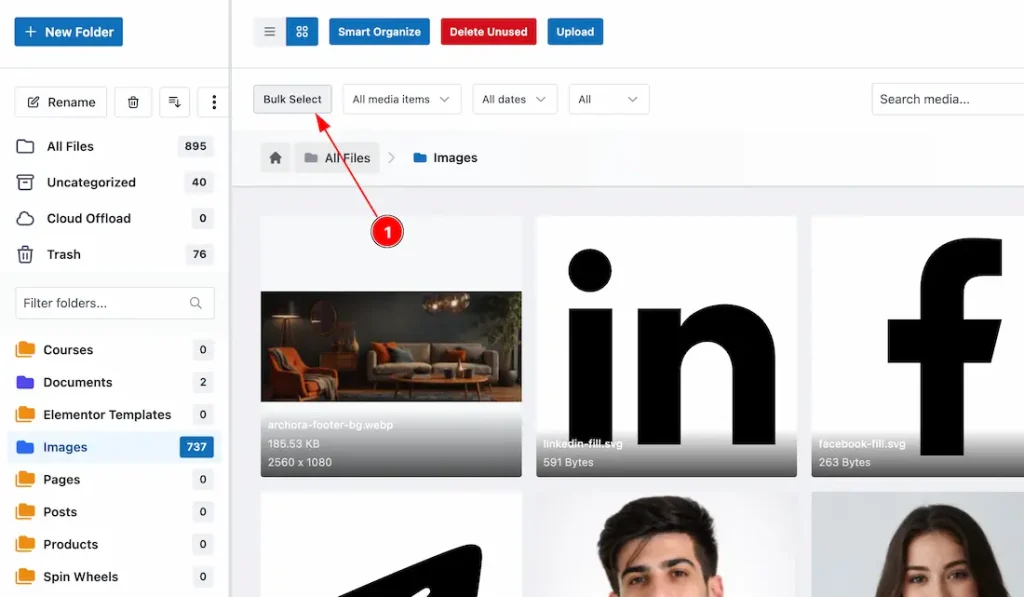
1. After configuring the Image Optimization settings, navigate to WP Dashboard > Media > Media Manager. Here, you will see the Media Manager Dashboard, where all your media files are organized. From there, select the folder containing the media files for which you want to optimize.
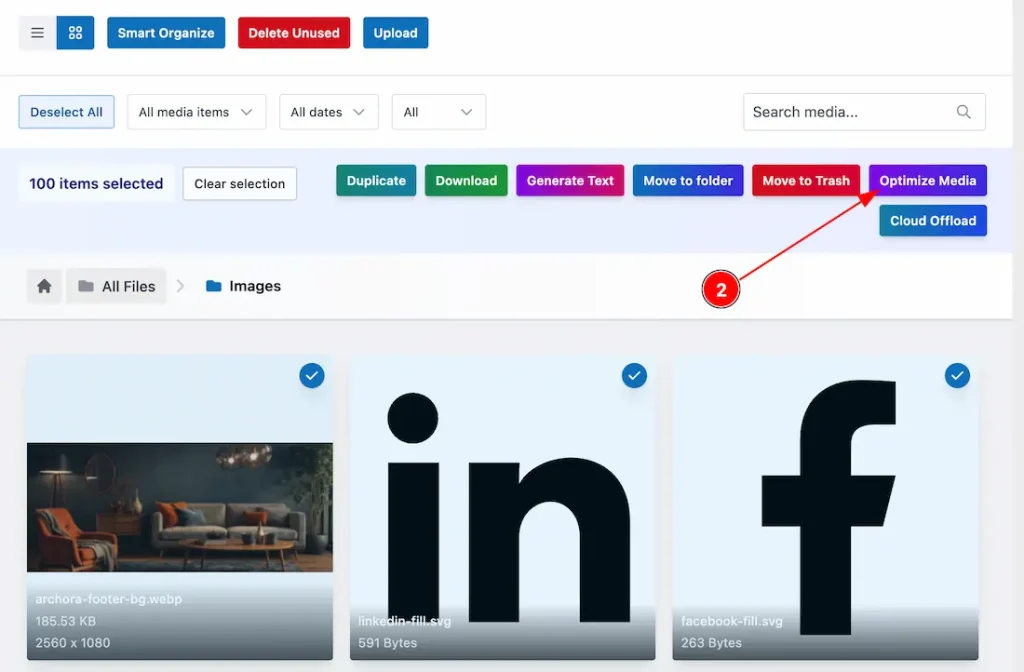
2. Then, click on the “Optimize” button, and a new pop-up will appear.
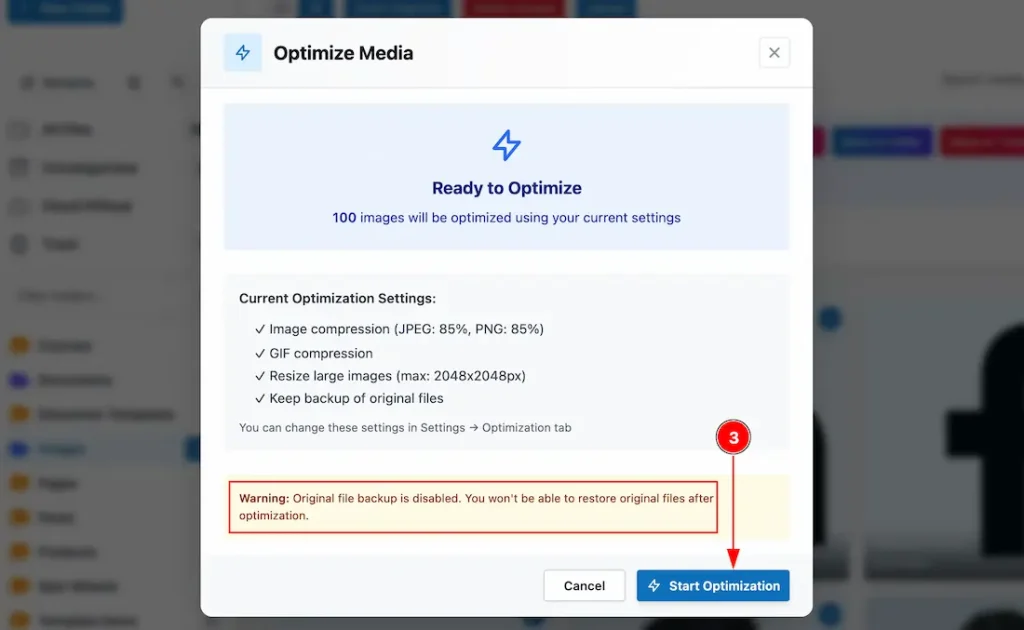
3. Click on the Start Optimization button to begin optimizing the image. Please note that if the Restore Original Files option is not enabled, we strongly recommend turning it on before proceeding. This will allow you to revert to the original version later if needed. If this option remains disabled, you will not be able to restore the image to its original state afterward.
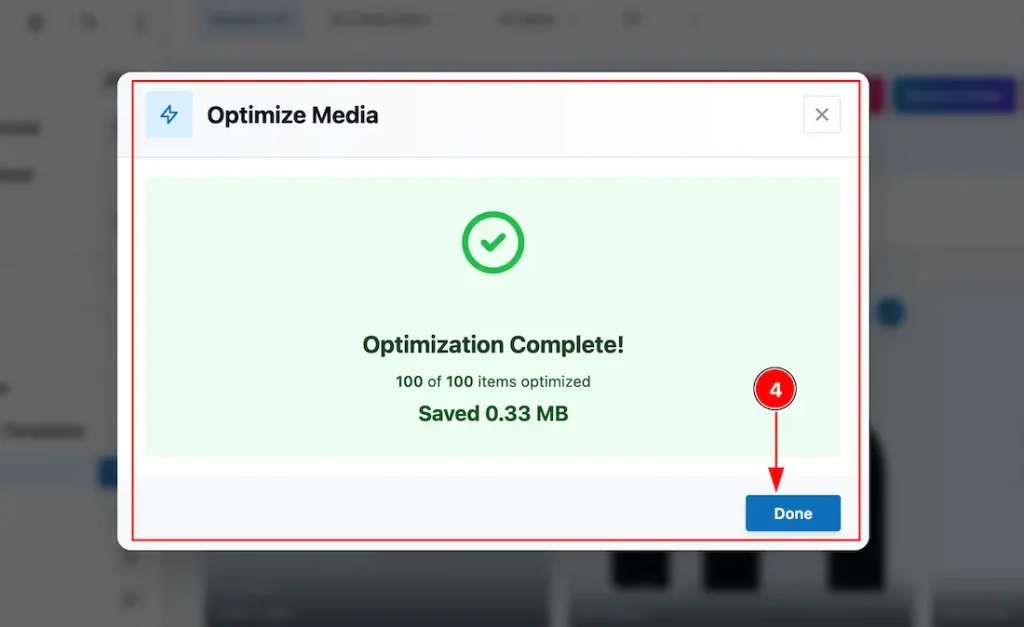
4. After that, the customization will be done, and you will get to see the pop-up again with that information, also mentioning the space that was saved. Click on the Done button to close the pop-up.
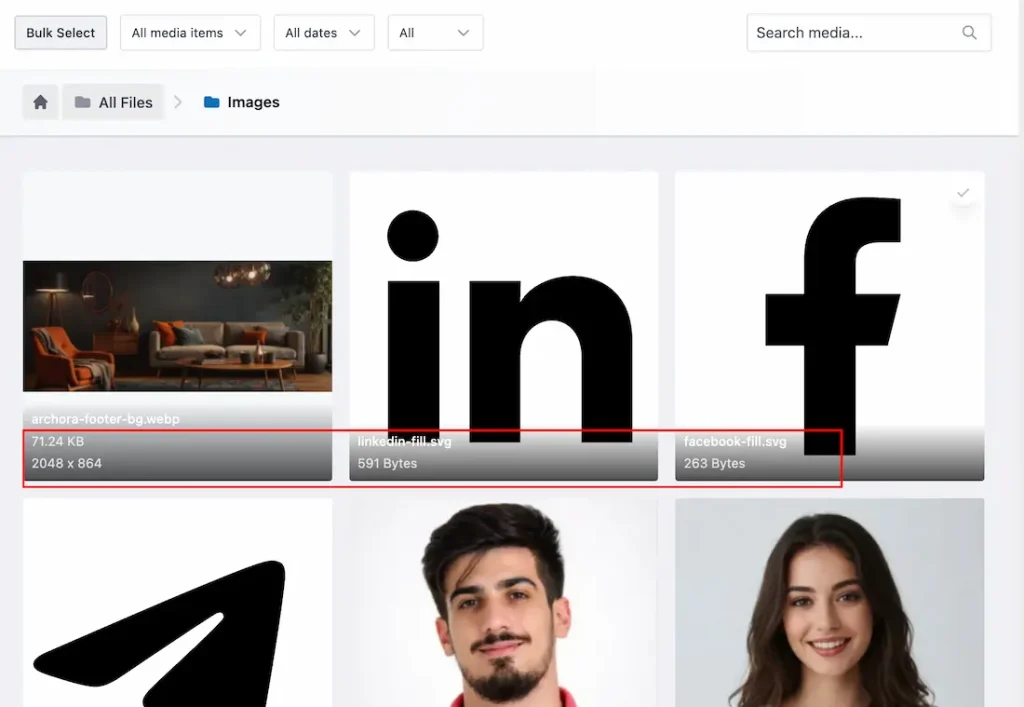
Now, you can see all the images that are optimized. If you have enabled the file size & dimension visual from General settings, then you can see this too.
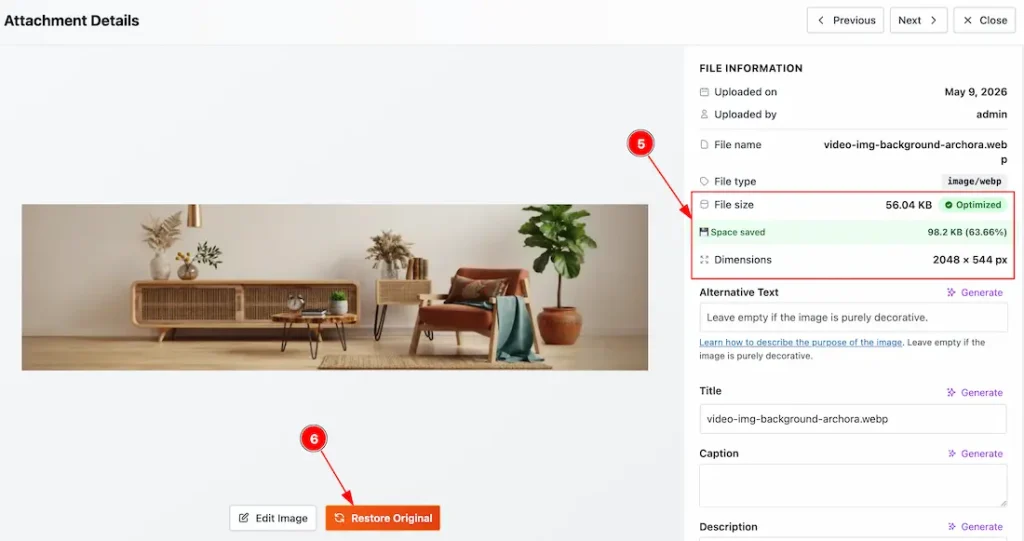
5. Now, randomly click on any image, and you can see the marked field about the image optimization information.
6. You can click on this button to turn the image back to its original format.
Video Assist
The video will come soon. If you want, you can try the Pro plugin features directly from here.
Thanks for staying with us.