

Do you want to take advantage of the Sigma Forms (AI-generated Forms) White Label Branding feature for your WordPress website? This premium feature is included with the Agency package of the plugin, and many users have requested a proper guide on how to activate and use it effectively.
We’re happy to let you know that the White Label Branding feature has now been fully developed and optimized for use. In this documentation, we will walk you through the complete process of enabling and customizing the White Label Branding option in the Sigma Forms (AI-generated Forms) plugin.
What is White Label Branding?
White Label Branding is a feature that allows you to rename and rebrand a product as your own. It helps you hide the original product identity and present it under your own branding to your website visitors. This can help strengthen your brand value while using the product with the permission of the original developer.
Sigma Forms offers the White Label Branding feature with the Agency Package, Developer Package, and Extended License. Using this feature, you can easily change the plugin name, Menu Icons, hide the license, and plugin settings tab from the dashboard.
With the Sigma Forms White Label feature, you can present the plugin as your own product on your website and maintain a consistent brand identity for your clients or audience.
What’s Possible with White Label Branding?
You can do the following things through White Label-
- You can change the Product Name to your own name.
- You can change the Product logos/icons to your own logos and icons.
- You can hide the license tab section from the Sigma Forms plugin dashboard.
- You can hide the White Label and license tab from the plugin tab.
How to activate White Label Branding feature
So, let’s see how to activate the White Label Branding on Sigma Forms (AI-generated Forms) easily, step by step. From here, you can check the documentation on how to download and activate the pro version plugin.
Activate the License key
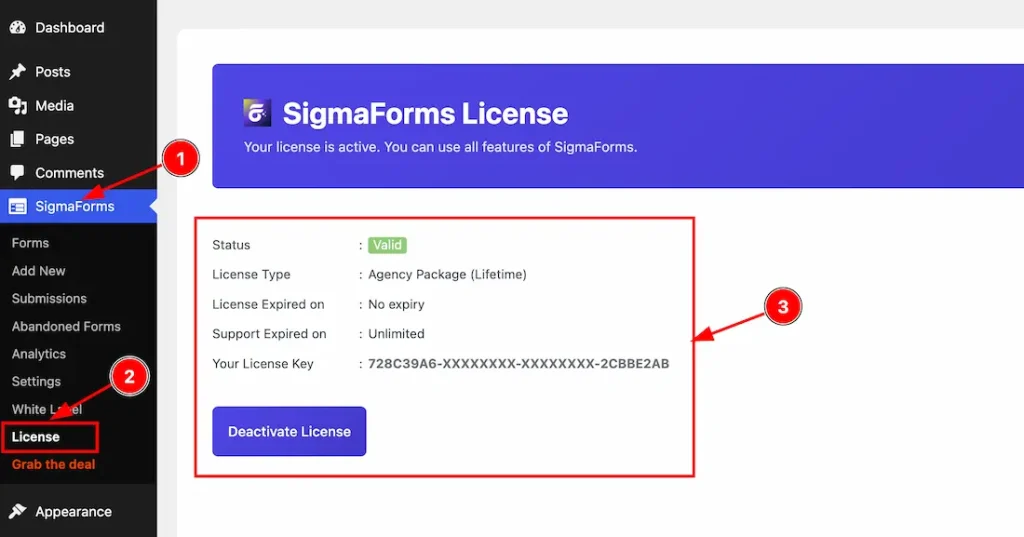
After installing the plugin, just activate the plugin with your license key. For that, just follow the instructions below-
- Go to the WP dashboard > Sigma Forms.
- Click on the license tab option.
- Enter your email and license key and click on the activate button to activate the plugin.
Note: To use the White Label feature, you must have the Agency, Developer, or Extended license.
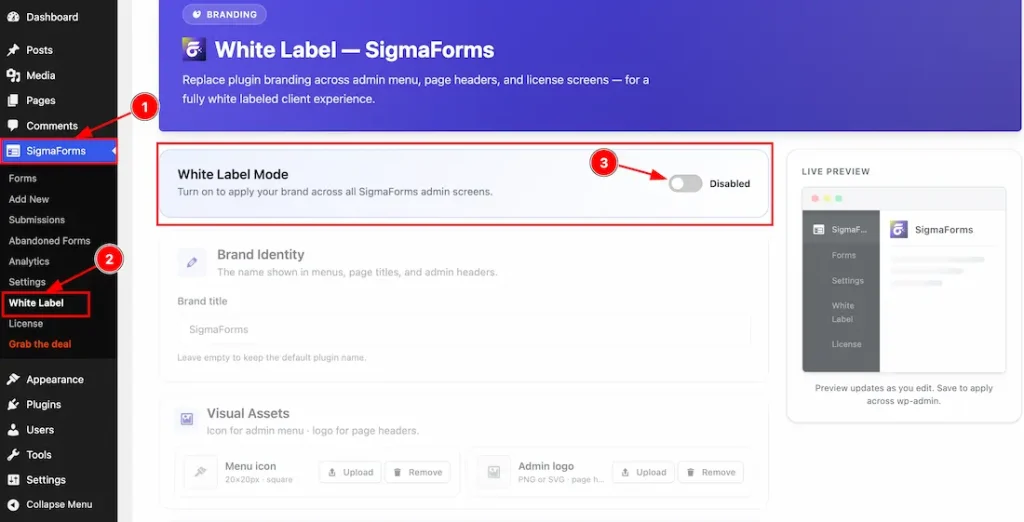
After activating the license key, just follow the steps below-
- Go to WP dashboard > Sigma Forms.
- Click on the White Label tab.
- Enable the White Label switcher button and click on the Save button to save the White Label Settings.
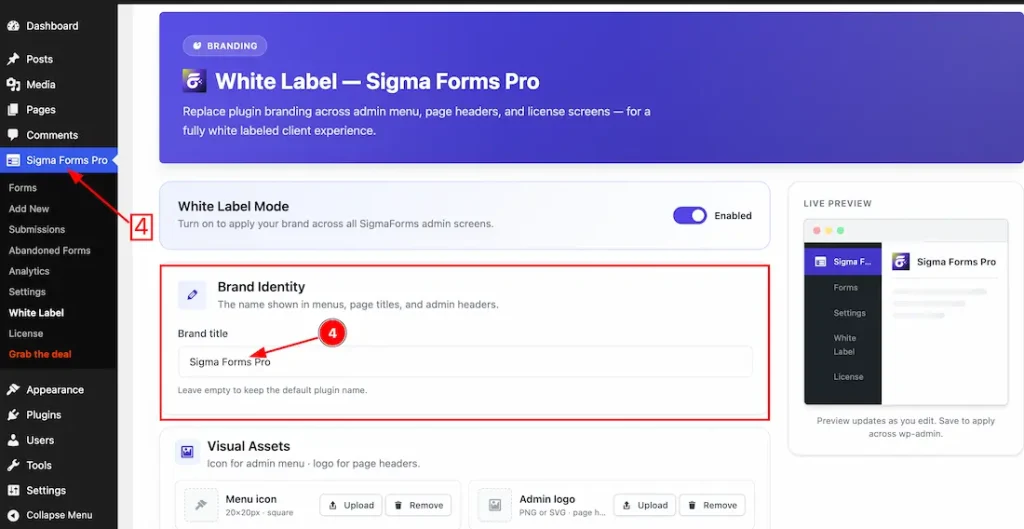
After enabling the White Label option, you will gain access to the following settings:
- Brand Identity: You can change the Sigma Forms plugin name to your preferred brand name.
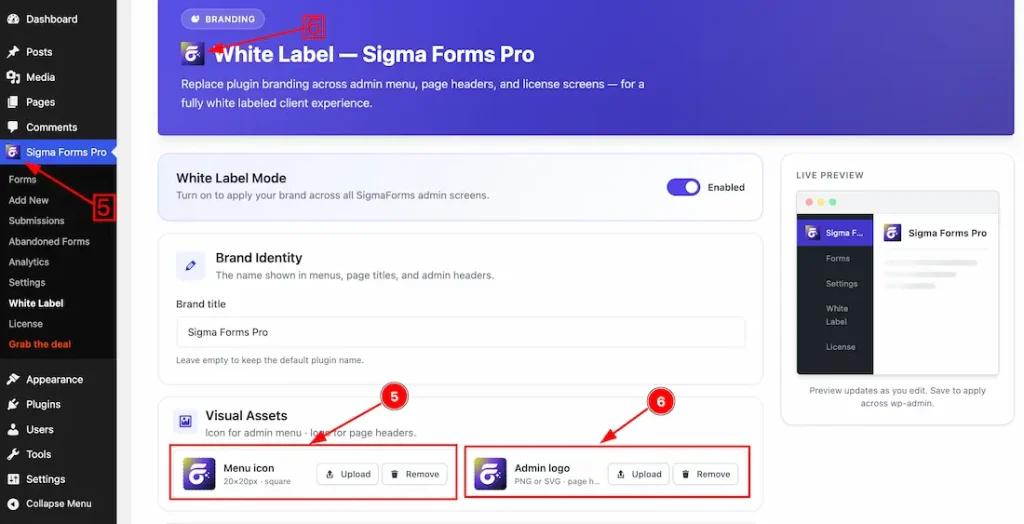
5. Menu Icon: You can replace the default Sigma Forms icon with your preferred icon.
6. Admin Logo: You can change the Sigma Forms Admin dashboard logo to your preferred logo or icon.
Before Enabling the Hide License Menu Tab
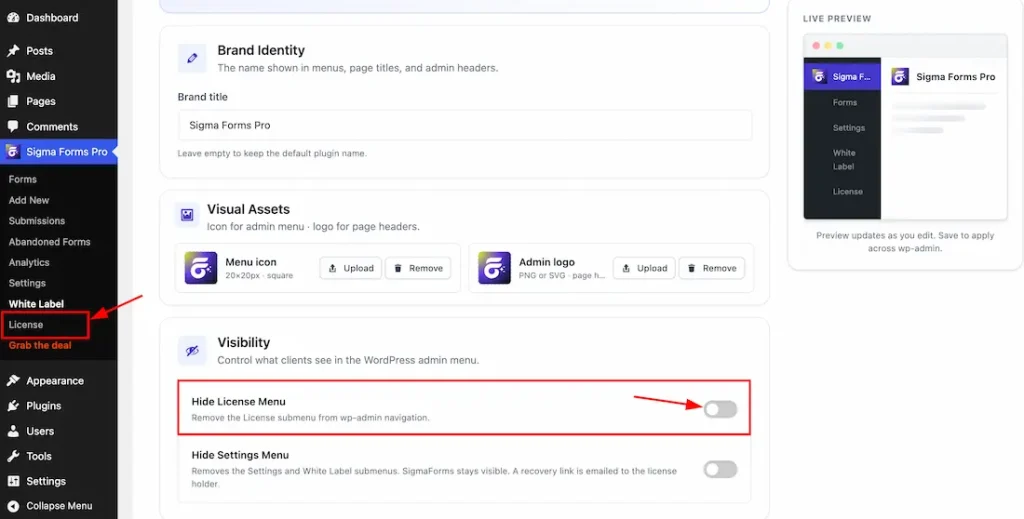
Hide License Tab: If you enable the hide license tab switcher button, then the license tab will disappear from the plugin dashboard.
After Enabling the Hide License Tab
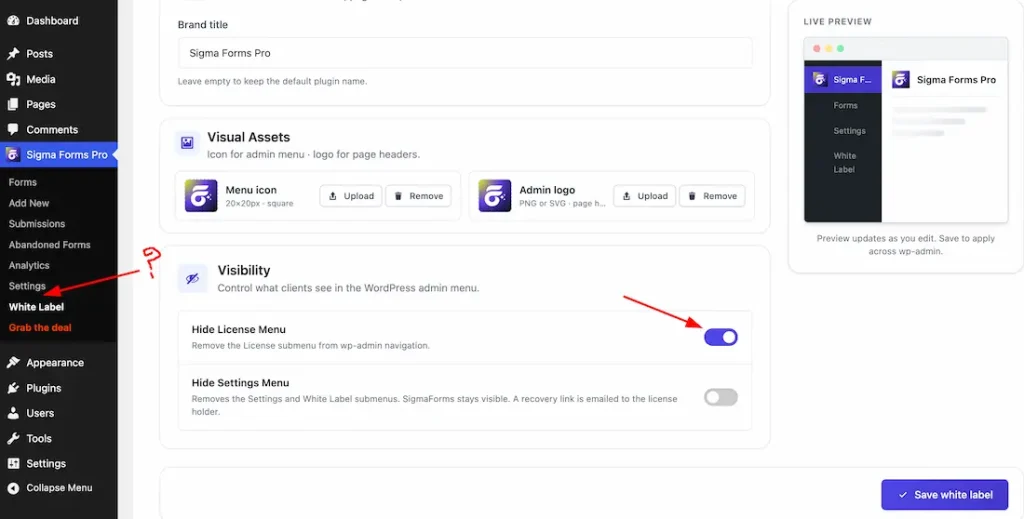
After enabling the hide license menu switcher button, the license tab disappears from the dashboard.
Hide Sigma Forms Settings Menu from the WP Dashboard
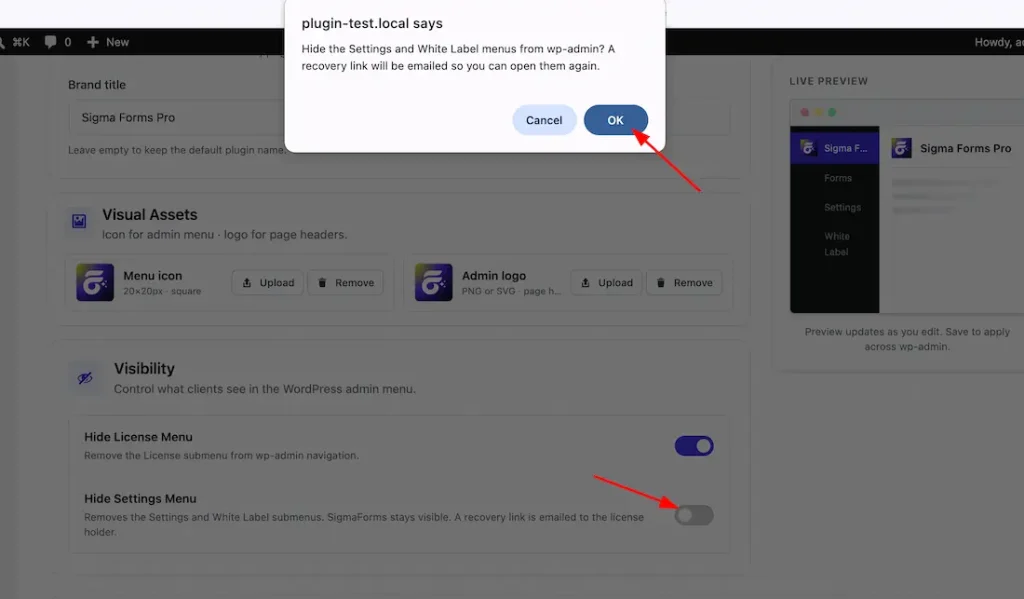
After clicking on the Hide Settings Menu switcher, a pop-up will appear, similar to the screenshot above. If you want to hide the Sigma Forms license tab and White Label option from the Sigma Forms menu, simply click on the Hide Admin Menu button.
Note: Enabling it will send an email with a signed recovery link to your license address when you save. Configure site mail (for example, WP Mail SMTP or your host’s SMTP) so delivery works before you enable this.
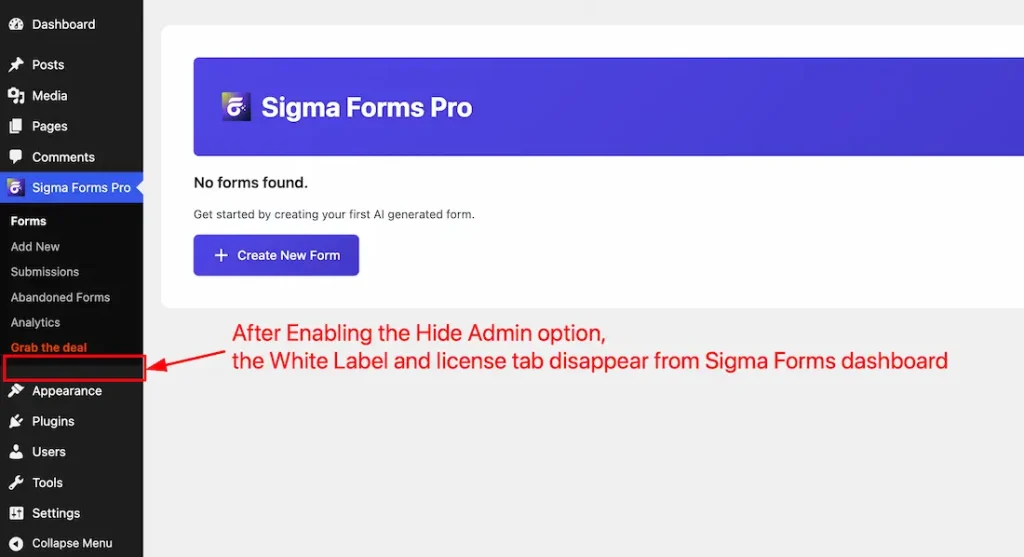
After confirmation and clicking on the save button, the Sigma Forms license tab and White Label option disappear from the Sigma Forms menu.
Video Assist
The video will come soon. Thanks for staying with us.