

In this documentation, we will guide you through the Shop Page Template feature of Ultimate Store Kit Pro. You’ll learn how to create and customize a fully personalized WooCommerce shop page using Elementor, allowing you to design an attractive, responsive, and user-friendly storefront. We’ll cover everything from selecting and applying a shop page template to customizing its layout, styling, product display, and other essential settings, so you can create a professional shopping experience without writing a single line of code.
Things That Must Be Done
1. You must install the WooCommerce Plugin and have products added.
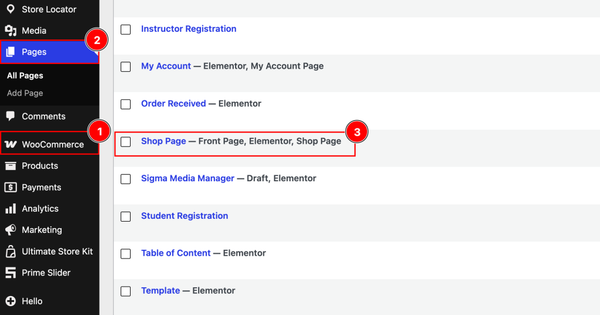
2. After that, go to the Pages Tab.
3. After you have installed the WooCommerce plugin, it will automatically generate some WooCommerce pages. Among those, the Shop Page will be one. If it’s not generated, then create the page yourself.
Creating the Shop Page Template
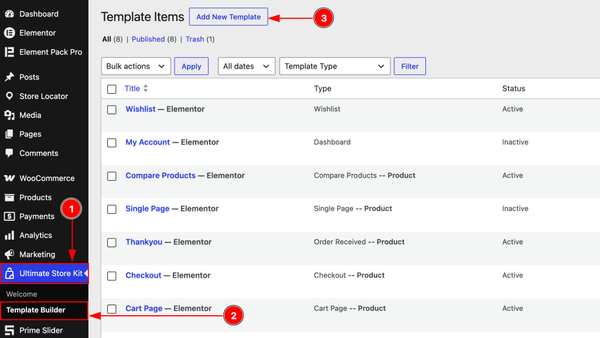
1. Go to the WP Dashboard and then click on the Ultimate Store Kit.
2. Below, inside the Ultimate Store Kit dashboard, you will find the Template Builder section. Now click on it.
3. After that, click on the Add New Template to create a new template.
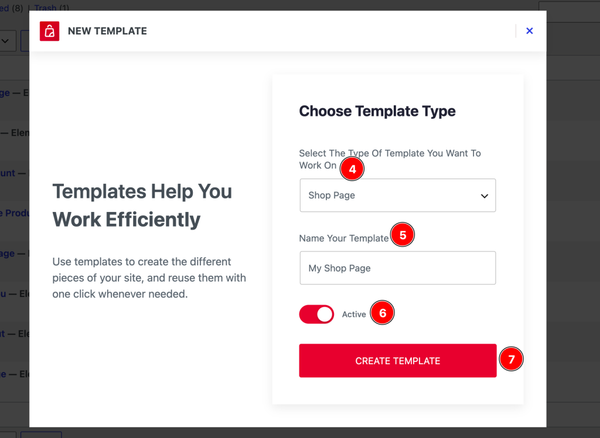
4. Choose Template Type: You can select the template type with this option. You need to find the template type named Wishlist products and select that.
5. Name Your Templates: In this field, you have to name the template.
6. Switcher: Enable the switcher to make the template active with this option.
7. Update Template: Click on this Product to save the settings that you have changed above.Product
Inserting the widget into the Shop Page Template
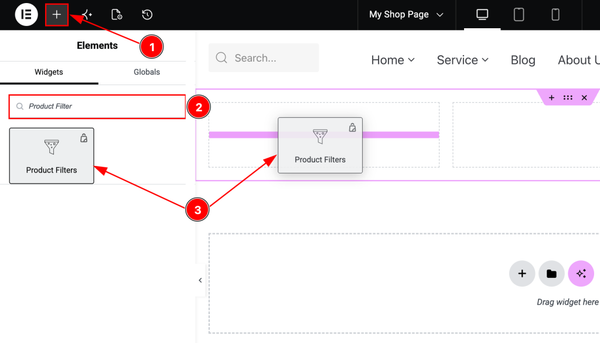
After clicking on the update template Products, the settings will change, and it will redirect to the Elementor editor page, where you can customize the template. Let’s see what we have to do here –
1. Hit the “+” (Add Element) icon Products.
2. Search the Product Filters widget.
3. Drag the widget and drop it on the editor page, and publish the page.
Now, let’s insert a widget that will showcase the products –
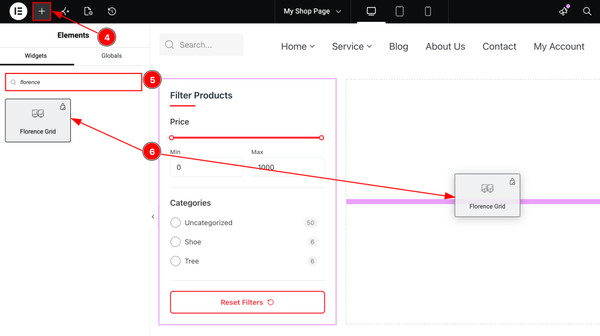
4. Hit the “+” (Add Element) icon Products.
5. Search the Florence Grid widget.
6. Drag the widget and drop it on the editor page and publish the page.
Note: Here we are creating a demo design and for this we are using the filter widget & the Florence grid widget. You can use anything and create a design of your shop page as you want.
Customizing the Widgets (Inserted on the Shop Page Template)
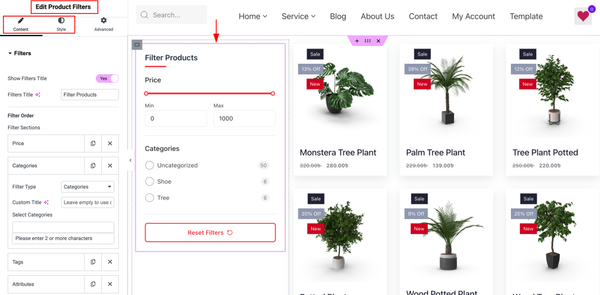
As we have inserted two widgets, we have to customize the settings as per our requirements for both widgets. Here we have selected the Product Filter widget first, and after selecting the widget, you can configure both the content tab & style tab settings as per your needs.
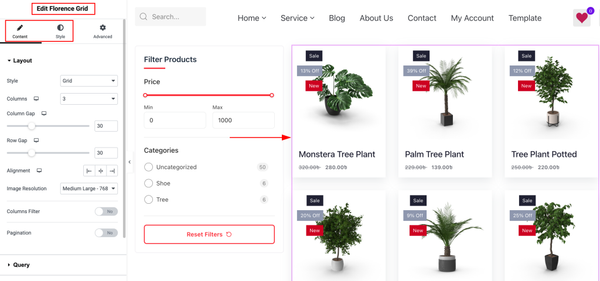
Now, move to the Florence Grid widget. Select the widget and then customize both the Content & Style Tab of the widget as per your requirement.
Final Preview of the Shop page
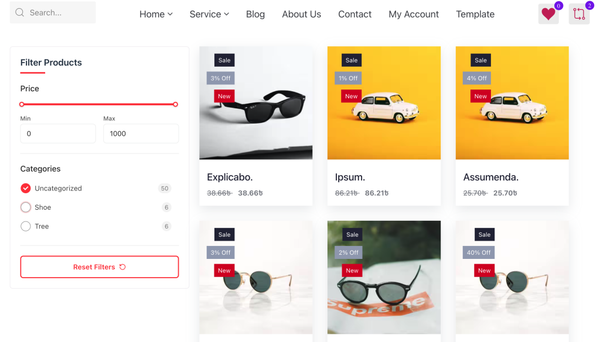
All done! You have successfully customized the Shop Page template on your website.
Video Assist
The video will come soon. Please visit the demo page for examples.
Thanks for being with us.