Do you want to upgrade the layout of your WordPress blog? As experts, we know that your blog’s design is not just about how it looks; it’s the foundation of a great user experience.
A well-crafted layout not only catches the eye but also welcomes your readers, helps them feel comfortable, and encourages them to stay and explore.
To change blog page layout in WordPress, you can either use the theme appearance on your site or any page builder plugin. While the theme appearance gives you basic blog editing options, page builder like Element Pack offers advanced layout changing features.
In this guide, I’ll walk you through the right step-by-step methods for how to change blog page layout in WordPress. We’ll use themes and helpful plugins in our approach. Plus, I’ll share some of my personal, proven ideas for getting your blog design right so it really engages your visitors.
Let’s get started.
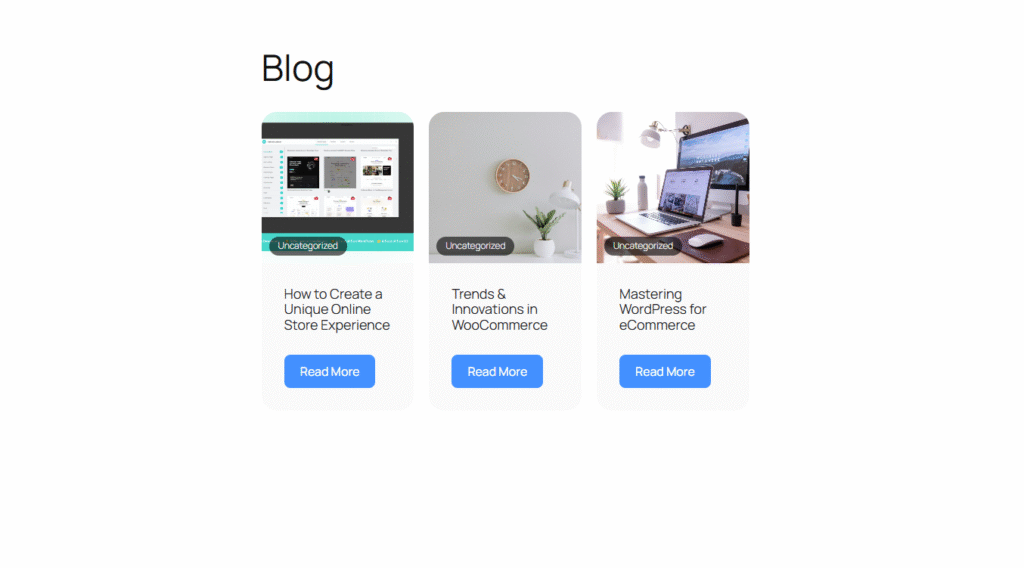
3 Methods to Change Blog page Layout in WordPress
Your blog’s layout is very structured. It’s how your posts, images, and widgets are arranged to guide readers and make your site easy to use. A good layout helps visitors find what they need and looks great, making them want to stay longer.
To help you choose the ideal approach for your needs, I’ve put together three reliable methods for adjusting your blog page layout in WordPress.
- Method 1: How to Change Blog Layout Using Page Builders
- Method 2: How to Change Blog Layout Using a Theme
- Method 3: How to Change Blog Layout Using Block Editor (Gutenberg)
Method 1: How to Change Blog Layout Using Page Builders
I’ve personally revamped countless WordPress blog page layouts using various page builders. It’s undeniably the quickest way to create a custom look without touching a single line of code.
While there are many page builders out there, I wholeheartedly recommend Element Pack. Because Element Pack is powered by Elementor, and we all know Elementor is the easiest and most popular page builder for WordPress.
However, you can’t create advanced and premium blog layouts using Elementor alone, which is why I will use the Element Pack. And it truly offers a completely code-free and beginner-friendly experience. So let’s get started.
Step 1: Install Element Pack
Since we’re using Elementor Pack’s drag-and-drop builder as an easy way to update the blog layout. So,
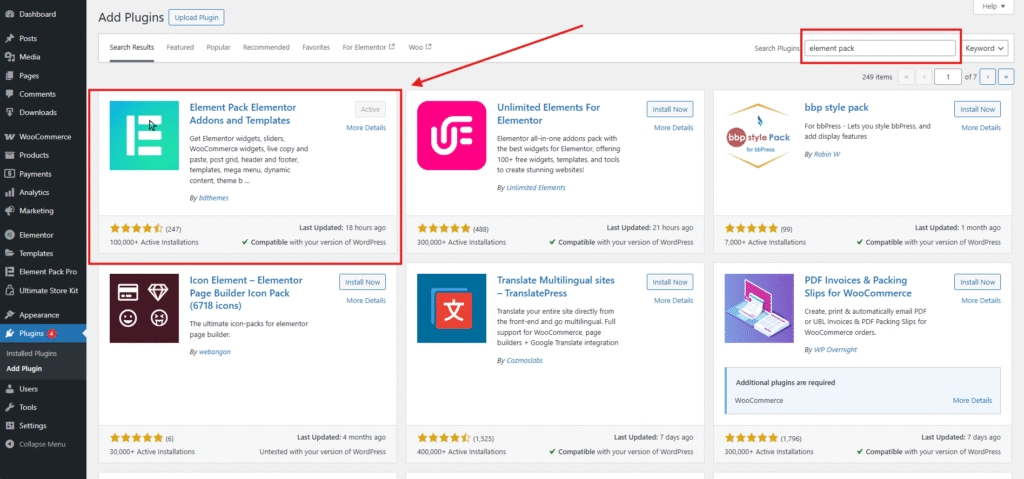
- First of all, you’ll need to download the Element Pack plugin and install it on your WordPress site.
Note: Since Elementor Pack is an Elementor-based page builder, you must install Elementor first.
- After activating Element Pack.
Step 2: Setting up Element Pack
- Go to Element Pack >> Core Widgets. Now, click on the search bar and type Post, then activate the widgets you need to build for blog page layout.
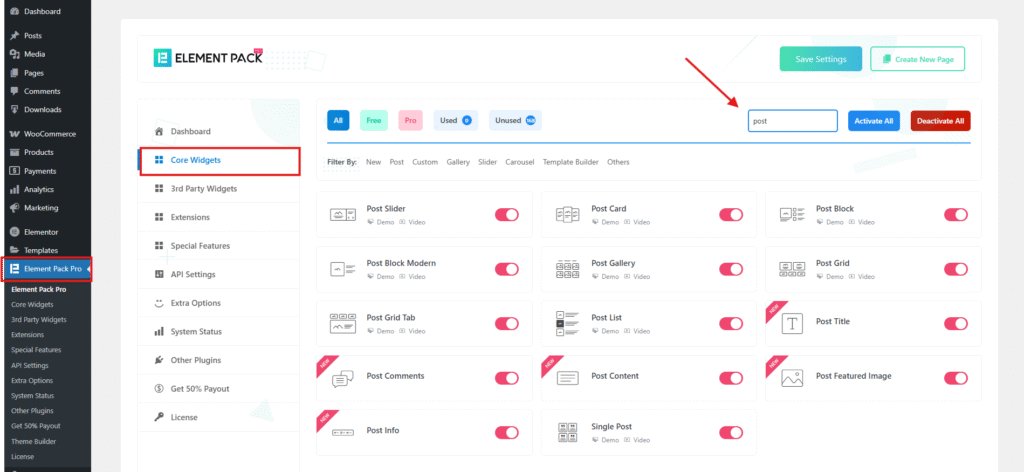
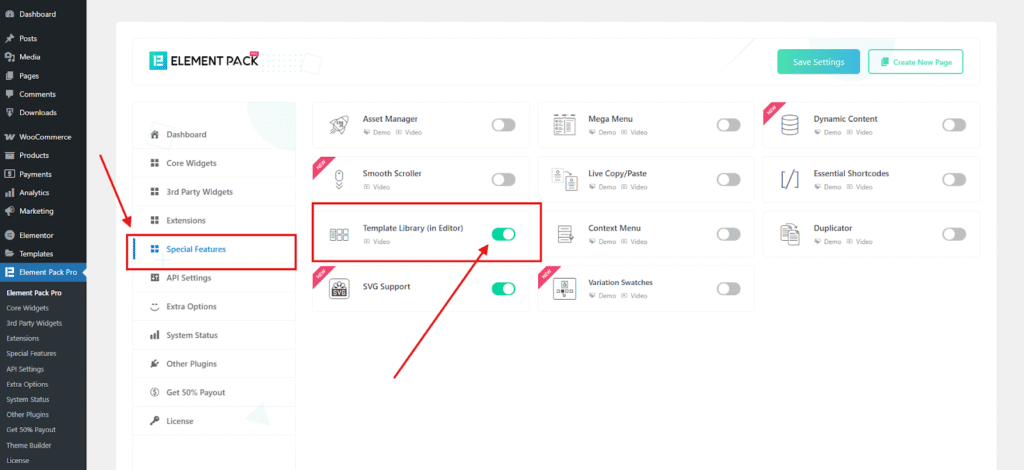
- Then go to the bottom and click on the Special Features option. Active Template Library (in Editor) module and click the Save Settings button.
Step 3: Create blog layout page template
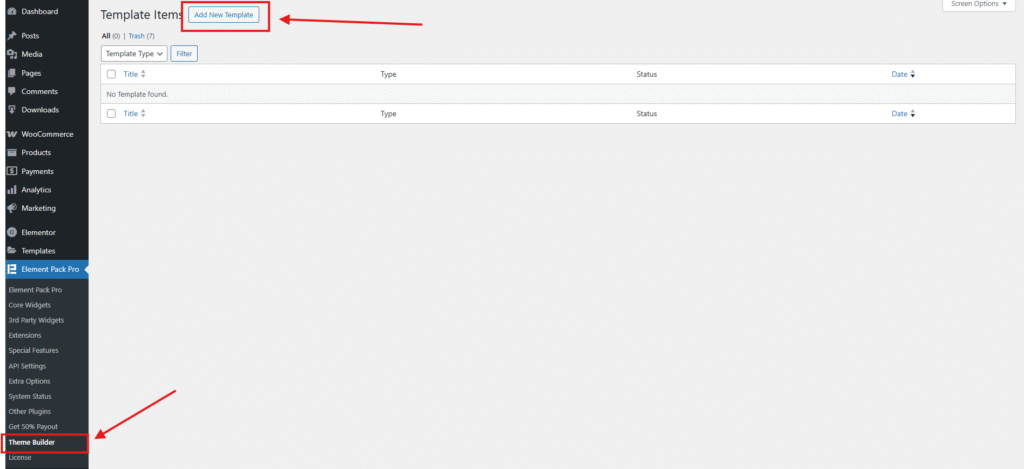
- To do this, navigate to Element Pack >> Theme Builder from your WordPress dashboard and click the Add New Template button.
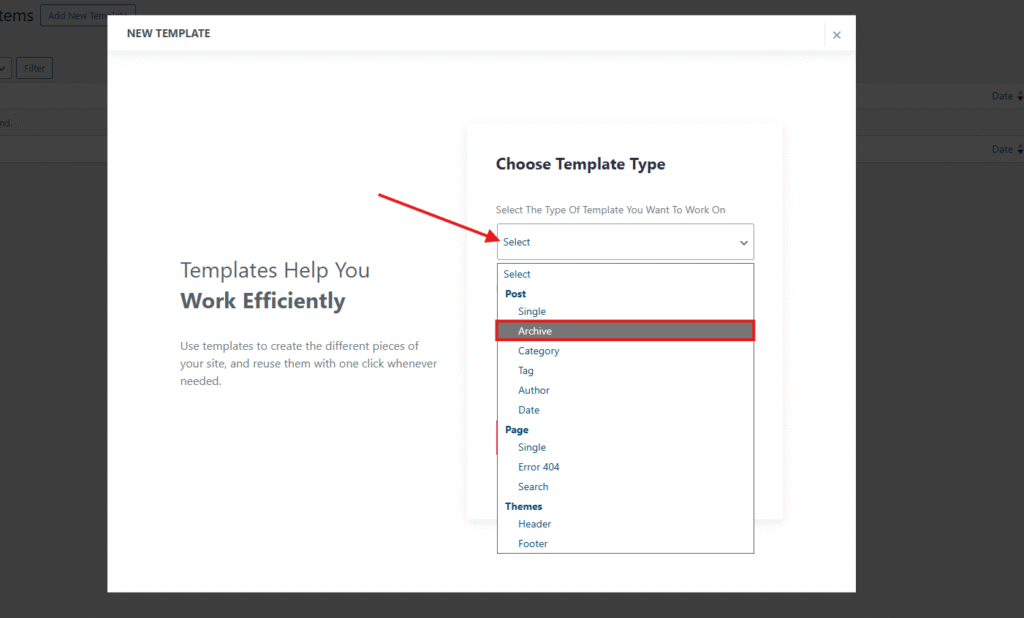
- Choose template type, Post >> Archive.
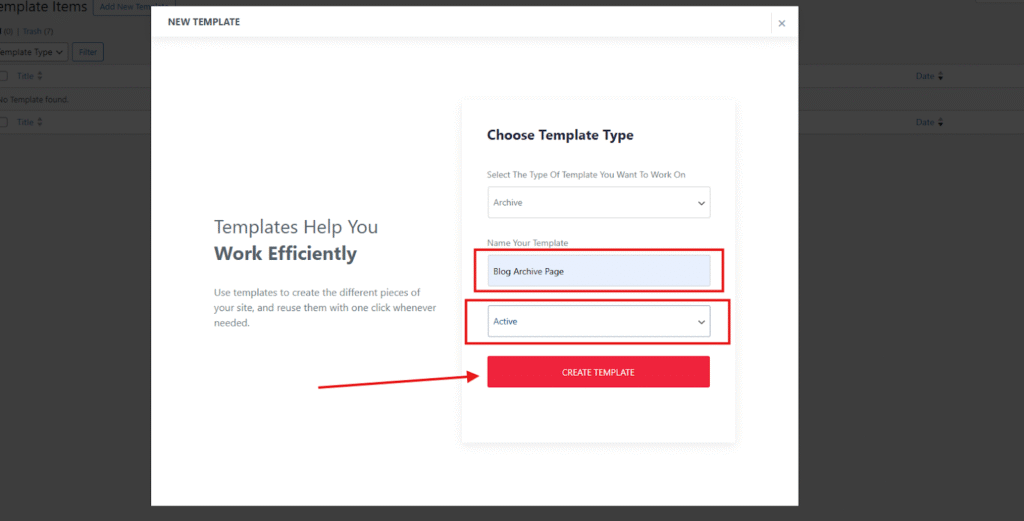
- Enter Template Name and select Active status.
- Enter the Create Template button
Step 3: Design blog layout page template
- The template will now open with Elementor.
- Now, click on Elemnt Pack icon to choose a template
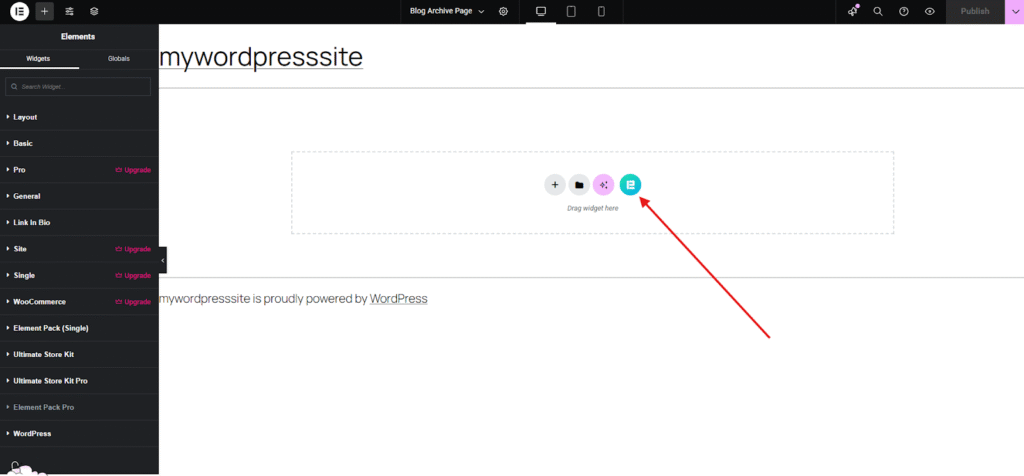
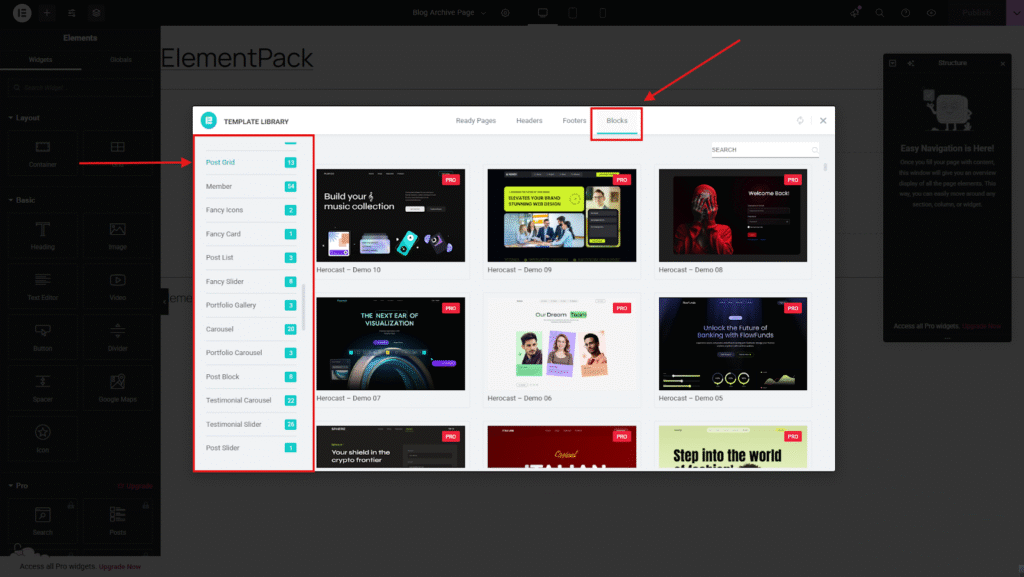
- Go to Block, and choose a blog layout block
- To find the blog layout block, just scroll the left side bar. You will show many post grids and post layouts here.
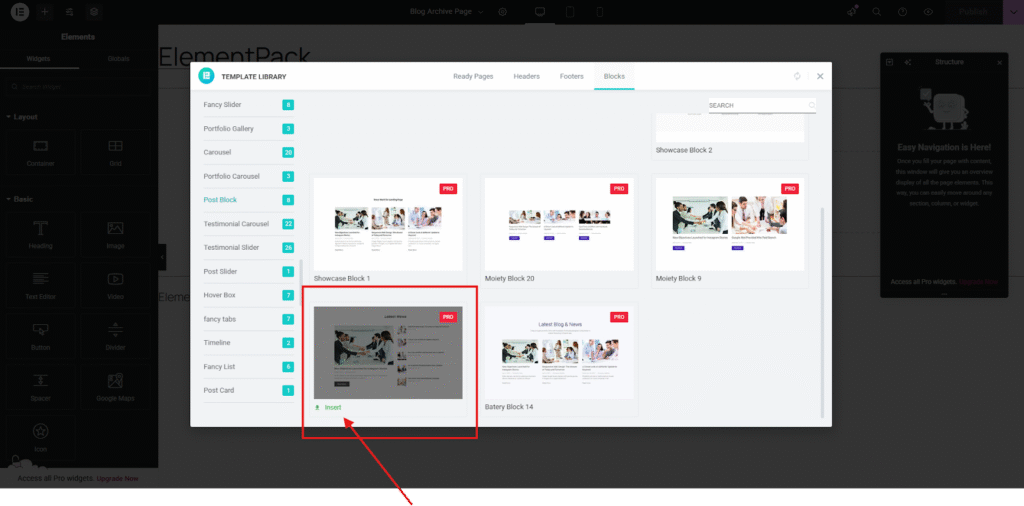
- Here, I am choosing a post block
- Click on Insert, or you can open it. On the right side, you will see a live copy and paste button
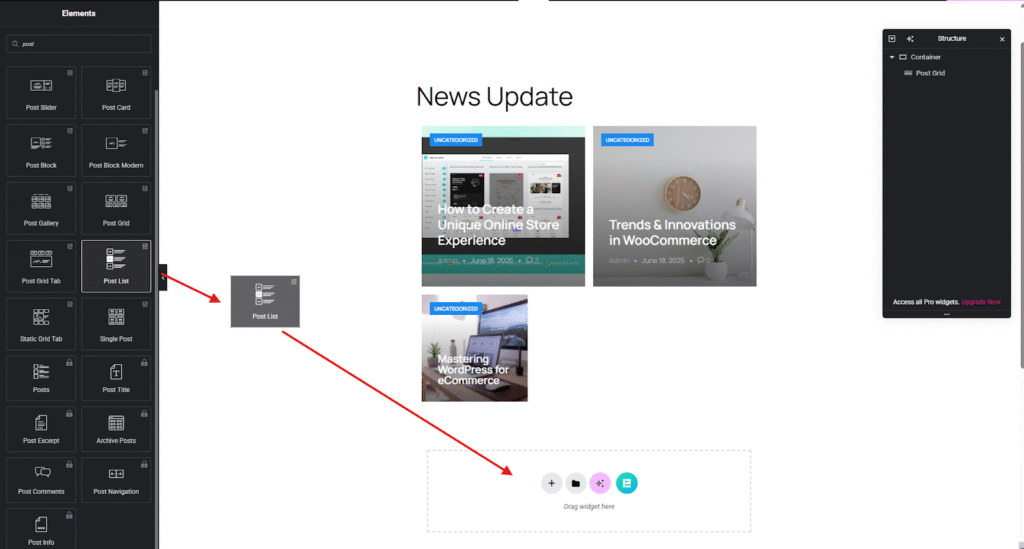
- Now, after inserting the post grid, the blogs are displayed here.
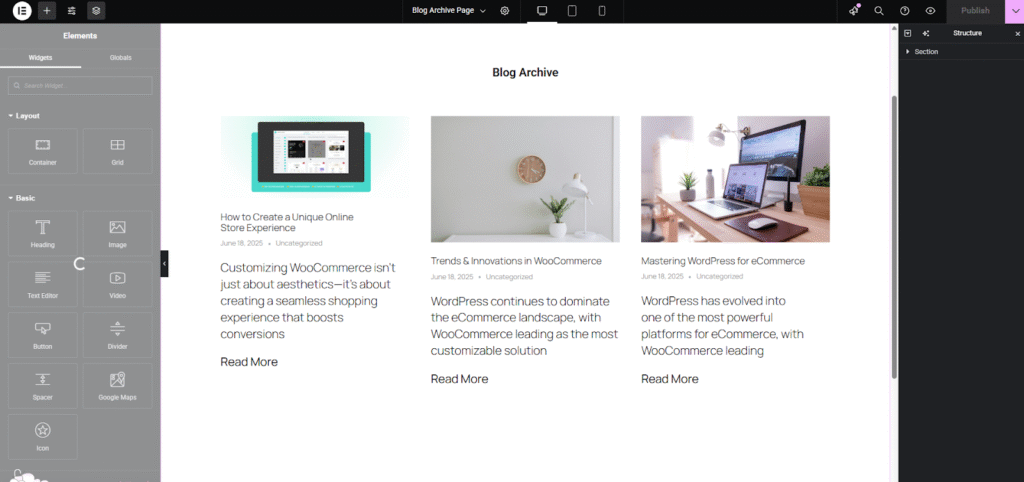
- I clicked the Publish button and saved it.
- You can also create a post grid page using the Elementor widget if you want.
- Just search for Element “Post”; you will get all widgets about posts.
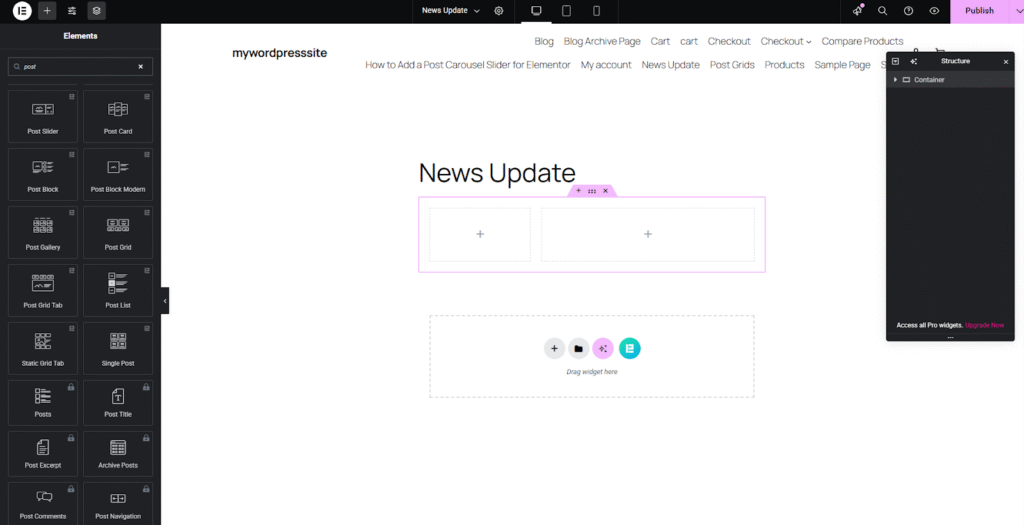
- Drag and drop your essential post widget in the container.
Method 2: How to Change Blog Layout Using a Theme
I understand that page builders aren’t the perfect fit for everyone. That’s why I’ll walk you through a few other ways to change your WordPress blog layout below.
Now, I’ll show you exactly how to change your blog layout by installing a new theme and customising it to match your style, no coding required.
Step 1: Choose a New Theme
- Browse the WordPress theme directory or visit reputable theme developers.
- Pick a theme that fits the style and layout you’re looking for.
Step 2: Install the Theme
- Go to your WordPress dashboard.
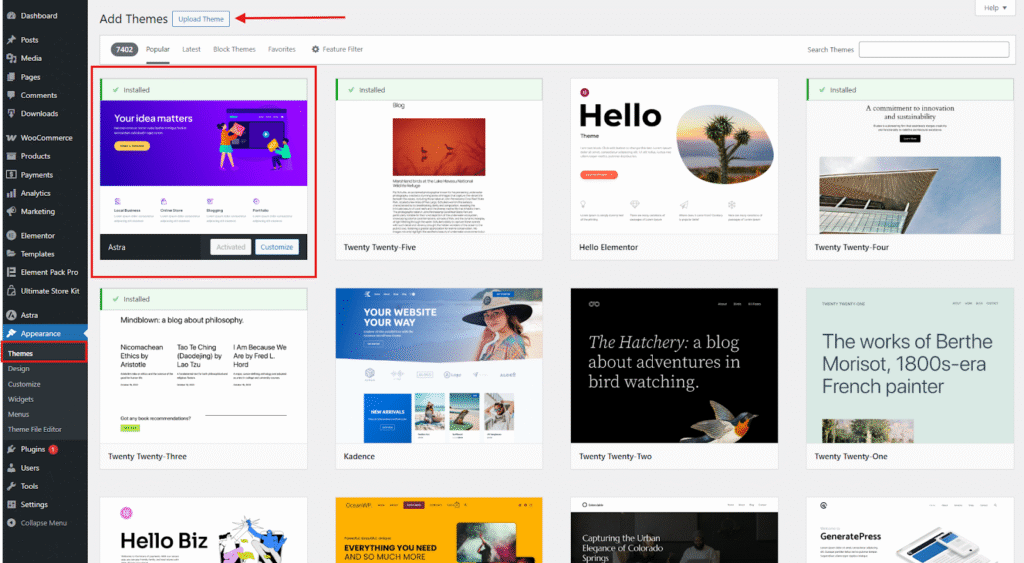
- Navigate to Appearance> Themes and click Add New.
- To use a downloaded theme, click Upload Theme, choose the .zip file, and hit Install Now.
- Once installed, click Activate to apply the theme.
Step 3: Customise the Blog Layout (using Astra as an example)
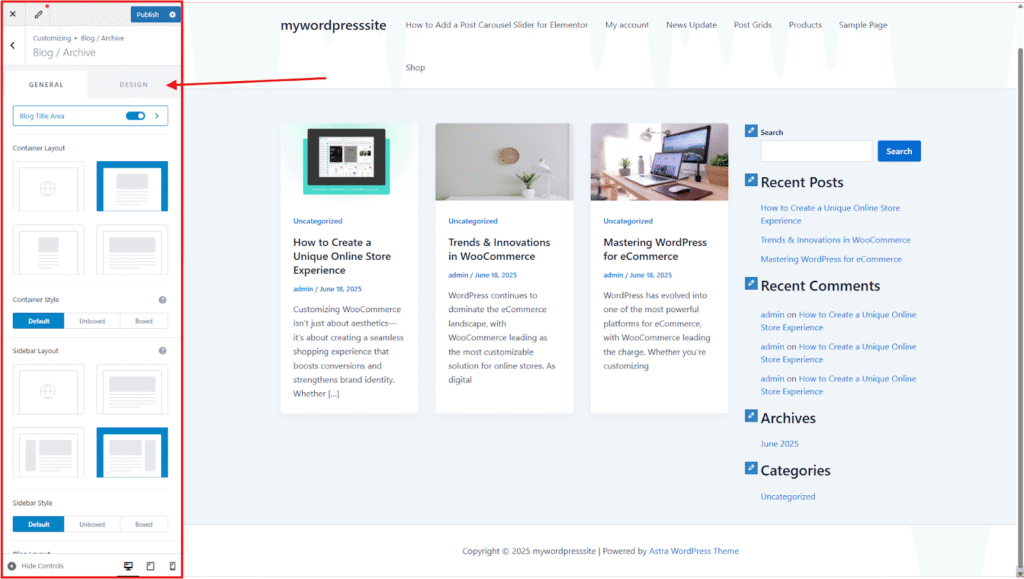
- From the dashboard, go to Appearance> Customize to open the theme customizer.
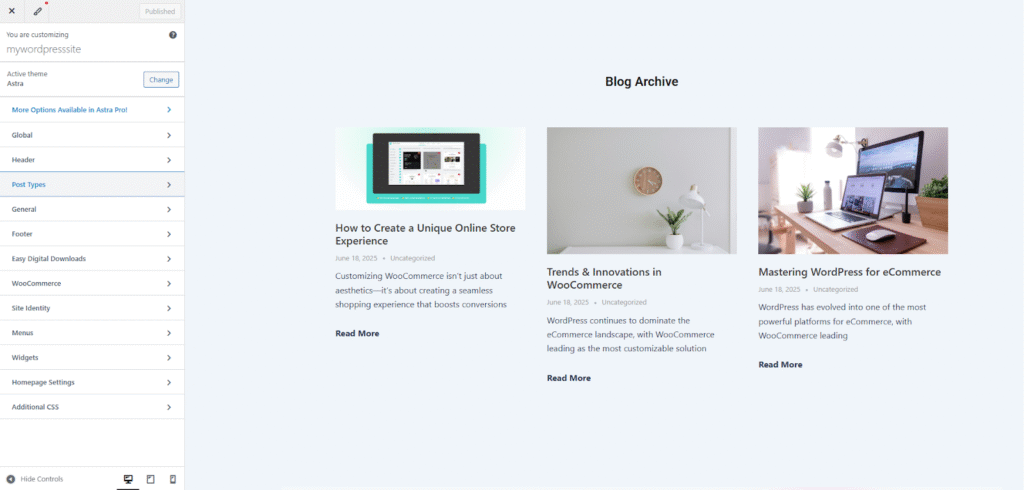
- Click on the Post Type section, then select the Blog/Archive tab.
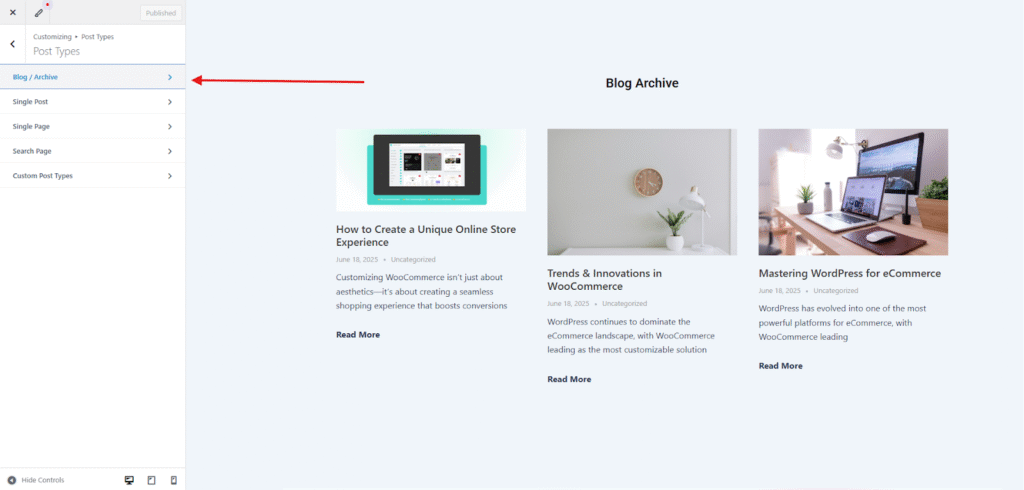
- Customise the container width, sidebar layout, and other elements as needed.
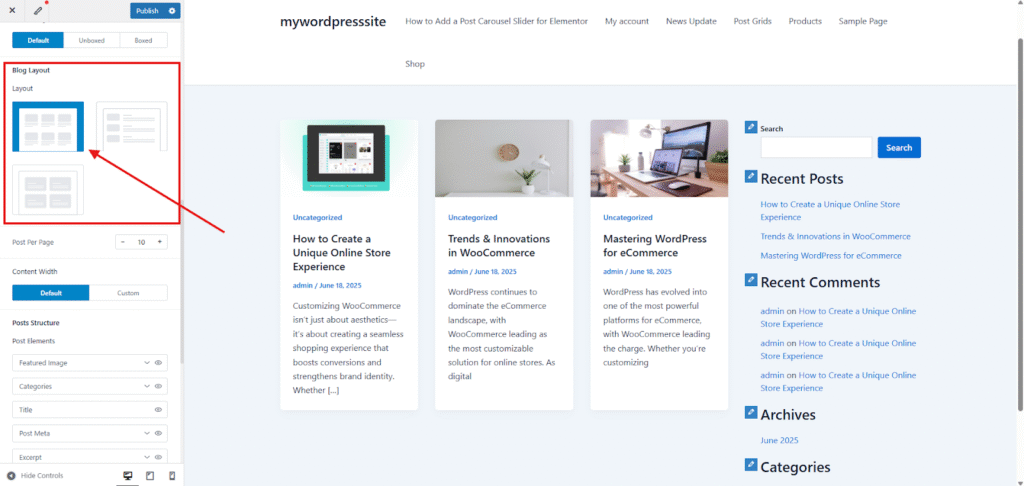
Step 4: Choose a Blog Layout Style
- Scroll down to find layout options:
- Classic
- Grid
- List
- Cover
- Select the layout that best suits your blog.
Step 5: Save and Preview
- Click Publish to save your changes.
- Visit your site to see your refreshed blog layout in action.

Method 3: How to Change Blog Layout Using Block Editor (Gutenberg)
I’m sharing another method here for those who want to create blog layouts using only WordPress’ default functions or the Gutenberg block editor.
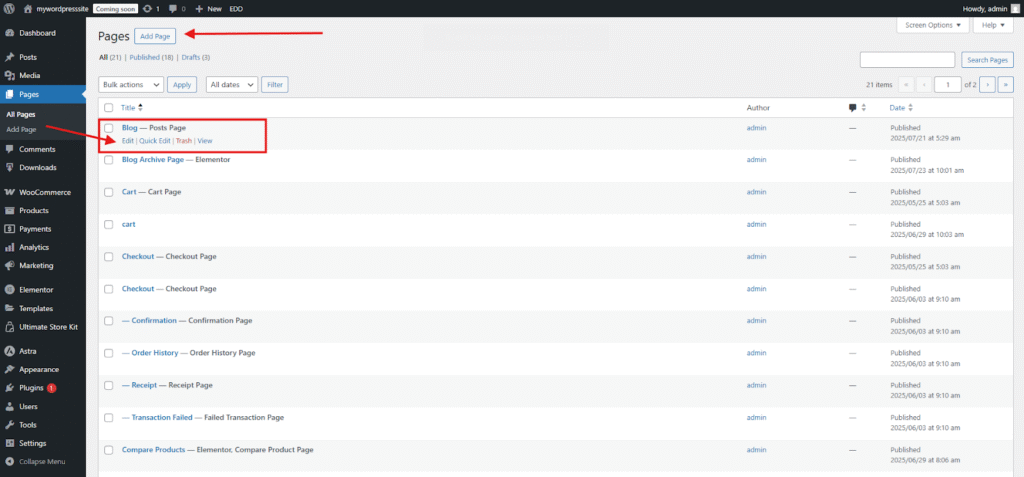
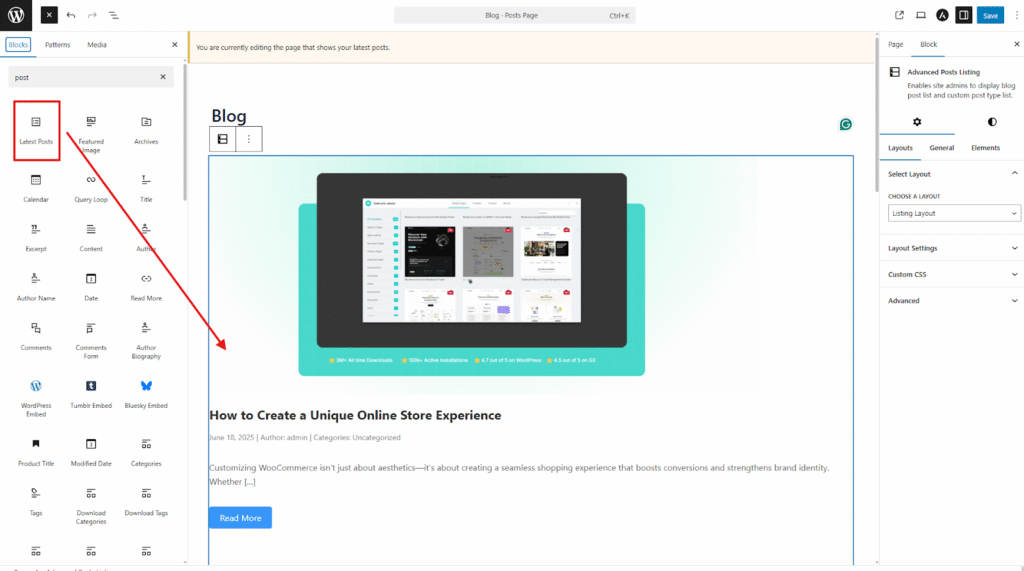
Step 1: Create or Edit a Blog Page/Post
- Go to Pages » Add New or choose an existing blog page to edit.
- Gutenberg will open by default.
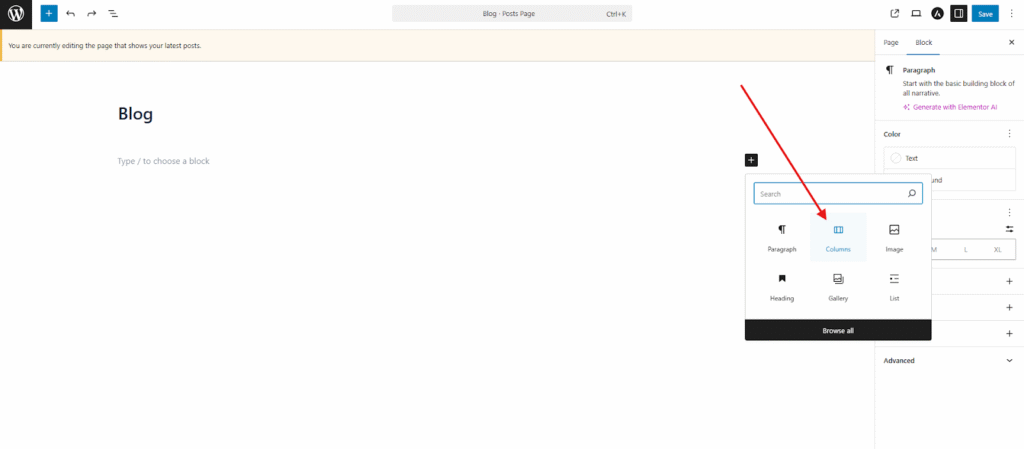
Step 2: Use Layout Blocks
- Click the + icon to add blocks.

- Use layout-focused blocks like:
- Columns – for multi-column layouts.
- Group – to bundle multiple blocks together.
- Cover – for hero-style sections.
- Spacer – to control vertical spacing.
- Separator – for visual breaks.
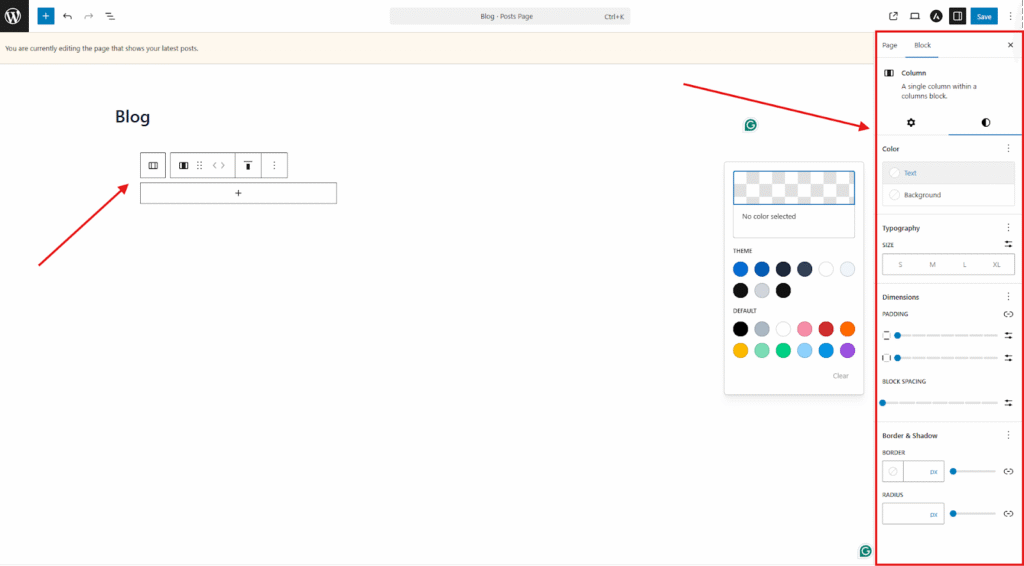
Step 3: Customise Each Block
- Click on a block to reveal its toolbar and sidebar settings.
- Adjust alignment, padding, background colour, typography, and more.
- Use the List View (top toolbar) to manage block structure easily.
Step 4: Organise Content Visually
- Drag and drop blocks to rearrange sections.
- Nest blocks inside Groups or Columns for more control.
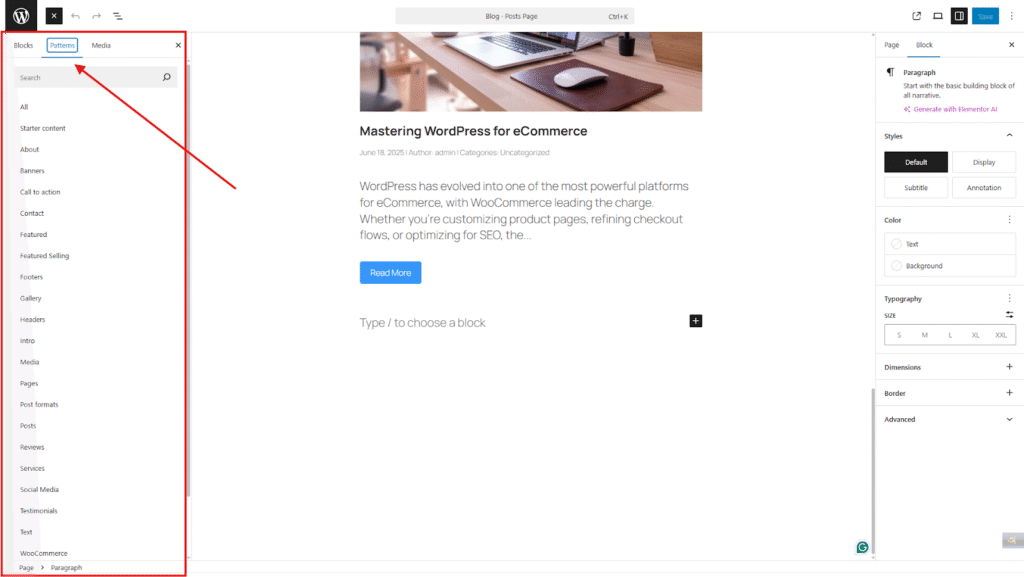
- Use Patterns (pre-designed block layouts) to speed things up.
Step 5: Save and Preview
- Click Preview to see how your layout looks.
- Once satisfied, hit Publish or Update.
How to Pick the Perfect Blog Layout for Your Readers?
Choosing the perfect blog layout for your readers begins with understanding what they expect in terms of readability, design, and user experience. Using a page builder or post content widget is the most powerful and flexible option among the available methods.
Page builders allow you to design your blog layout from scratch or customize existing templates with drag-and-drop simplicity. This method offers advanced features such as dynamic content blocks, animation effects, custom headers and footers, responsive design elements, and full control over margins, spacing, and colors.
Whether you’re a seasoned blogger or a digital entrepreneur, page builders empower you to create a layout that aligns perfectly with your brand and audience preferences.
Unlike preset theme limitations or basic block editors, page builders unlock endless possibilities tailored to your vision, making them the ideal choice for anyone looking to deliver a visually compelling and engaging blog experience.
Avoid Common Mistakes: What to Check Before Switching Layouts
Back Up Your Website First
- Use a WordPress backup plugin to safeguard your site.
- Popular plugins offer scheduled backups and cloud storage for extra protection.
- If needed, refer to a guide on how to back up your WordPress site.
Evaluate Your Current Theme
- Understand that your theme controls the design, layout, and overall look of your blog.
- Check for limitations that may prevent you from achieving your desired layout.
- Determine whether your theme allows customization or if you’ll need to switch to a new one.
Know Your Goals and Limitations
- Be clear on what kind of layout you want.
- Identify what your current theme can’t support before making changes.
Wrapping It Up!
In this guide, I’ve shared 3 effective methods to change your blog layout in WordPress, each one tailored for a different type of user. Whether you’re a beginner, intermediate, or someone who wants advanced design flexibility, there’s an option here for you.
I didn’t just list these methods; I tested each one to understand how they perform, what they offer, and who they best serve. From the powerful capabilities of Element Pack to the simplicity of changing a theme or using the Full Site Editor, I’ve broken it all down to help my readers make the most informed choice.
No matter which method you choose, make sure it aligns with your content goals, technical comfort level, and your audience’s experience. Because in blogging, layout isn’t just design—it’s strategy.
Let your blog reflect your vision. And if you ever need help picking the right method, I’m just a message away!