Do you get nervous every time you update your WordPress site? Worried that something will break in front of your visitors? We can understand the struggle.
There’s nothing more stressful than knowing that potential customers might stumble upon errors or incomplete pages while you make changes.
That’s why we’re going learn to create a maintenance mode page in today’s blog. It provides a professional way to stop public access, giving you a friendly notice that your site is undergoing an update while you work behind the scenes.
In case you didn’t know, WordPress maintenance mode is a temporary setting that lets visitors know that your website is being updated or modified.
So without further ado, let’s walk step-by-step through creating a maintenance mode page, from setting it up to taking it live.
Create a Maintenance Mode Page with a WordPress Plugin
There are many WordPress maintenance plugins. But Launch Guard by Sigmative stands out in the crowd as it combines innovative features with ease of use, making managing your site updates seamless.
With just one click, you can enable or disable maintenance mode. It can also display custom messages to reassure viewers when things are going on behind the scenes.
This premium plugin offers everything you need to manage maintenance gracefully:
- Maintenance / Pre-launch Protection: Secure your entire site before it goes live.
- Interactive Templates: Use ready-made, customizable templates that you can activate in seconds.
- Custom Templates: Design your own maintenance page with a custom logo, text and background.
- Mailchimp Embedded Forms: Gather subscriber emails directly in your Mailchimp list.
- Social Links: Add your social icons and links to stay connected with visitors while you’re offline.
- Visitor Email Analytics: Track sign-ups and monitor basic metrics like submissions and timestamps.
- Password Protection: Keep your preview page private by granting password access for selected users or guests.
- Role Bypass Controls: Allow specific user roles (Admin, Editor, Author, etc.) to bypass the guard page.
- Lightweight & Secure: Built with performance and security best practices for smooth admin access control.
Whether you run a personal blog or a business website, Launch Guard makes maintaining your WordPress site smooth, secure and easy. And to create a maintenance page with Launch Guard, you only need to follow these steps.
- Step 1: Install and Activate a Maintenance Mode Plugin (Launch Guard)
- Step 2: Configure Plugin Settings
- Step 3: Preview and Verify
Then, let’s follow the steps…
Step 1: Install and Activate a Maintenance Mode Plugin (Launch Guard)
After downloading the Launch Guard plugin, install it to begin your maintenance mode setup guide.
- Go to the Plugins section and click Add New.
- Select the Upload Plugin in the top-left corner.
- Click Choose File, then upload the plugin (LaunchGuard.zip) from your computer.
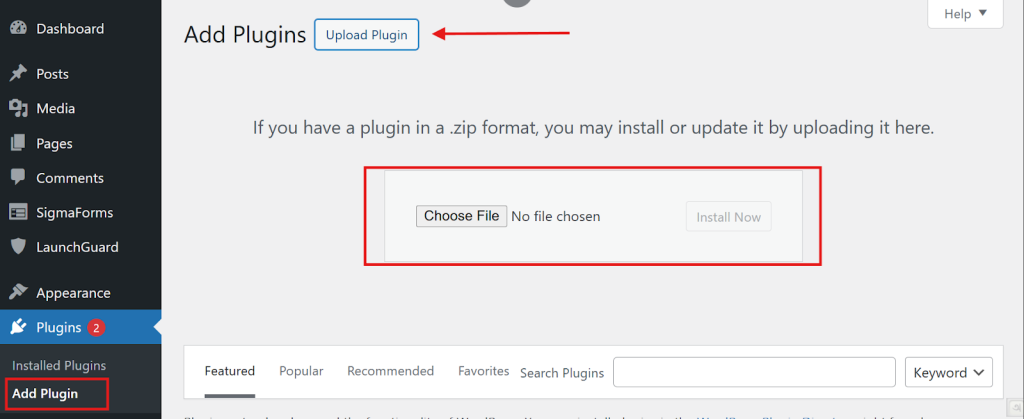
- Click Install Now to start the installation.
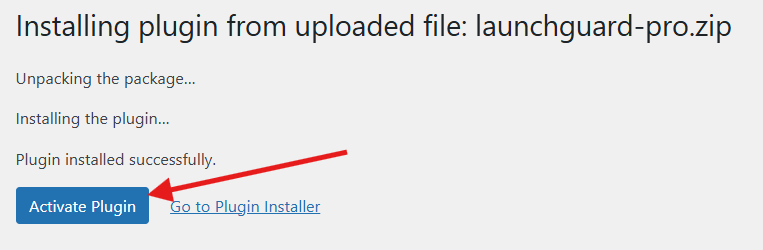
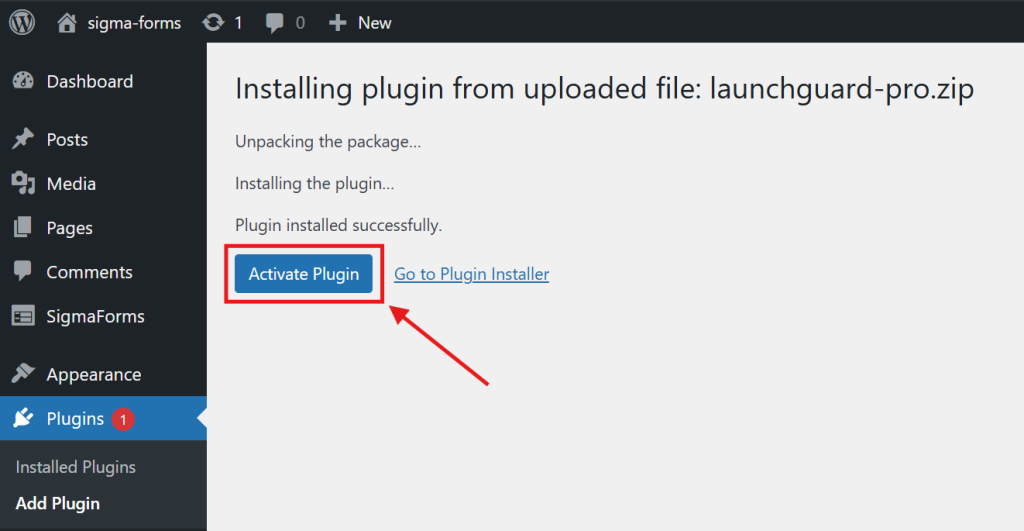
- When it’s done, click Activate Plugin to enable it.
License Activation
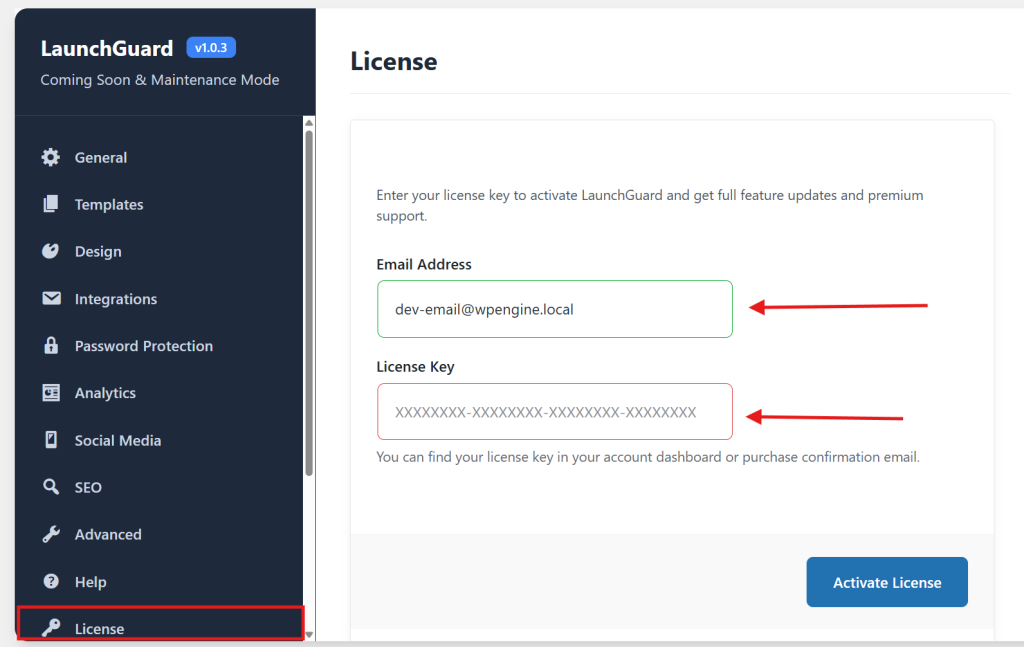
- Go to Launch Guard > License in your WordPress dashboard.
- Click the License tab to open the license section.
- Enter your license key and email address in the provided fields.
- Click Activate License to complete activation.
- Once activated, you’ll see your license details displayed below.
Step 2: Configure Plugin Settings
- Go to Launch Guard > General in your WordPress dashboard.
- Turn on the Enable Launch Guard switch.
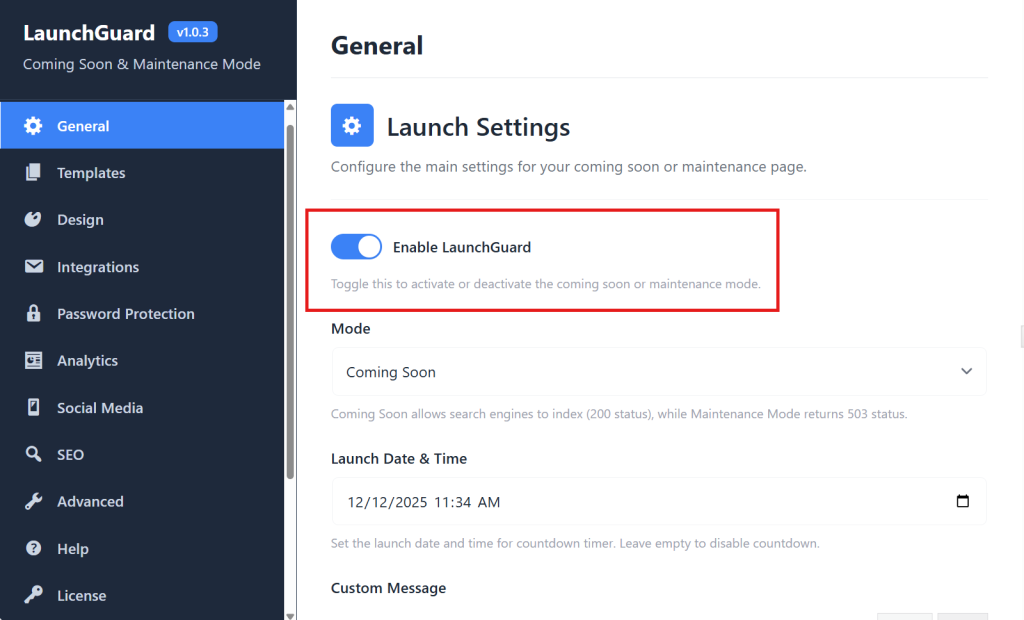
Once enabled, visitors will see your Maintenance page instead of the live site.
- Choose your preferred mode. Two Modes are available. Select the Maintenance Mode options.

Step 3: Choose a Pre-Built Template or Custom Design
- In Launch Guard > Templates, scroll to the Templates.
- Preview any of the 12 professional templates by hovering and clicking Preview.
- Close previews with the X icon.
- Select your desired template and click Save All Settings to activate it.
- You can use built-in templates or design your own with branding and Mailchimp forms.
Step 4: Preview and Verify
- Open your site in an incognito/private browser window to verify the maintenance page.
- Ensure everything looks correct for visitors (while admins can still access the full site).

How to Deactivate Maintenance Mode
To deactivate maintenance mode in WordPress using the Launch Guard plugin, you simply need to toggle off the maintenance setting in the plugin’s dashboard.
Disable Maintenance Mode with Launch Guard
- Go to your WordPress dashboard and navigate to Launch Guard > General.
- Locate the option labeled Enable Launch Guard.
- Switch this setting OFF to disable maintenance mode. Your regular website will become visible to visitors again.
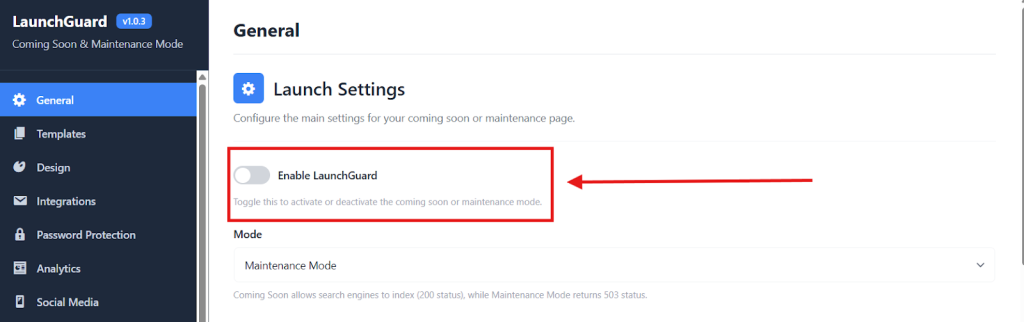
This action immediately restores the public domain, making your site live for everyone. You don’t have to remove the add-on or make any other changes.
Conclusion
Setting up a maintenance mode page with Launch Guard takes just minutes. It also keeps your brand safe while you work on the backend of your website.
You can use templates, email collection and access controls to ensure a smooth, professional update process without any stress or public errors.
Give your visitors confidence during site updates. Try Launch Guard for uninterrupted maintenance mode on your WordPress website.