If you have a WooCommerce shop and you want to grow your business, we are here to show you how to edit WooCommerce shop page with Elementor page builder.
In this article, we will show you the process to customize woocommerce shop page with elementor through a few simple steps. You have to be with us till end to learn the process.
I assume that you have installed WooCommerce and setup a shop page for your business. Lets show you the process of editing single product page.
There are a few simple steps to edit the shop page. You don’t have to be worried about this. We will use elementor woocommerce builder & elementor woocommerce theme.
Step 1: Create the Single Product Template
Step 2: Choose a Pre-Designed Woocommerce Template, or build one from scratch
Step 3: Add the Product Widgets that will make up your page
Step 4: Preview the Product Page With Another Product
Step 5: Set the Conditions
Let’s get started!
Step 1: Create the Single Product Template
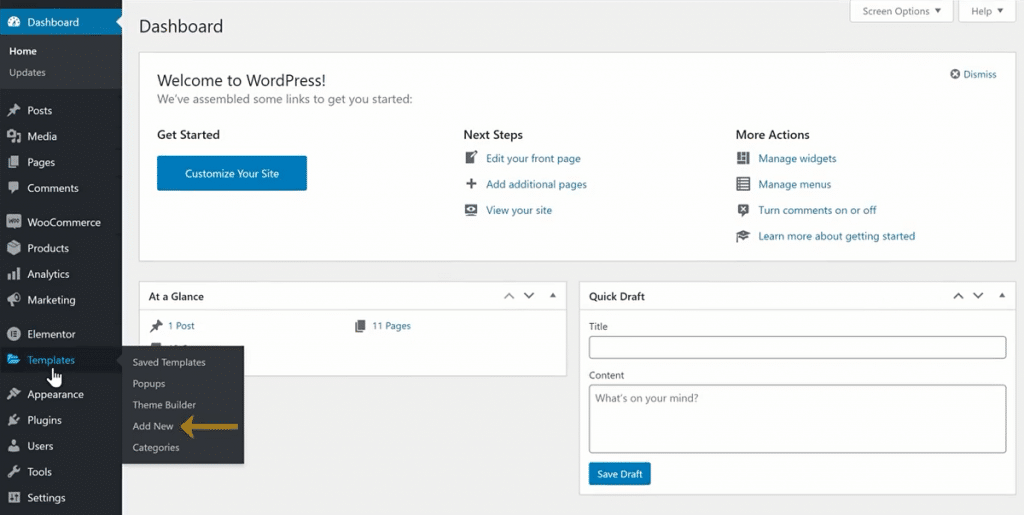
Start designing the single product template in Elementor, follow a similar procedure as creating the regular single template.
To do this, you have to go to the WordPress website dashboard>Template>Add New. Then you have to select Single Page from the template options and click on the Create button.
Step 2: Choose a Pre-Designed Product Page Template, or build one custom template from scratch
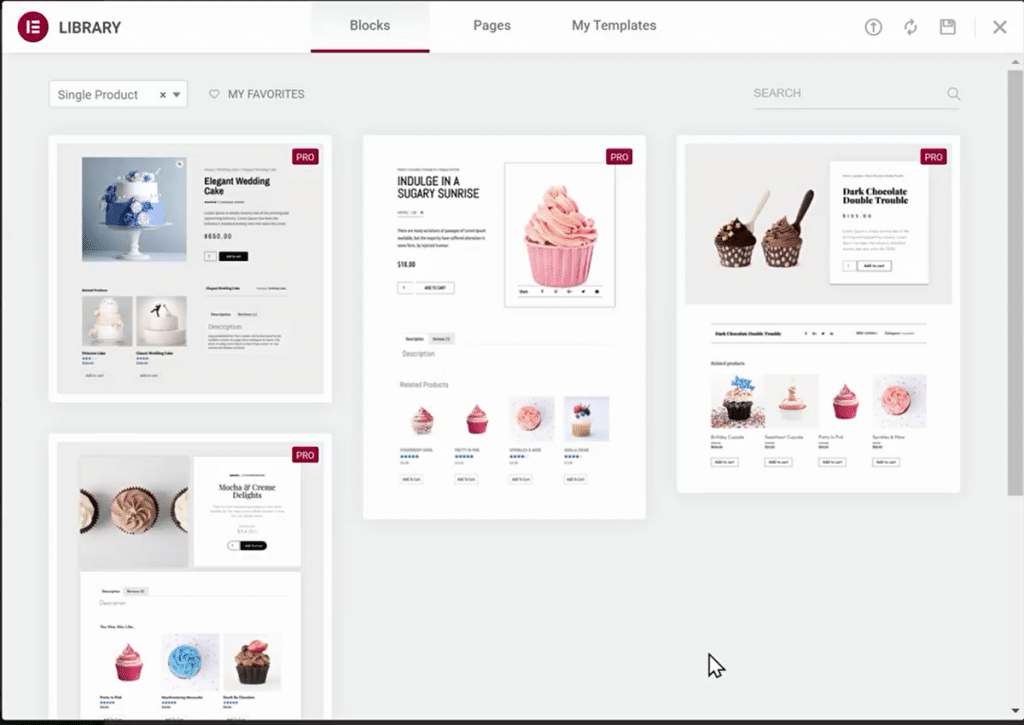
Follow the easiest way to get started. Use one of the pre-designed woocommerce shop page template,customize it to fit your site. You can choose various styles because there are several different styles of product pages to choose from.
Before you start adding widgets, make sure you are working on a full width product page, by switching to a full-width template.
Use Elementor to have total customization control over the layout and style of the product page.
There is another option to build it from scratch. In the editing panel, you can see the special widgets for the product.
Step 3: Add the Product Widgets that will make up your page
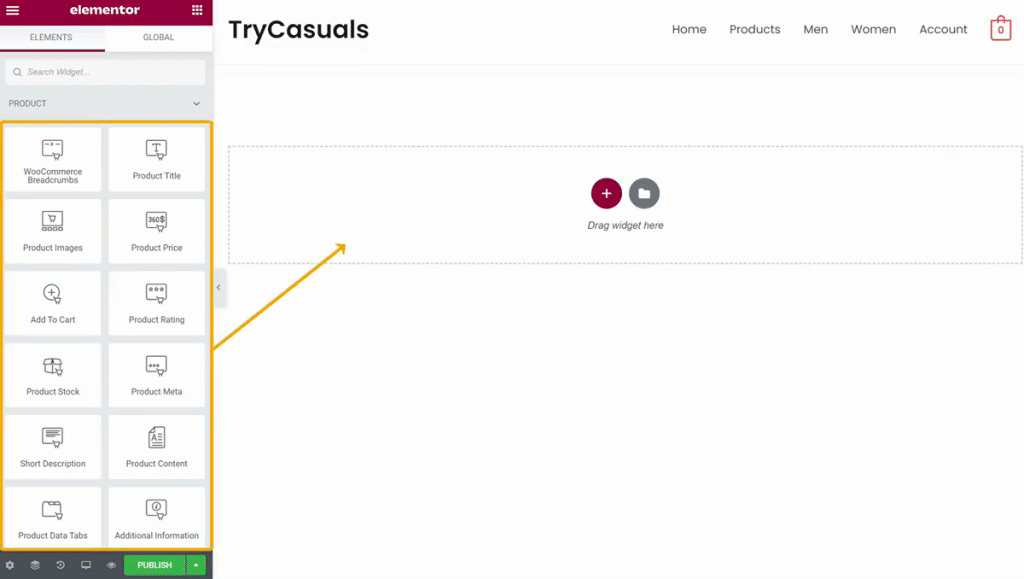
Now, it’s time to build the elements that will make up your product page. For the full list of product widgets, head over to our documentation on the subject. For this tutorial, you will use the following Elementor widgets and no other plugins:
- Product Title widget
- Product image widget
- Woocommerce Breadcrumbs widget
- Short description widget
- Product rating widget
- Product price widget
- Product meta widget
- Add to cart widget
- Product related
- Product data tabs
- Upsells widget
You have complete freedom to play around with the layout and move elements around.
You have the opportunity to use any other widget to make your product page more effective and engaging. You can add Share buttons, call to action widgets, featured image, drop down menus, and even custom fields to the template using the dynamic content feature.
Step 4: Preview the Product Page With Another Product
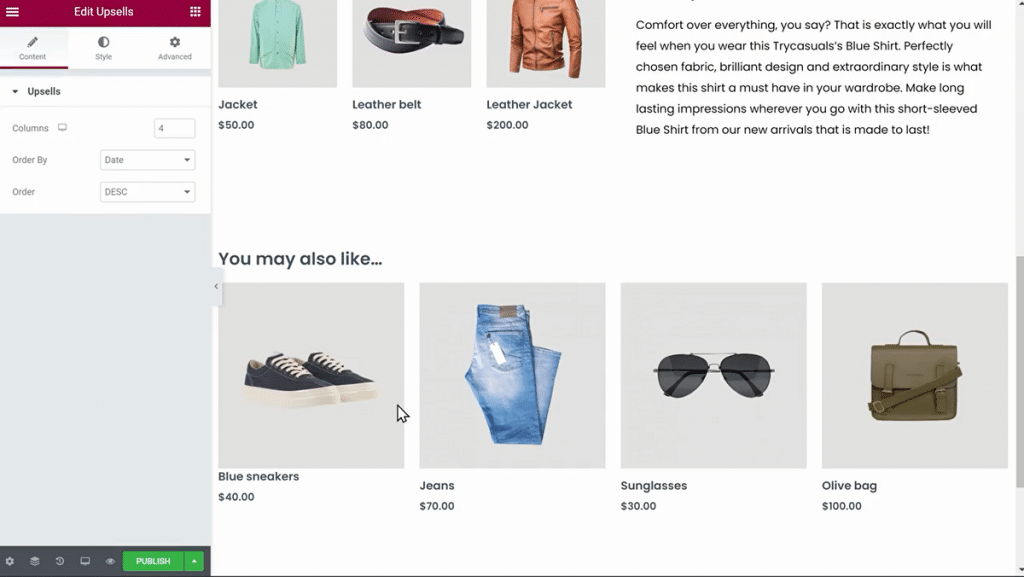
We advise that you preview it with several different products to make sure your product template has the right design.
You have to click on the eye icon on the bottom left panel, then settings. Under Preview Settings, choose the specific product you want to display. Now, apply and review to see how it looks like.
Step 5: Set the Conditions
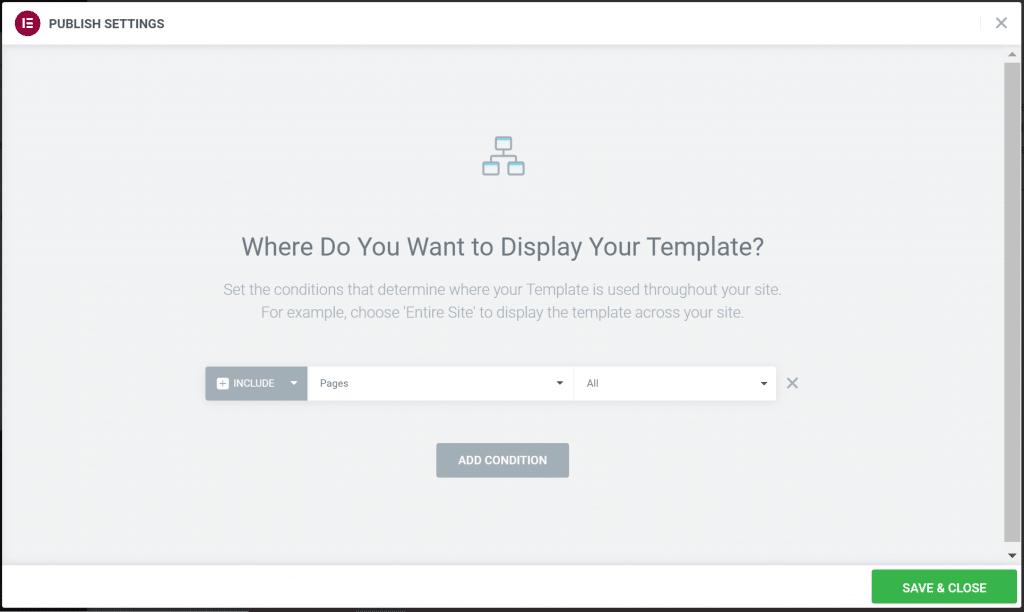
This is the last stage in which you set the conditions to determine where your product template will appear. By default, the template will affect all the product pages on your site. You can also select a specific category of products.
Click on Publish – and your single product is live!
All done! You have successfully edited your WooCommerce shop page using wsdgets. Now you can expect more visitors to your site ever than before.
Conclusion
You can get the design flexibility to create and fine-tune your product pages visually with Elementor’s WooCommerce Builder that gives you the opportunity. This helps you save your time, and considerably reduces the time it takes to go from an idea you have, to a live and fully-functional online WooCommerce store.
There are numerous WooCommerce themes that you can look at and check this examples of WooCommerce websites for inspiration.
Thank you to be with us. Have a nice day.


