Forms are a big part of any website. They help you collect messages, feedback, orders, signups, and more. Most WordPress form plugins give you pre-made forms to get started quickly. That’s helpful if you just need a basic contact form or a simple survey.
But what if you want more control?
Some users need to build forms from scratch. They want to choose every field, set custom rules, and design the form to match their exact needs. Maybe you want to add special logic, change how the form looks, or connect it to other tools. That’s where custom forms come in.
In this blog, we’ll show you how to create a custom form in WordPress. You’ll learn how to add fields, set up form settings, and place the form on any page or post. So let’s start…
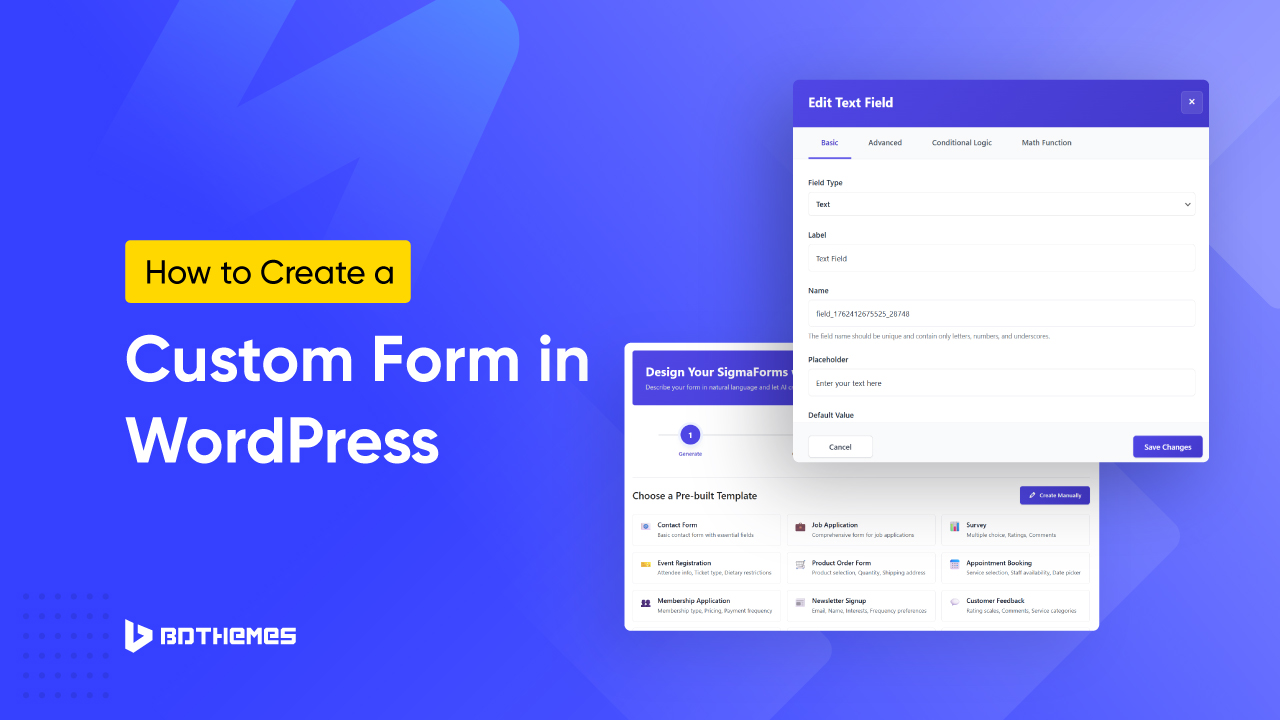
Create a Custom Form in WordPress
You can make a form in WordPress in just a few easy steps:
- Step 1: Pick a form plugin you like.
- Step 2: Install the plugin
- Step 3: Start a new form.
- Step 4: Add a Field and Customize Your Form
- Step 5: Configure Your Form
- Step 6: Place the form on any page or post.
Here is an easy step-by-step guide to the entire process.
Step 1: Pick a form plugin you like
The easiest and fastest way to build a form is through a plugin. However, some plugins have security limitations. Also, some plugins are not as flexible as coding from scratch.
So I would recommend using Sigma Forms. This plugin doesn’t offer a free tier. You can get started with a paid plan from $20/Year.
Whichever plugin you choose, you can put Sigma Forms on top of all others for better spam control and security.
I won’t go into detail here, as I am serious about security, so I will cover the entire blog using Sigma Forms here.
Step 2: Install the plugin
After purchase, you need to install the plugin in your WordPress website.

- To install the plugin, open your WordPress dashboard >> “Plugins” >> “Add New” and choose “Upload.” Find the plugin zip file on your computer, then click “Install” and “Activate.”
Step 3: Start a new form
After installing the Sigma Forms plugin, let’s make a new form.
- Stay in your WordPress dashboard.
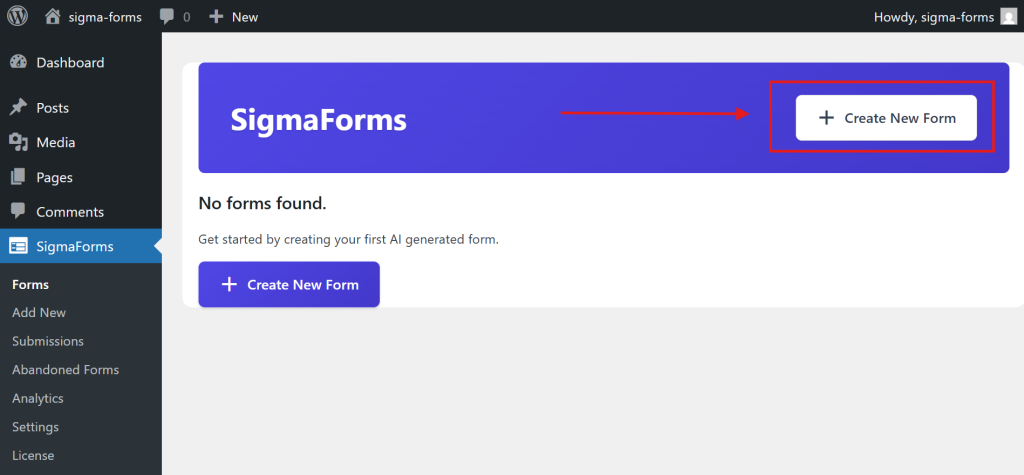
- On the left sidebar, click on “Sigma Forms” >> “Forms.”
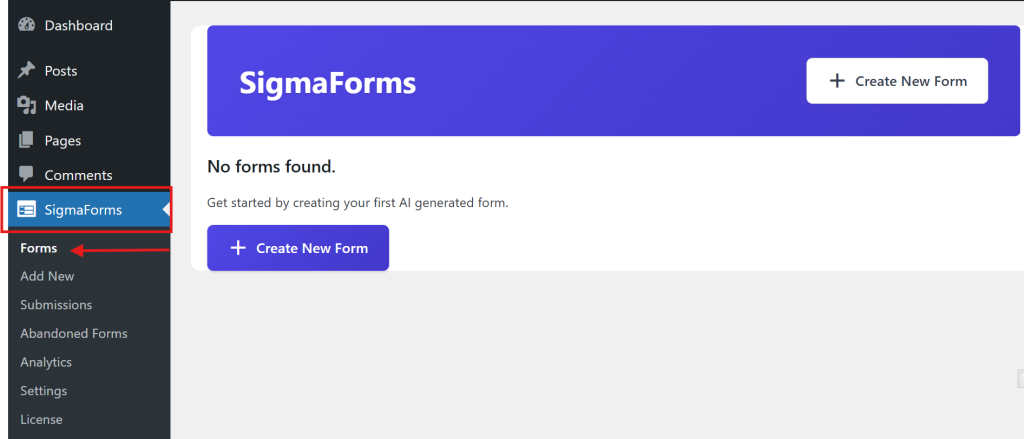
- At the top, click “Create New Form” to get started.
- Here you will find two methods to create forms. But I will now show you how to create a manual form. And below, I will discuss how to build a form using a pre-built template.
- So, click on the Create Manually button.
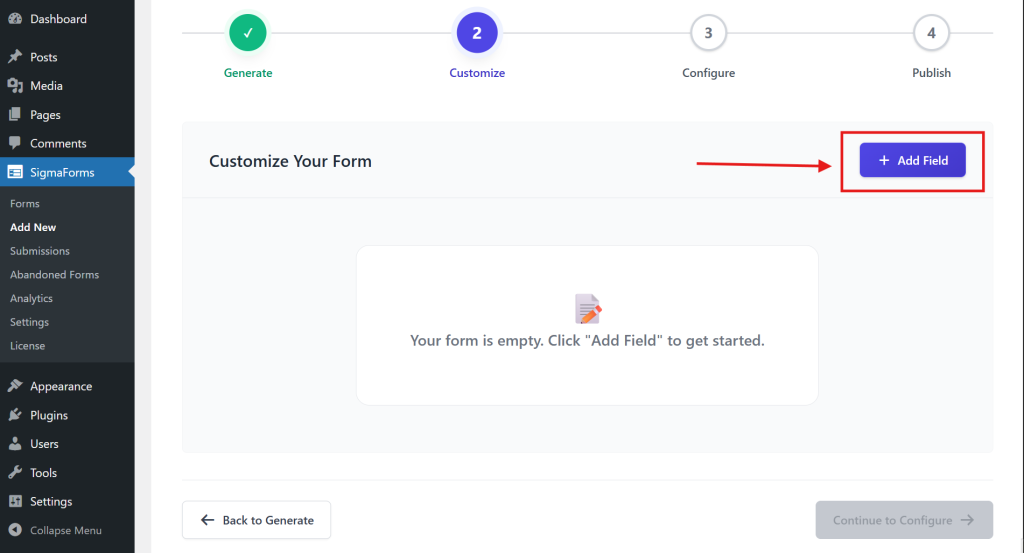
Step 4: Add a Field and Customize Your Form
- Now, you need to create the field according to your requirements. Click on the Add Field button to create the field.
- Now you will see an interface to select some field types. Choose a field type from here.

- For example, I will create a contact form, so I first took a text field and set a Label, Name, and Placeholder. I left the value here as the default.
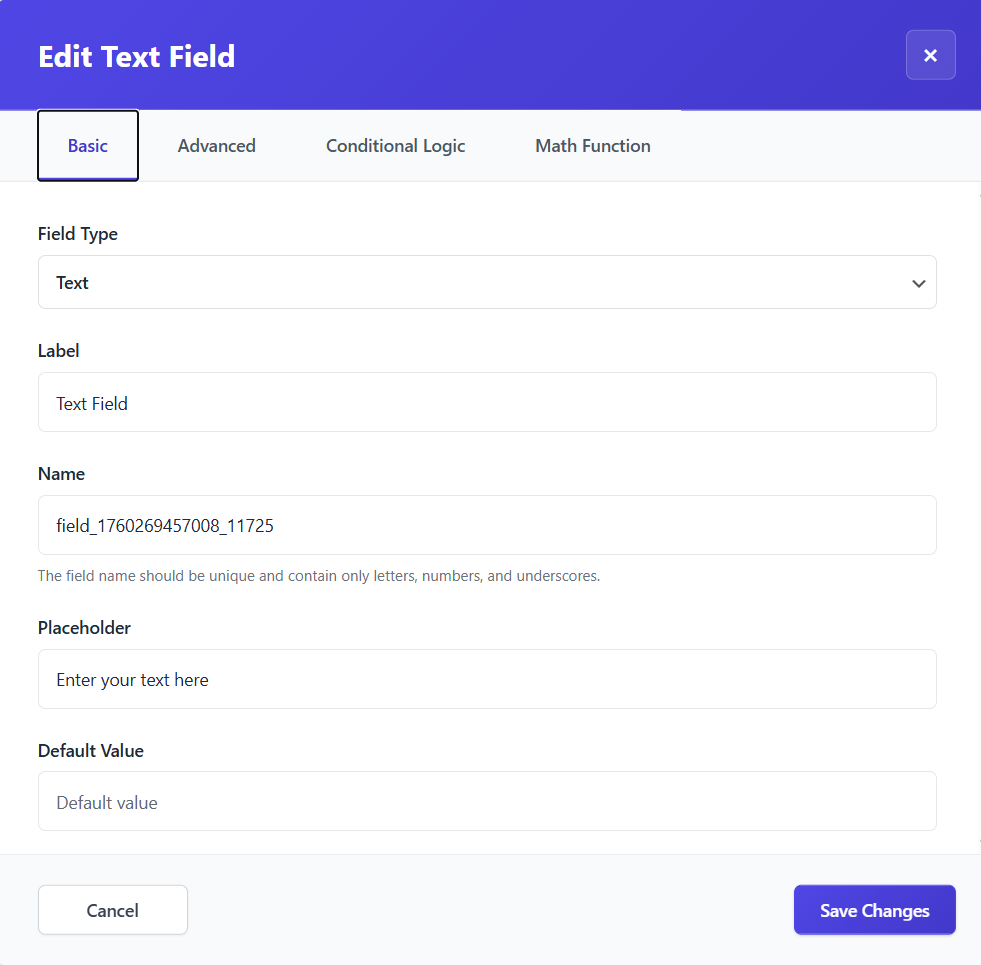
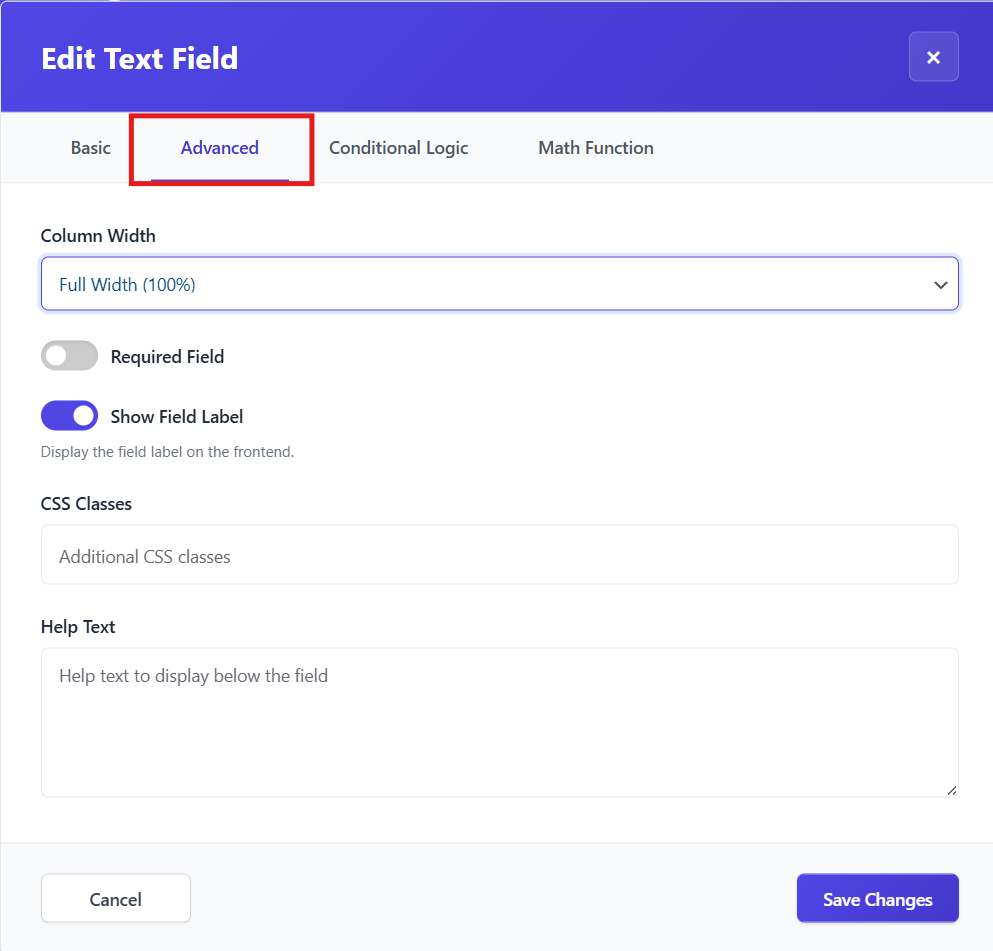
- Then, from the Advanced tab, you can set the column width, required on/off, additional CSS, and a help text.
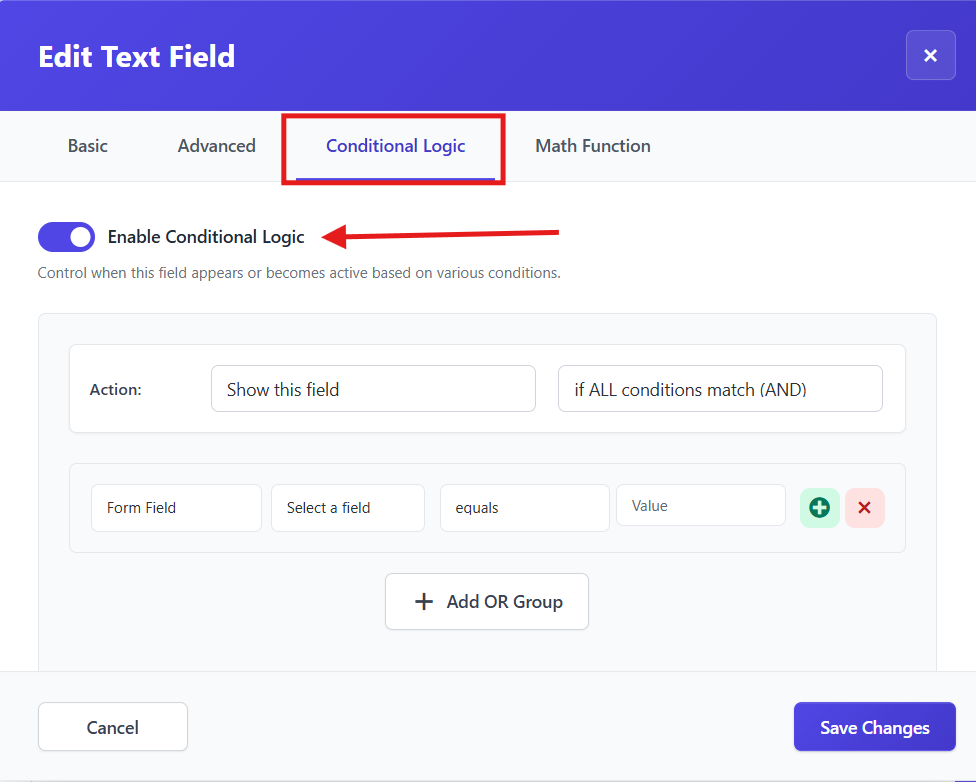
- If you want to apply any conditional logic to the field, set the logic from the Conditional Logic tab.
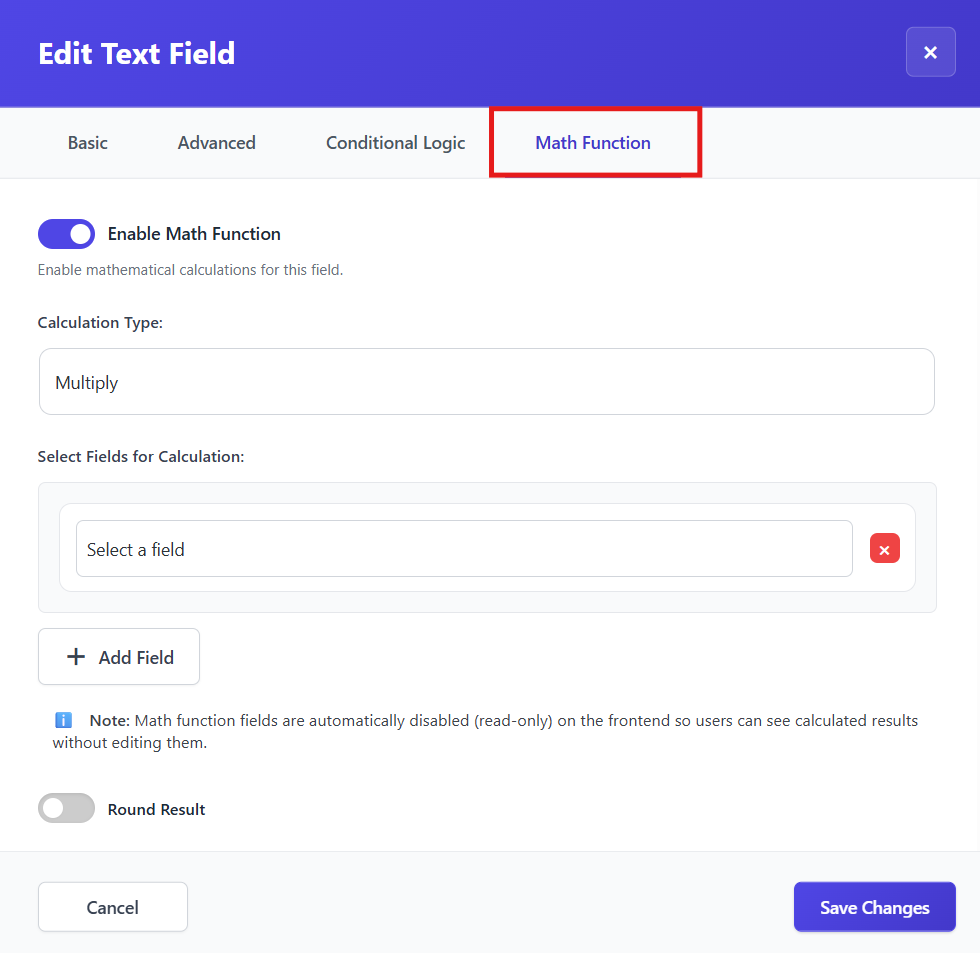
- Finally, if you want to include a math function in the field, set the field and logic through the Math Functions tab.
- Then click Save Changes.
- Finally, you have successfully created a field.
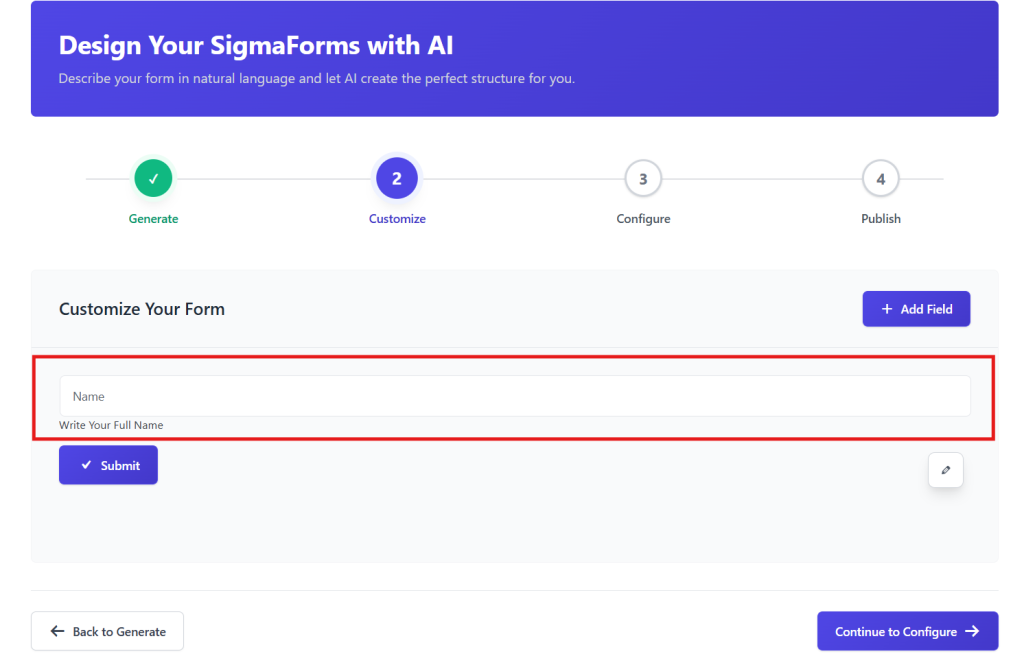
- Now, in the same way, you can create the remaining fields like phone number, email, and other fields required for the contact form.

Step 5: Configure Your Form
Now you need to configure the contact form.
- First, give the form a name and enter the message that will be displayed to someone when they submit the form.
- If you want the form data to be stored in the database, turn on the Store Submissions in Database toggle button.
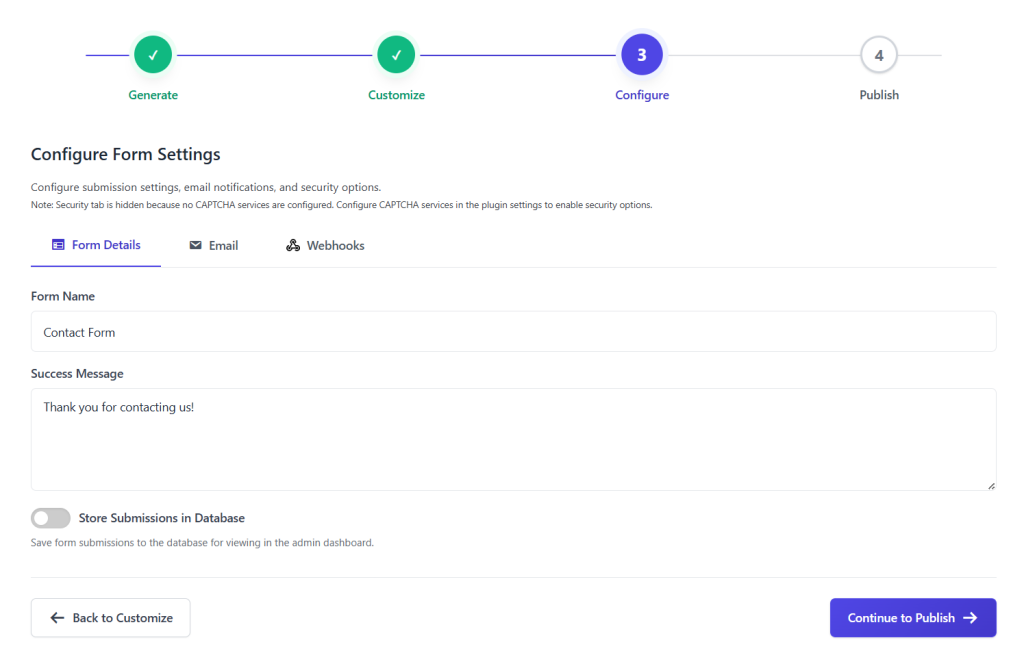
- Then, configure submission settings, email notifications, and security options from the Email tab

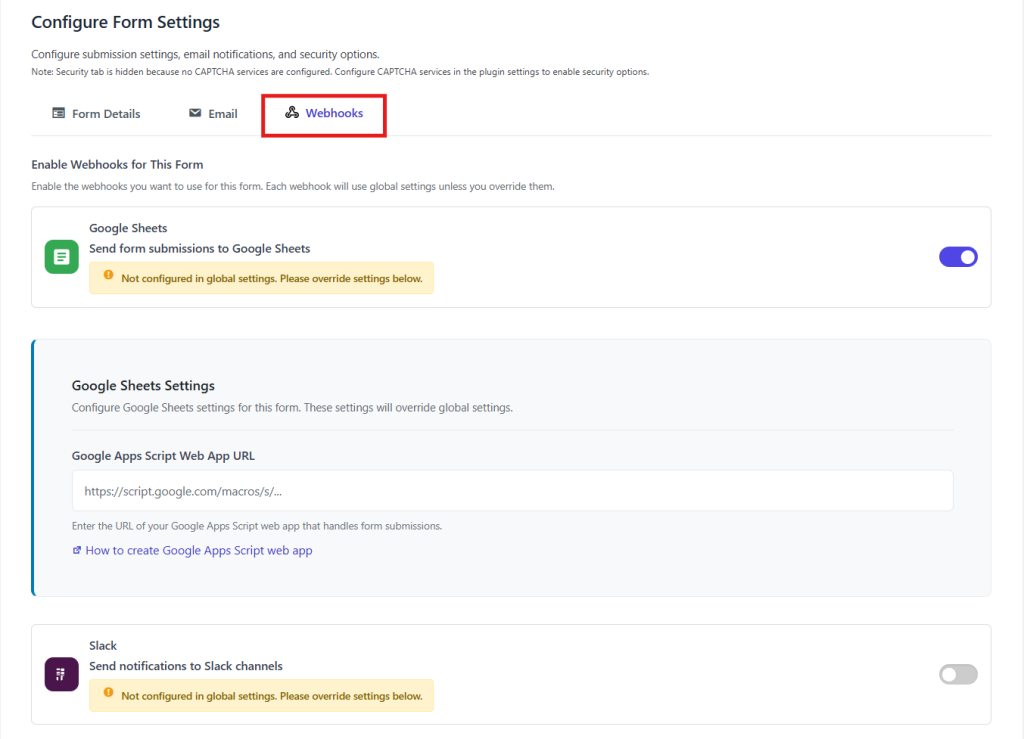
- Now, go to the Webhooks tab. Enable the webhooks you want to use for this form. Each webhook will use global settings unless you override them.
- Then, below, click the Continue to Publish button.
Now, your form is ready to be published! Review the information below and click the Publish button.

Step 6: Place the form using shortcodes on any page or post
Congratulations! Your form is ready. And you will get a shortcode to use the form.
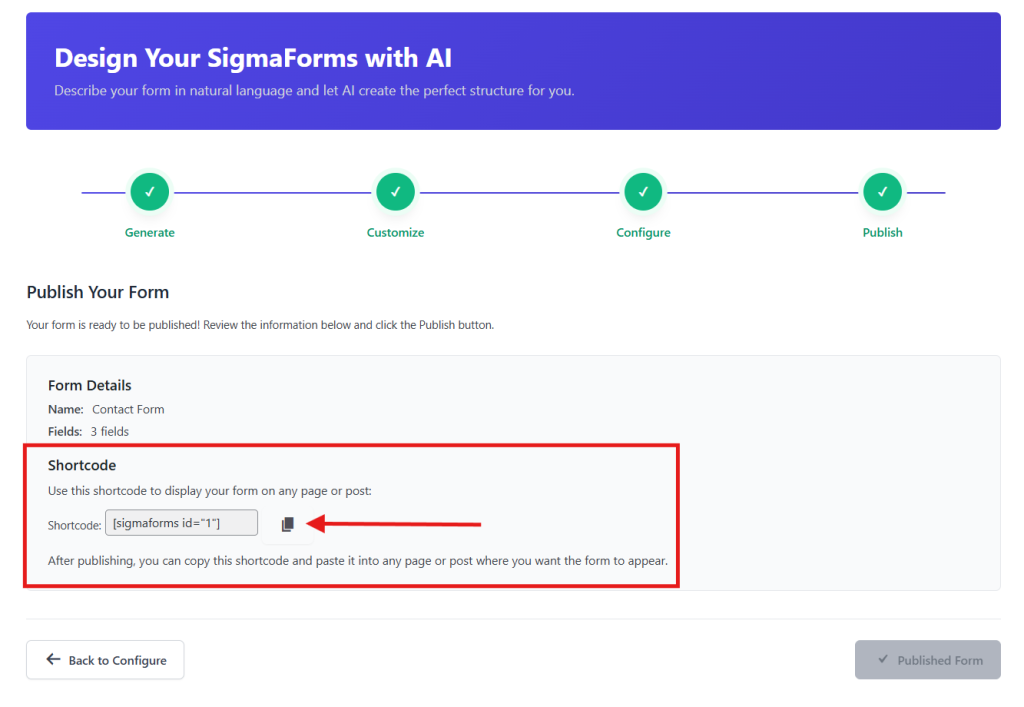
- Copy the shortcodes.
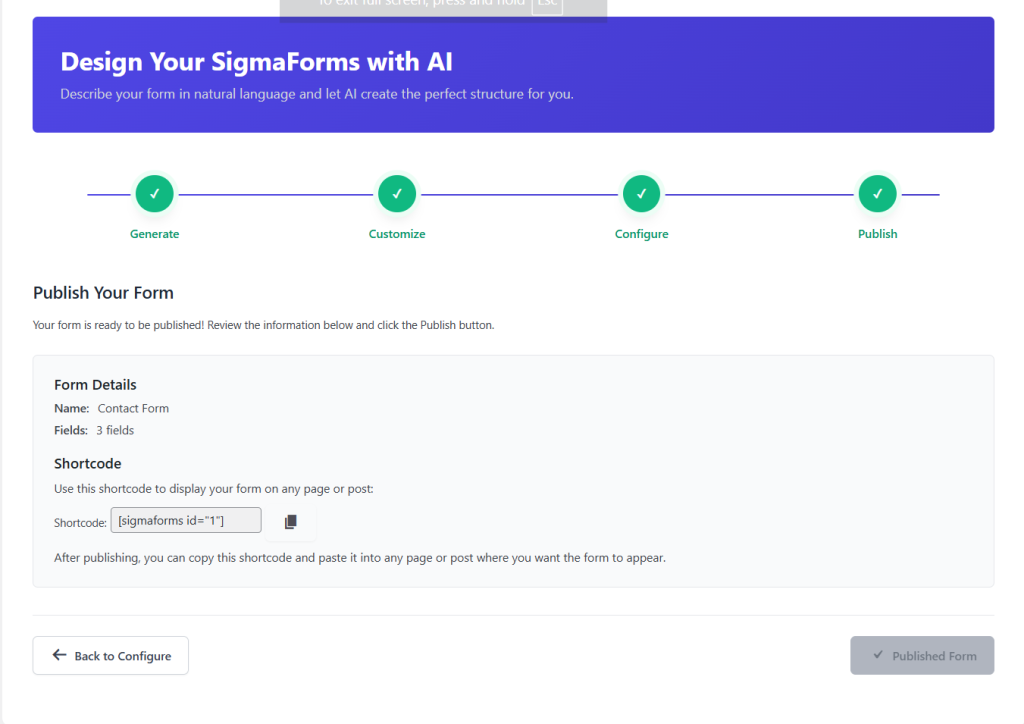
- Now go to your desired page where you want to set the form.
- Get a shortcode widget or block on the page.
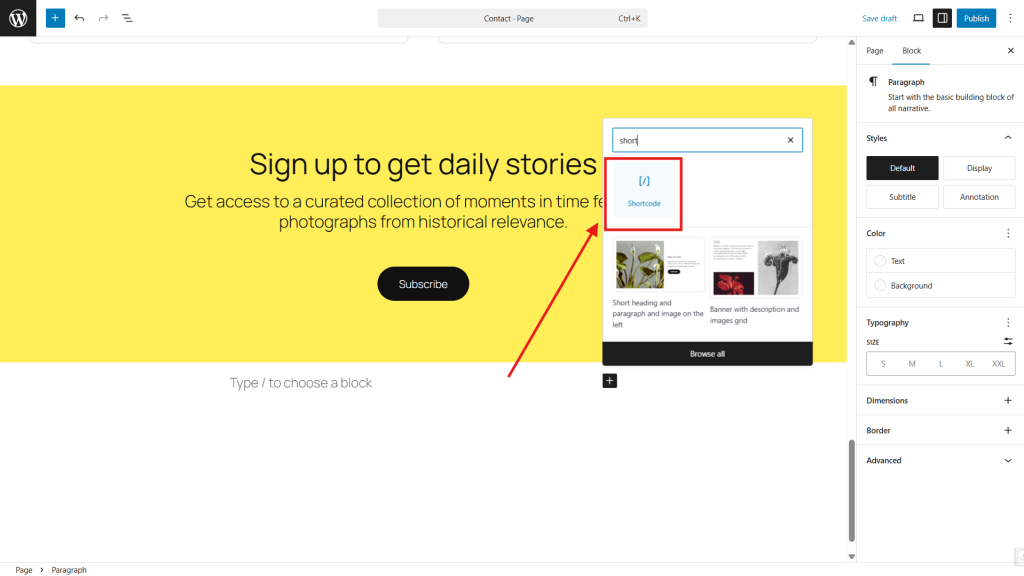
- Paste the shortcode here.

- Click on the save draft or publish button. Then preview the page.

- Contact form built successfully.
This way, you can easily set up any form, from basic to advanced, on any page or post. If you want to build forms using a faster and more time-efficient method, you can use the pre-built feature.
Optional: Create a Form Using a Pre-built Template
As I said above, in Sigma Forms, you will find two methods of creating forms. One is the manual form creation method. And another is creating a form using a pre-built template.
Instead of choosing manually in step 3, you could have chosen a pre-built template. Sigma Forms builder provides 80+ Pre-built form templates.
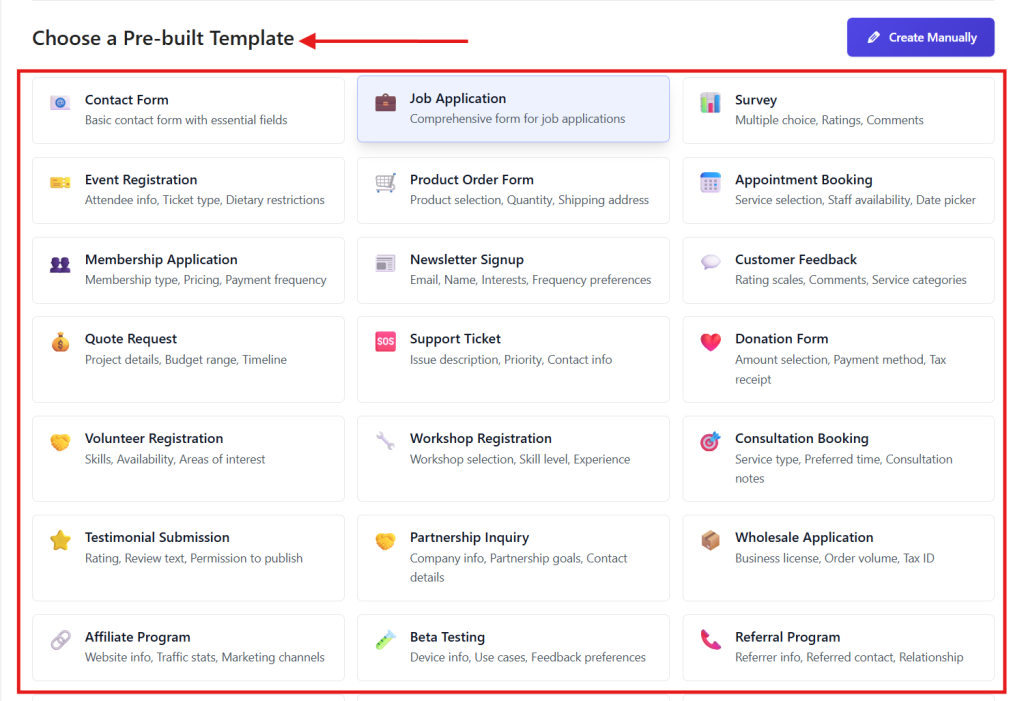
Each pre-built template is customizable. You can easily modify the templates and add new fields according to your needs. Here you will find a variety of complete pre-built templates, including,
- Contact Form
- Job Application
- Survey
- Event Registration
- Product Order Form
- Appointment Booking
- Membership Application
- Newsletter Signup
- Affiliate Program and many more.
To use a pre-built template, just select a template from here and follow from step 5.
Bonus: Create a Custom Form Using AI in WordPress
Sigma Forms is a WordPress plugin designed to take the pain out of creating forms that fit your exact needs.
When you need to create a form, you usually have two options: either manually add all the form fields one by one or choose a pre-made template. But the problem is: manual forms often don’t look professional, while templates rarely match your exact needs.
Instead of dragging and dropping form fields one by one, you can simply describe the form you need, and Sigma AI will instantly create it. For real-time visitor interaction beyond forms, an AI chatbot widget can handle questions instantly — a good complement when you want AI working on both ends of the page.
Suppose you want a customer feedback survey form for your restaurant, you just prompt Sigma AI with the form’s description. In just a few seconds, the form will be ready with the relevant fields.
It’s smart, fast, and flexible. But more importantly, it’s built for everyone. From beginners who just want a quick contact form to power users who need advanced, industry-specific workflows.
Frequently Asked Questions (FAQ)
1. Do I need coding skills to create a form with Sigma Forms?
No. Sigma Forms is beginner-friendly. You can build forms using drag-and-drop or AI without writing any code.
2. Is Sigma Forms free?
Sigma Forms is a premium plugin. You need to buy it from the official Sigma Forms website before installing it.
3. Can I use Sigma Forms on any WordPress theme?
Yes. Sigma Forms works with most WordPress themes and page builders.
4. How do I add the form to my page?
After publishing your form, copy the shortcode and paste it into any page or post using a shortcode block.
5. Can I save form submissions?
Yes. Just turn on the “Store Submissions in Database” option while setting up your form.
Conclusion
Making forms in WordPress is easy. Sigma Forms helps you do it fast and safely. It’s great for beginners and pros.
You can build forms by hand, use a ready-made template, or let AI do the work. No need to worry about spam or setup.
Just pick what you need, add your fields, and publish. Your form will look good and work well.
So go ahead, make forms that help your site grow. It’s simple, smart, and saves time.