In this blog post, we will explain how to change WordPress from blog to website.
Do you have a blog on the WordPress platform? But wait, it is not hosted under a particular custom domain name.
You use WordPress.com to write blogs for your readers, which are not self-hosted and have no particular domain. Looks a bit more personal instead of being professional.
So what to do?
You need to change your simple blog into a website. Sounds like you need to hire a developer for this project.
Don’t worry! You can change your personal blog into a professional website with a few simple steps.
What is the difference between a blog and a website in WordPress?
The WordPress.com blog and WordPress.org CMS has many difference. Find out the reason from the table that triggers you to change your blog into a website.
| Features | WordPress Blog | WordPress Website |
| Purpose | Share content with readers | Provide information about a business or organization |
| Pages | Fewer Pages | More pages, such as About, Contact, Portfolio, Advertising, Services, Store, etc. |
| Design | More casual and personal design | More professional and polished design |
| Monetization | Typically not used for business purposes and not monetized | Often used for business purposes and can be monetized |
| Control | More limited in terms of customization options | More control over design and functionality |
| Hosting and Domain | No hosting and custom domain name | Self hosted with custom domain name |
| Storage | Limited storage | Unlimited Storage |
| SEO | Limited SEO | Self-hosted with custom domain name |
| Theme | Minimal Theme options | Limitless Theme options |
| Plugins | Few Plugins | Unlimited Plugin options |
Hosting
WordPress.com is a blogging service that doesn’t require any technical knowledge to use additional hosting and domain for the blog. However, if you plan to use WordPress for a business, you need to use WordPress CMS with a self-hosting and custom domain.
Design
There is limited customization in the free plan of the WordPress blogging service. But you can avail of their premium plan which starts at $48 per year. Instead, you can customize more with a professional look to your blog and create a website using the WordPress CMS for free.
Plugin and Theme options
The blog looks dull and has limited functionality. WordPress.com doesn’t offer many options to change the look of your theme and add extra functionality with the plugins. Whereas using WordPress CMS you can use premium and free themes to give a versatile look and add limitless functionality with the freemium and premium plugins.
Monetization
You can’t monetize your blog in WordPress.com blog for free, but you will find ads from their own system appearing in your blog. That’s why you need to host your blog in your own website to earn revenue from the ads and affiliate program.
Storage
WordPress.com offers limited storage space in the free plan for your blogging. But you want more storage to write more and add service for your clients. Switch to self-hosting with unlimited storage using WordPress CMS.
You know the differences and find out that a website using the WordPress CMS offers more advantages. So let’s dive into the process of changing your blog into a professional website.
How to change WordPress from blog to website
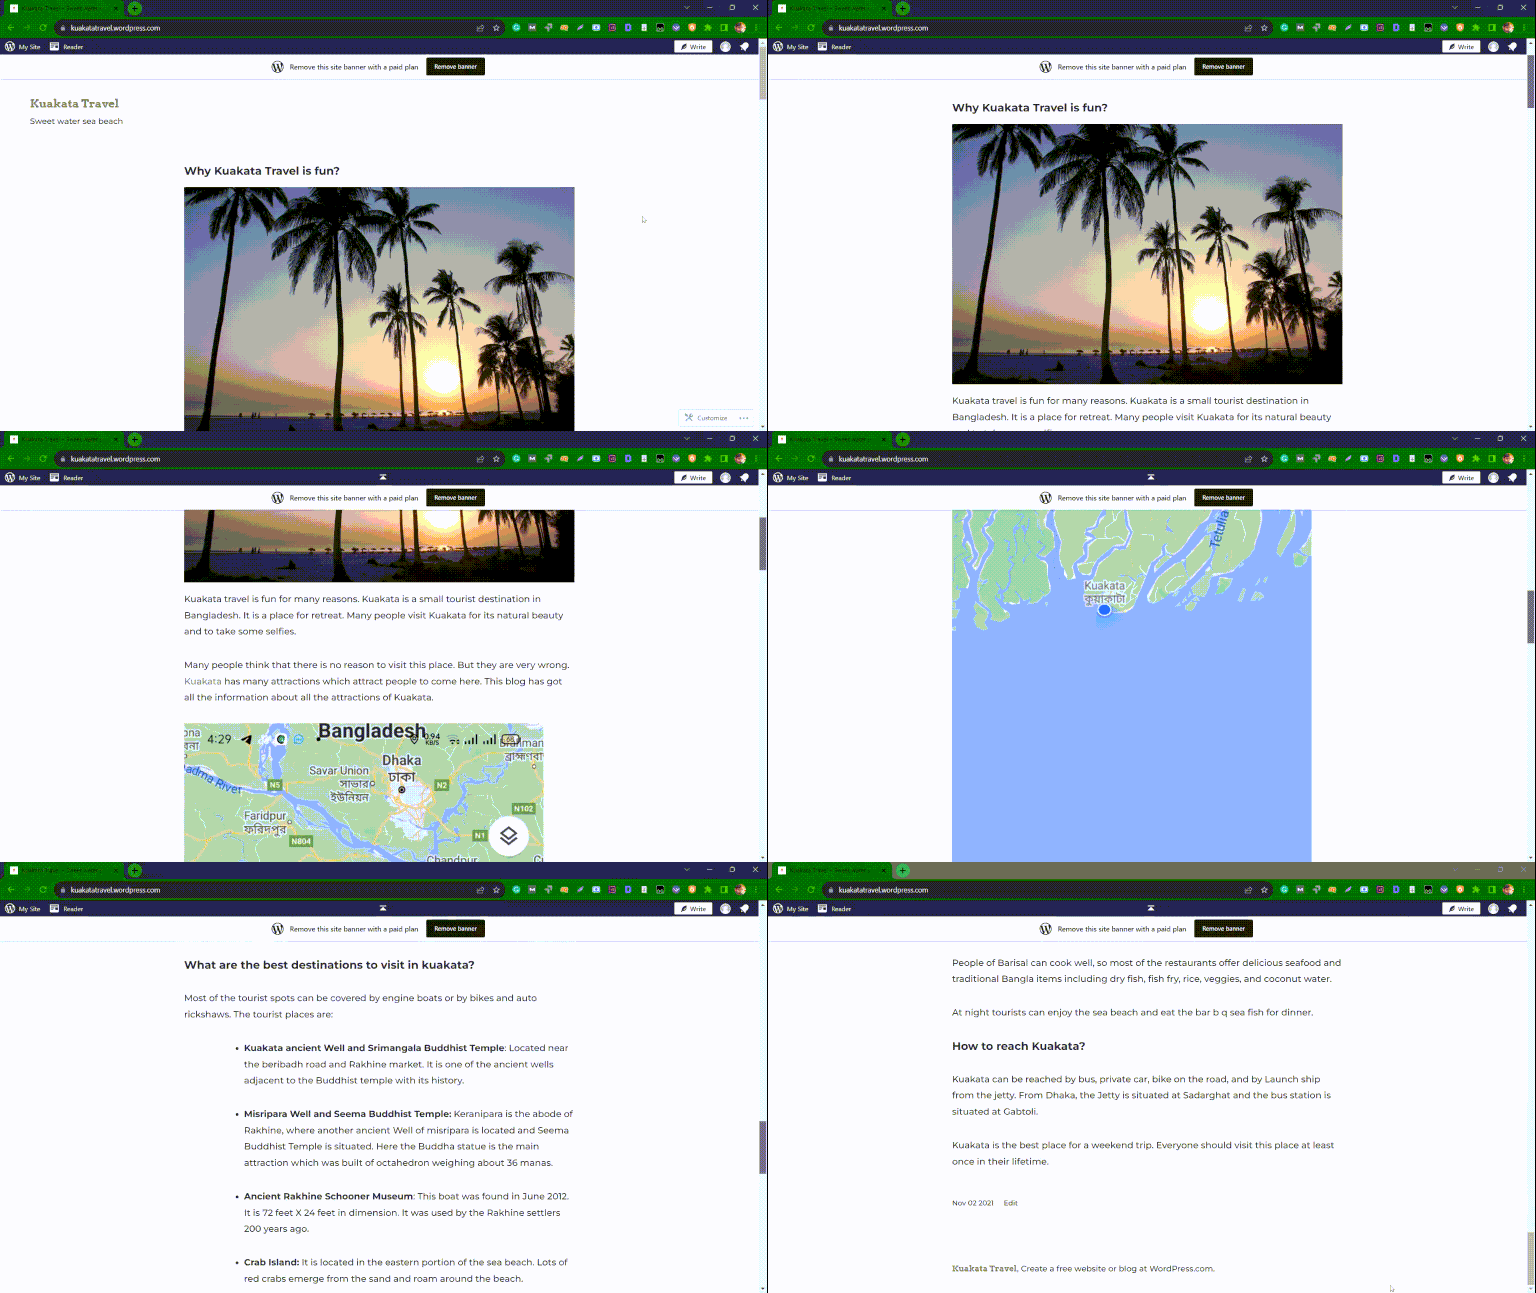
Currently, your blog looks like a simple page without any other pages to navigate.
It won’t be difficult. No matter what level of experience you have with WordPress, you can build a website in no time. You just need to follow the steps carefully.
To get started, follow these four steps
Step 1. Register a domain name
Domain names are the first thing you need to purchase for your website. You should consider how it will affect your website’s growth. Make sure your domain name is short and easy to remember. People are more likely to pay attention to a name that is good for SEO.
Namecheap is a good place to start if you’re just starting out. There are different extensions for each domain. Check if the name is available with your extensions by typing it into domain search. Grab the name you desire if it is available and proceed to the next step.
Step 2. Choose a powerful hosting service
To host your website, you’ll need a server. There are many companies that host websites. It is important to choose the right server for your website. Hosting companies tend to emphasize their strengths and minimize their weaknesses.
Ensure the hosting server has good storage, reliable uptime, good technical support, fast download speeds, and reliable backup facilities. It is a good idea to choose Hostinger because it has a good reputation and provides WordPress-friendly hosting.
Hosting is also fairly easy to install.
- Click “Get started” on Hostinger’s website.
- Choose a hosting plan.
- You’re done! Just pay the bill!
Step 3. Secure your website with SSL certificates
The importance of SSL for your website cannot be overstated. Your site and your users’ browsers communicate using a Secure Socket Layer (SSL). The result is that hackers are much less likely to gain access to private information. As a result, your website will be trusted by your visitors and search engines will rank it higher.
Hostinger offers free SSL for a lifetime
Installing SSL on Hostinger is as simple as following these steps:
- Log into your Hostinger CPanel.
- Click on the Websites link.
- Then click the “Manage” button next to the website for which you want to activate SSL.
- From the sidebar, select SSL.
- Select “Install SSL” from the menu.
- You can import and install a custom SSL certificate by clicking Import and Install.
- Click the Save button.
In a matter of seconds, Hostinger will move your site from HTTP to HTTPS once your SSL certificate is installed. Your SSL certificate can be viewed under SSL > Details.
Step 4. The WordPress installation process
You can set up WordPress from the Hostinger Control Panel. WordPress can be installed with one click. You only need to give your username, password, and database name when you click the one-click installer.
In a few seconds, you’ll be able to access your website.
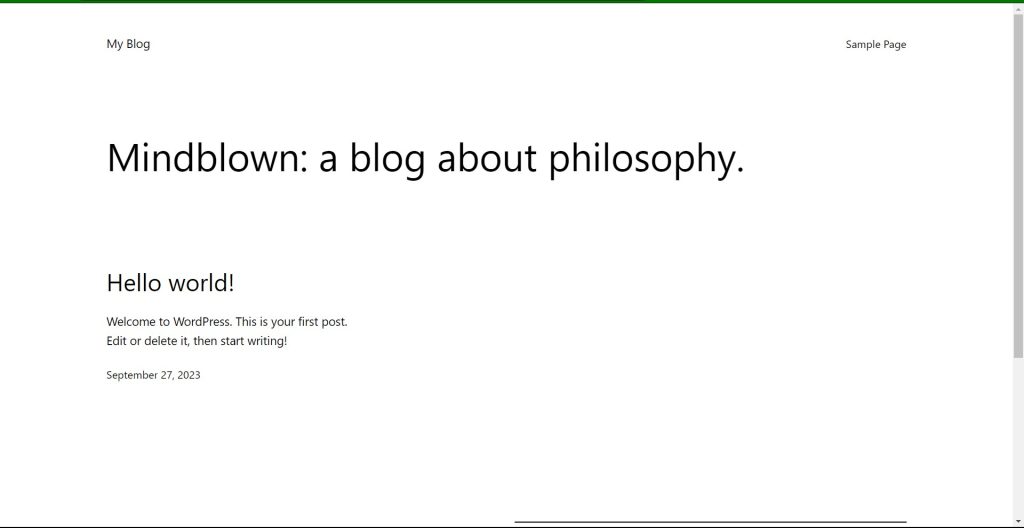
Great job! Your website has already gone live. Simply type the URL of your website into the browser. A default WordPress theme will display on your screen.
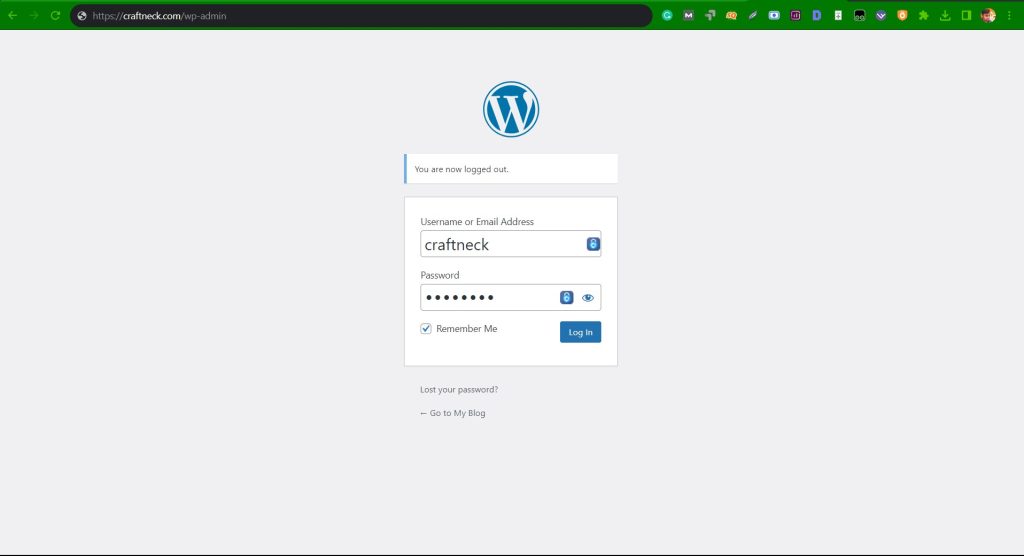
You need to type wp-admin right after the domain name with “/” on the browser. Then Log in with your username and password.
You will see a dashboard like this after logging in.
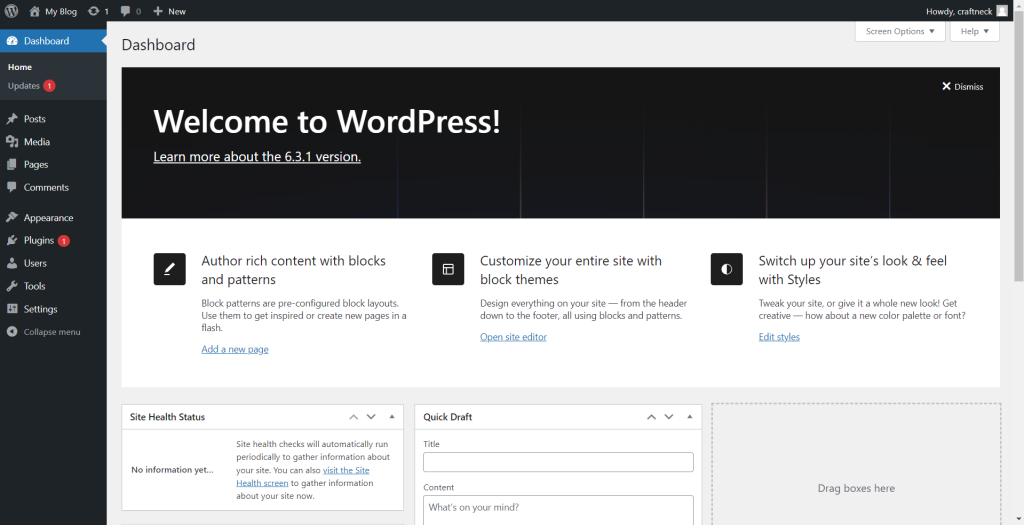
Now you will give your website a professional look.
All you need is to choose a theme and plugins that will instantly create your web pages.
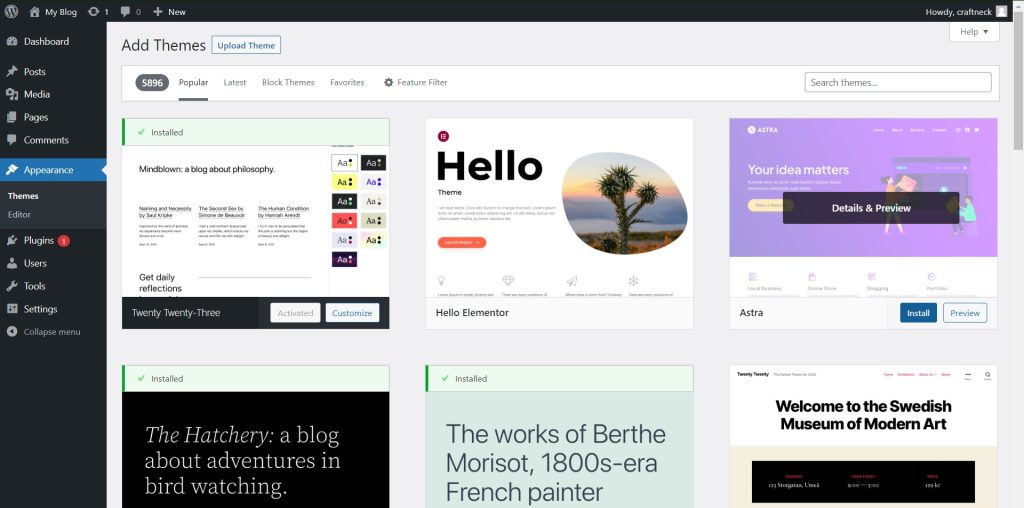
We are using the Astra theme and their starter templates plugin for this method.
Go to Appearance tab -> Themes -> Add New -> Type Astra on the Search bar
Click Install and wait a few seconds -> Then hit Activate
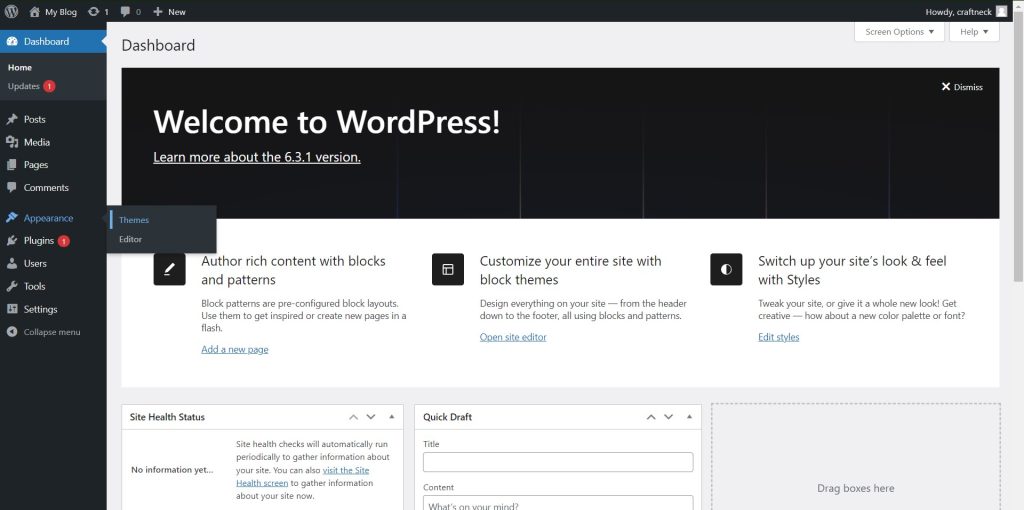
Go to the Plugins tab after installing the theme.
Click Add new -> Type Starter templates on the search bar -> Click Install Now and then Activate it.
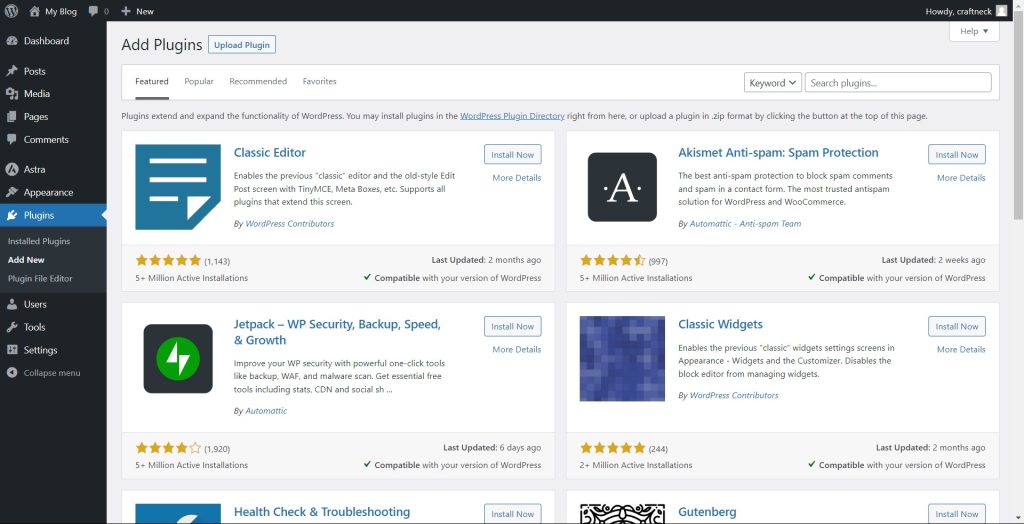
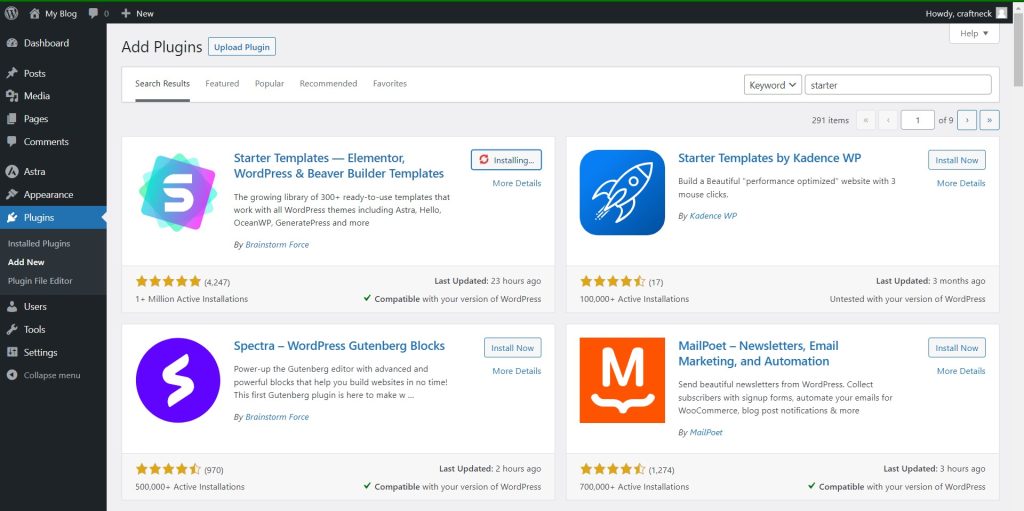
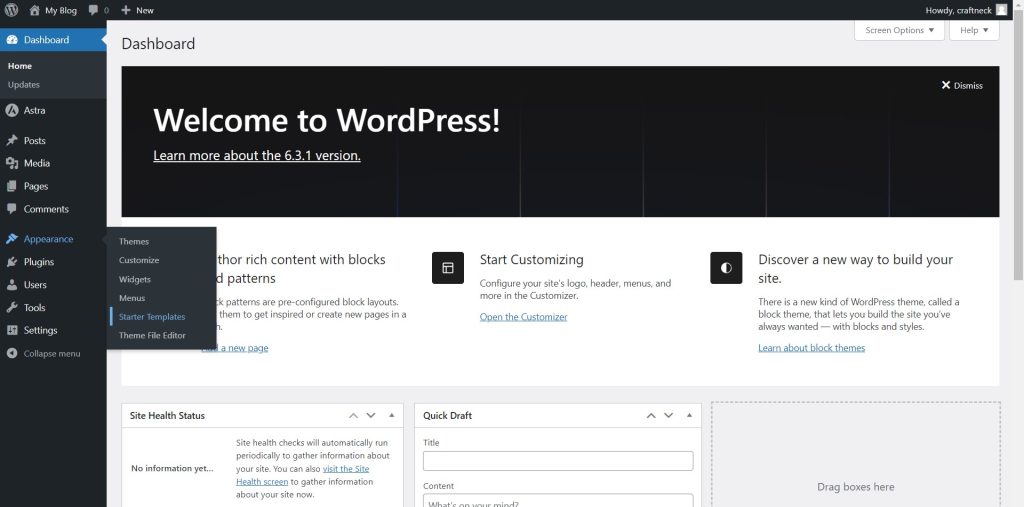
Once the Starter templates have been installed, navigate to the Appearance tab. Select the Starter templates from the menu.
You will find many ready-made templates for the Gutenberg editor, Elementor, and Beaver builder. Choose the template based on your website niche.
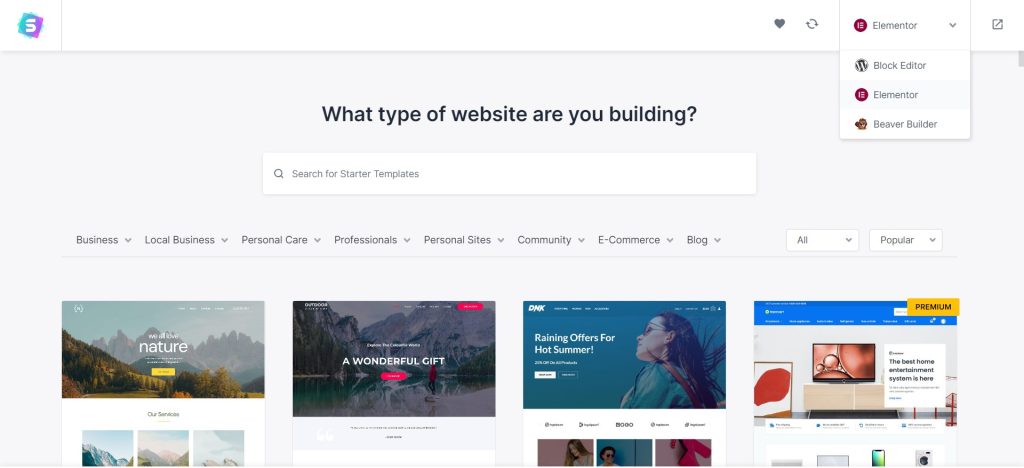
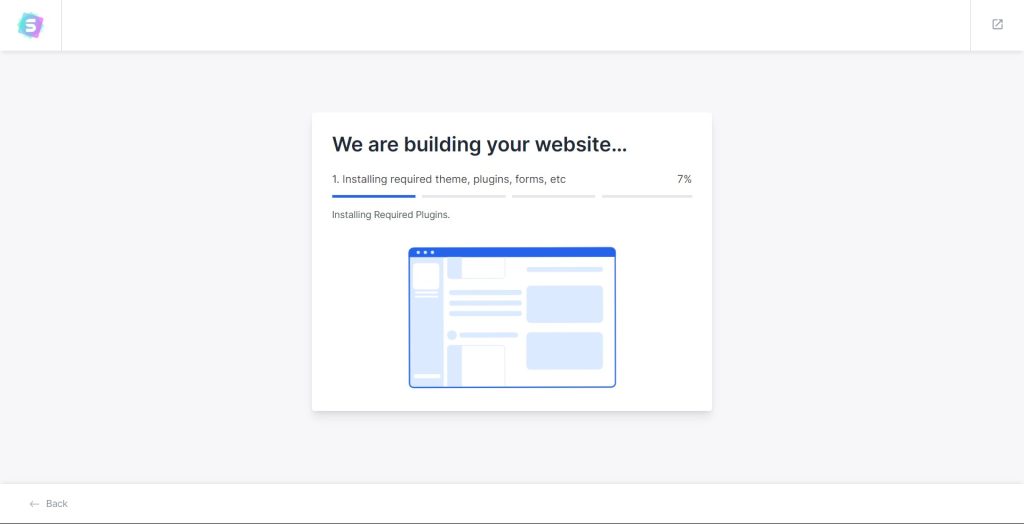
After selecting the template, click continue and skip all other settings, and then finally click submit & build my website.
You will see your website appear in just a few seconds.

You can navigate and check all the sections of your home page, about page, services page, and contact page. But if you want to use any other free themes, check these 65+ Best Free WordPress Themes.
Well, now our website structure is ready and we can edit the dummy content and also customize it with Elementor or block editor.
If you want to edit your page’s content, simply click Edit with Elementor above the header. But now we need to import our blog from WordPress.com to our custom domain.
How to add WordPress blog to existing website
To do that go to your blog dashboard.
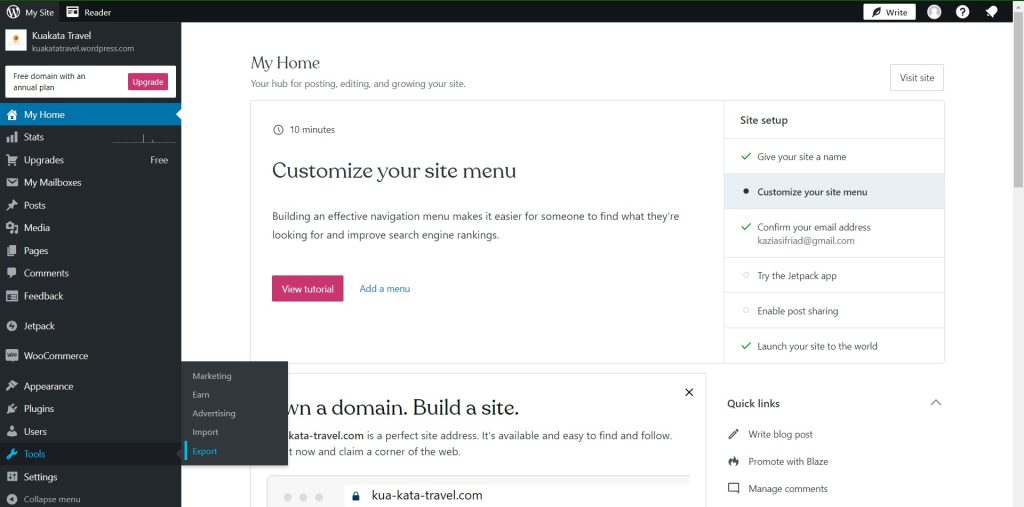
Then click Export All for all the contents. A download link will prompt, simply download the zip file. Then extract the file.
Again click Download for all the media files in the blog. A tar file will be downloaded.
Now go to your new website dashboard
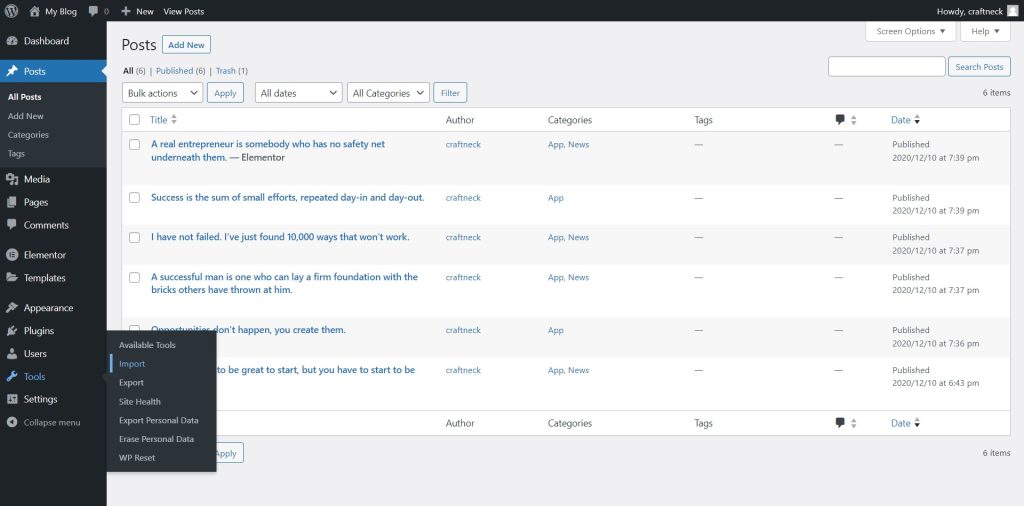
Click Tools -> Import
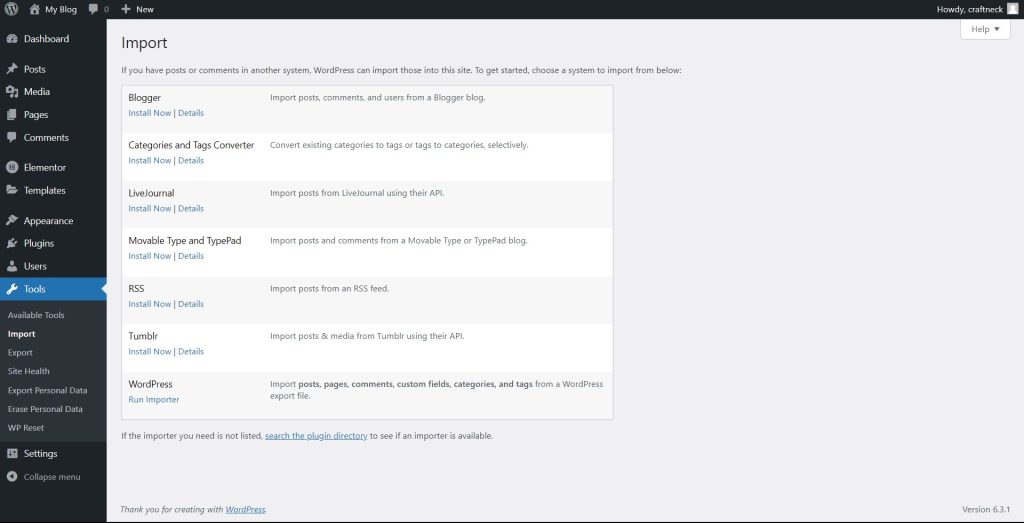
Click Install Now on the WordPress importer
Then click Run Importer
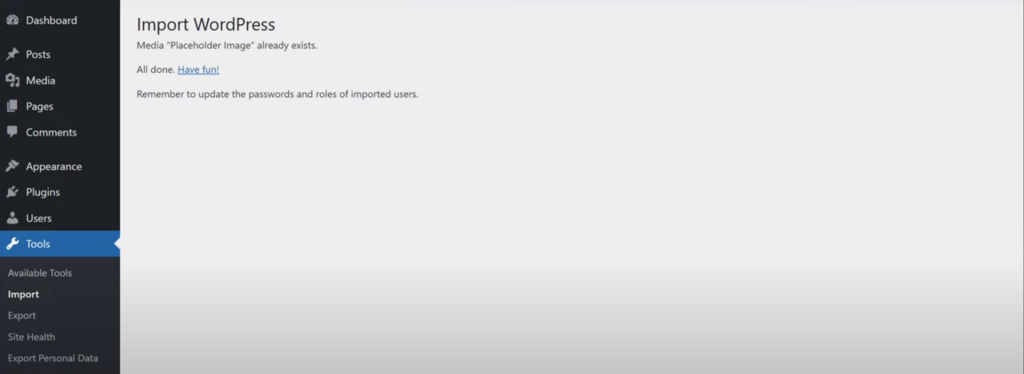
Click Upload file
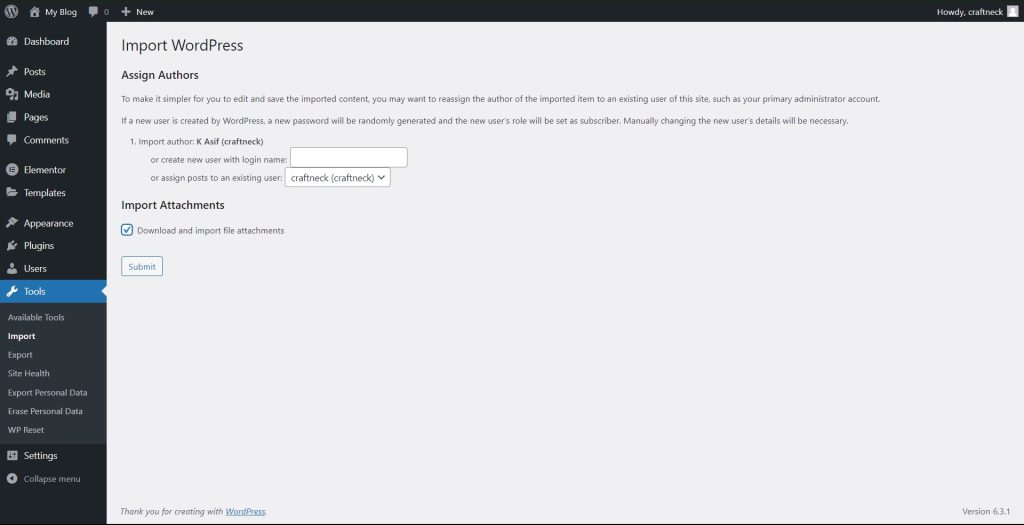
Assign the author to your new content and check the download and import file attachments.
Then click Submit
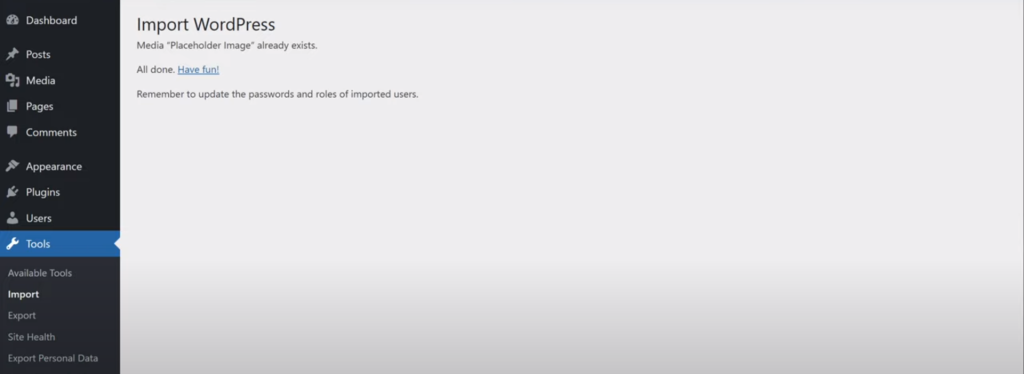
You have finally imported all the content from your blogs.
Now go to your WordPress.com blog and go to settings-> General-> Privacy
Set your blog to private. So that other visitors won’t find your blog.
But it won’t redirect your blog to your new website.
To do that you need to purchase the redirection plan from WordPress.com for $13 per year.
Final Thoughts
Awesome! Now you know how to change WordPress from blog to website?
With the right plan and these easy steps, you can convert your WordPress site from a blog into a website in no time. Keep your website fresh and engaging by updating and improving it constantly.
Make your WordPress site stand out by taking it to the next level. With just a few clicks, you can have a fully functional and stylish website!
FAQS
How can converting a WordPress blog to a website help with branding?
When a WordPress blog turns into a website, it increases brand visibility, offers better monetization opportunities, retains the existing audience and SEO efforts, provides more customization options, and promotes the website more effectively on social media platforms.
Can I convert my blogger into a WordPress website?
Yes, you can convert your blogger into a WordPress website.
1. Choose a web hosting provider and install WordPress.
2. Export your content from Blogger.
3. Import your content into WordPress using the Blogger Importer plugin.
4. Please set up your WordPress site and customize it to your liking.
5. Redirect your old Blogger URLs to your new WordPress URLs.
Can I buy a custom domain from WordPress.com?
Yes, you can buy a custom domain from WordPress.com. In fact, WordPress.com offers domain registration as part of its paid plans.

