Picture this: it’s 10 PM, and your visitor is browsing your WordPress website on their phone. Research shows that after 10 p.m., about 82.7% of users switch to dark mode, yet many websites still force them to stare at bright white backgrounds.
This mismatch between user preferences and website design creates an immediate disconnect. That’s why people now want dark mode in their WordPress sites as well.
To add dark mode in WordPress, enable Dark reader on your site. Then, in the settings panel, adjust the color contrast and grayscale of the dark theme. From the advanced settings, enable dark mode automatic scheduling.
It’s that simple. You don’t need to hire developers or write complex code. WordPress makes it possible to add professional dark mode functionality in minutes, not hours.
So, let’s get started.
How to Add Dark Mode in WordPress Website (Step by Step)
Adding dark mode to your WordPress website requires the right plugin and proper configuration.
We’ll use the Dark Reader plugin, which offers both free and premium features for creating professional dark mode experiences.
I recommend this plugin because, while other dark mode plugins on the market offer only a basic dark toggle, this WordPress dark reader plugin offers advanced colour contrast, automatic scheduling, and works with any builder’s like feature.
So, let’s jump into the steps.
Step 1: Install the Dark Reader Plugin on WordPress
The Dark Reader plugin transforms your WordPress site with customizable dark mode functionality. Here’s how to get started:
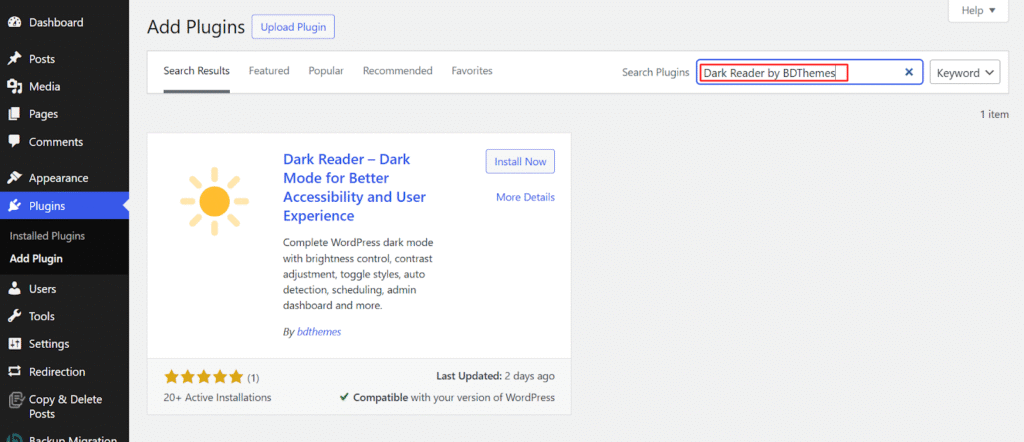
- Navigate to your WordPress dashboard and click on Plugins → Add New.
- In the search bar, type “Dark Reader” and look for the official plugin by BdThemes.
- Click Install Now
- Activate once the installation completes.
- The plugin will appear in your WordPress admin sidebar under Settings → Dark Reader.
Step 2: Configure Basic Dark Mode Appearance Settings
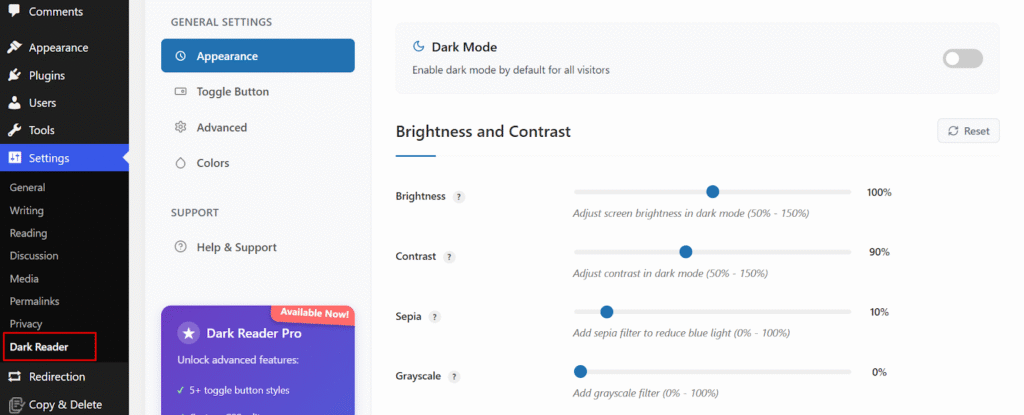
Once activated, access the plugin settings by navigating to Settings → Dark Reader in your WordPress admin.
Step 2.1: Set Default Dark Mode Behavior for New Visitors
In the Appearance tab, you’ll find the Dark Mode toggle.
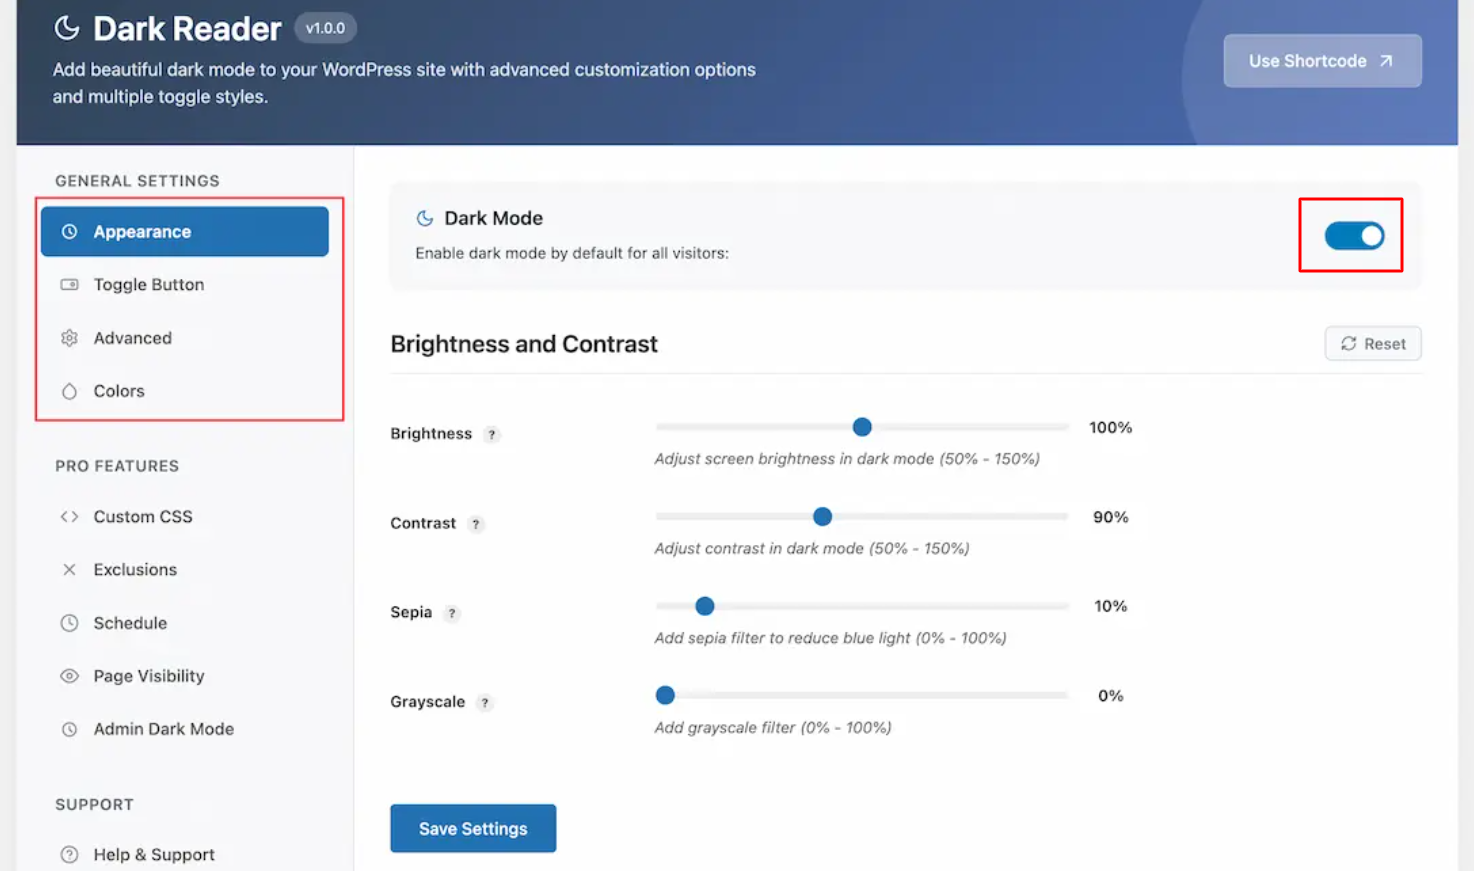
Enable this to set your website to display in dark mode by default for all visitors. Most users prefer to have control over this choice, so consider leaving it disabled initially.
Step 2.2: Adjust Visual Elements for Optimal Dark Mode Display
Fine-tune your dark mode appearance with these controls:
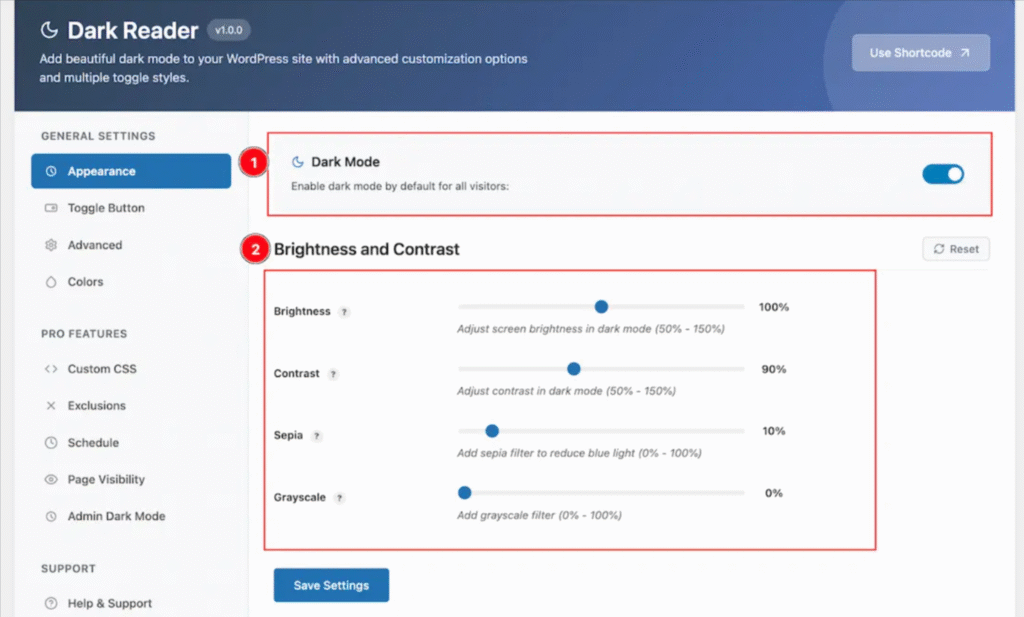
- Brightness: Set between 50% – 150% to control overall luminance in dark mode
- Contrast: Adjust between 50% – 150% to sharpen or soften element edges
- Sepia: Apply a warm filter from 0% – 100% for reduced blue light
- Grayscale: Add grayscale effect from 0% – 100% for minimal distraction
These settings help you create a dark mode experience that matches your brand while maintaining readability.
Step 3: Customize the Dark Mode Toggle Button Position and Style
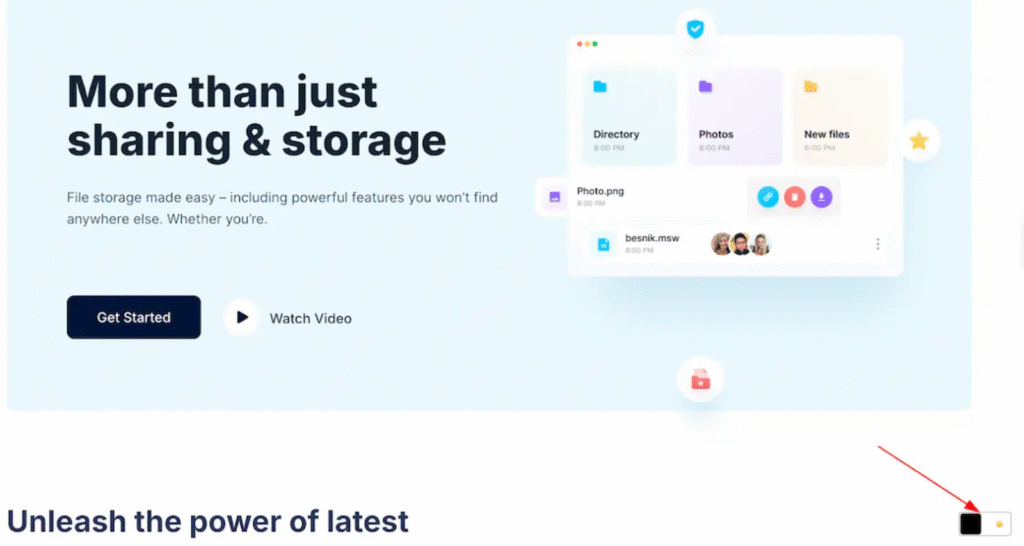
Your visitors need an easy way to switch between light and dark modes. The toggle button serves this crucial function, and its placement and design significantly impact user experience.
Step 3.1: Choose the Best Toggle Button Position for Your Website
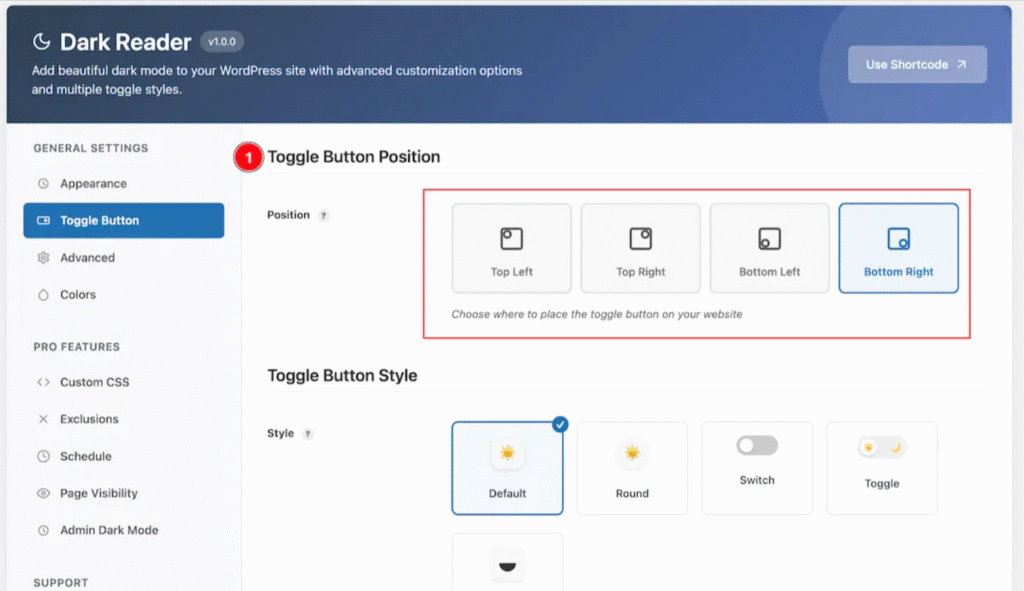
Select where the toggle button appears on your website:
- Top Left: Visible but doesn’t interfere with main content
- Top Right: Common placement that users expect
- Bottom Left: Less intrusive for reading-focused sites
- Bottom Right: Popular choice for most WordPress sites
Step 3.2: Select Toggle Button Design That Matches Your Brand
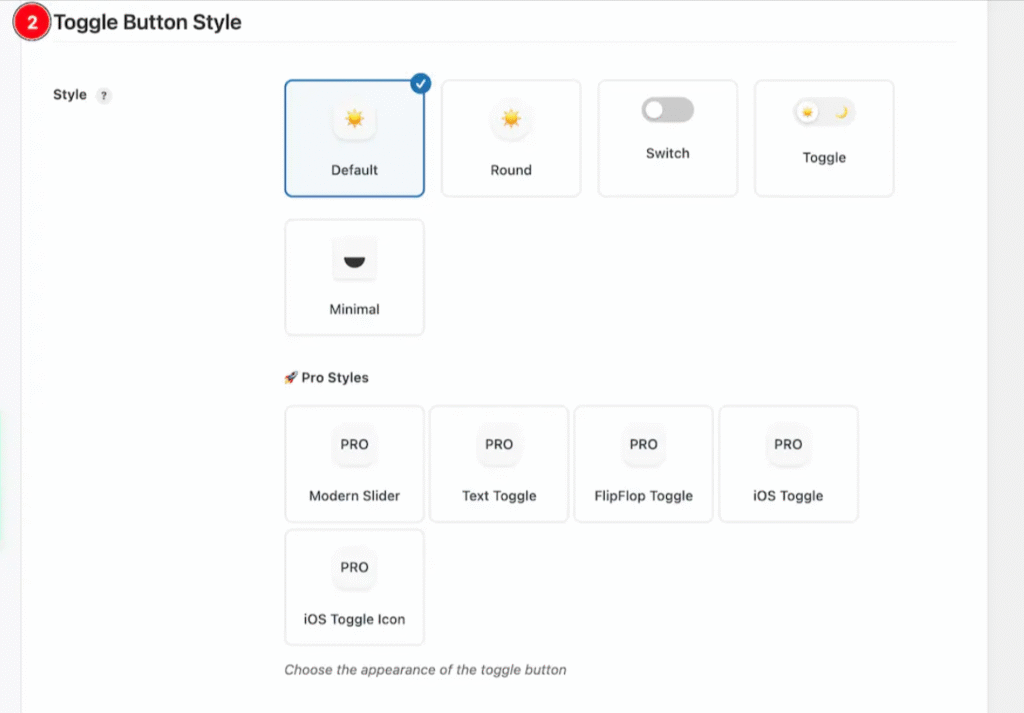
The plugin offers several free styles:
- Default: Simple text-based toggle
- Round: Circular button design
- Switch: iOS-style sliding toggle
- Toggle: Traditional on/off button
- Minimal: Subtle icon-only approach
Pro users get additional premium styles:
- Modern Slider: Contemporary sliding animation
- Text Toggle: Clean text-based switching
- FlipFlop Toggle: Animated flip transition
- iOS Toggle: Apple-inspired design
- iOS Toggle Icon: Icon version of iOS style
Choose a style that complements your website’s design and provides clear visual feedback when toggled.
Step 4: Enable Smart Dark Mode Detection and Advanced Settings
Beyond basic appearance, the plugin offers intelligent features that enhance user experience by automatically detecting preferences and applying dark mode to various content types.
Step 4.1: Activate System Color Scheme Detection for Seamless Experience
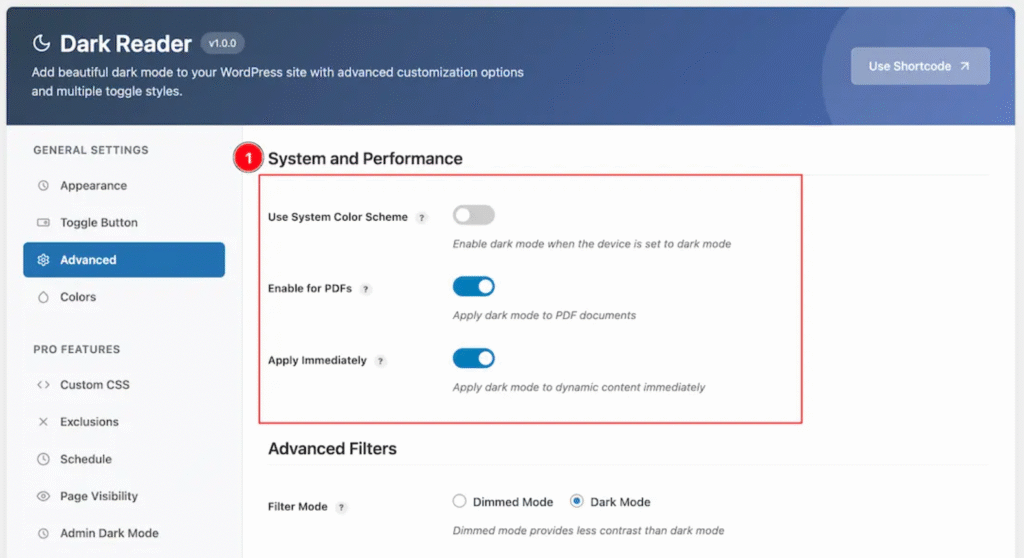
Enable Use System Color Scheme to automatically detect if your visitors have dark mode enabled on their device.
This creates a seamless experience by matching their system preferences without requiring manual toggling.
Step 4.2: Configure Dark Mode Application for Different Content Types
Configure how dark mode applies to different content types:
- Enable for PDFs: Apply dark mode to embedded PDF files and documents
- Apply Immediately: Instantly apply dark mode to dynamic content that loads after the initial page
Step 4.3: Set Advanced Filter Options for Enhanced Visual Control
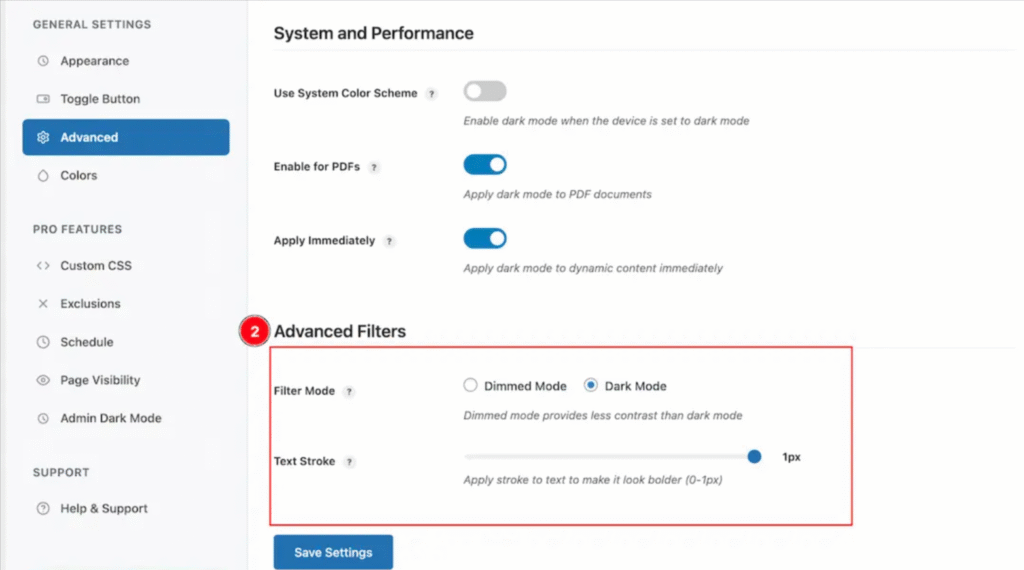
Choose your Filter Mode:
- Dimmed Mode: Subtle darkening that maintains some original colors
- Dark Mode: Full transformation to dark theme
Add Text Stroke to improve text readability if needed, particularly useful for websites with complex backgrounds or images.
Step 5: Fine-Tune Dark Mode Colors and Apply Custom CSS Styling
Creating the perfect dark mode experience often requires adjusting colors and applying custom styles. This step covers both basic color adjustments and advanced CSS customization options.
Step 5.1: Customize Background and Text Colors for Brand Consistency
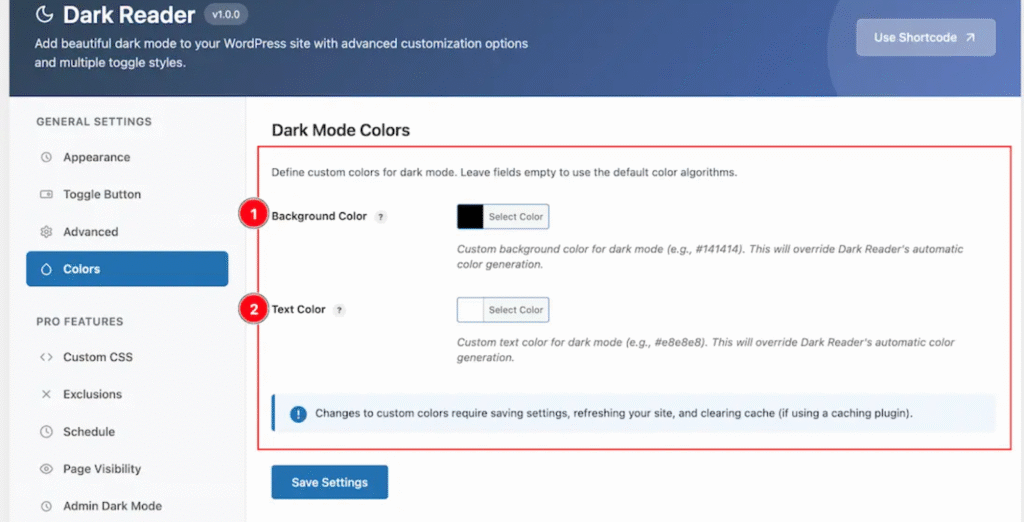
Fine-tune your dark mode palette in the Colors tab:
- Background Color: Set the main dark background color for your site
- Text Color: Choose the text color that provides optimal contrast and readability
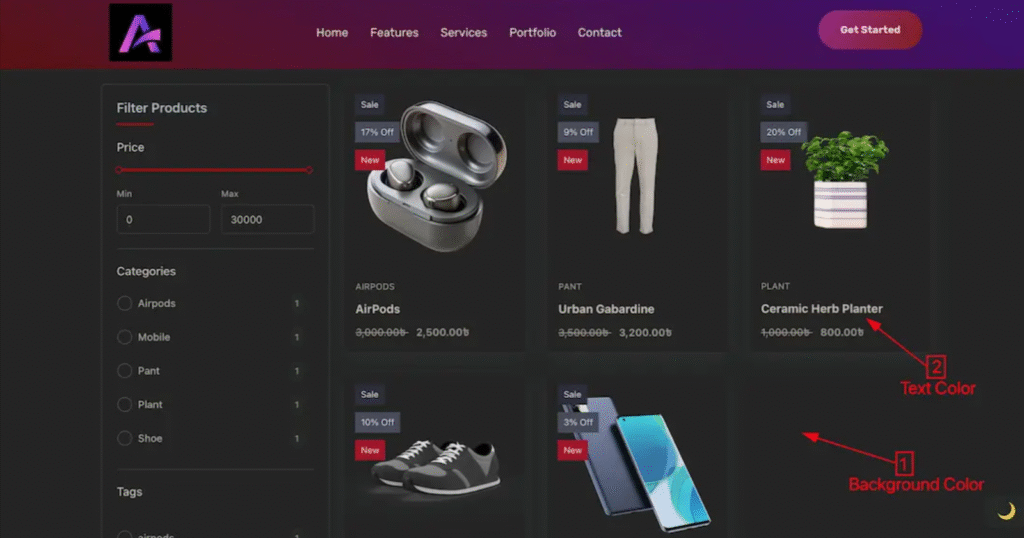
Test different combinations to ensure accessibility standards are met while maintaining your brand identity.
Step 5.2: Add Custom CSS for Advanced Dark Mode Styling
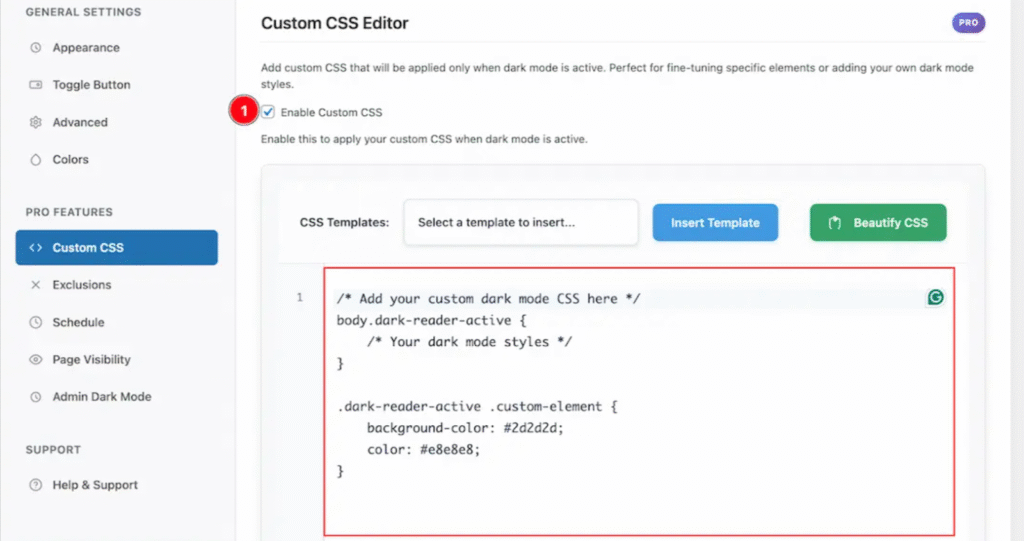
The Custom CSS tab allows advanced customization:
- Enable Custom CSS to apply styles only when dark mode is active
- Use the provided CSS Templates for common customizations
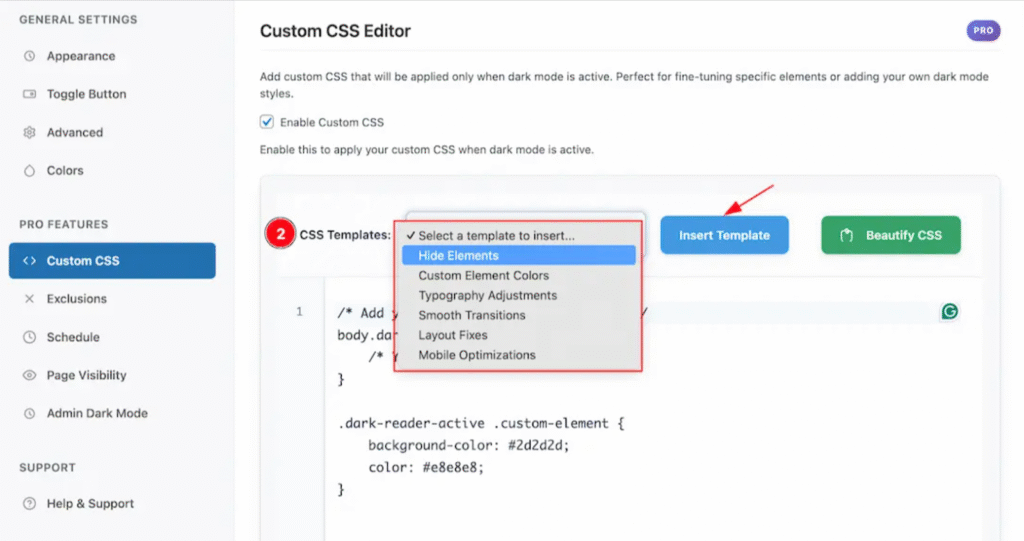
- Click Beautify CSS to format your code for better readability
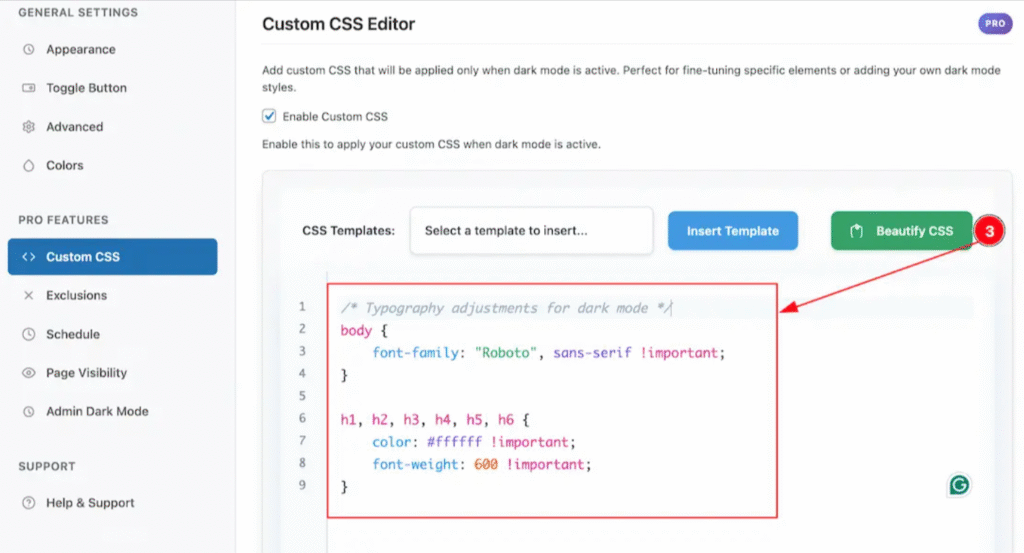
This feature lets you fine-tune specific elements that might need special attention in dark mode.
Step 5.3: Exclude Specific Elements from Dark Mode Transformation

Some elements look better in their original colors. Configure exclusions:
- CSS Selectors: Exclude specific elements using CSS selectors like .logo or #header-image.
- Image Exclusions: Prevent all images from being affected by dark mode transformations.
- Logo Images: Keep your logo in original colors using specific CSS selectors.
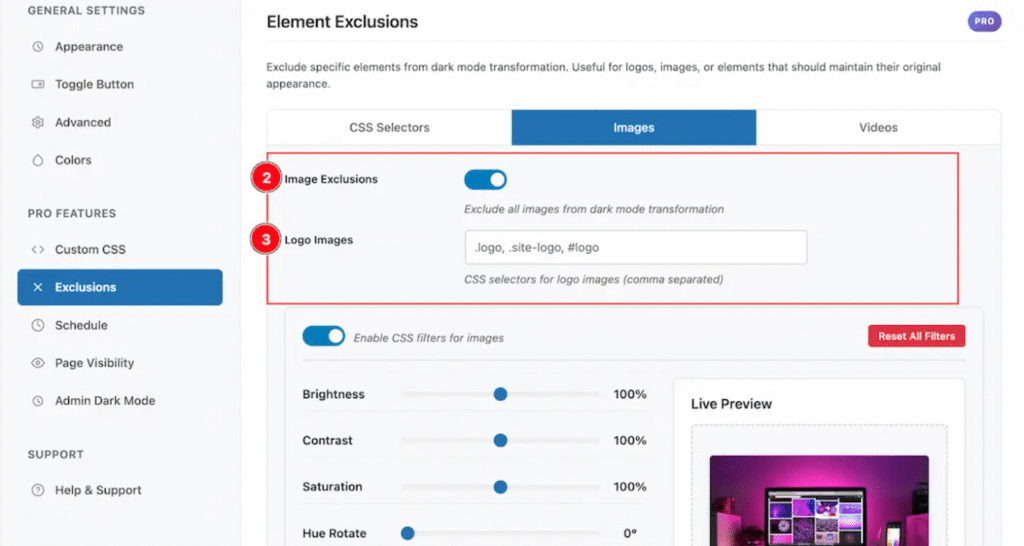
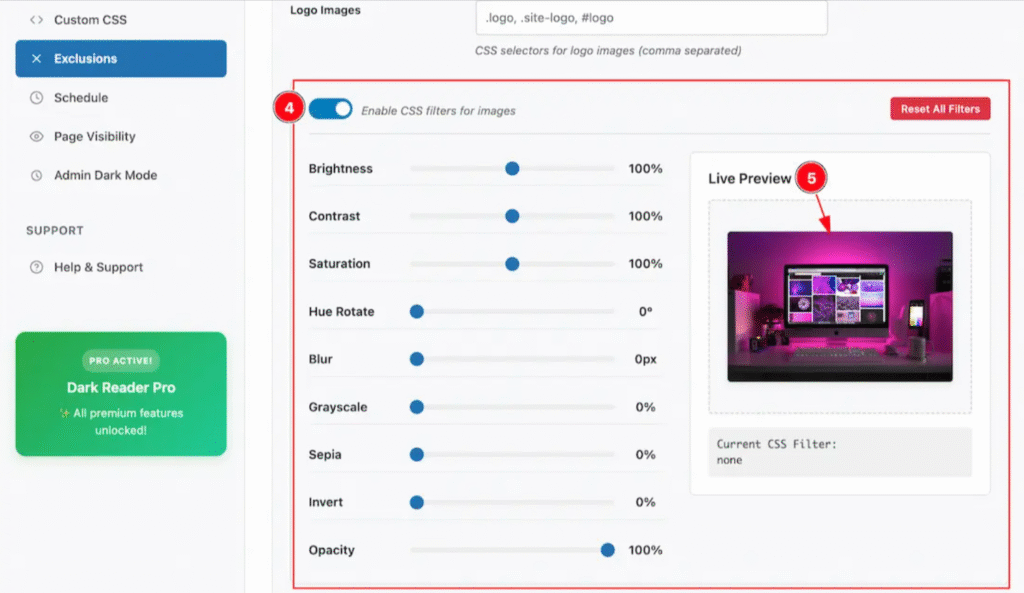
- CSS Filters: Apply custom filters to images and videos in dark mode, including brightness, contrast, saturation, and blur adjustments.
Step 5.4: Schedule Automatic Dark Mode Activation Based on Time or Conditions
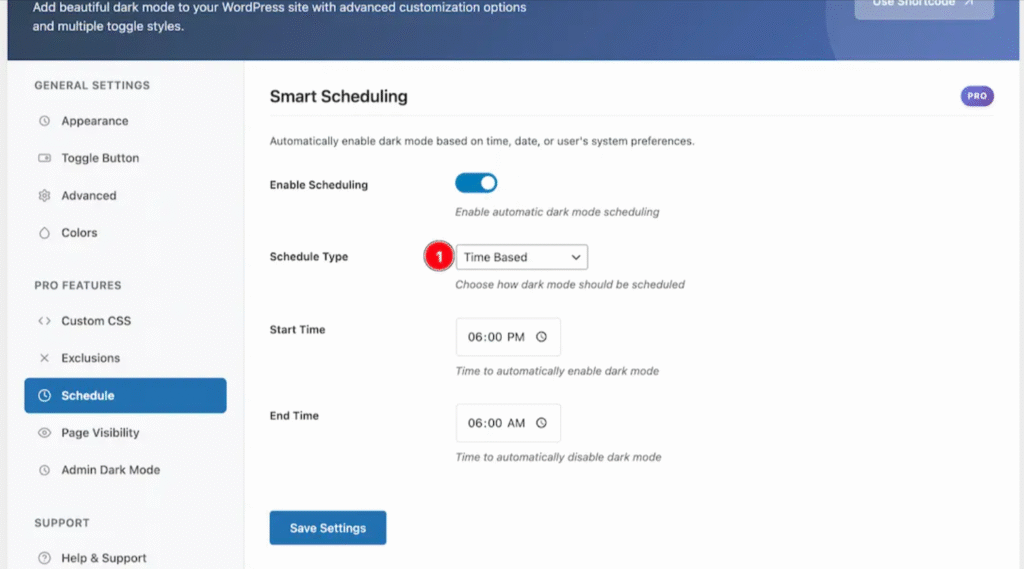
Set up automatic dark mode activation based on time or conditions:
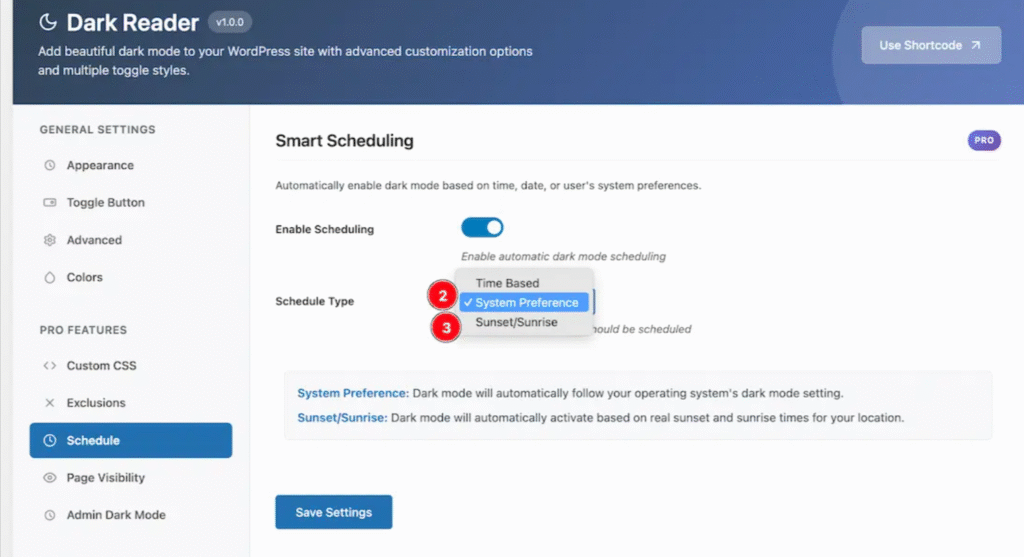
- Time-Based Scheduling: Set specific start and end times for automatic dark mode activation. Perfect for websites targeting users in specific time zones.
- System Preference: Dark mode automatically follows the user’s operating system setting.
- Sunset/Sunrise: Automatically activate dark mode based on the user’s location’s actual sunset and sunrise times.
Step 6: Control Dark Mode Visibility Across Different Pages
Managing where dark mode appears on your website gives you granular control over user experience. This is particularly useful during testing phases or for sites with specific design requirements on certain pages.
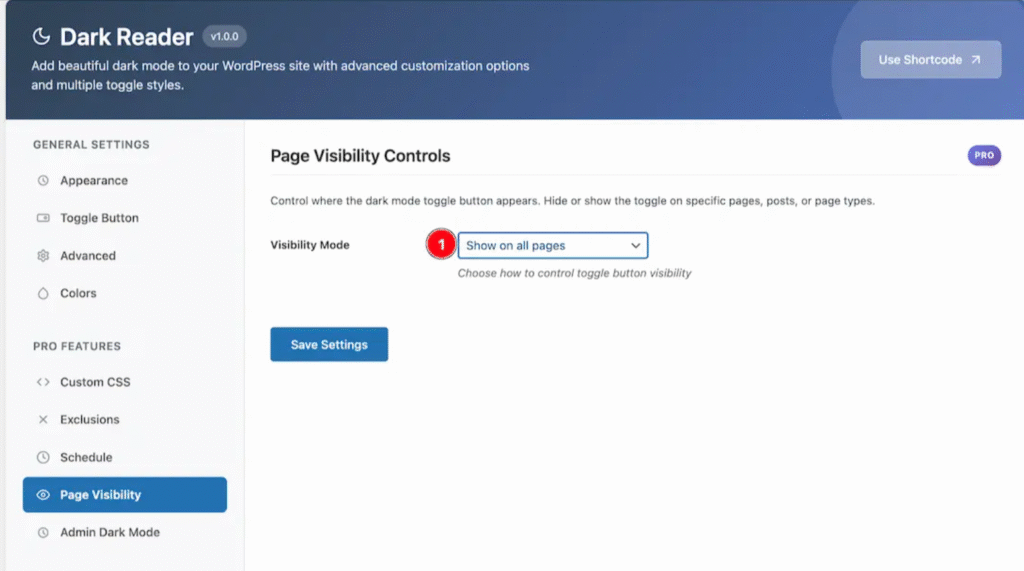
Control where dark mode appears across your website:
Step 6.1: Set Page-Specific Dark Mode Visibility Rules
- Show on all pages: Apply dark mode toggle site-wide
- Show only on selected pages: Limit dark mode to specific pages or posts
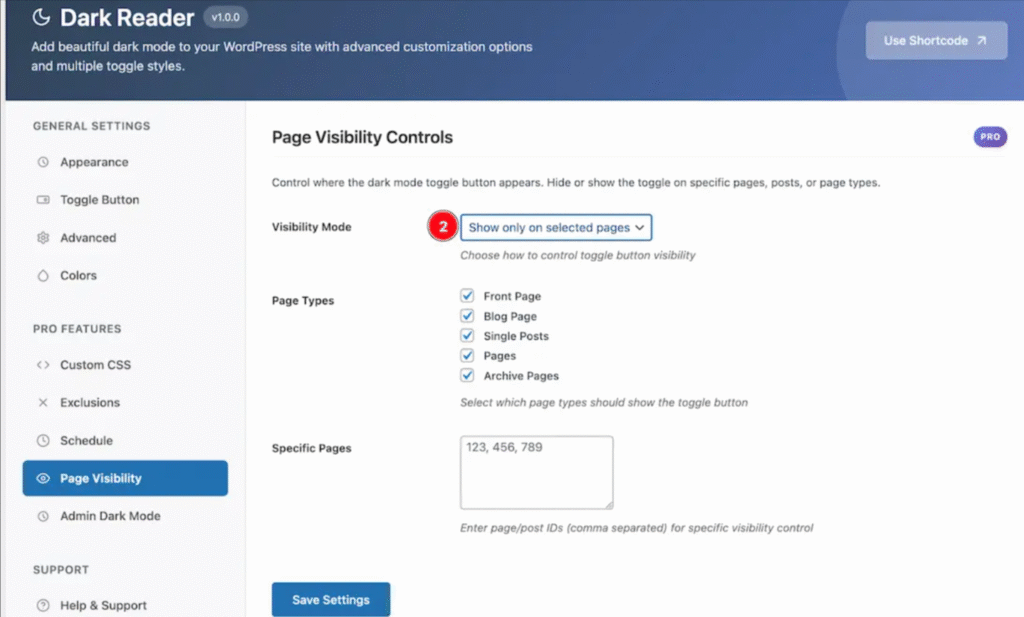
- Hide on selected pages: Exclude dark mode from certain pages
- Hide on all pages: Temporarily disable dark mode across the site
This granular control helps you test dark mode gradually or exclude pages where it might interfere with specific design elements.
Step 6.2: Enable Dark Mode for WordPress Admin Dashboard
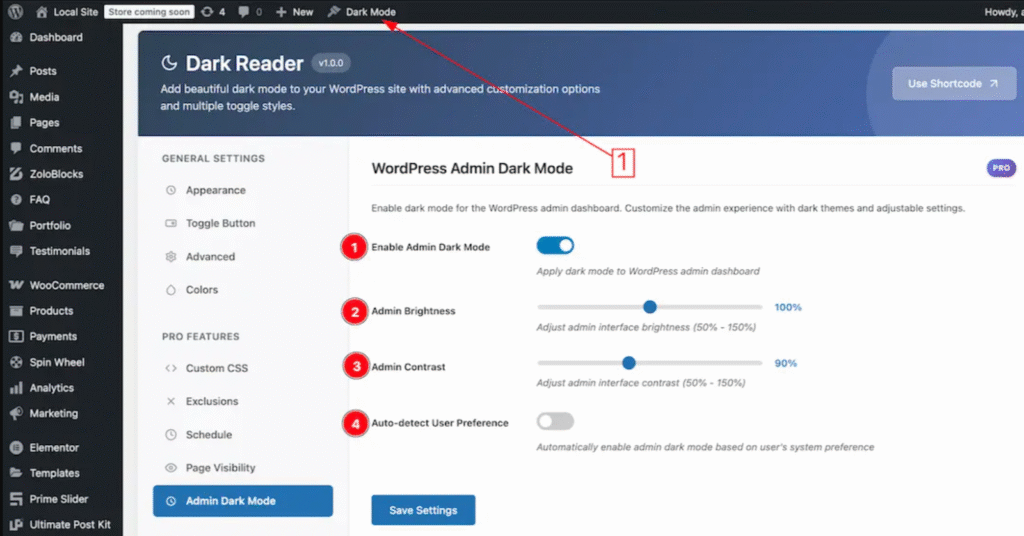
Enable dark mode for your WordPress admin dashboard:
- Toggle Enable Admin Dark Mode for a dark backend experience
- Adjust Admin Brightness (50% – 150%) for comfortable editing
- Set Admin Contrast (50% – 150%) for optimal readability
- Enable Auto detect user preference to follow system settings
Step 7: Place Dark Mode Toggle Anywhere Using WordPress Shortcodes
The shortcode feature provides maximum flexibility for toggle button placement, allowing you to position the dark mode switch exactly where your users expect to find it.
The [dark_reader_toggle] shortcode provides maximum flexibility for toggle button placement.
Step 7.1: Use the Dark Reader Shortcode for Custom Placement
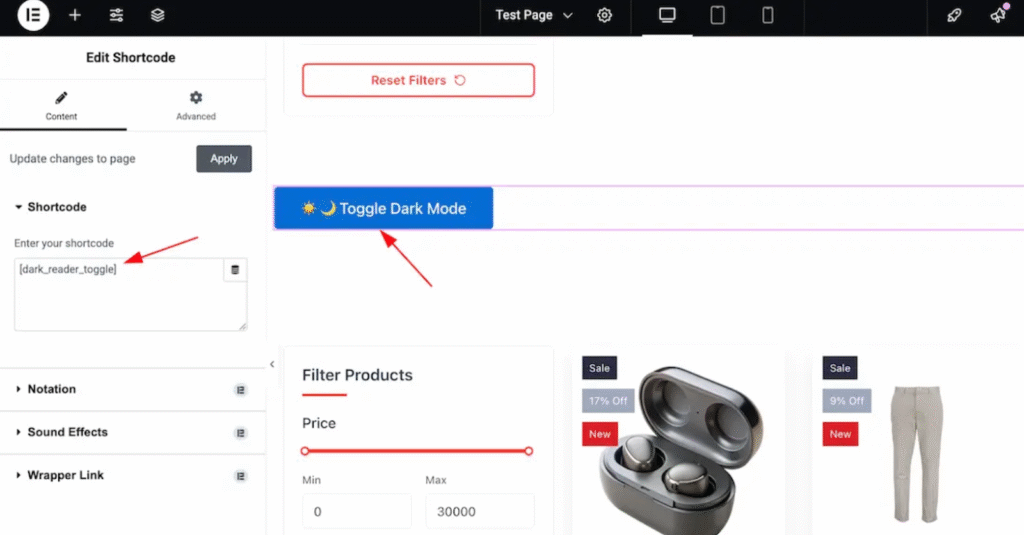
Add the shortcode anywhere on your site:
- Pages and Posts: Insert directly in the content editor
- Widgets: Use the shortcode widget in sidebars or footers
- Theme Files: Add via PHP using do_shortcode(‘[dark_reader_toggle]’)
- Page Builders: Most builders support shortcode elements
Step 7.2: Customize Toggle Button Text for Better User Understanding
Customize the toggle button text to match your site’s tone:
- “Switch to Dark Mode” / “Switch to Light Mode”
- “Night Mode” / “Day Mode”
- “Dark Theme” / “Light Theme”
Choose terminology that resonates with your audience and maintains consistency with your site’s voice.
Step 8: Test and Optimize Your Dark Mode Implementation
Before launching a dark mode site-wide, thorough testing ensures a smooth user experience. This final step involves checking functionality across different devices and troubleshooting common issues.
Complete Frontend Dark Mode Testing Checklist
- Toggle Functionality: Verify the button works on all pages
- Color Contrast: Check readability of all text elements
- Image Appearance: Ensure images look appropriate in dark mode
- Form Elements: Test input fields, buttons, and interactive elements
- Mobile Responsiveness: Verify dark mode works across devices
- Loading Speed: Confirm dark mode doesn’t slow page performance
Resolve Common Dark Mode Implementation Issues
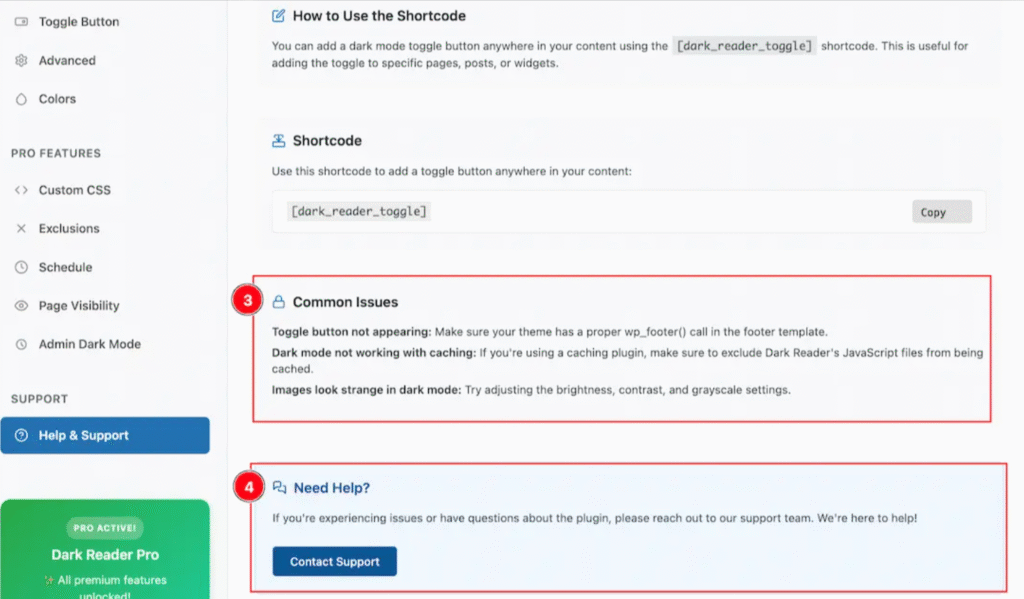
- Toggle Button Not Showing: Clear caching plugins and check for theme conflicts.
- Images Look Strange: Use the image exclusions feature for photos that need original colors.
- Text Readability Issues: Adjust brightness, contrast, or add text stroke in advanced settings.
- Caching Problems: Most caching plugins need to be purged after dark mode changes.
Step 9: Save Settings and Go Live
After configuring all settings, click the Save Settings button at the bottom of the Dark Reader configuration page.
This applies all your customizations and enables dark mode for your visitors.
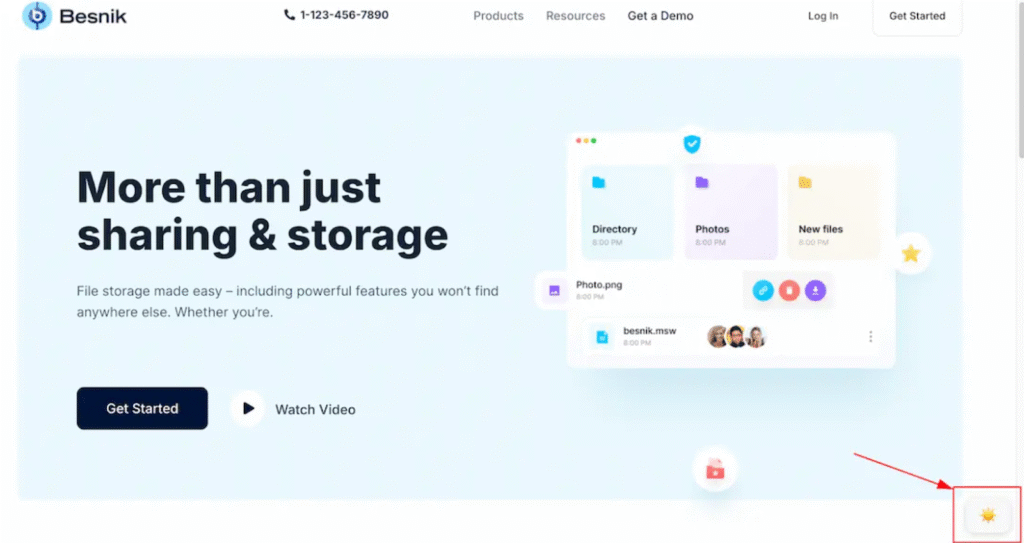
Test the frontend of your website by clicking the dark mode toggle button.
The transformation should be smooth and immediate, providing users with an instant alternative viewing experience.
Frequently Asked Questions
Does dark mode actually improve website performance?
Dark mode itself doesn’t directly improve website loading speeds, but it can reduce power consumption on devices with OLED screens. When the screen was at 100% brightness, dark mode reduced power consumption by an average of 67%, helping preserve battery life and encouraging longer browsing sessions.
Will adding dark mode affect my website’s SEO?
Dark mode doesn’t negatively impact SEO when implemented properly through plugins like Dark Reader. Search engines crawl the default (light) version of your site, while dark mode is applied on the frontend via CSS and JavaScript. The content and structure remain identical, maintaining your SEO value.
Can I customize the dark mode colors to match my brand?
Yes, the Dark Reader Pro version allows custom color selection for backgrounds and text. You can also use custom CSS to fine-tune specific elements, ensuring your brand identity remains consistent across both light and dark themes.
How do I handle images and logos in dark mode?
With Dark Reader, you can exclude the logo and images from the dark mode effect. This plugin has a dedicated panel for excluding elements from dark mode. Not only images, but you can also exclude pages, posts, etc.
Conclusion
Implementing dark mode on your WordPress website no longer requires technical expertise or custom development.
The Dark Reader plugin simplifies the entire process, offering both free and premium options to match your specific needs. From basic toggle functionality to advanced scheduling and custom CSS integration, you can create a professional dark mode experience without writing a single line of code.
Start with the basic setup and gradually explore advanced features as your comfort level increases. Your visitors will appreciate having the choice to browse your content in their preferred viewing mode, potentially increasing engagement and time spent on your site.
Ready to give your WordPress site a modern dark mode makeover? Install the Dark Reader plugin today and join the millions of websites providing better user experiences through adaptive design.