

If you plan on running your own online store and launching your entrepreneurial career with your online business, you have come to the right place.
In this article, we will show you how to design an Ecommerce website with Elementor and WooCommerce. We have covered everything i.e.: from choosing the best platform for your business to launching your own Ecommerce website.
Why Choose Ecommerce?
However, starting and running a physical storefront is challenging for you and requires a huge amount of capital investment. But, building and launching an Ecommerce website and selling your products online is pretty within reach for you.
In this modern world, shopping online is not a luxury anymore, it becomes a necessity in our daily life. Nowadays, 25% of the total world population are shopping on PCs or mobiles, and the number is moving upward quickly.
To start your online business, all you need is a well-designed, fully functional Ecommerce website that helps you to promote your products to a wide range of customers.
If you sell products via a physical storefront that is limited, you can only reach a limited number of people and it depends on available stocks and opening times. On the other hand, you can sell your products all over the globe via Ecommerce website.
So, let’s get started!
How to Design an Ecommerce Website with Elementor and WooCommerce
Ecommerce refers to a business model which involves sales and transactions done on the web. Every online shopping website follows this structure. An Ecommerce website refers to any site where you can choose and obtain items for sale over the internet.
With WordPress, Elementor, and WooCommrece, you can design a fully functional and cost-effective Ecommerce website that needs no coding. Elementor’s features, templates, and drag & drop editor allow you to customize your own Ecommerce website.
Before you design your Ecommerce store, you have to set up all the required elements for it. Basic settings and customizations of your E-commerce store are needed for this.
You will need these pre-requisites to create your online shop:
- A WordPress site
- WooCommerce
- Elementor
- Element Pack Pro
Now, the question arises in your mind normally- ‘why will I use WooCommerce and Elementor for my WordPress online shop?’ The answer is below-
WooCommerce
WooCommerce helps to turn your WordPress site into an Ecommerce business platform without coding or HTML in the blink of your eyes, and know what? you can do it with just a few clicks. The more amazing thing is, this plugin comes with all the basic functionalities of an online store for free. You can extend your store’s capabilities with a number of options of this plugin.
It provides all the flexibility and various exciting features i.e.: inventory, secure payments, tax management, and shipping integration. For this, it runs over 28% of all online stores.
Elementor
Now, let’s put the spotlight on Elementor. You can easily design your website like ABC with this drag-and-drop page builder. You can get your site ready to live with a few clicks. You don’t need the help of a professional to build a nice-looking site. The reason why more than 5 million people are actively using it on their WordPress site.
The combination of WooCommerce and Elementor makes the infinite possibilities of selling with your Ecommerce store, no matter what or how much you are selling.
The question is moving in your mind- ‘how to design an Ecommerce website with Elementor and WooCommerce?’ We will answer it at a step. You have to wait a bit.
Key elements of an Ecommerce website and their roles
Before starting the guide to create your site, you need to know the pages and elements every easily accessible Ecommerce website needs:
- Homepage: It is the storefront of your business that attracts the attention of your visitors that leads to the success of your business. The hero image depicts the name of your store and your latest, new and popular products along with a compelling message and clearly displaying a search bar.
- Category page: This page is the list view for the products of a specific category of your shop. You can categorize your products here. This can be decided based on industry norms, search volume, and market research. Each category needs its own lobby page describing the available products, a well-designed grid, with pictures of the product, and price information. Make sure that your customers can navigate, search, and get the precise product they are looking for.
- Category Overview: You can display all the categories of your store including sub-categories and others. So, your visitors can easily understand what you are selling and immediately check their required products. You can skip this if your store has only one category of products.
- Product page: This page displays the details of a particular product i.e.: product description, price, product photos, ‘Add to Cart’ CTA, shipping, and delivery details, and any relevant information like size, weight, product ratings, testimonials, stock availability, etc. If you want to upsell additional products, you should include a ‘People also buy’ carousel with relevant related products.
- Search & Search Results: You can add searching options essential in an online store to help your customers who want quick access to their desired page.
- Location of your physical store: If you have also a physical store, then you must include the address and contact details of it because some people check your site just to know the address of your nearest outlet.
- Cart: Digital shoppers can see here the products they have added from your shop. They can see the total price including shipping charge, insert the promo code, and discounts on this page. Always remember that cart abandonment is a big issue for any eCommerce business.
- My Order: On this page, your customers can check the order history that helps them check their previous shopping items- reorder them or cancel an item.
- Returns: A return/exchange option under some conditions gives great confidence to your visitors to continue their shopping on your site.
- Checkout Funnel: The checkout funnel must be smooth, seamless, and fully optimized. The funnel includes a shopping cart where your customers add their products, checkout with CTA, and confirmation.
- Guest Checkout: Not all visitors feel comfortable sharing their information to buy a product. You can allow your visitors to buy without registering on your site.
- Reviews: Allowing your customers to share their views, demands, queries, and shopping experience on your eCommerce site is very important. Positive feedback works as a great influencer for new customers.
- Blog: Finally, you need a blog for your Ecommerce store. You need to inform your visitors and potential customers about the benefits of your products via your website. A high-quality blog post helps a lot to promote your website in search engines that increase more traffic to your site and sales.
You are eagerly waiting for the answer to this question- ‘how to design an Ecommerce website with Elementor and WooCommerce?’ Well, we are going to that point. Please have patience.
Let’s take it you have already had your necessary domain and hosting plan for your website. Now, configure your WordPress site and install all the required plugins including WooCommerce, Elementor, Element Pack Pro, and Best Upsell for WooCommerce.
Then, you can create and customize or design your Ecommerce site easily in WordPress and Elementor by installing WooCommerce.
Finding the answer to ‘how to design an Ecommerce website with Elementor and WooCommerce?’ Just wait a minute!
Here is the step-by-step guide for this:
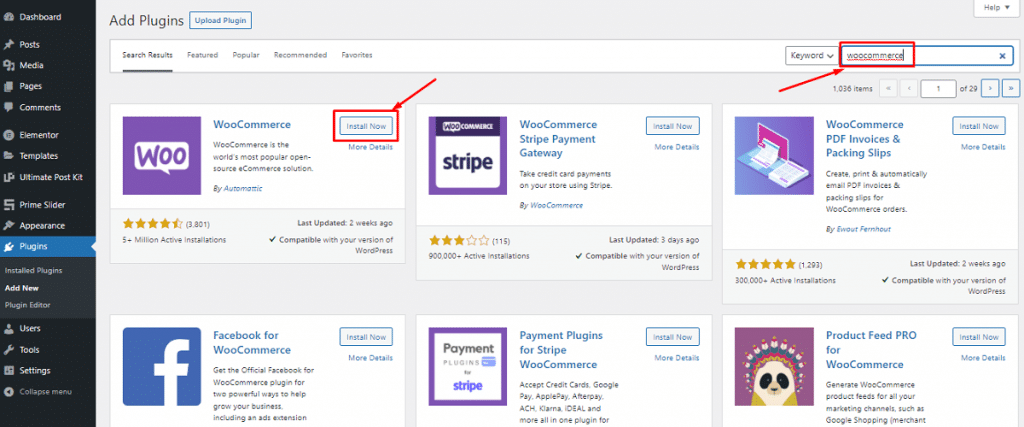
Step-1: Start by installing WooCommerce plugin.
Navigate to the WordPress Admin Dashboard>Plugins>Add New.
Then, search for ‘WooCommerce’.
After that, install the plugin by clicking on ‘Install now’ button.
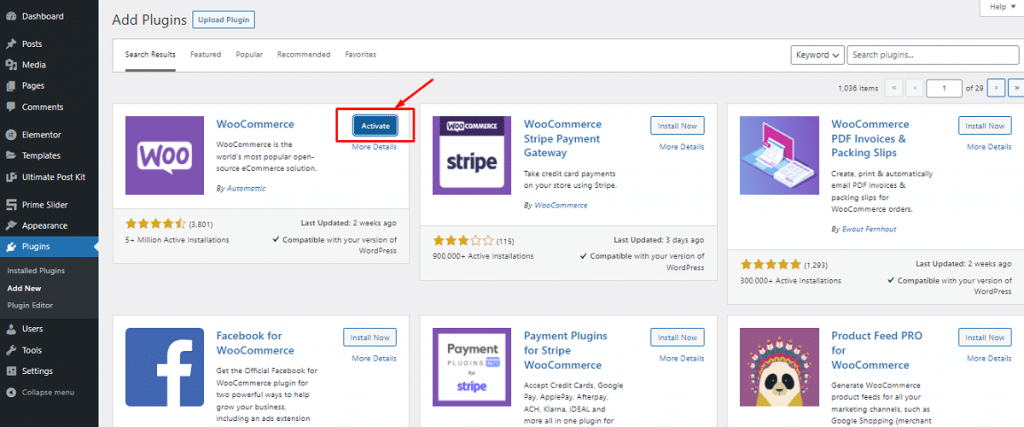
Now, click on ‘Activate’ as consecutive attempts.
Now, you will get an installation wizard. Instead of skipping this part, it’s better to go through the process and make all the basic customization accordingly. Here we will choose ‘Continue’ to get started with the setup wizard.
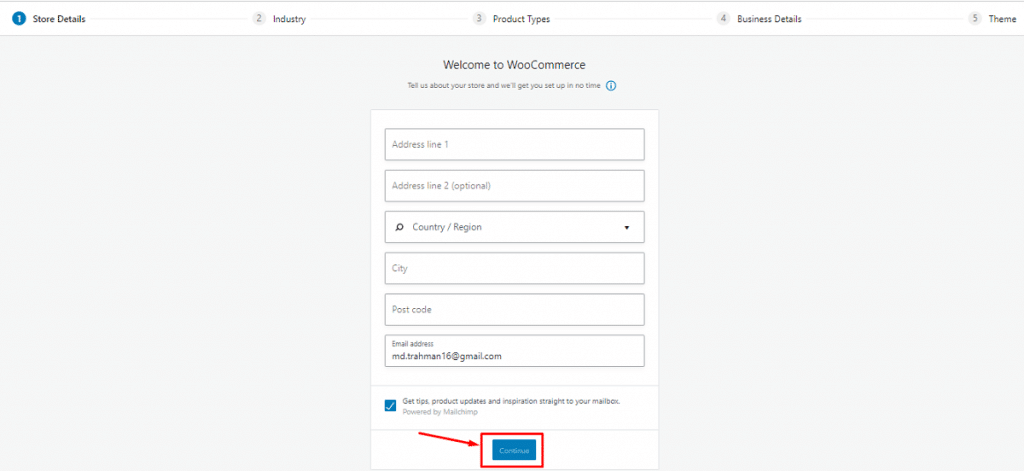
A. Provide basic information step by step
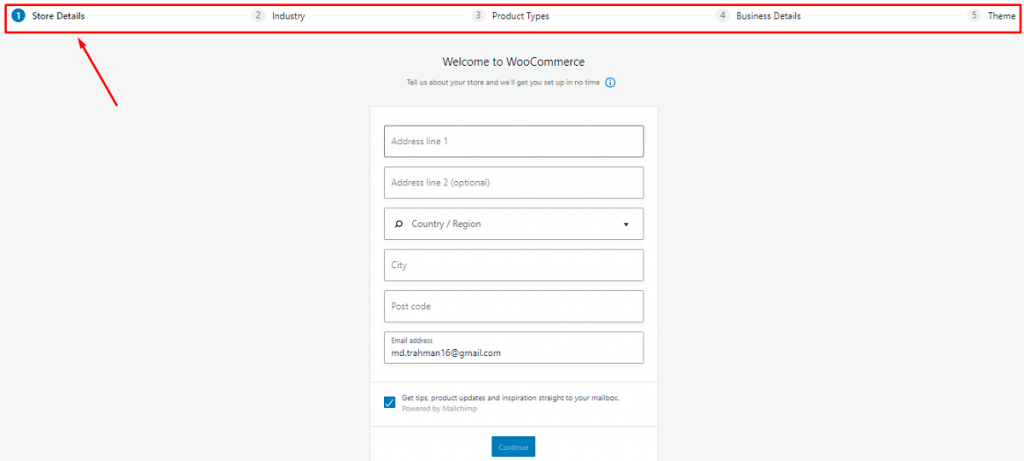
First of all, it is asking for your shop’s initial data including store location, product type, the currency you are using, and the types of goods you are planning to sell i.e.: physical, digital, both, in-person, and others.
You can also determine whether you want to allow WooCommerce to track your usage for the improvement of your store. Fill up the form appropriately, click on the ‘Continue’ button at the bottom and jump right to the next settings.
B. Set up WooCommerce payment gateways
You can configure the payment options for your online store here. The options of this step depend on your store location and the product types you want to sell.
You will only get Stripe and Paypal if you didn’t mark the ‘selling products in person’ option. You will see Square, Paypal, and Stripe if you marked the ‘Selling in-person’ option and live in Canada, Australia, the U.S., Japan, and the U.K. Because these payment gateways are available in these countries.
You can choose a payment option i.e.: check, bank transfer, or cash from the drop-down menu by selecting the ‘Offline Payments’ option.
After finishing all the settings, click the ‘Continue’ button and proceed to the next step.
C. Set up WooCommerce shipping
It’s all about shipping your product details in this step. WooCommerce supports two (2) shipping zone:
- Zone 1- USA and Canada
- Zone 2- rest of the countries
If your shop is in zone 1, you will get the live shipping rate option. But you can set a flat shipping rate or free shipment with flexibility. You have to set up the correct weight and dimension in terms of the actual shipping rate.
Click the ‘Continue’ button, but first checkmark the ‘print shipping labels at home’ to get your credentials printed.
D. Configure some extra options
At this point, WooCommerce asks you to install some essential plugins i.e.: automated taxes with Jetpack, MailChimp for email marketing, and the Facebook for WooCommerce plugin. You can choose whatever is essential for your Ecommerce website. To do this, you just have to select the check box to get all these automatically on your site, or you can install them later manually as well.
E. Connect WooCommerce with Jetpack and finalize the setup
Here, the setup wizard asks you to connect your site with Jetpack mentioned earlier. This plugin works amazingly with all the functionalities of automated tax ensuring the highest security.
Click ‘Continue with Jetpack’, and you are on the last page of the wizard. You can create, import products, visit your dashboard, or review the entire settings from this page. Just check and go ahead.
All done! Now you can add products to your shop.
You are waiting for the answer to this question- ‘how to design an Ecommerce website with Elementor and WooCommerce?’ We are moving to that point.
Step-2: Add products to your WooCommerce store.
It’s time to fill your online Ecommerce shop with the essential products that customers can purchase. Let’s see how we can do it.
A. Add a product
On your WordPress dashboard, go to Products>Add new, here you can insert the information about your product.
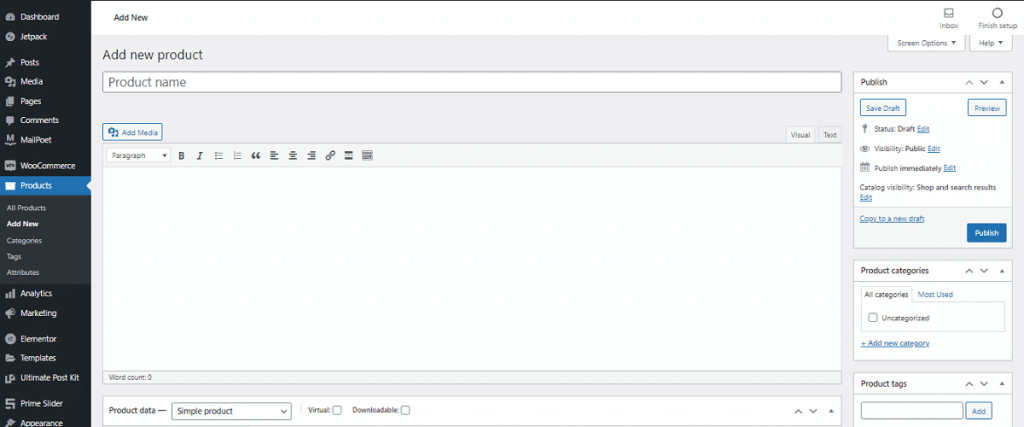
You can add your product details including product name, category, image, tag, gallery, description, and others. Include all your products one by one in your shop with all the required information.
B. Configure product data
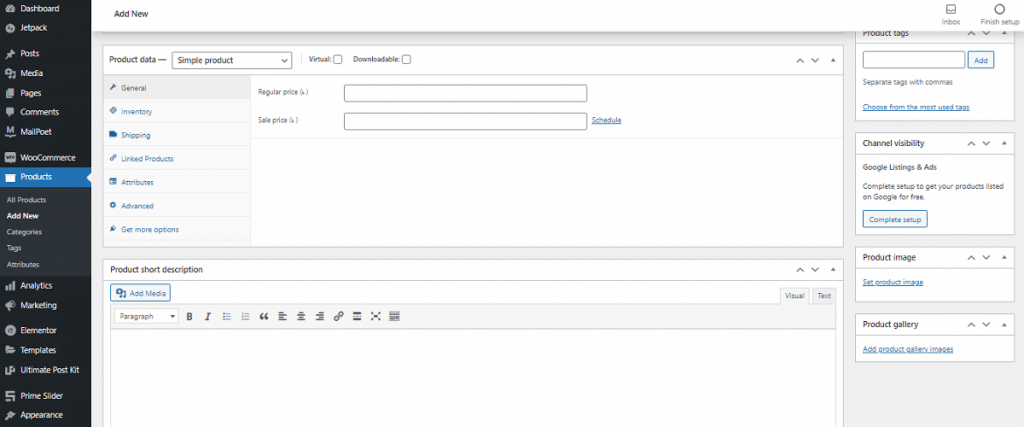
At the panel below the main editor window, set your product data. Carefully customize the data as necessary for your shop to work smoothly.
First, select the data type of the products you are selling from the drop-down menu as-
- Simple product
- Grouped product
- External/Affiliate product
- Variable product
Different configuration options will appear upon your choice. So, according to your business niche, industry type, product categories, and others, you have to set all the data. You can check the product from ‘All Products’ once you are done and saved.
C. Check the product’s frontend view
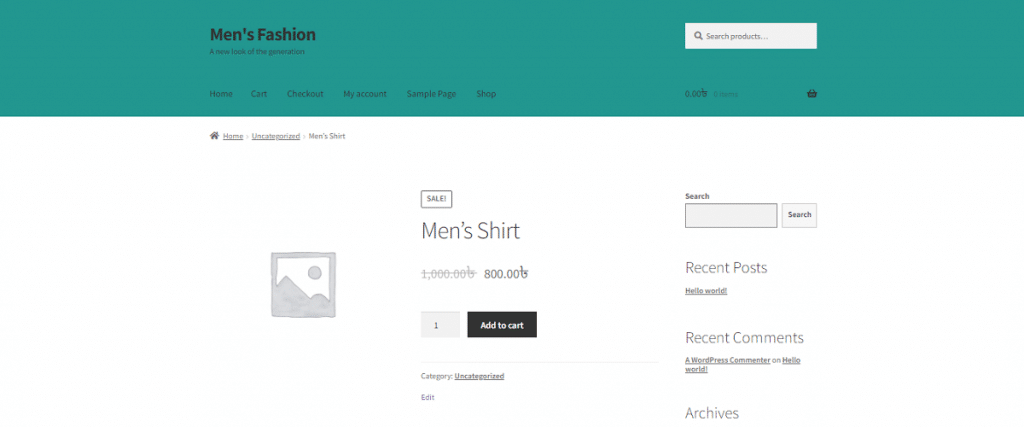
Great! You have done all the necessary tasks. Now it’s time to see the frontend view of your online store and the appearance of your products. It largely depends on the theme you have used. <Select a theme>
Finally, we have reached the question- ‘how to design an Ecommerce website with Elementor and WooCommerce’! Let’s proceed.
Step-3: Design your Ecommerce website with Elementor
In this step, you can design your online store with Elementor. To do that you have to-
- Navigate to the WordPress Admin Dashboard>Plugins>Add New
- Search for ‘Elementor’
- After that, install and activate the plugin
- Then activate the plugin similarly you did for WooCommerce
Or, you can do this manually by downloading Elementor and uploading the file using the ‘Upload Plugin’ option.
Now, start designing your store pages with Elementor in the following steps-
A. Build a Product Page via Elementor
Customize every inch of your online store with dynamic features and widgets of Elementor. If it’s your first time with Elementor then you can follow this step by step guideline:
To design a product page to showcase the details of a specific product, follow the steps:
- Go to your WordPress Dashboard>Pages>Add New
- Enter a page title and select ‘Elementor Canvas’ option from the right side template dropdown
- Finally, click on the ‘Edit with Elementor’ button and start working with this WordPress builder
Otherwise, if you want you can use a pre-built template or block to design your page. Moreover, you can install third-party add-ons to extend your template library with more exclusive features.
You can design the individual section by inserting multiple types of useful widgets. Here, we have used widgets from free core Elementor and Element Pack Pro to make the product page stunning.
B. Finalize your design
You have done all the customization process successfully. Now, it’s time to publish the page. Before that, you have to set the condition to show your page under a specific category.
You can design your other pages in this way also and there are no bindings. All you have to do is just think of a design and portrait them in real life using different widgets. You can also use animation and move your objects in any direction with Element Pack Pro.
Conclusion
In this article, I have shown you an easy way for how to design an Ecommerce website with Elementor and WooCommerce. I hope, this will help you a lot and you can establish your own online shop and run it.
If you need any further help, do comment in the comment section below.
Thanks for reading. Have a nice day!


1 thought on ldquo;How to Design an E-commerce Website with Elementor and WooCommerce”
sander taow
Elementor is a handy tool for anyone who knows anything about design or coding but can use it to create a great website. Its drag-and-drop feature makes it very convenient.