


Build any WordPress form in minutes with Sigma Forms.
Coming Soon & Maintenance Mode Page Builder Plugin
Easily make websites accessible One Accessibility
Simplify your dashboard with Smart Admin Assistant
Dark Reader plugin is eye-friendly reading experience.
A full Featured web design companion for Anyone
Most superior Slider in the Era of Elementor Slider
ZoloBlocks helps you create stunning websites with the Gutenberg builder.
The only Compatible blogging widgets in Elementor for any Blog
Create next gen e-commerce website for your business in WordPress
Organize your photos in a different angel every time with Elementor
Boost engagement and sales with the Spin Wheel WordPress plugin.
Instant Image Generator for WordPress powered by ChatGPT.
Copy & Paste any web design you like just with 2 clicks!
A fully functioning theme for elementor with unlimited options
Smart Clean & Flexible Block Theme for Gutenberg
WooCommerce one-page checkout to boost conversions.
Find Nearby Stores Instantly with Sigma Store Locator
The Ultimate WordPress Media Library Organizer
Find us 24/7 at your service. We are glad to help.
Detailed guidelines available for every features at BdThemes
A changelog is a log or record of all notable changes made to a product.
Learn product usage, WordPress tips & tricks from our videos
Earn hefty commissions by joining us in the promotion
Widget Idea Share is a great way to find similar widgets that you can improve.

It’s very well known that a header is a crucial part and a vital factor for a website. And now, a sticky header in Elementor is essential to prevent bounce rates. Using a sticky header in Elementor is very easy for the experts. But for the new users? It’s not so hard at all! In this article, we will inform you about the sticky header in Elementor.
A sticky header in Elementor is very helpful for a website that brings more traffic towards it, and you can use it for your site smoothly.
Here’s a situation- visitors who roam online are charmed by your site’s header and hop on it to see what’s inside.
And after that, they may want to switch to another link or menu from any position they are on the site, and if they have to scroll up a long way to do that, it will be disturbing & hazardous for them, and leave instantly. This might not happen if a sticky header in Elementor was used.
That’s why a sticky header is badly needed for your website. Now, we are going to talk about the sticky header that will help you grow more visitors.
Let’s start!
A sticky header in Elementor or a persistent header is the header that stays at the same place and keeps showing near the user’s reach at any position on the site.
Using the sticky header in Elementor, the users can easily go to any other links or menus quickly. It’s not much to say that the sticky header in Elementor is a trend nowadays and growing faster.
You can make a normal header into a sticky header in Elementor within a few seconds! There are some simple and easy ways to do that. You can do it with both Elementor Pro and free. The procedures are shown below:
You can make a sticky header in Elementor with Elementor Pro. To do that, just follow the steps:
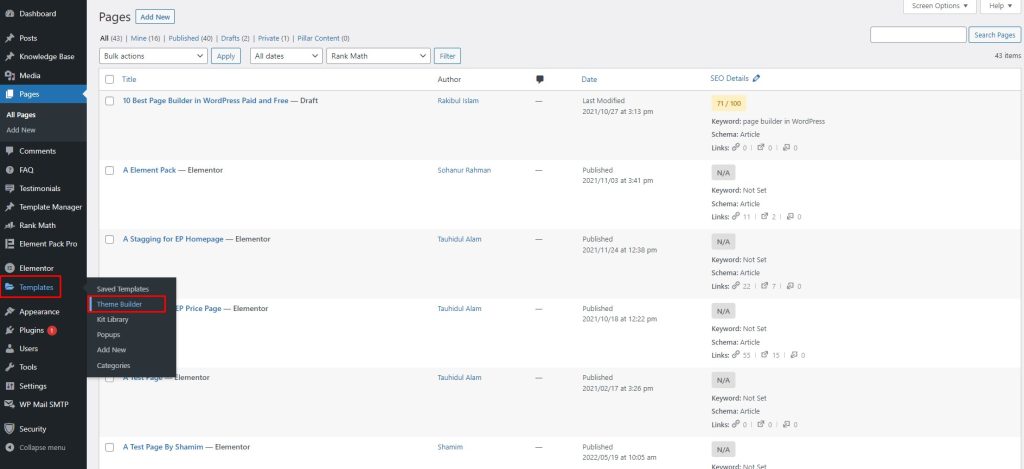
First, go to the dashboard, then go to the menu bar. After that, go to Templates, then go to Theme Builder.
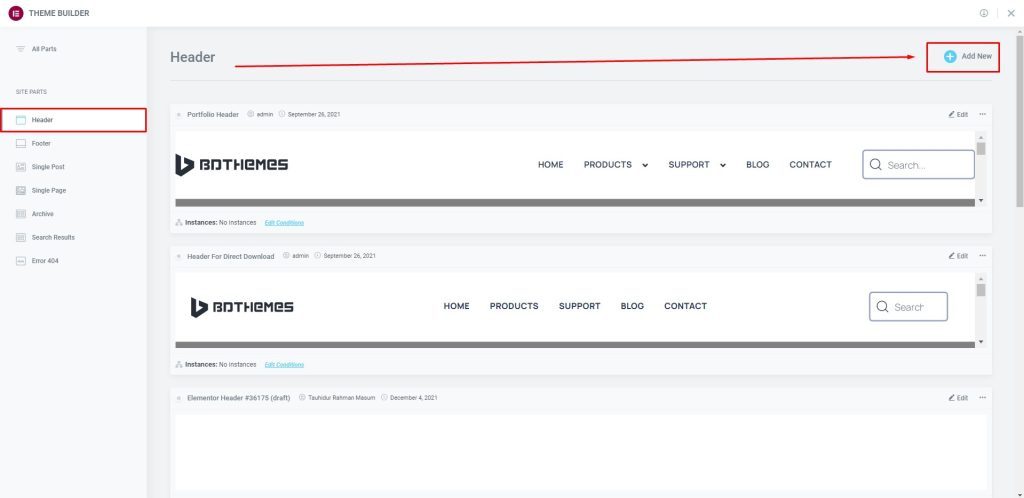
Next, go to the Header, then go to Add New.
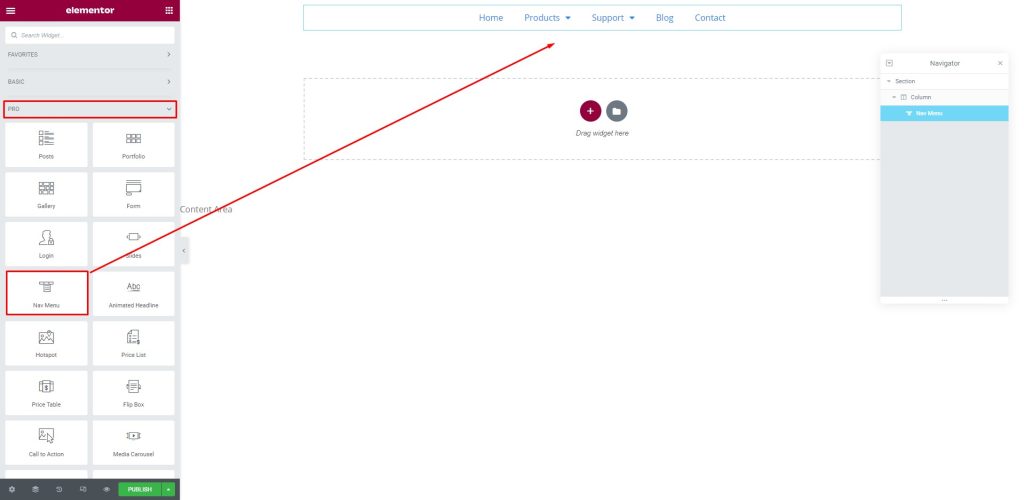
Now, go to the widget menu under the Pro tab. Next, drag-drop the New Menu in the text area.
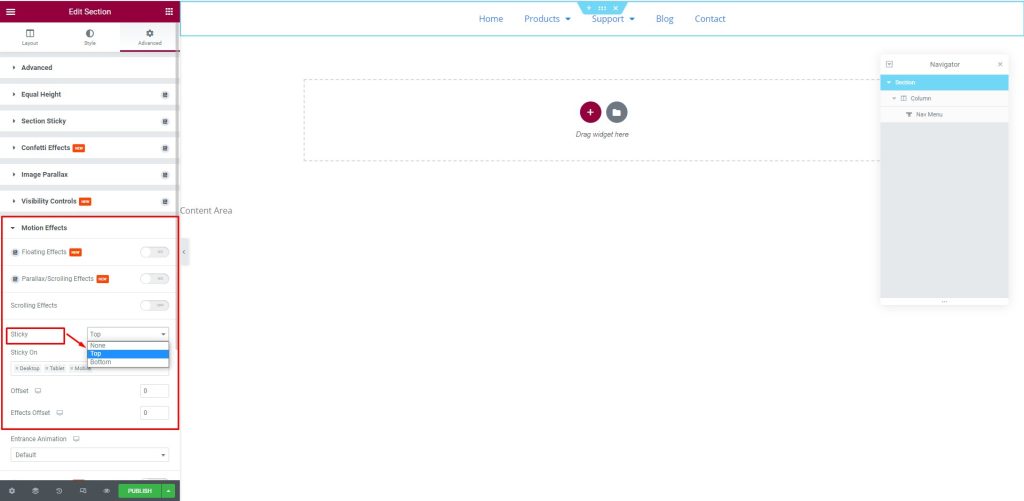
Next, go to the Advanced tab. After that, go to the Motion Effects menu, then go to the Sticky sub-menu, select Top to set the header on top.
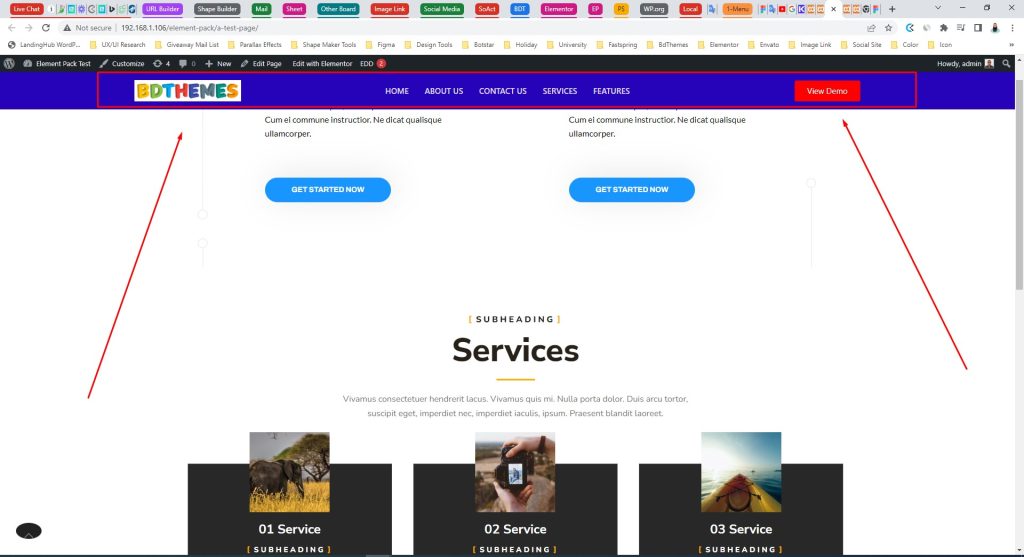
After doing all the procedures, the sticky header in Elementor Pro will show on the screen.
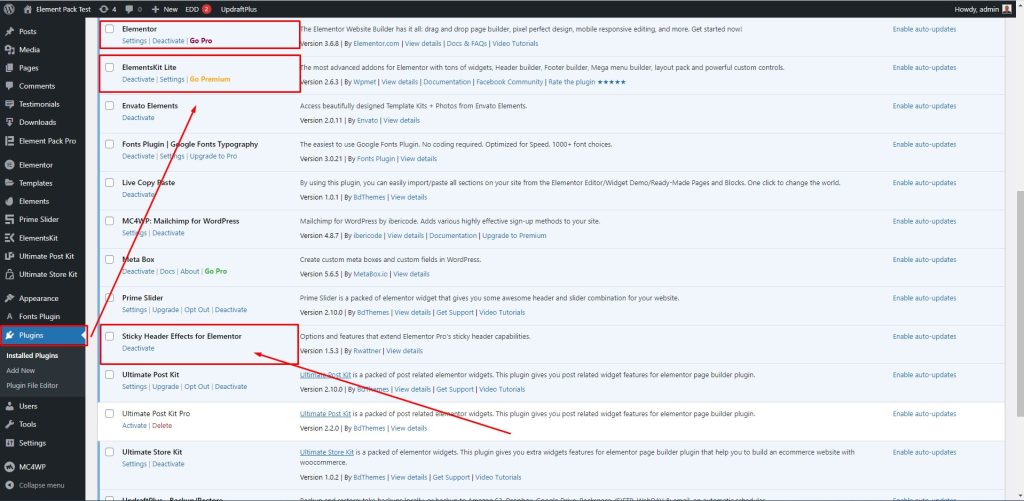
You can do it with Elementor free too. Here, you have to use third-party support to do that. We are taking help from ElementsKit Lite. Now, Follow the steps below:
First, go to the menu bar, then go to Plugins, then go to ElementsKit Lite. After that, select the Sticky Header Effects for Elementor.
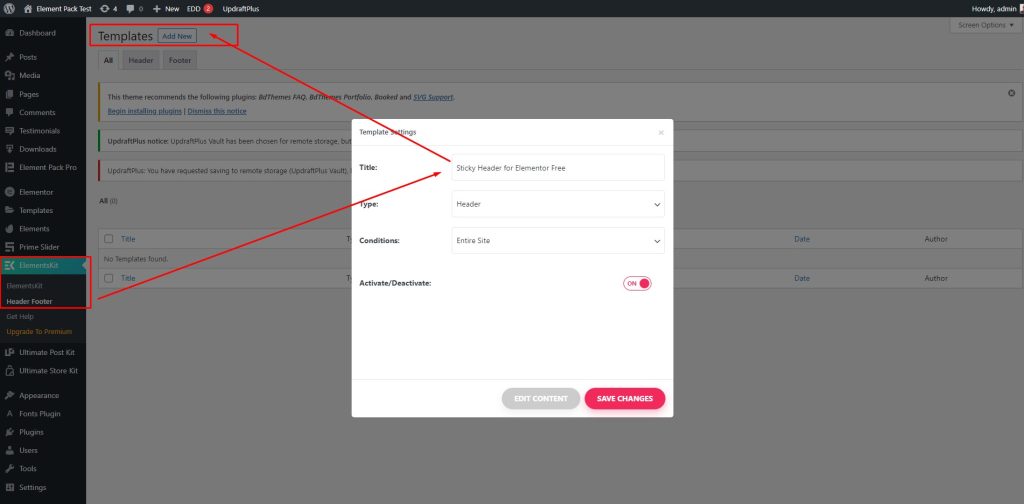
Next, go to ElementsKit, then go to Header Footer. After that, go to Templates, then select Add New, after that a box will appear on the screen. Here, type the title- Sticky header for Elementor Free, then enable the Activate/Deactivate switcher and hit the Save Changes button.
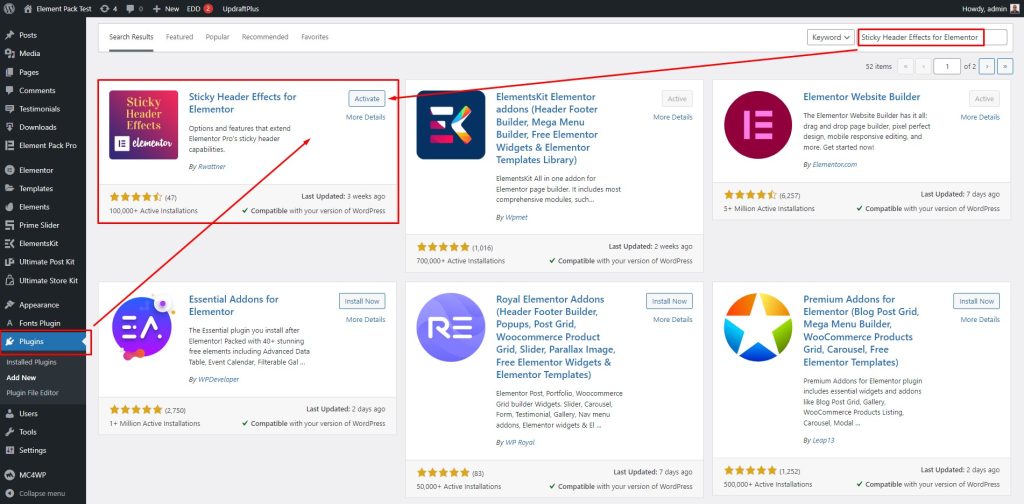
After that, go to Plugins, then search ‘Sticky Header Effects for Elementor’, then hit the Activate button to enable the option.
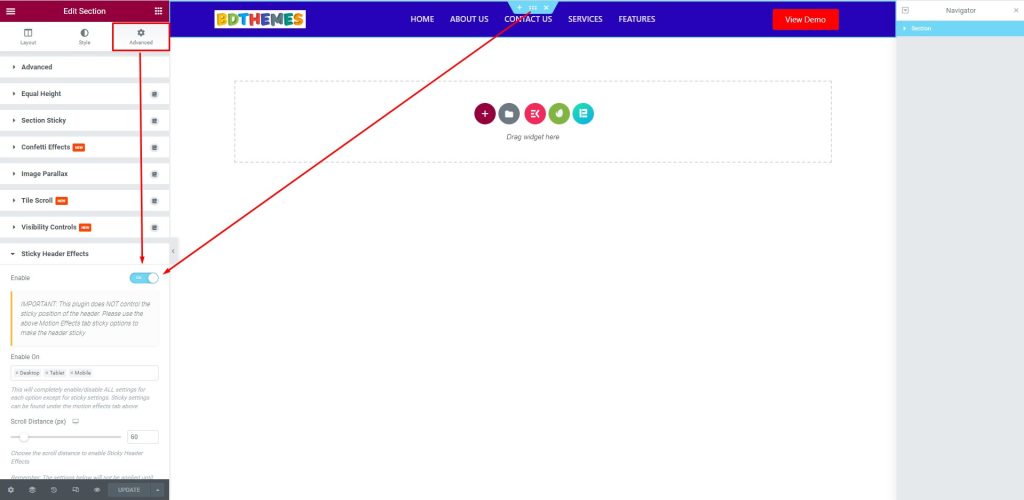
After that, go to the Advanced tab, then go to the Sticky Header Effects menu, then enable the switcher.
Finally, after all the procedures are done, the sticky header will look like this.
It’s a pleasing matter that you can make a sticky header in Elementor with Element Pack Pro also. Element Pack Pro has the option to get the job done that will make it more engaging.
To do that, follow the steps below:
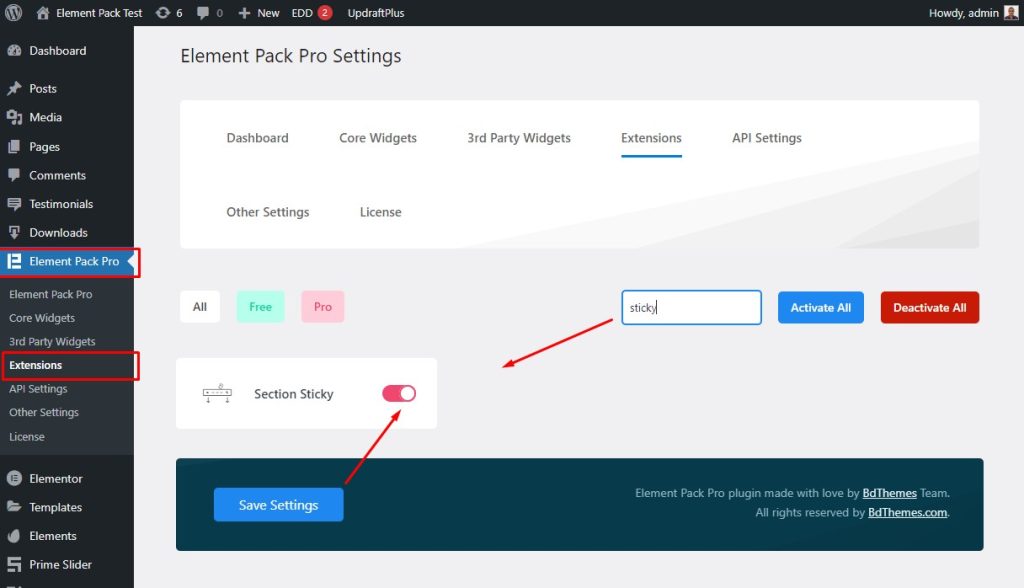
First, go to the menu bar, then go to the Element Pack Pro menu, then go to the Extensions sub-menu. After that, search Sticky, then enable the Section Sticky switcher and hit the Save Settings button.
Now, go to the Advanced tab, then go to the Section Sticky menu, then enable the Enable Sticky switcher.
Lastly, after completing the process, the sticky header will look like this.
Additional Tips: You can customize and change the style of the sticky header into various kinds. Here are some more tips you can use.
You can make the sticky header into transparent sticky header. To do that, follow the steps below:
First, go to section editor, then go to the Style tab. After that, go to the Background menu, then go to the Color option.
After that, select a light color and set the color transition to transparent.
It’s done! You have successfully made the sticky header into a transparent sticky header. See the effect on the screen.
You can make sticky header into shrinking sticky header. To do that, follow the steps below:
First, take a look at the sticky header.
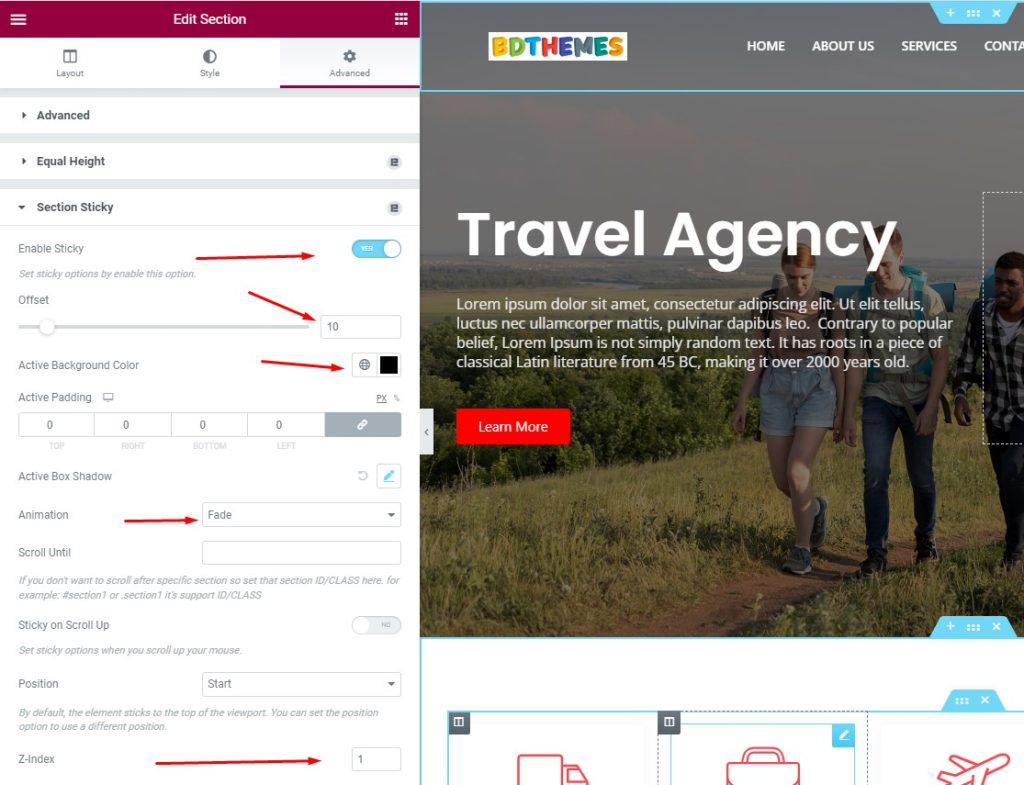
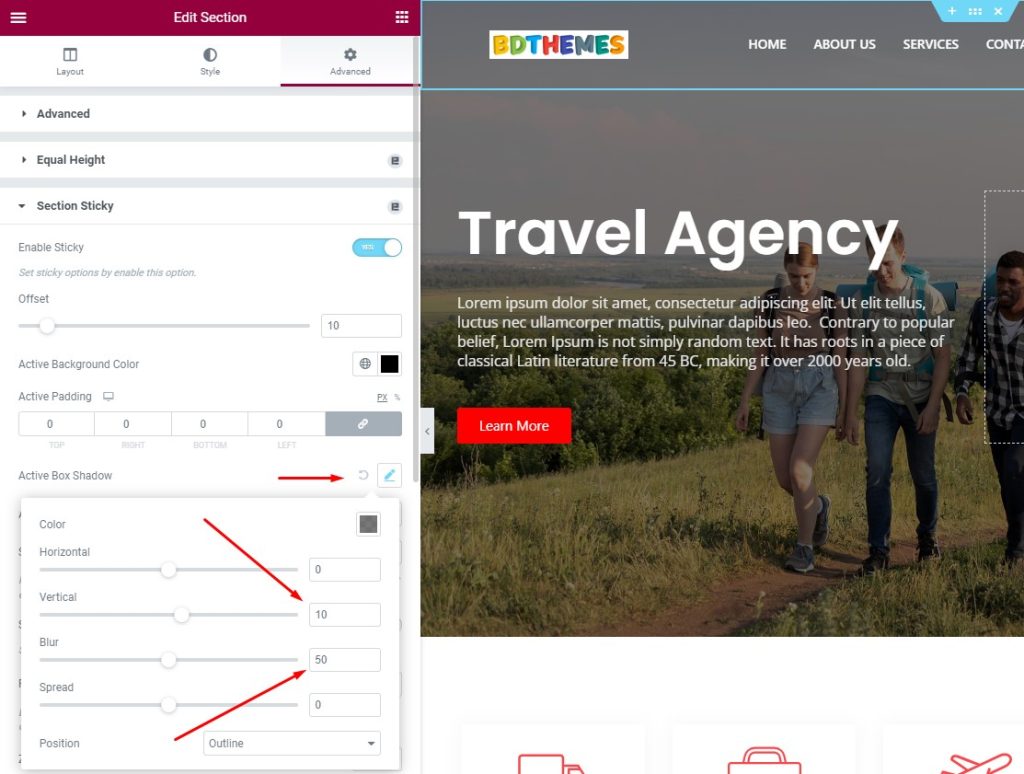
Next, go to the Advanced tab, then go to the Section Sticky menu, then enable the Enable Sticky switcher, then select the Offset to 10. After that, select the Active Background Color, then select the Animation to Fade, then set the Z-index at 1.
Next, go to the Active Box Shadow menu, then set the Vertical to 10, after that set the Blur ratio to 50.
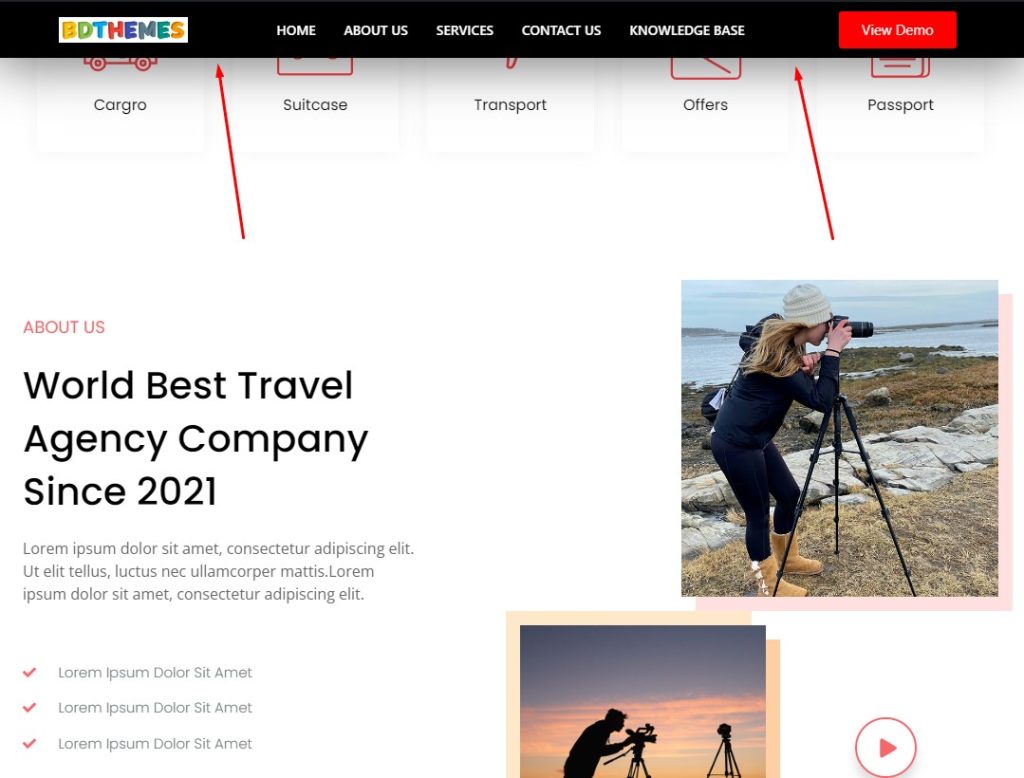
Notice that, the sticky header is shown broadly in full size here.
Now, the sticky header has been shrunk on the screen.
This shrunk sticky header will remain like this while you scroll down continuosly.
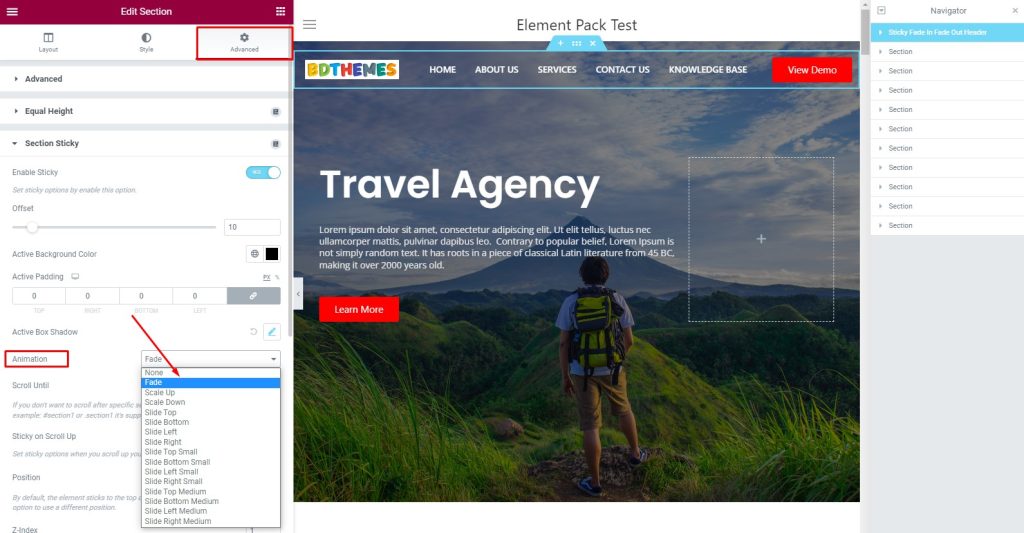
Yes! You can add transition to the sticky header in Elementor like fade in and fade out. To do that, just follow the steps:
To add Fade In and Fade Out transition, you have to go to the Advanced tab.
Now, after going to the Advanced tab, go to the Section Sticky menu, then go to the Animation section and select Fade from the drop-down list.
Finally, look at the sticky header and see the effect!
We have discussed the importance of a sticky header in Elementor and some procedures and styles of it above. Hope this will help you a lot to make your site more engaging to the visitors.
Thank you for reading this article with patience. Have a nice day.
Take advantage of fine-tuned plugins to speed up web projects without sacrificing quality. We offer a 60-days money-back guarantee.
BdThemes is the sole owner of #1 market-leading addons for Elementor such as Element Pack Pro, Prime Slider, Ultimate Post Kit, Ultimate Store Kit, Pixel Gallery, and more useful plugins.
This website is powered by Element Pack Pro, Rooten Theme, and the sister concern of Sigmative LLC
Call or WhatsApp for assistance:+880 1700 55 95 95