Stuck with how to install WordPress on localhost? Then this step-by-step guide is just for you.
Installing WordPress locally is a great way to get familiar with its features without having to purchase a domain or hosting. In this how-to guide, we will walk you through each step of how to install WordPress locally.
By the end of this guide, you will have a local WordPress installation that you can customize, experiment with, and learn from before launching your website to the public.
Requirements
Before you start, you need to make sure you have all the software and tools. First, get a local server environment set up on your computer.
We recommend using MAMP for this, which is a popular and easy-to-use local server environment for Mac and Windows. Download MAMP and wait for the next step.
You also need to download the latest version of WordPress. The next step is installation.
Installing MAMP
MAMP stands for Macintosh, Apache, MySQL, and PHP and it allows you to create a local web server environment on your Windows or Mac computer.
The steps of installing MAMP are given below.
Step 1:
After downloading, locate the installer in your downloads folder. Double-click on it to begin the installation process.

Step 2:
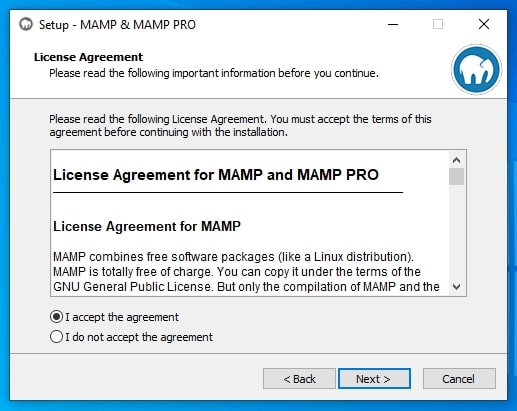
Follow the installation prompts. Agree to license agreement and select the default options. Change only if you have a specific reason to change them.
Step 3:
Once the installation is complete, open MAMP by navigating to your applications folder. Double-click on the MAMP icon.
Step 4:
You’ll see a control panel with various options for starting and stopping the Apache and MySQL servers. Make sure both servers are running by clicking on the “Start Servers” button.
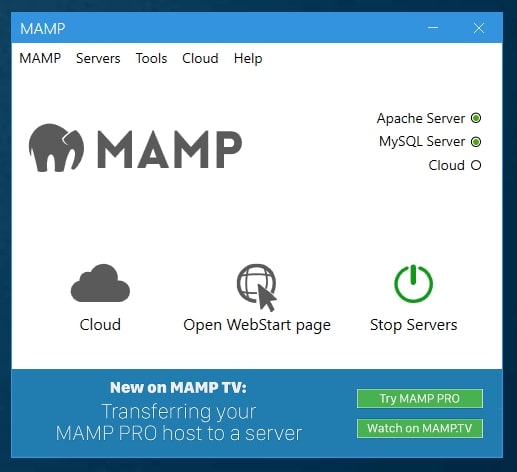
Once both servers are running, you’re ready to move on to the next step of installing WordPress on localhost.
Install WordPress On Localhost
Before we can install WordPress in localhost, we need to create a MySQL database. MySQL is an open-source database management system that stores and organizes data for websites and applications.
In this section, we’ll guide you through the process of creating a MySQL database using MAMP.
Step 1:
Open the MAMP control panel and make sure both the Apache and MySQL servers are running.
Step 2:
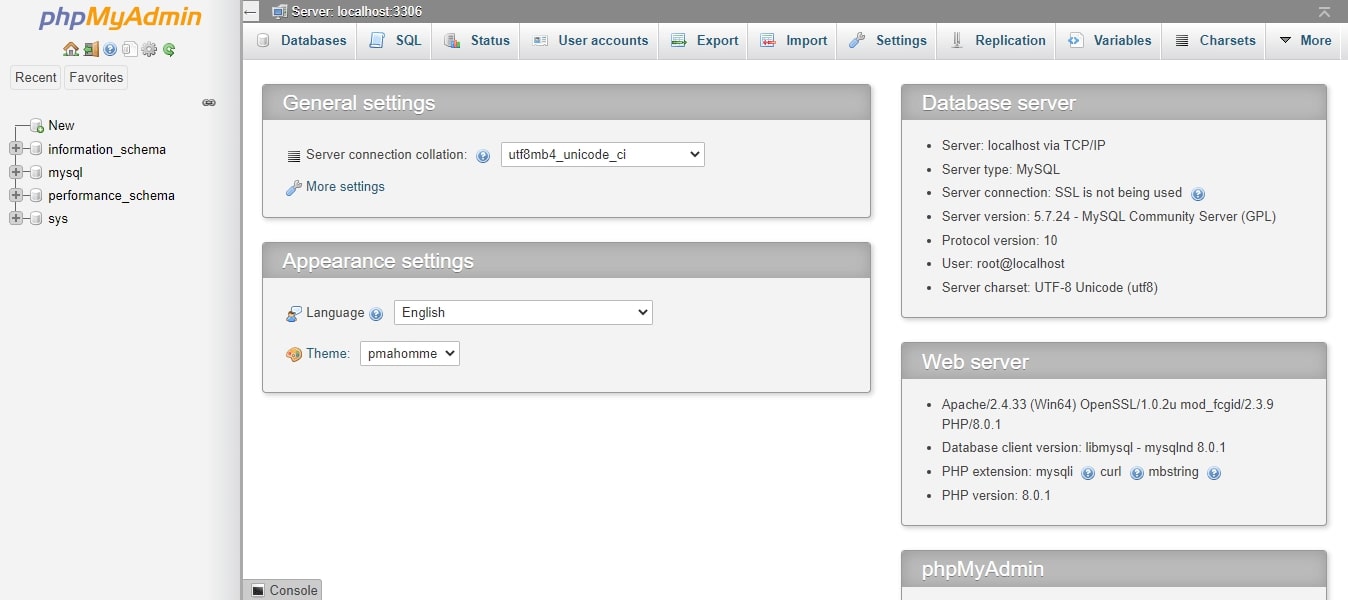
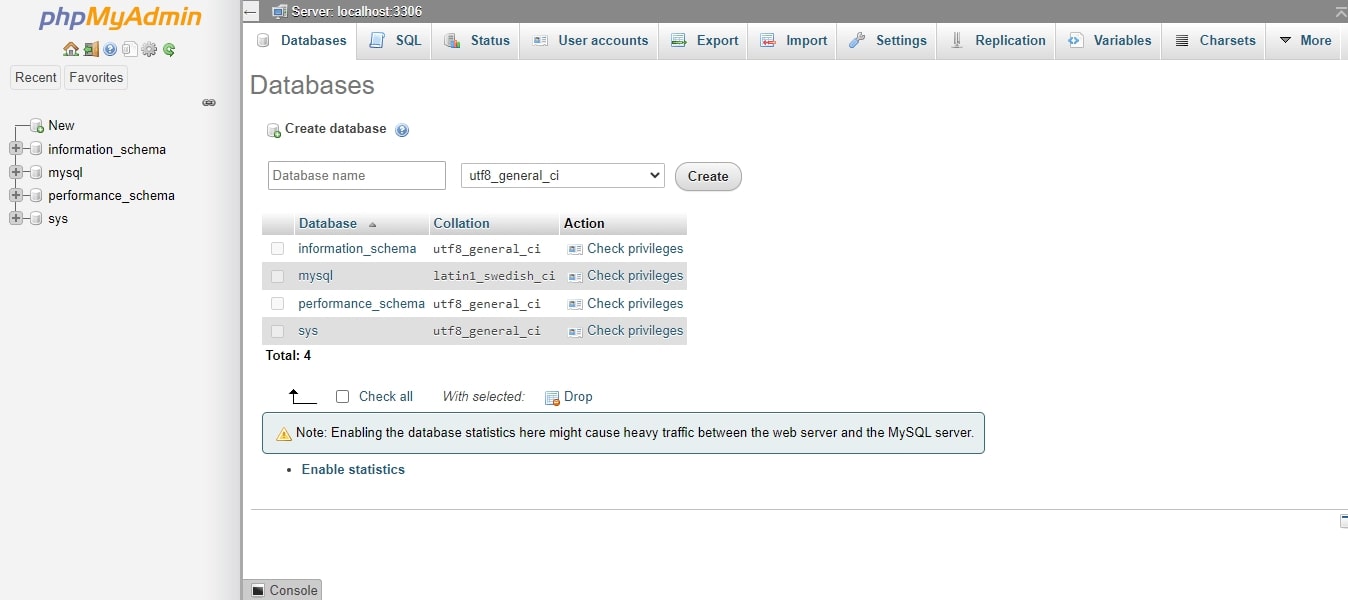
In your web browser, navigate to “localhost/phpMyAdmin.” This will open the phpMyAdmin interface, which allows you to manage MySQL databases.
Step 3:
Click on the “Databases” tab at the top of the screen.
Step 4:
Click on the “Submit” button to continue.
Step 5:
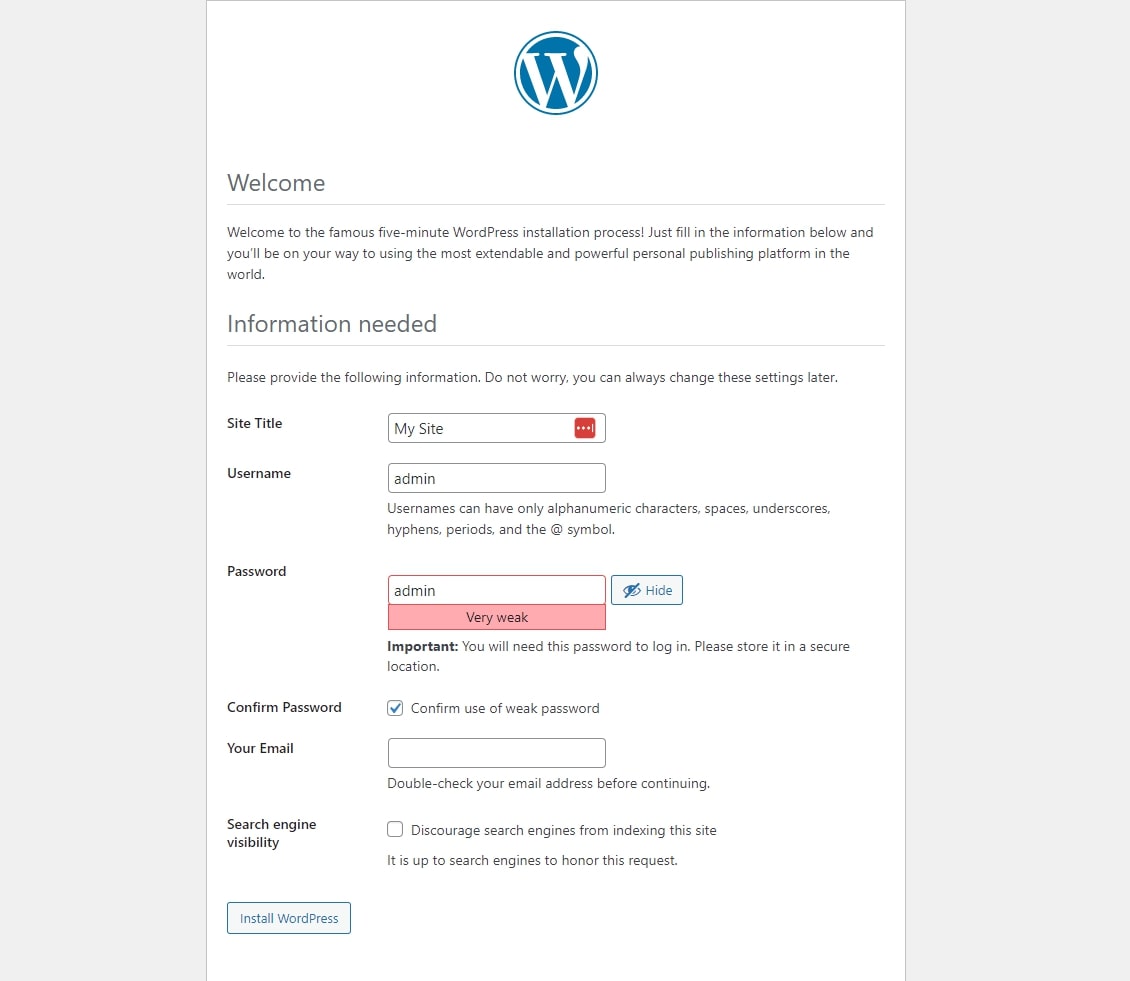
On the next screen, WordPress will ask you to enter some basic information about your website, such as the site title, your username, and your password.
Step 6:
After entering your information, click on the “Install WordPress” button.
Step 7:
WordPress will now install on your computer, which may take a few minutes.
Step 8:
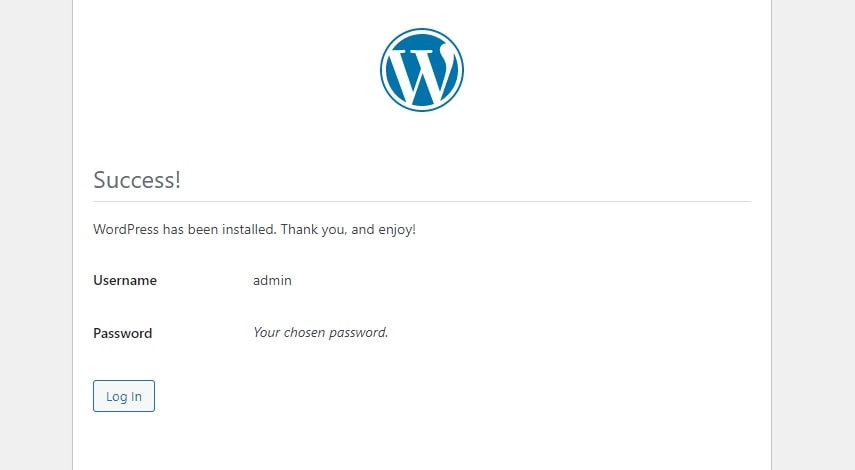
Once the installation is complete, you’ll see a screen confirming that WordPress has been installed successfully.
Step 9:
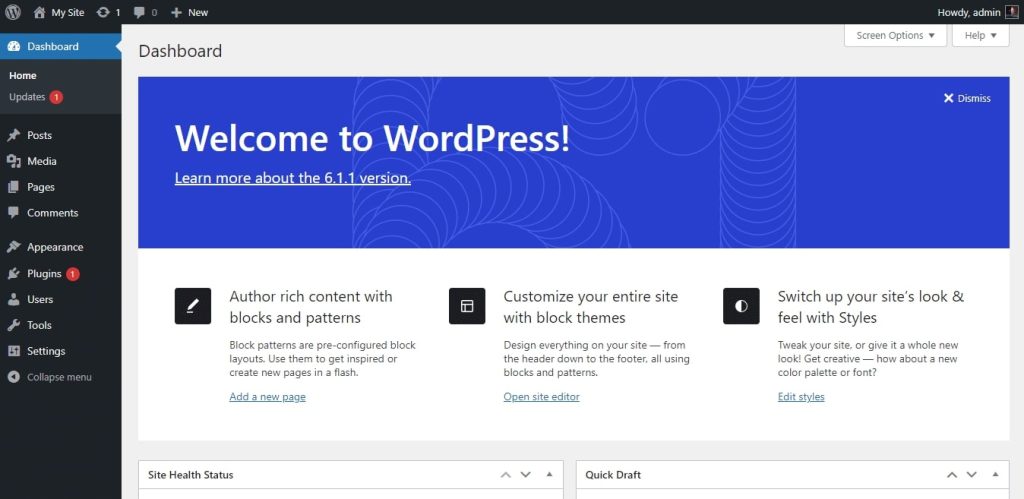
Click on the “Log In” button to access the WordPress admin panel, where you can start customizing your website.
Done!
Congratulations! You have successfully installed WordPress on your localhost using MAMP.
Now you have a safe and private environment to create and customize your website.
You can now begin creating content. Install themes and plugins, and explore the vast WordPress ecosystem to build your dream website.
We hope our install WordPress on localhost guide is helpful to you. Once you are happy with your design, make it live.
But make sure you keep a backup of it. Here is a guide to help you out. Happy website building!
Frequently Asked Questions
If you encounter issues during WordPress installation on localhost, try checking your server settings, database configurations, and file permissions. You can also try resetting your installation by deleting the existing database and starting over.
To migrate your local WordPress site to a live server, you need to export the site’s database and files, create a new database on the live server, import your local site’s database to the new server, and upload your local site’s files to the live server.
To configure the wp-config.php file for your WordPress site on localhost, you need to enter your database name, username, and password, as well as your authentication keys and salts. You can find these details in your local server’s control panel.
To download and install a WordPress theme on localhost, you can either search for free themes in the WordPress repository or upload a premium theme. To upload a theme, go to Appearance > Themes > Add New > Upload Theme.
To download and install a WordPress plugin on localhost, you can either search for free plugins in the WordPress repository or upload a premium plugin. To upload a plugin, go to Plugins > Add New > Upload Plugin.
To update themes and plugins on localhost, go to the Themes or Plugins page in your WordPress dashboard and check for updates. You can also manually update themes and plugins by downloading the latest version and uploading it to your local site.
Yes, you can use Elementor Pro on a localhost environment. Elementor, including the Pro version, can be installed and used on your local server without any issues.
The best local server depends on your specific needs, preferences, and the operating system you’re using. Consider factors like ease of use, features offered, compatibility with your development environment, and community support when making your choice. It may be helpful to try a few and see which one aligns best with your workflow. Some localhost are XAMPP, MAMP, WampServer, Local by Flywheel etc.

