Build any WordPress form in minutes with Sigma Forms.
Coming Soon & Maintenance Mode Page Builder Plugin
Easily make websites accessible One Accessibility
Simplify your dashboard with Smart Admin Assistant
Dark Reader plugin is eye-friendly reading experience.
A full Featured web design companion for Anyone
Most superior Slider in the Era of Elementor Slider
ZoloBlocks helps you create stunning websites with the Gutenberg builder.
The only Compatible blogging widgets in Elementor for any Blog
Create next gen e-commerce website for your business in WordPress
Organize your photos in a different angel every time with Elementor
Boost engagement and sales with the Spin Wheel WordPress plugin.
Instant Image Generator for WordPress powered by ChatGPT.
Copy & Paste any web design you like just with 2 clicks!
A fully functioning theme for elementor with unlimited options
Smart Clean & Flexible Block Theme for Gutenberg
WooCommerce one-page checkout to boost conversions.
Find Nearby Stores Instantly with Sigma Store Locator
The Ultimate WordPress Media Library Organizer
Find us 24/7 at your service. We are glad to help.
Detailed guidelines available for every features at BdThemes
A changelog is a log or record of all notable changes made to a product.
Learn product usage, WordPress tips & tricks from our videos
Earn hefty commissions by joining us in the promotion
Widget Idea Share is a great way to find similar widgets that you can improve.

What is the best navigation header for WordPress? As a WordPress user, you must know the importance of the navigation header. It’s very helpful for maintaining the webpage. You can go to any options or menus using it. If you want to get benefitted using the best navigation header for WordPress, you have to make it for your WordPress website first.
WordPress has a drag-and-drop interface that helps you make navigation header, header menus, menus with dropdown options, and more. In this article, we will show you how to create the best Navigation Header for WordPress step by step.
A navigation header in WordPress is the top or upper part of the website where navigation menus and a bunch of links point to essential areas of a website.
Generally, it is seen as a horizontal bar with links on the top of every page on a WordPress website. You can change the direction to vertical by customization.
The navigation header helps you build the site structure and make it easy for visitors to find their desired items. Using the navigation header, you can easily add menus and sub-menus and let your visitors go to any links they want.
You can easily add links to your important pages, topics, categories, blog posts, and even to your social media profile.
Every element has advantages and disadvantages known as pros and cons. So the navigation header has the same. Here the pros and cons are given:
N.B.: You can overcome the cons by customizing and using tools.
Using Elementor, it’s very simple to create your own navigation header. You can follow the steps to do so:
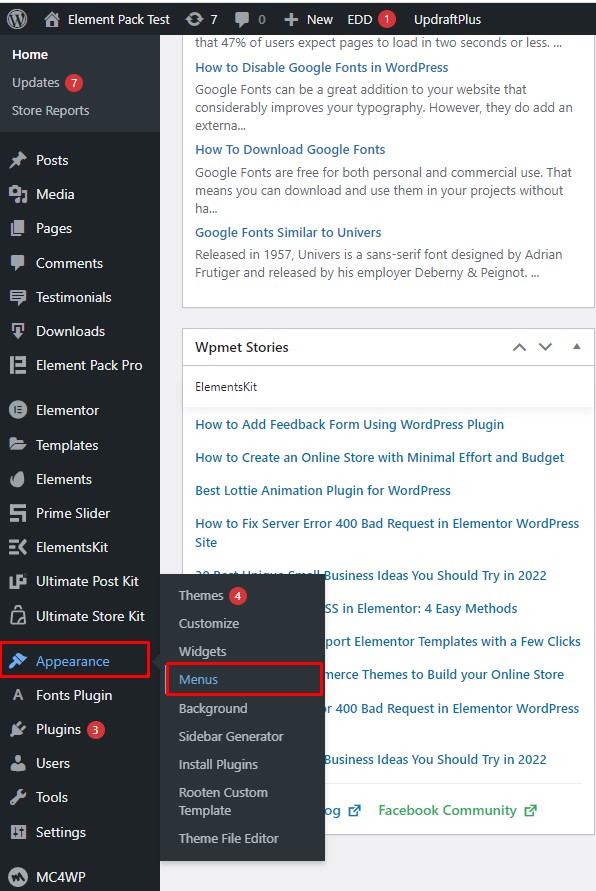
Go to the Appearance menu in the menu bar, then go to Menus.
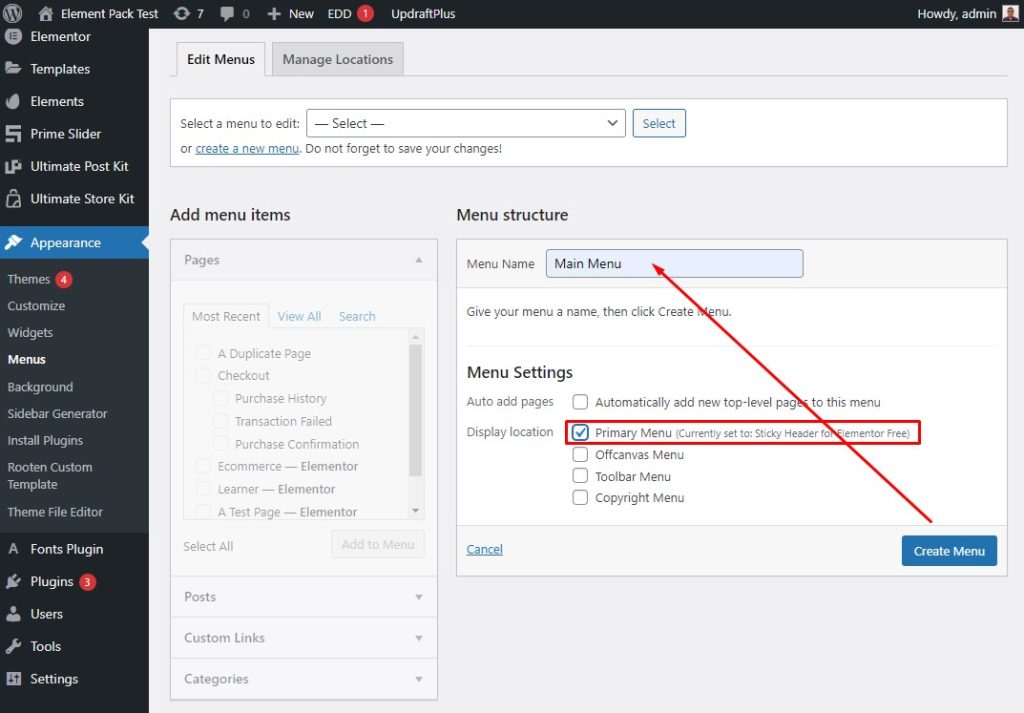
Next, give a Menu Name, then mark the Primary Menu check box for Display Location.
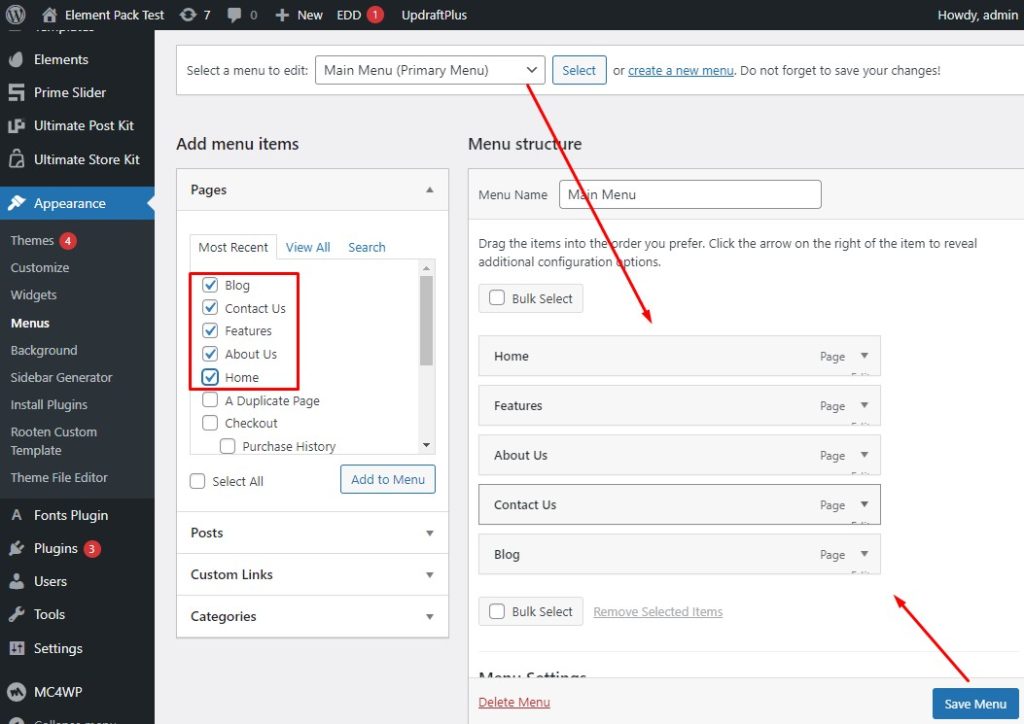
Now, select a menu, then select the menu items by clicking the check box, then hit the Save Menu button.
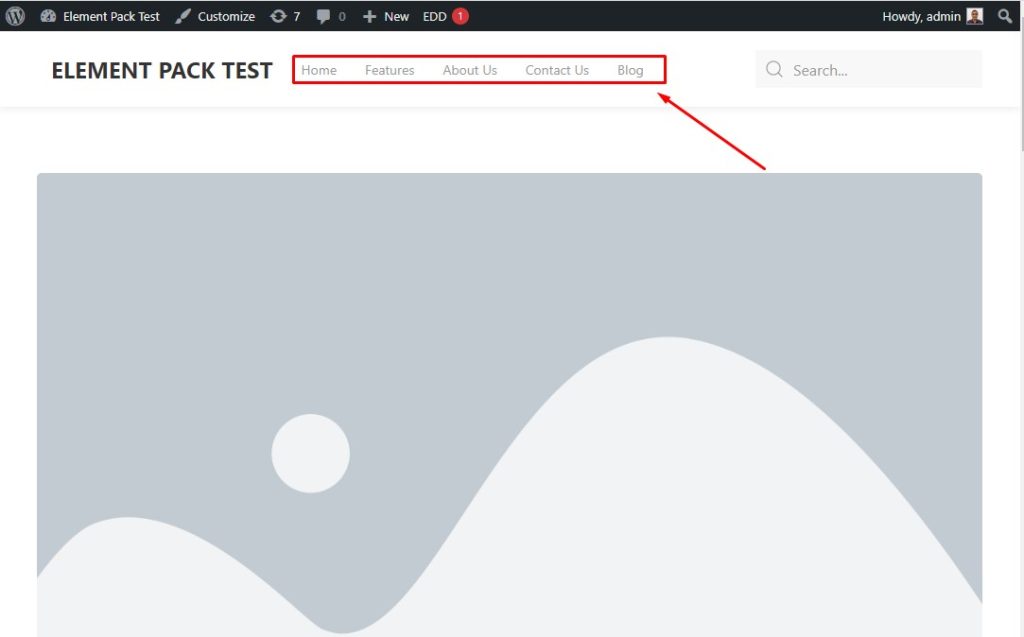
After the setup procedure, the header menu will look like this.
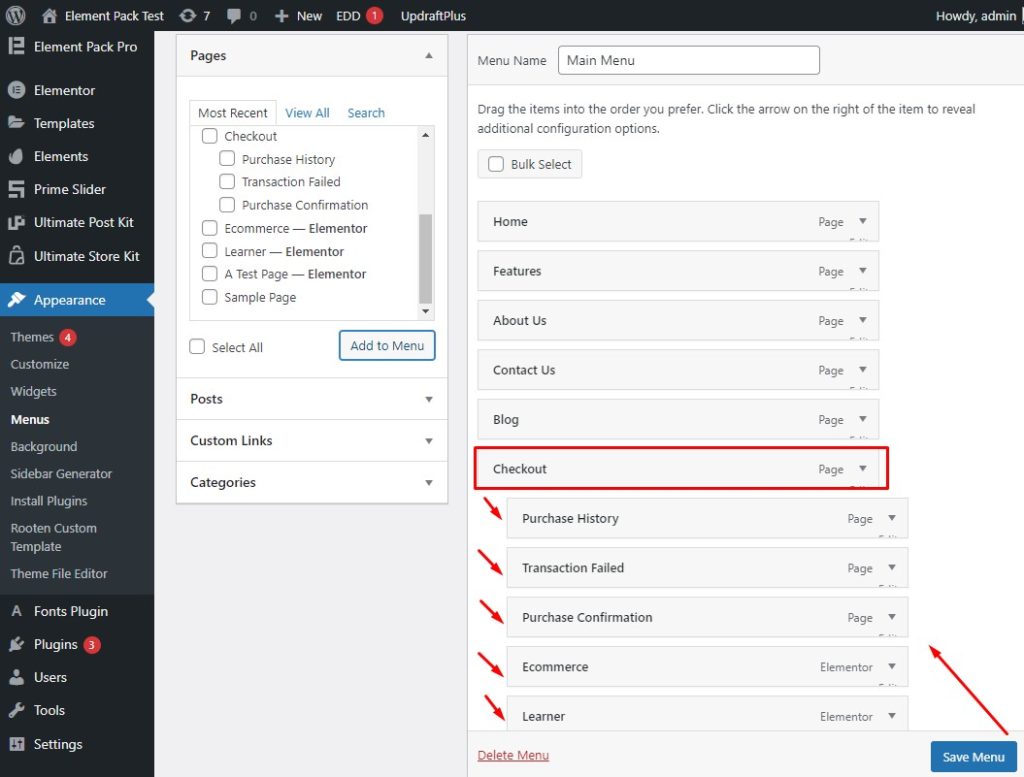
First, go to the Appearance menu, then select the Checkout items, and hit the Save Menu button.
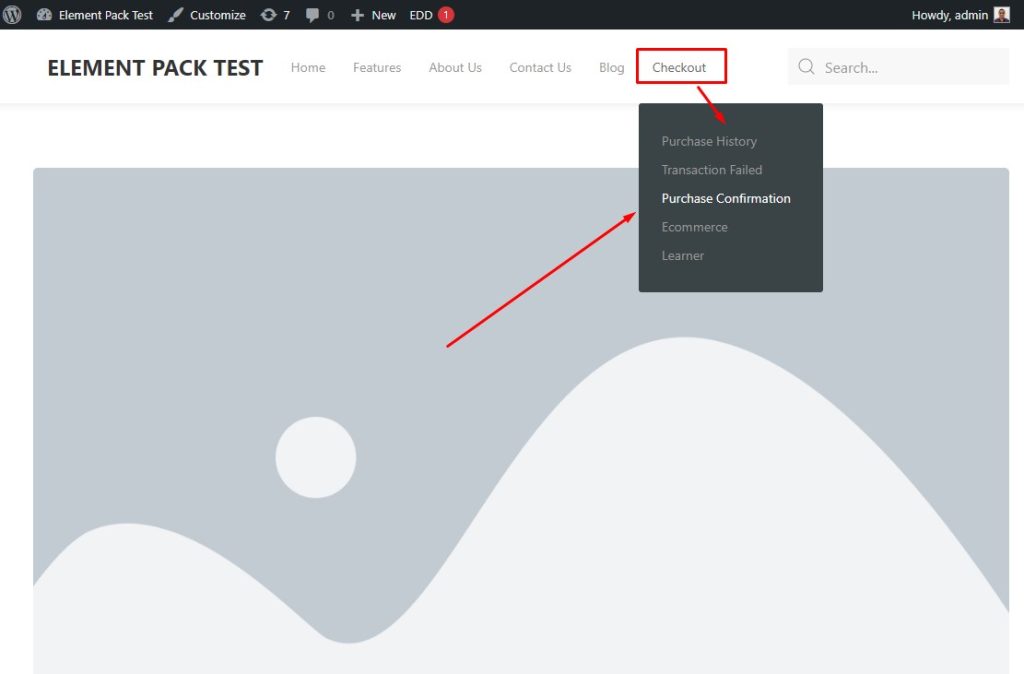
It’s done! The checkout menu looks like this.
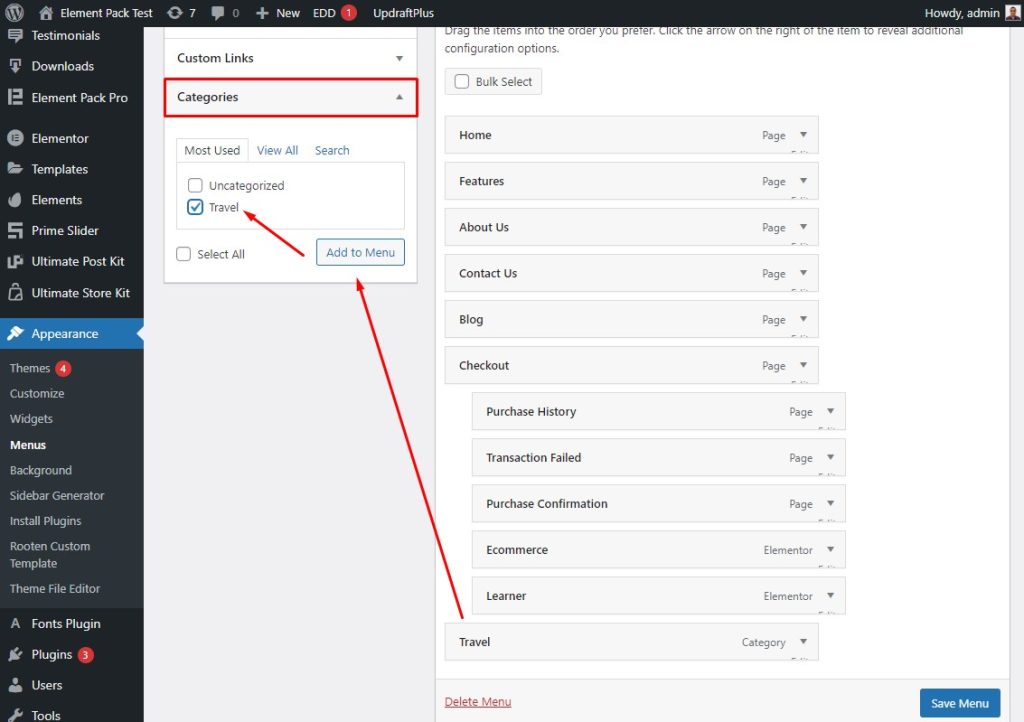
Go to the Appearance menu, then go to Categories, then select the category, then hit the Add to Menu button. Don’t forget to Save Menu.
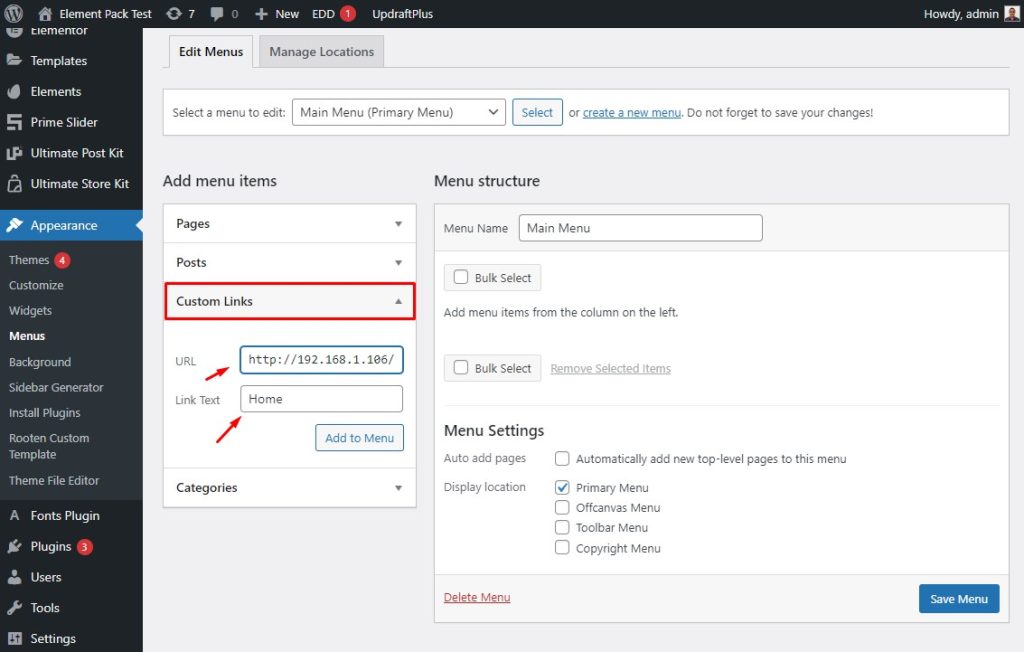
First, go to the Appearance menu, then go to Custom Links. After that, type or paste the link into the URL field, and Home in the Link Text field, then Save Menu.
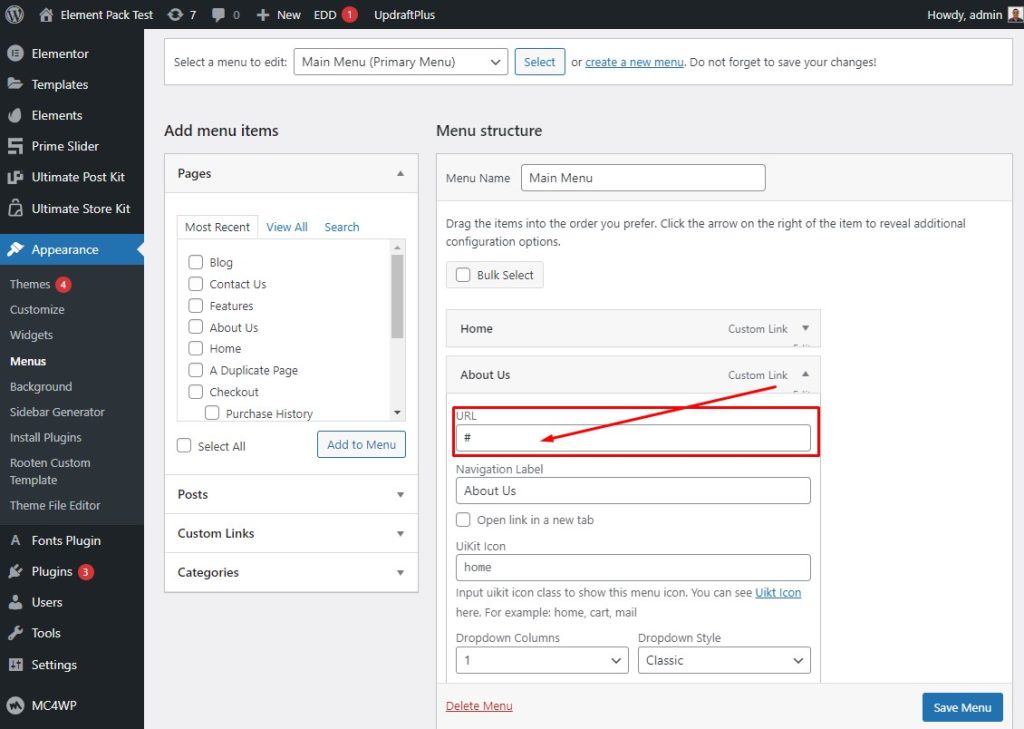
After doing that, the link will show in the URL field under the About Us menu.
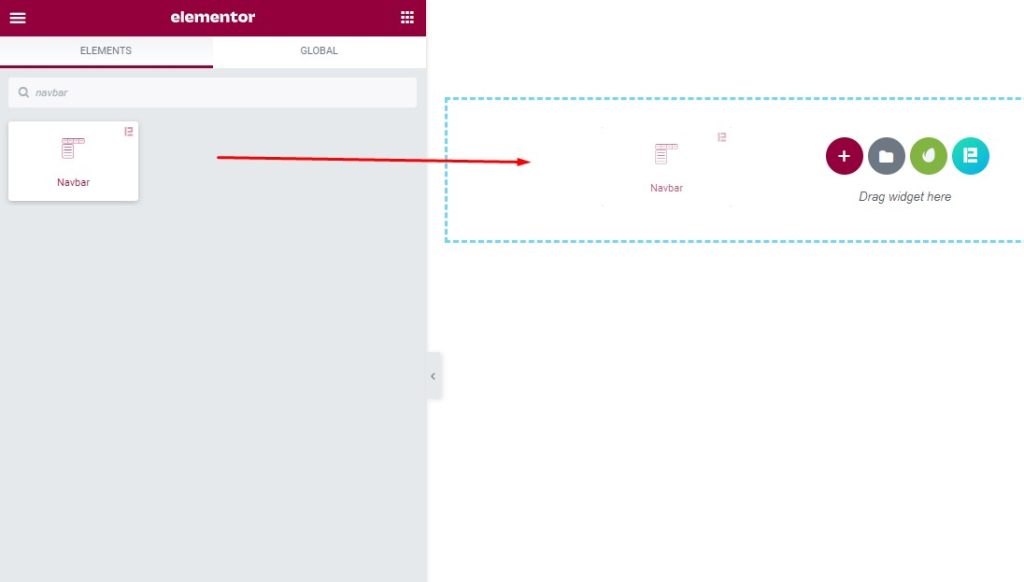
First, go to the widget menu, then search Navbar in the search field, then drag-drop the widget into the text area.
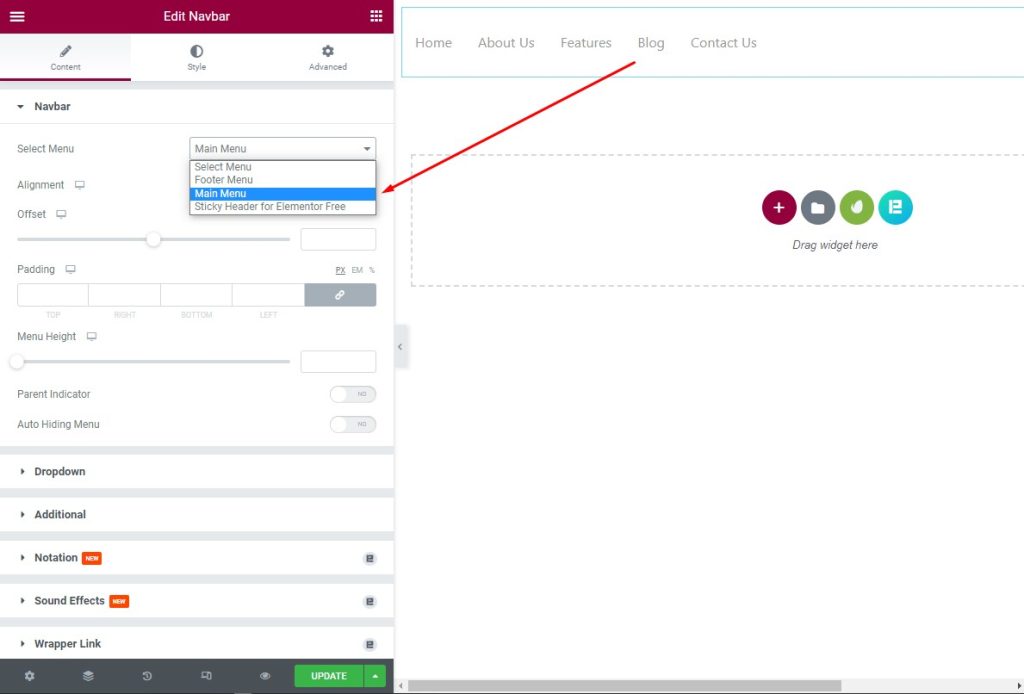
After that, select Main Menu from the drop-down list in the Navbar under the Content tab and see the result in the text area.
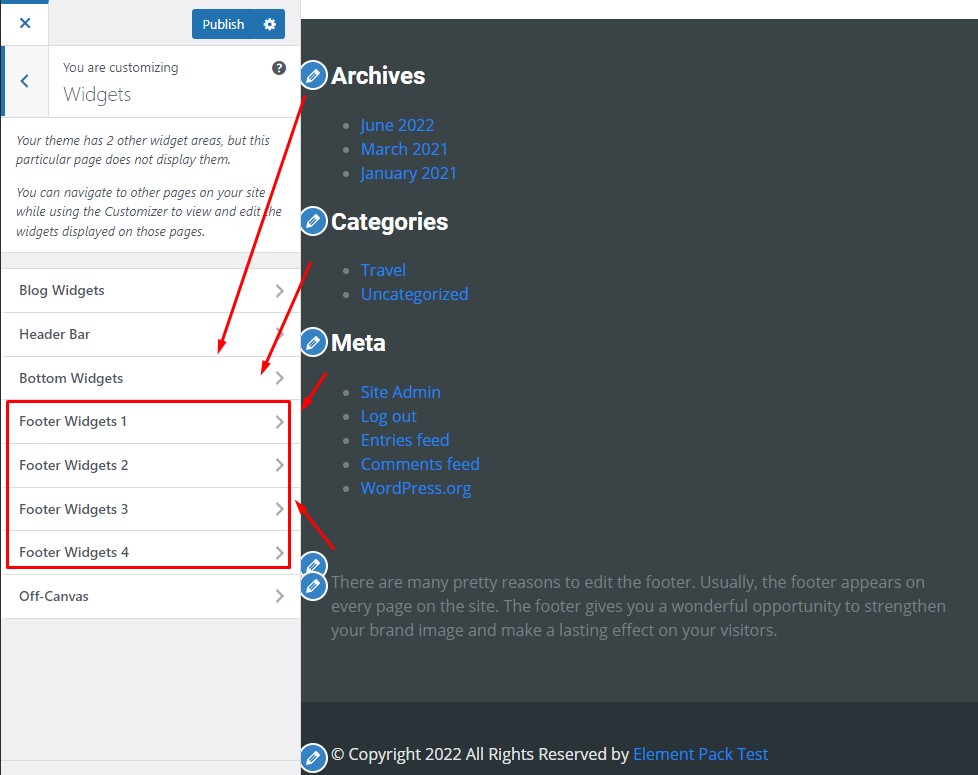
Go to the Header Bar, then select the Archives, Categories, and Meta. After that, go to the Footer Widgets and select them.
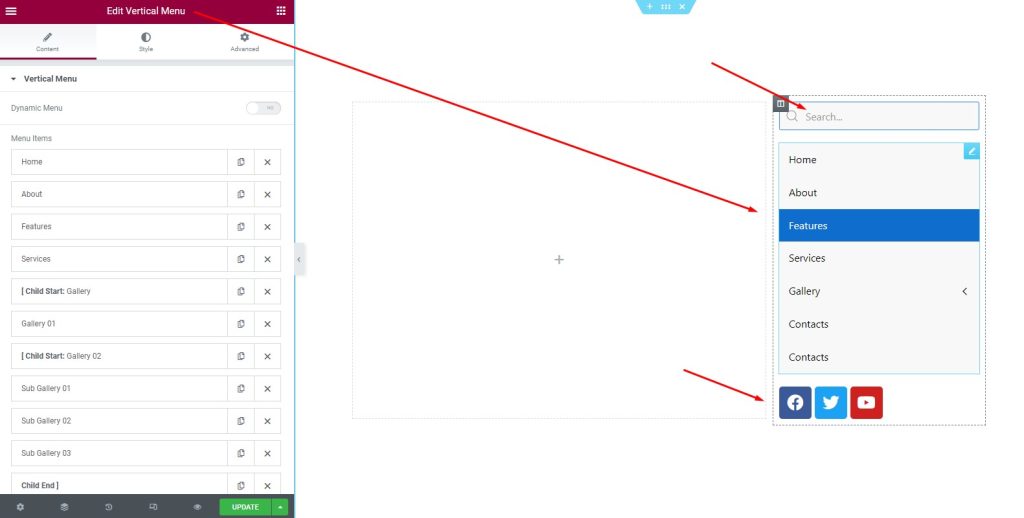
After that, go to the Edit Vertical Menu, then edit the items, and Update.
Generally, people have a query about the WordPress header, and it’s expected. Here are some common questions about WordPress header and their answer to them.
1. Question: What is a custom header in WordPress?
Answer: A custom header in WordPress is a header customized for a specific user on a website. A custom header allows a site owner to upload his own “title” image to his site, which he can place at the top of specific pages. You can customize and crop through a visual editor in the Appearance > Header section of the admin panel. You may also place text beneath or on top of the header.
2. Question: How do I create a custom header in WordPress?
Answer: To create a custom header, follow this- go to WordPress Dashboard > Templates > ThemeBuilder. Then click Add New Template and choose Header (or Footer) Name your header template and click Create Header (or Footer) Now you’ll be able to either choose a premade header (or footer) template or create one from scratch.
3. Question: What is the use of custom headers?
Answer: Commonly, custom headers provide additional information that may be pertinent to a web developer, or for troubleshooting purposes. These headers oftentimes begin with X-,
4. Question: How do I use unique headers in WordPress?
Answer: In the post or page edit screen, the unique Headers Plugin applies a custom header image box. It lets you upload an image all new on different pages. Just go to edit the page on which you want a new header. Just click the Set Custom Header Image in the bottom right corner of the screen.
5. Question: How do I change the color of my header in WordPress?
Answer: The color options of each Element are incorporated in each section. For example, you can change the Header background color from Customize > Header > Header > Header Background Color. To change the topbar Color go to Customize > Header > Topbar.

Take advantage of fine-tuned plugins to speed up web projects without sacrificing quality. We offer a 60-days money-back guarantee.
Call or WhatsApp for assistance:+880 1700 55 95 95