Installing WordPress on your local computer is the best way to test, learn, theme-plugin testing and develop websites without needing a live server.
WordPress on localhost signifies a WordPress setup that operates on a computer’s resources.
It is frequently utilized for development and testing purposes, reducing the necessity for a web hosting plan and minimizing the chances of encountering problems on the live site.
In this blog, we discuss a few easy steps to install WordPress on your localhost. You will also be able to gain knowledge and get a clear idea about the use of XAMPP software.
This guide will walk you through the process step by step, making it easy and accessible for beginners and professionals alike.
What is localhost for WordPress, and why is it useful?
Localhost is basically your computer acting as a mini web server. When you install WordPress on localhost, you’re setting it up on your computer instead of a live online server. This means you can run and test your website in a private environment.
Why is it useful?
- Safe testing ground: You can try out new themes, plugins, or code changes without the fear of breaking a live website. If something goes wrong, it only affects your local setup, not a public site.
- Faster development: The site loads quickly since everything is on your computer, making it easier to test and see changes instantly.
- Learning environment: It’s an ideal space for beginners and experienced developers alike to practice WordPress development without any real-world consequences.
- Offline work: You can work on your website even when you’re not connected to the internet.
- Cost-effective: There’s no need to pay for web hosting while you’re experimenting and learning.
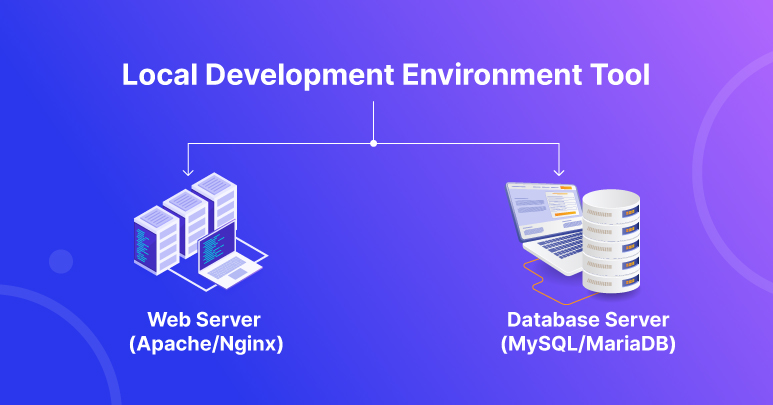
Local Development Environment Tools
A local development environment tool lets you run a web server, database, and PHP on your computer. In other words, it simulates an online server right at home so you can develop, test, and run WordPress without ever connecting to the internet.
This is extremely useful for both beginners and professionals because it provides a safe, cost-effective space to work on your website projects without affecting a live site.
How Does It Work?
A local development environment tool bundles everything you need—such as Apache (or another web server), MySQL (or a similar database), and PHP—so you don’t have to install and configure each component separately.
Popular Local Development Tools
Here’s a quick look at some popular tools available for setting up a local WordPress environment:
| Tool | Platforms | Note |
| XAMPP | Windows, macOS, Linux | Widely used; bundles Apache, MySQL, PHP (and more) easily. |
| MAMP | macOS, Windows | It is a great choice for macOS and is equally available for Windows users. |
| Local | Windows, macOS | Best features: one-click setup, live link sharing, and performance optimizations. |
Note: In this guide, we will utilize the XAMPP software for localhost since it is free and compatible with different operating systems.
Requirements to Install WordPress on Localhost
Requirements to install WordPress on localhost :
- Computer with Windows, macOS, or Linux.
- Local development tool (XAMPP, WAMP, MAMP, or Local by WPEngine) to simulate a web server.
- PHP (usually included with the tool; version 7.4 or higher).
- MySQL/MariaDB for your database (also bundled).
- WordPress package, downloaded from WordPress.org.
- Web browser for accessing and testing your local site.
Optional: A text editor for editing configuration files or code.
Install WordPress on Localhost (Using XAMPP)
Installing WordPress on localhost, you need a local development tool. So, first of all we will install a local development tool. We will utilize the XAMPP software, XAMPP gives you a safe and free environment to test, development and learn. Follow these steps to install WordPress on Localhost :
Step 1: Download And Install XAMPP On Your Local Computer
Below is an easy-to-follow guide on how to download and install XAMPP on your local computer:
Download XAMPP
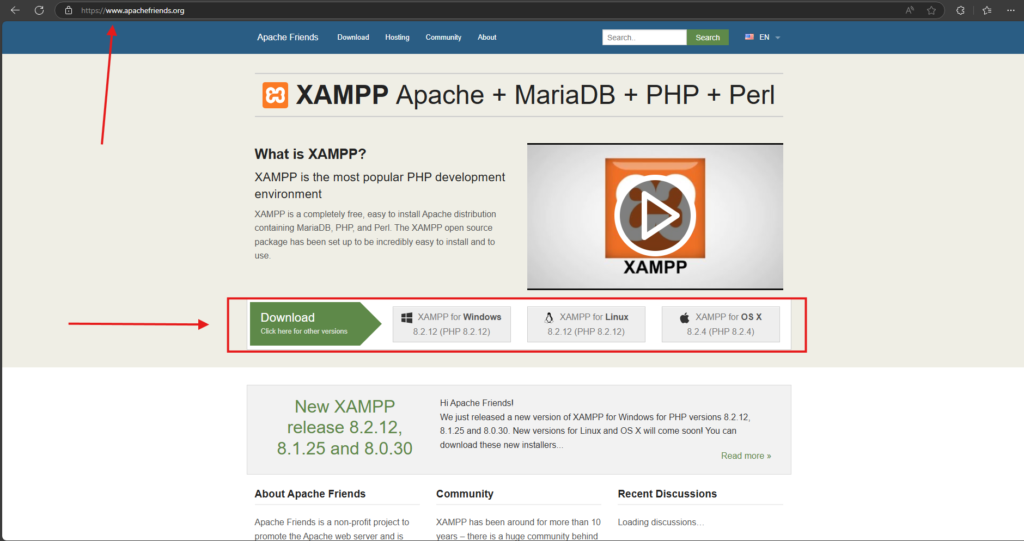
- Visit the Apache Friends website: Open your browser and go to https://www.apachefriends.org.
- Choose your operating system: Select the XAMPP version that matches your OS (Windows, macOS, or Linux).
- Download the installer: Click the download button to get the installer for your system.
Install XAMPP
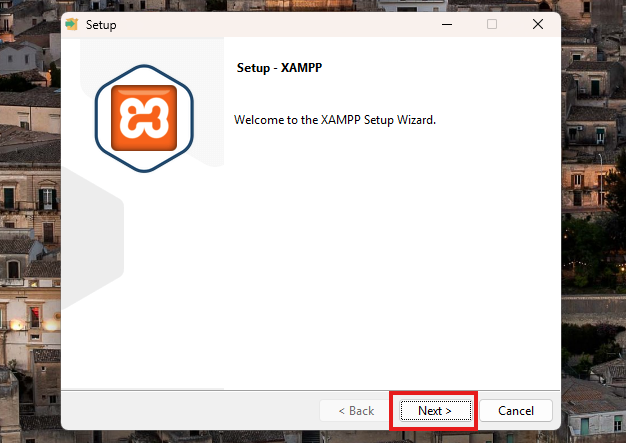
- Locate the downloaded file: Once the download is complete, find the installer file (e.g., xampp-windows-x.x.x.exe for Windows).
- Run the installer: Double-click the file to launch the setup. You might see a security prompt; click Yes to continue.
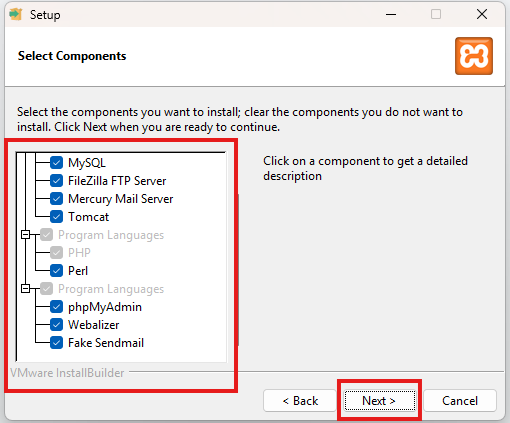
- Follow the installation wizard:
- Step-by-step instructions: The wizard will guide you through the process.
- Select components: Choose the default components (Apache, MySQL, PHP, etc.) for most WordPress setups.
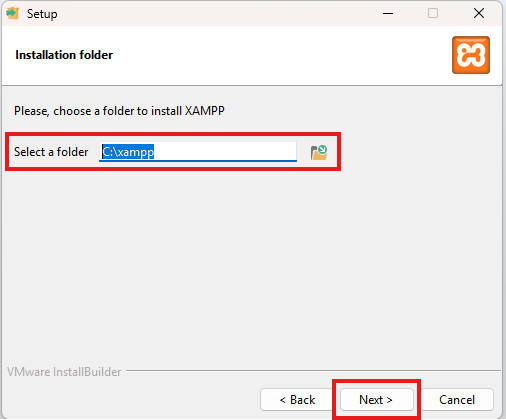
- Choose installation folder: The default folder is usually fine (e.g., C:\xampp for Windows).
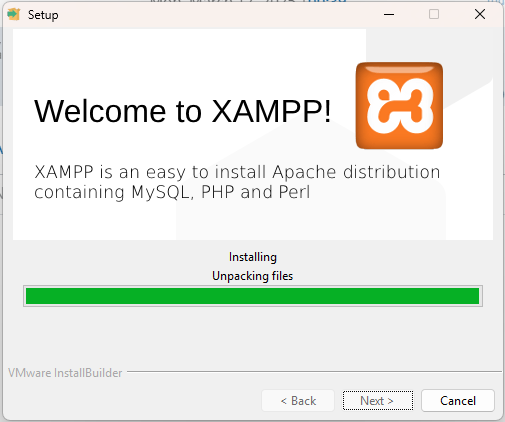
- Complete the installation: Click Next through the setup screens and, finally, click Finish once the installation is complete.
Launch and Verify XAMPP
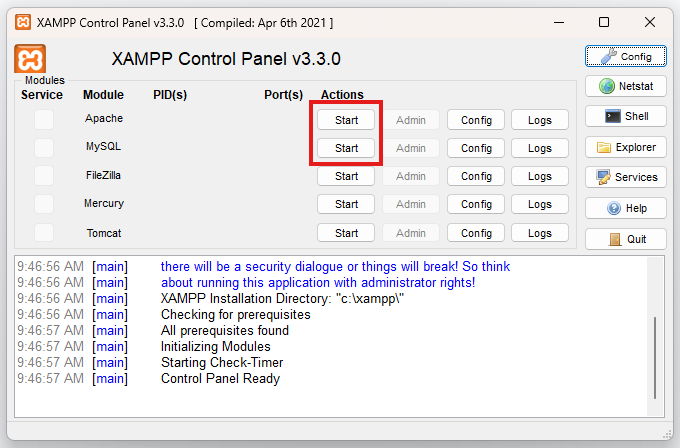
- Open the XAMPP control panel: You can usually launch it from your start menu (Windows) or your Applications folder (macOS).
- Start the services: In the control panel, click Start next to Apache and MySQL. You should see the status turn green, showing that both services are running successfully.
- Test XAMPP: Open your browser and type http://localhost in the address bar. If XAMPP is working correctly, you’ll see the XAMPP welcome page.
Step 2: Create a Local Database
To set up WordPress on your localhost, you’ll first need to create a local database. Follow these steps:
Access phpMyAdmin
- Open your browser and type http://localhost/phpmyadmin in the address bar.
- Press Enter to load the phpMyAdmin interface. This is a built-in tool in XAMPP for managing MySQL databases.
Navigate to Databases
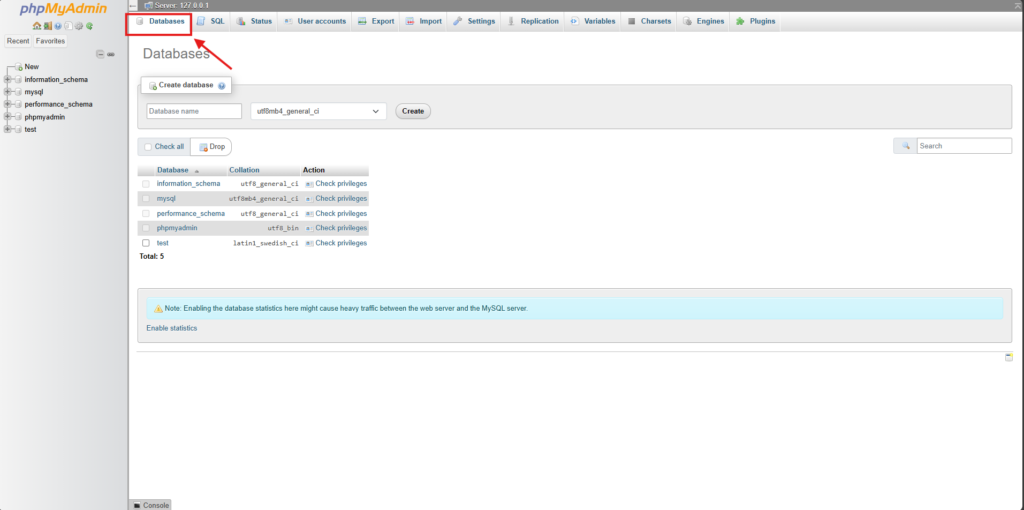
- In the phpMyAdmin dashboard, click on the Databases tab located at the top menu.
Create a new database
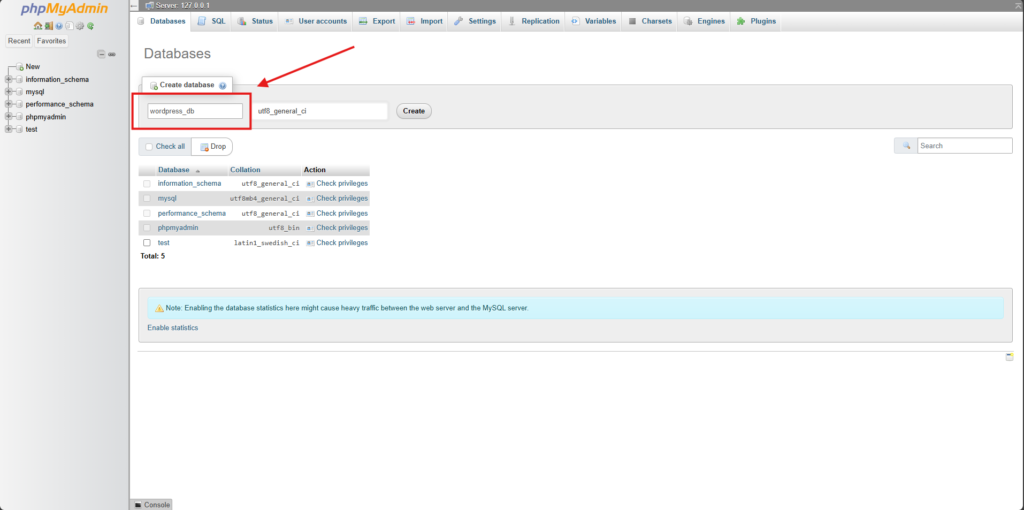
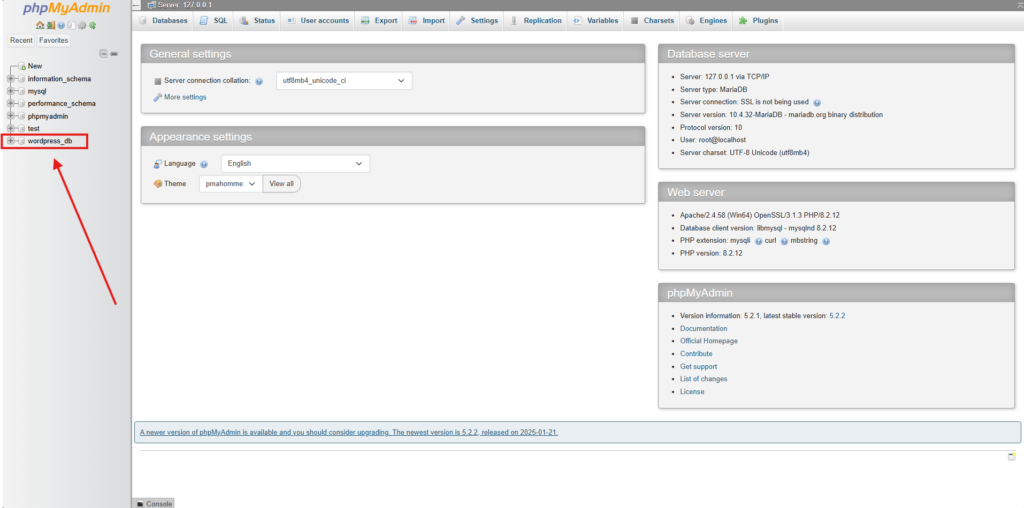
- Under “Create database,” type a name for your database. For example, you could name it wordpress_db.
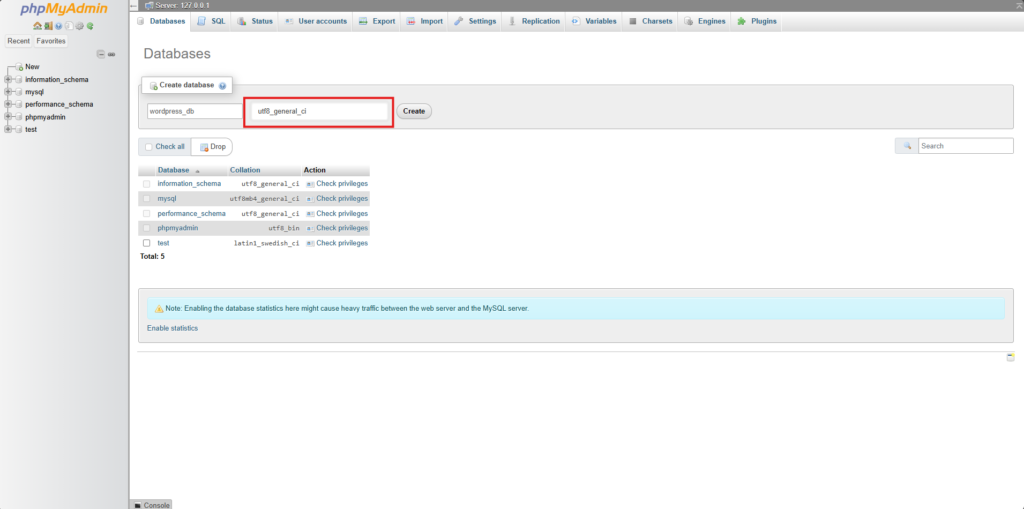
- Choose the database collation as utf8_general_ci to ensure compatibility with WordPress.
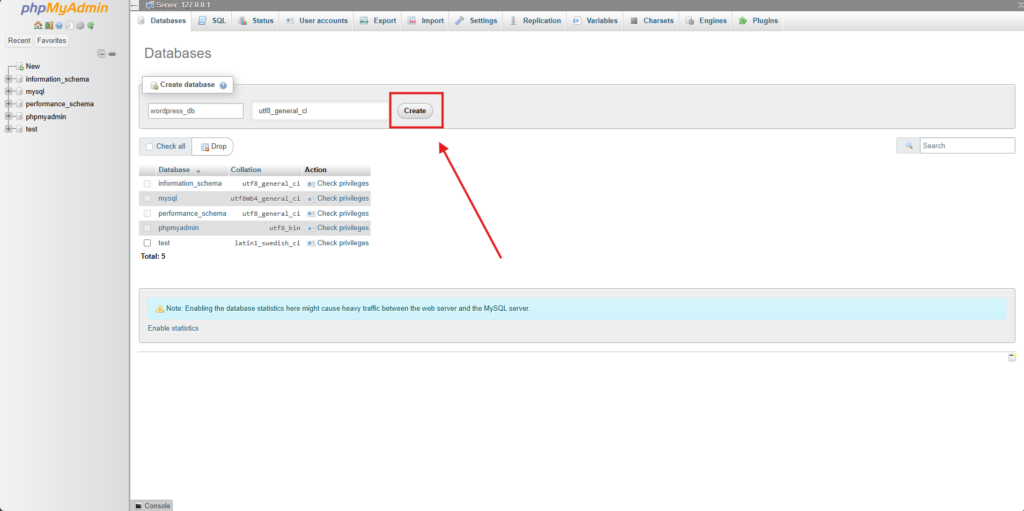
- Click Create to finalize.
Verify Database Creation
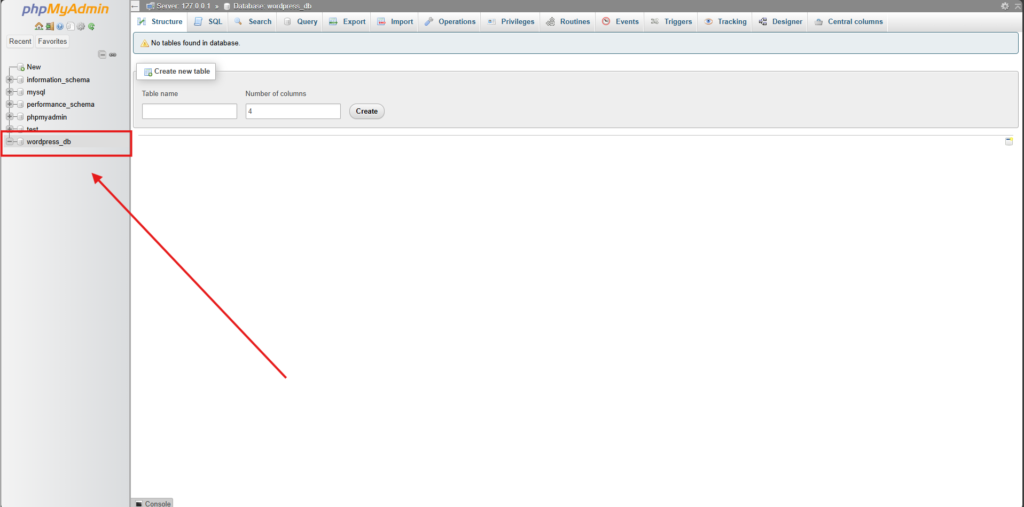
- Once created, your new database should appear in the list of databases on the left-hand side of phpMyAdmin.
Step 3: Download WordPress
Downloading WordPress is a quick and straightforward process. Here’s how you can do it step by step:
Visit the Official WordPress Website
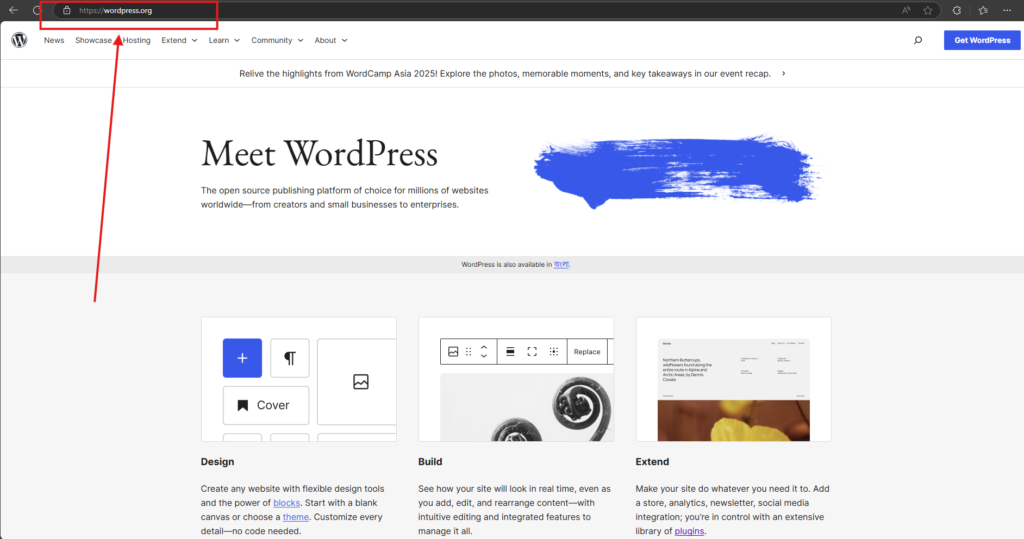
- Go to the WordPress.org website, the official source for WordPress software.
Locate the Download Button
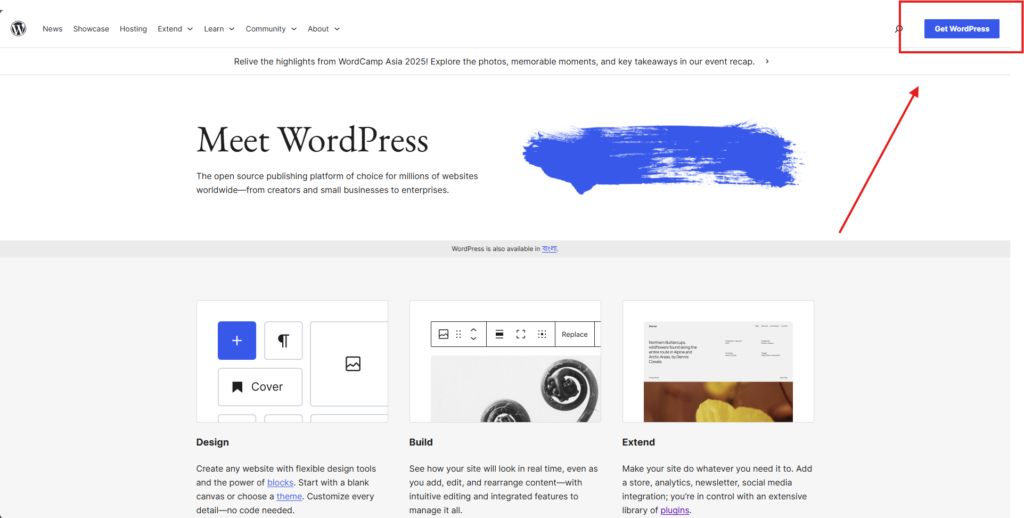
- On the homepage, you’ll see a prominent “Get WordPress” or “Download WordPress” button. Click on it to navigate to the download page.
Choose the Latest Version
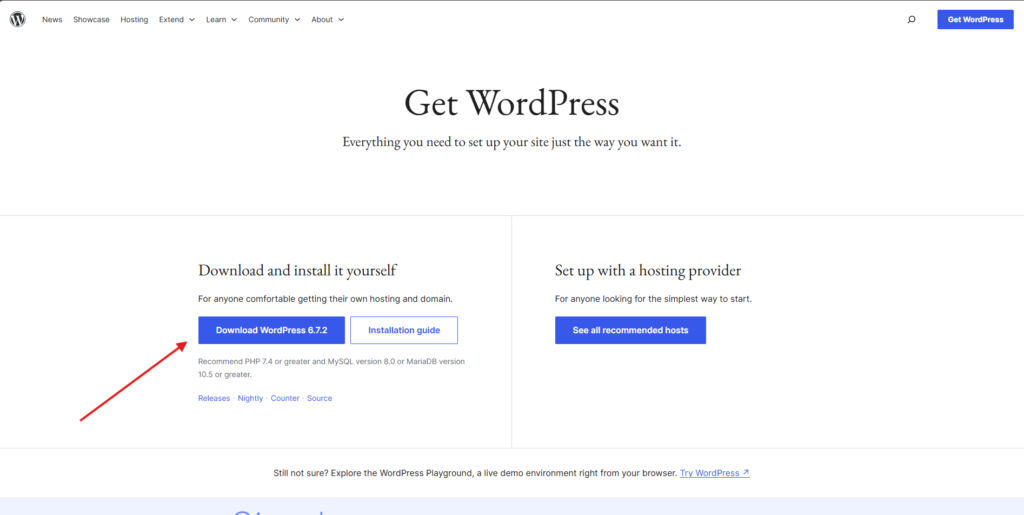
- The download page will display the latest version of WordPress, along with its release details. Click the Download button to start downloading the .zip file containing the WordPress core files.
Extract the Files
- Once the download is complete, locate the .zip file in your Downloads folder (or the folder you specified).
- Right-click the file and select “Extract All” or use any file extraction software to unzip its contents.
Place WordPress Files in the Localhost Directory
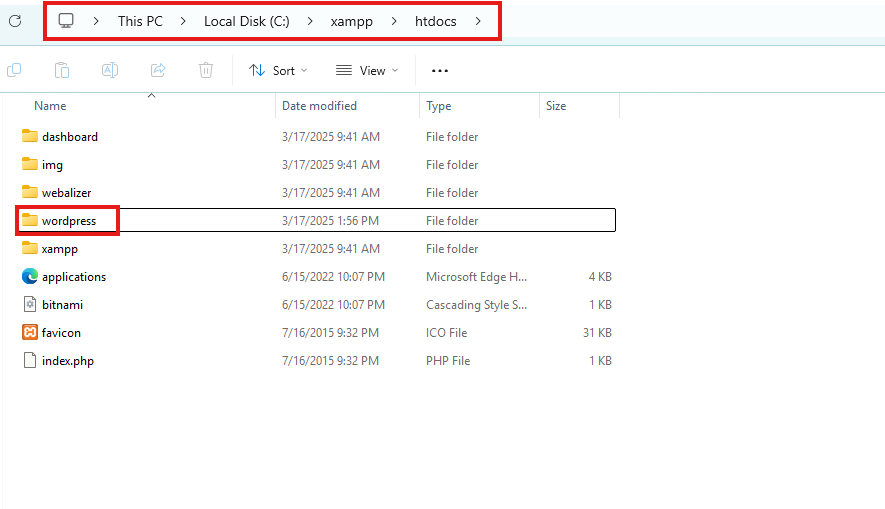
- After extraction, move the WordPress folder to the appropriate directory in your local development tool.
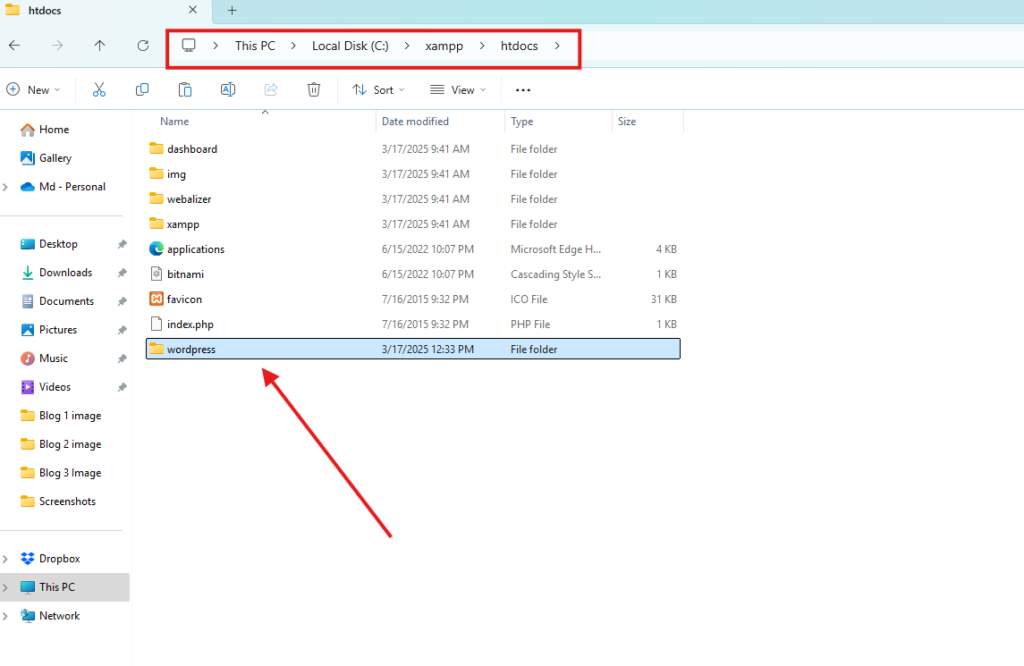
- Copy the extracted WordPress folder and paste it into the htdocs directory inside your XAMPP installation folder.
Ready for Installation
- Now the WordPress files are in place, and you’re ready to proceed with the installation process on your localhost.
Step 4: Install WordPress on Localhost
Now that you’ve set up XAMPP and created your local database, it’s time to install WordPress. Follow these steps carefully:
Access the WordPress Installer
- Open your browser and type http://localhost/wordpress in the address bar. This URL assumes you’ve placed the WordPress folder in the htdocs directory of your XAMPP installation.
Select Language
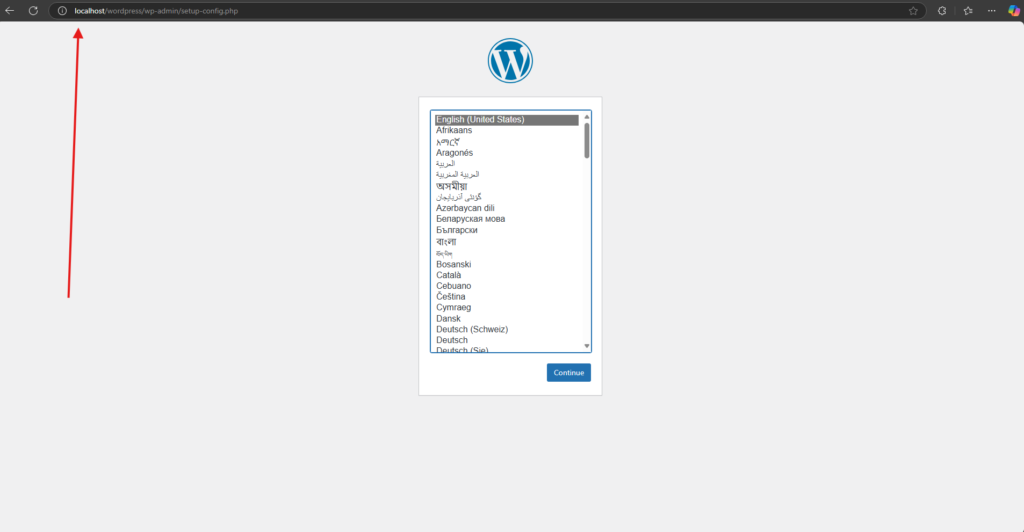
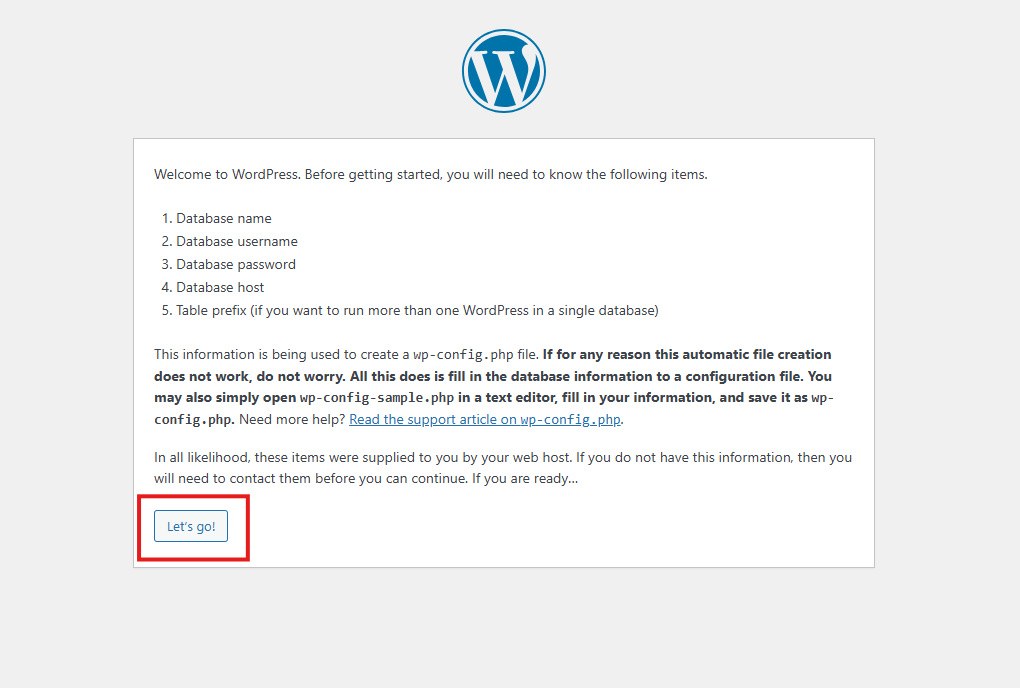
- The WordPress setup page will appear. Choose your preferred language and click Continue. Press Let’s go!
Set Up Database Connection
- On the next screen, you’ll need to provide your database information:
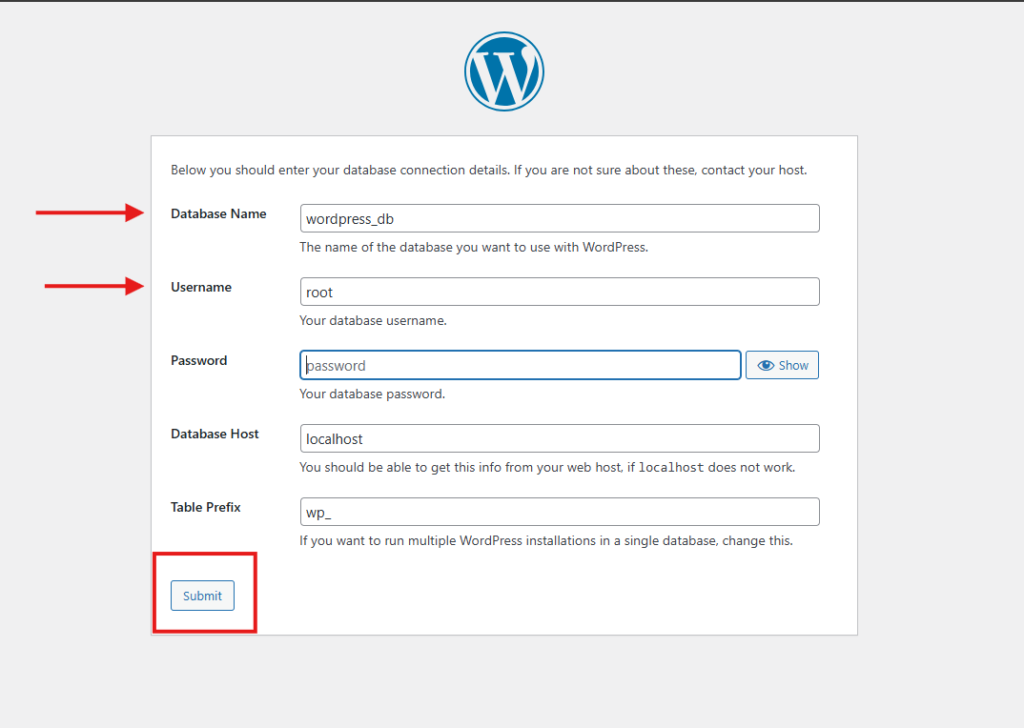
- Database Name: Enter the name of the database you created earlier, such as wordpress_db.
- Username: Use root (this is the default username for XAMPP).
- Password: Leave this field blank (XAMPP’s default setup has no password for MySQL).
- Database Host: Leave as localhost.
- Table Prefix: Use wp_ or any other prefix of your choice (optional, especially useful if you plan to use multiple installations on the same database).
- Click Submit.
Run the Installation
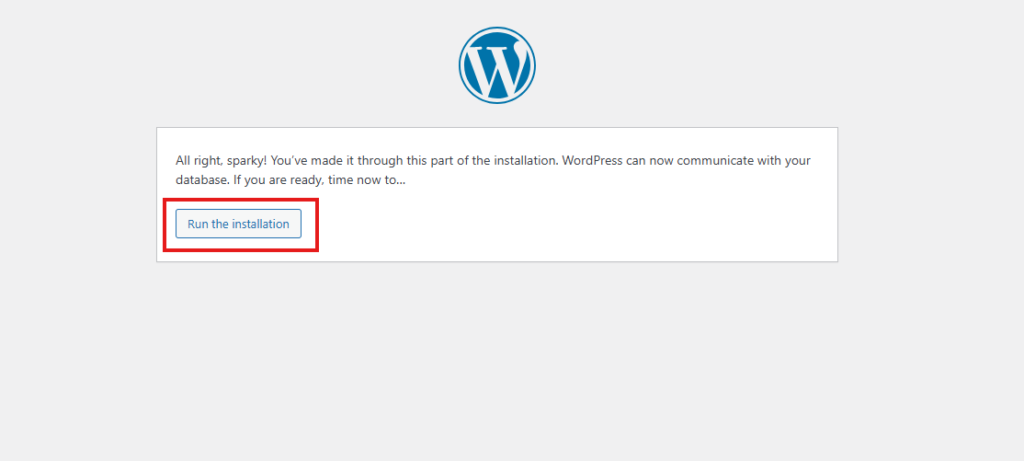
- If the database connection details are correct, WordPress will proceed to the installation screen. Click Run the Installation to start the process.
Set Up Your Website
- Provide some basic information for your site:
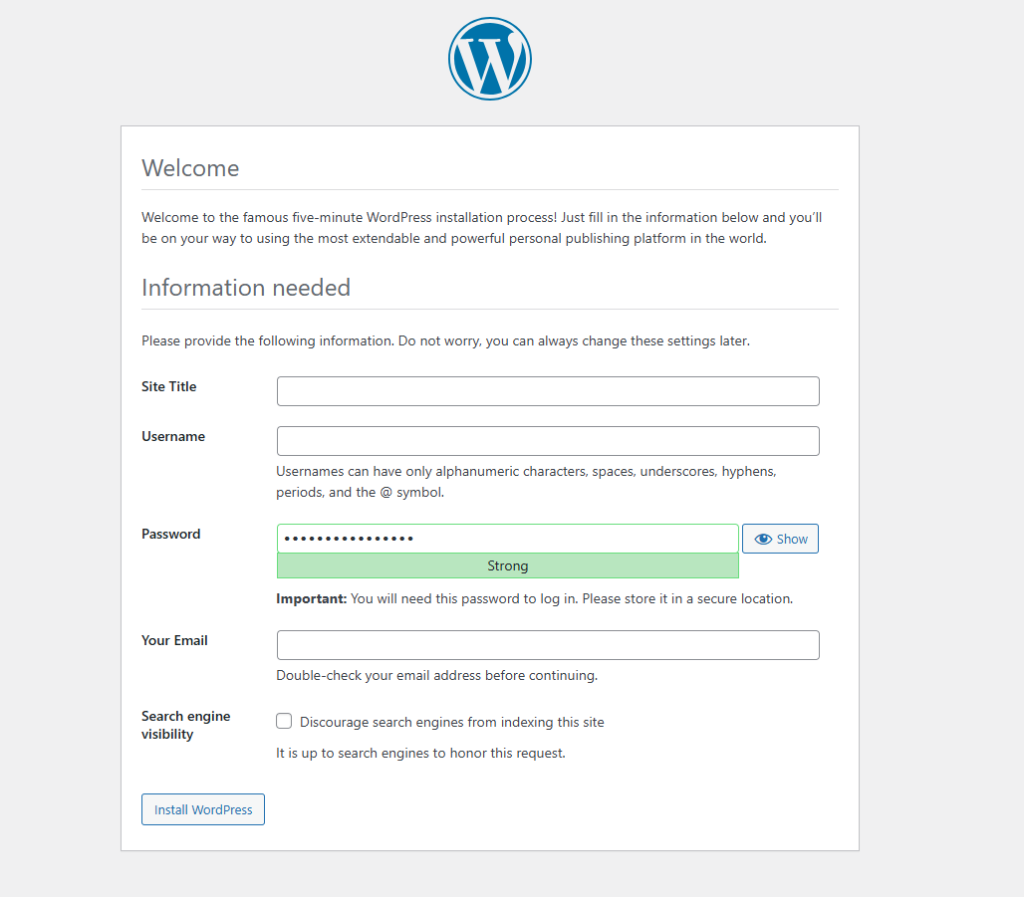
- Site Title: Name your site (e.g., “My Local WordPress Site”).
- Username: Enter the username for your admin account.
- Password: Create a strong password (note this for future logins).
- Email Address: Enter your email address for admin notifications.
- Optionally, check the box to discourage search engines from indexing your site (this is useful since it’s a local environment).
- Click Install WordPress.
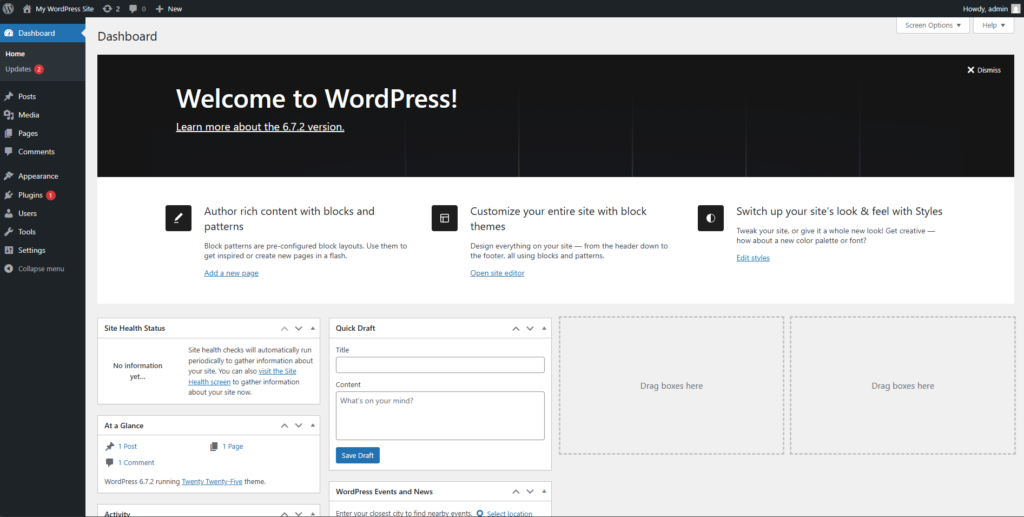
Login to Your WordPress Dashboard
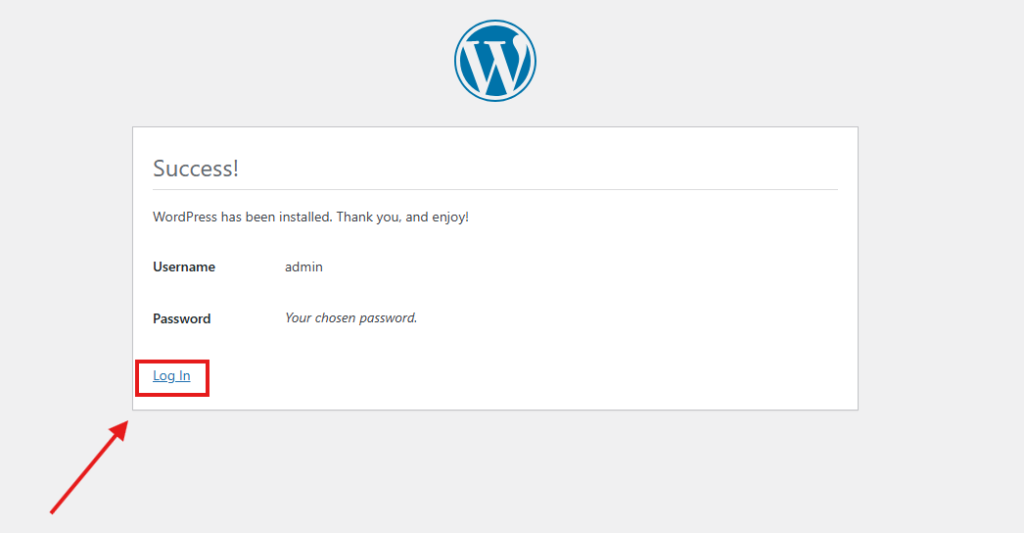
- Once the installation is complete, you’ll see a success screen with a login button.
- Click Log In and use your admin username and password to access the WordPress dashboard.
Step 5: Check the Local Site
After successfully installing WordPress on localhost, it’s time to confirm that everything is working properly. Follow these steps to check your local WordPress site:
Open Your Browser
- Launch your preferred web browser (e.g., Chrome, Firefox, or Edge).
Enter the Localhost URL
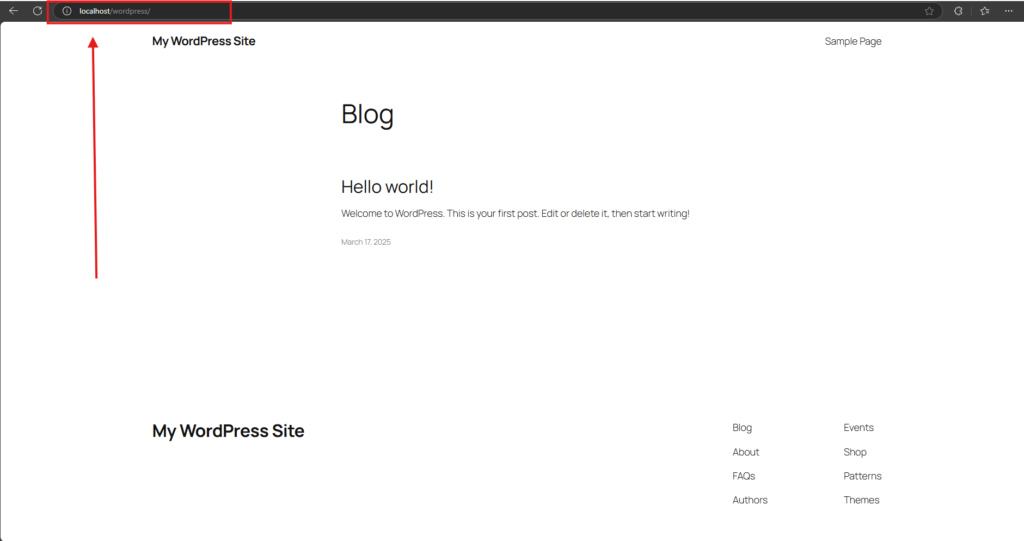
- Type http://localhost/wordpress in the address bar and press Enter.
- This assumes you named the WordPress folder “wordpress” while placing it in the htdocs directory. If the folder has a different name, replace “wordpress” in the URL with the exact name of the folder (e.g., http://localhost/mywebsite).
View Your WordPress Site
- If the installation is successful, your WordPress site’s homepage will load in the browser. This is the default theme and layout that comes with WordPress.
Access the WordPress Dashboard
- To manage your site, navigate to the WordPress admin dashboard by appending /wp-admin to the URL (e.g., http://localhost/wordpress/wp-admin).

- Enter the admin username and password you set during the installation process to log in.
Explore and Test
- Begin exploring your local WordPress site. Customize the theme, add plugins, or start creating content to test its features in this safe environment.
Extra: How to uninstall WordPress on localhost
If you no longer need WordPress installed on your localhost, here’s how you can safely and cleanly remove it:
Delete WordPress Files
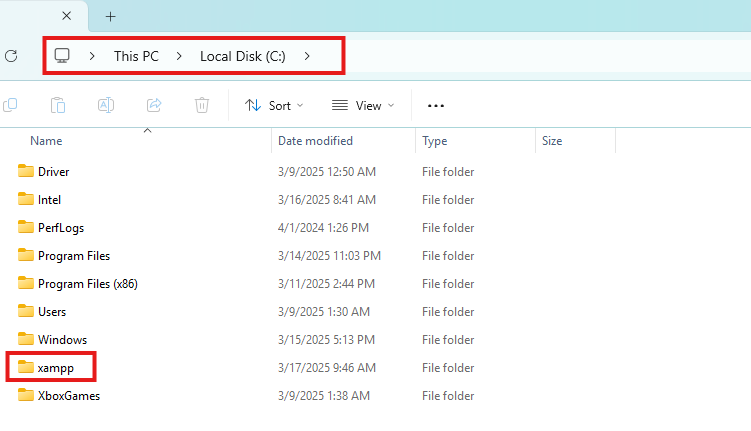
- Locate the folder where WordPress is installed. If you’re using XAMPP, this will typically be the htdocs directory inside your XAMPP installation folder.

- Find the folder named wordpress (or the name you used for your WordPress project) and delete it.
Remove the Database
- Open your browser and go to http://localhost/phpmyadmin to access phpMyAdmin.
- In the left sidebar, locate the database you created for your WordPress site (e.g., wordpress_db).
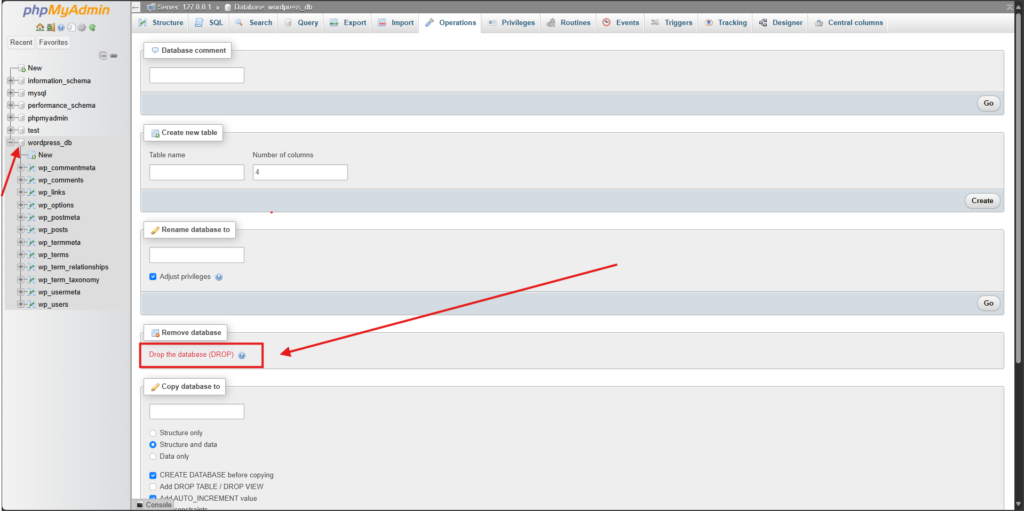
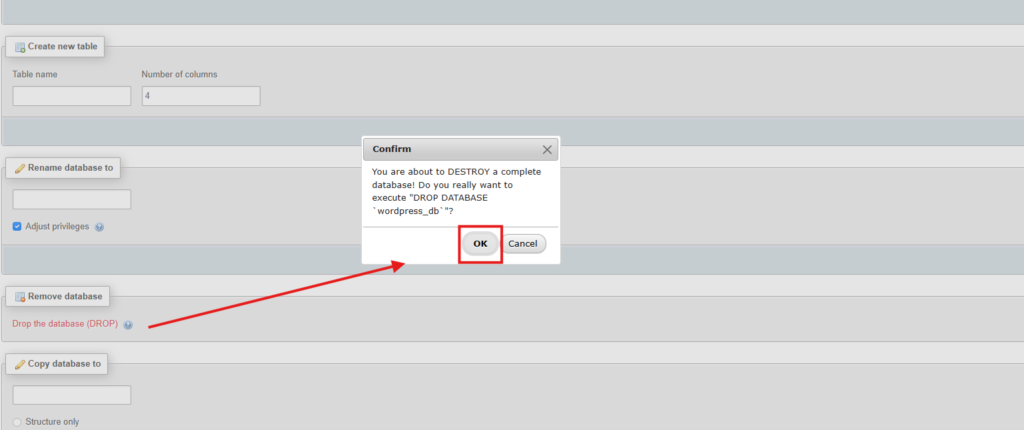
- Select the database and click Drop to delete it permanently. Confirm the deletion when prompted.
Clean Up Localhost Environment (Optional)
- If you want to uninstall XAMPP itself, follow these steps:
- Locate the XAMPP uninstaller in your installation directory and run it.
- Remove any residual files or folders left behind after uninstallation.
Confirm Cleanup
- Open your browser and navigate to http://localhost/wordpress (or your project’s URL). If everything is properly uninstalled, you should no longer see your WordPress site or access its files.
Conclusion
We hope we have satisfied you through the entire blog. We have tried to complete the WordPress installation process on localhost in a few very simple steps.
Here’s a recap of steps on how to install WordPress on localhost
- Download And Install XAMPP On Your Local Computer
- Create a Local Database
- Download WordPress
- Install WordPress on Localhost
- Check the Local Site
Please feel free to leave a comment below if you have any inquiries. Wishing you the best of luck!
If you liked this article, don’t forget to subscribe to our newsletter to get more exciting articles, news, and offers right in your inbox. Also, follow us on Facebook, Twitter, and LinkedIn to stay updated.