
Help Desk widget in Elementor is a customer support tool, built for faster response to the visitors. This widget suits all kinds of websites very easily. It’s a tiny, attractive, and handy widget.
To use this widget effectively, you need to know how it works. Let me give you a complete guide to it!
To Insert Widget

Inserting widget is just a matter of drag and drop. However, click and hold on the widget icon from the menu and drag the help desk widget to the drop point. Follow the picture above.
Content Tab
Using the Content tab, you can basically make a layout of a particular support desk part of the website.
Layout
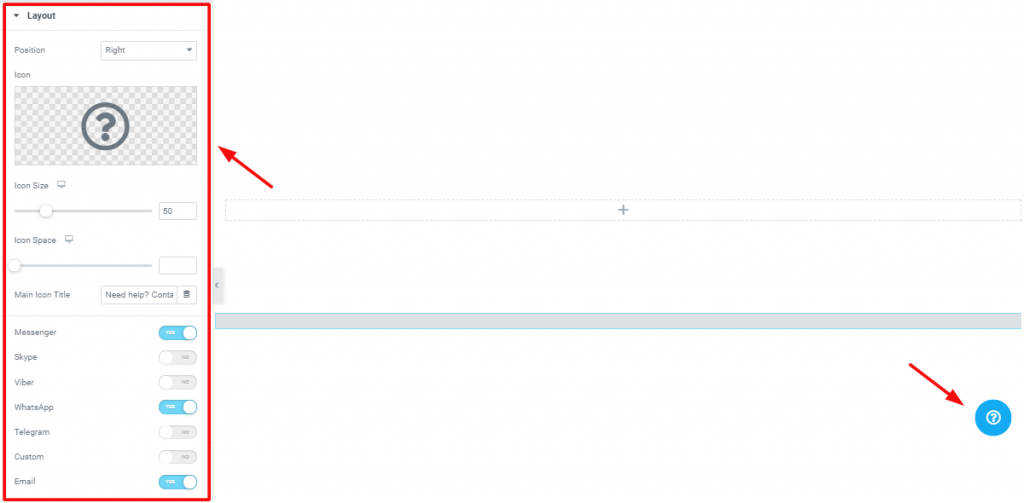
The first section is the Layout section. Here, you can choose an icon for the help desk. With the Icon Size &, Icon Space controllers, you can adjust the size and space of it. Also, you can adjust its Position on the screen from here for the WordPress support widget.
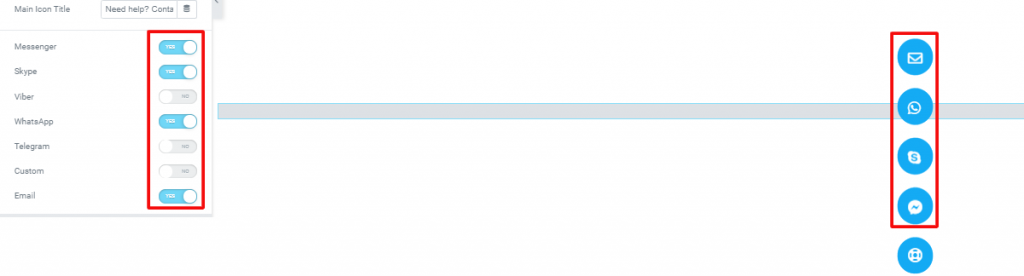
Moreover, you can see a bunch of switchers there. By turning each of them on/off you can show/hide the corresponding function. As you can see, the icons represent Messenger, Viber, Skype, WhatsApp, etc. applications.
Messenger

When you turn on the messenger switcher from Layout, a new Messenger section will appear. Here, you can create a tooltip message and insert links to your messenger webpage. Moreover, the On Click switcher enables the tooltip visible upon hover.
The settings are quite the same for all this type of section.
Additional

Go to Content Tab> Additional
This is the last section of the Content Tab. Here, you can change the offset position of the widget using Horizontal Offset and Vertical Offset.
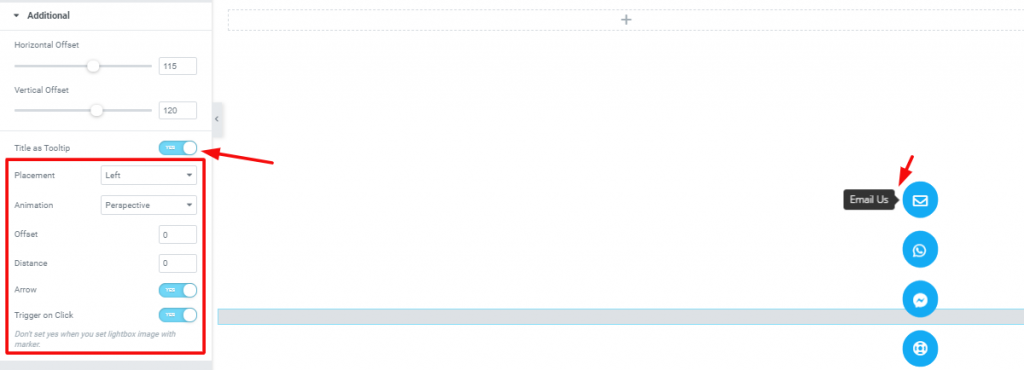
Moreover, when you click on the Title as Tooltip switcher, it will show more controllers and switchers. Here, you can change the placement, animation, offset, and distance of the tooltip. Also, you can place an arrow and active the tooltip upon click using the two switchers at the bottom.
Style Tab
Now, time for some Style. In this Style tab, you will have more options to create your unique Help Desk widget in Elementor as you like. Let’s have a look.
Main Icons
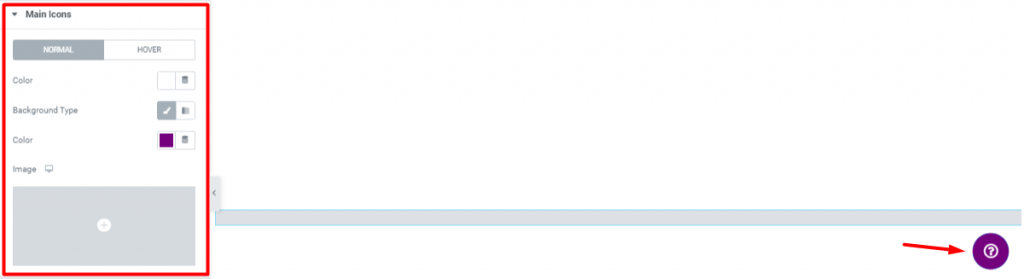
In this section, you can change the color and background of the help desk. This section helps you change the outer look of the main icon of the support desk.
Icon Style
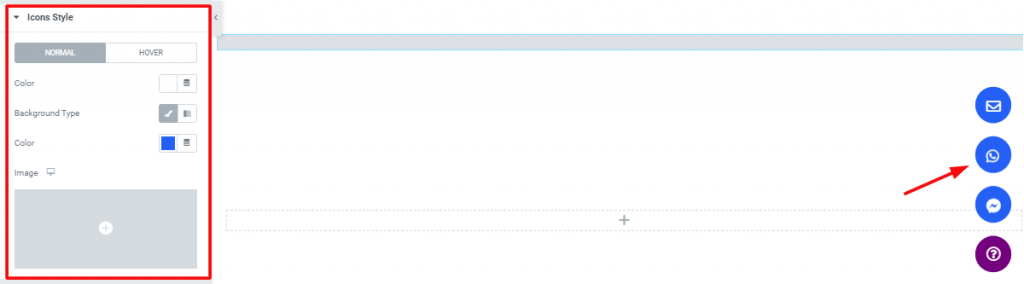
This section lets you customize the icons inside the main icon. They appear when you click the main icon of the help desk widget.
Tooltip
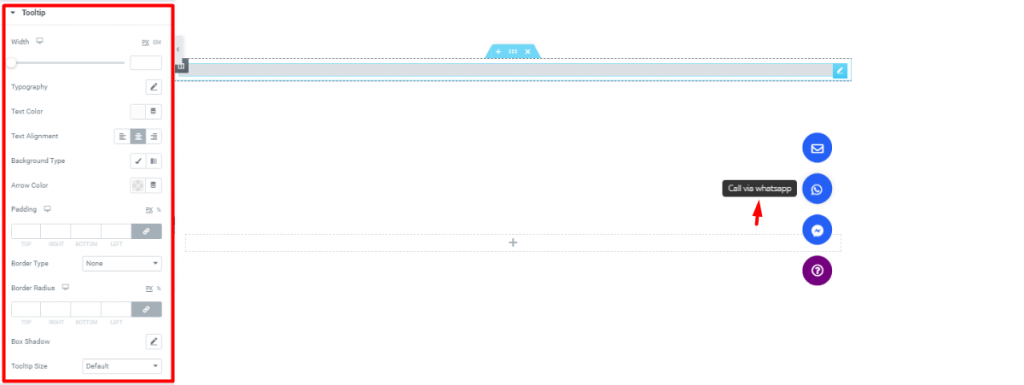
Go to Style Tab> Tooltip
This is the last section of the Style tab. Here, you can customize the Tooltip easily. You can, however, change the alignment, width, background. Also, you can add padding, border, etc. from here.
Video Assist
Well done. Seems you have learned the whole thing and how it works. It is easy and fun. Watch Video Assist and to get more in-depth ideas about the usage of the Help Desk Widget in Elementor, take a tour to the demo page.
[Note- on-page video link]