The Formidable Forms widget is one of the many form widgets Element Pack has been integrating for our users. It’s a quick-build form-making tool that comes in both free and premium versions.
Let’s see how to operate it.
Configuring Formidable Forms
The Formidable Form is a third-party widget in Element Pack that needs to be bought or installed manually inside your Dashboard> Element Pack> 3rd Party Widgets.
Once installed, you will get a new section called Formidable in your dashboard. You have to register each form manually using this dashboard.
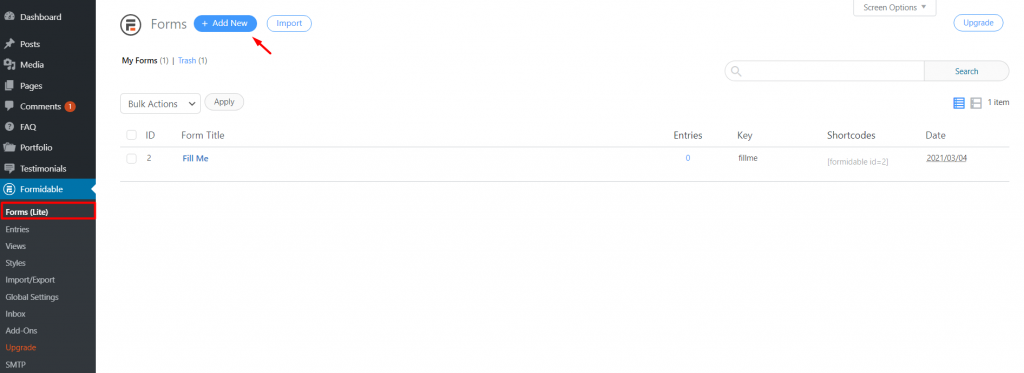
To create a new form, click on the Forms option and then click Add New.
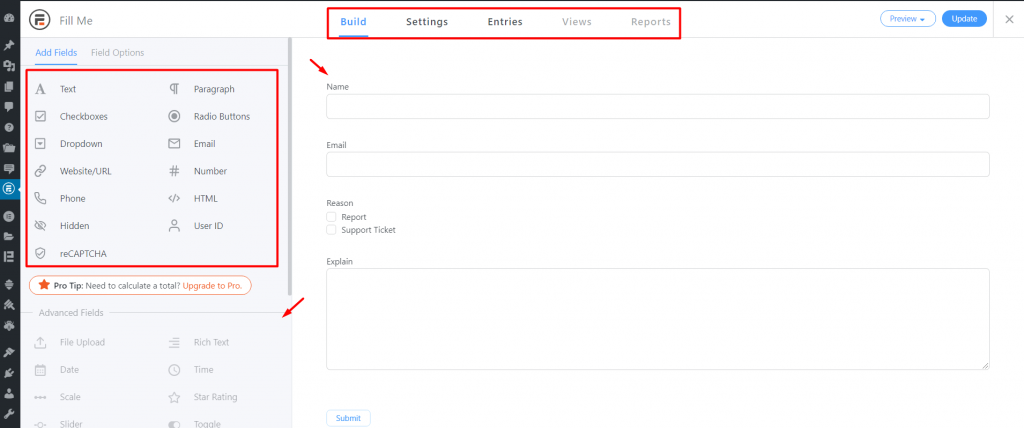
A new page with a lot of options will come to you. From there, you need to build your own form by dragging it inside the blank field on the right side.
Anyway, there are other settings besides the build section. Make sure to check those too.
Inserting widget
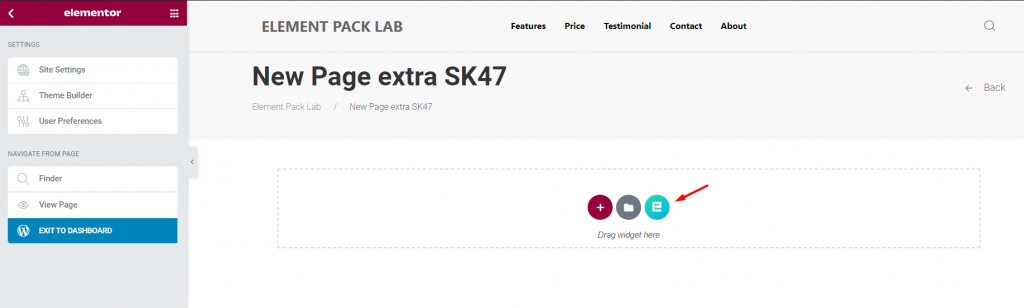
Find the Formidable Forms widget from the widget menu and drag it inside your page.
Content tab
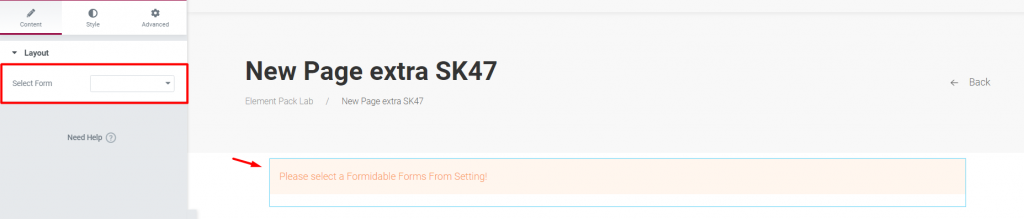
After inserting the widget, the first section Layout will prompt you to select a form. Unless you have pre-made forms inside your dashboard, the option will show empty.
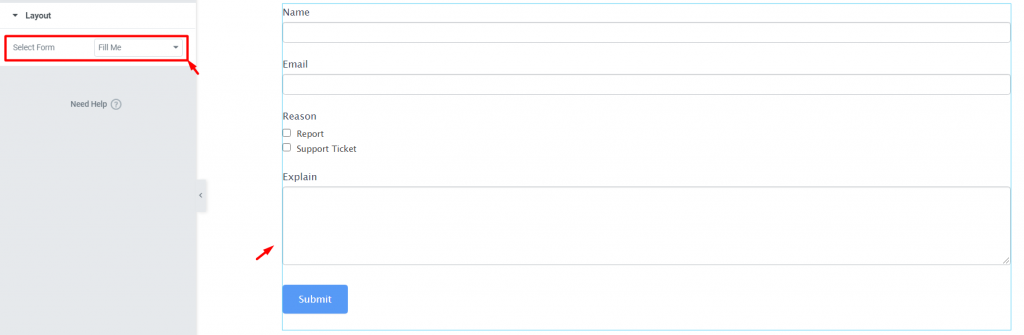
Let’s select the form we just designed. It has a name field, email field, checkboxes, and description field.
Style tab
Widget by Element Pack means there will be a lot of items for customization. To create something attractive, you have to keep an eye on its appearance.
Labels
Go to Style> Labels

In this section, you can customize the labels by text color and typography.
Input & Textarea
Go to Style> Input & Textarea
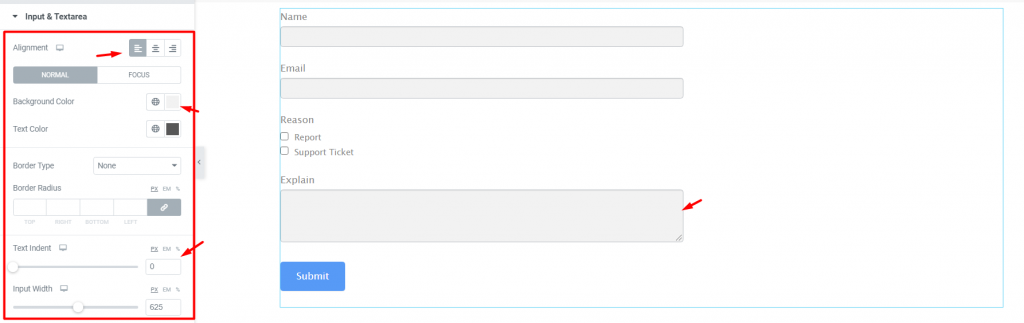
Here, you can adjust the alignment of the input fields as well as their colors. If you want to increase the space of the fields, you need to drag the scroll bars below the options.
Radio & Checkbox
Go to Style> Radio & Checkbox
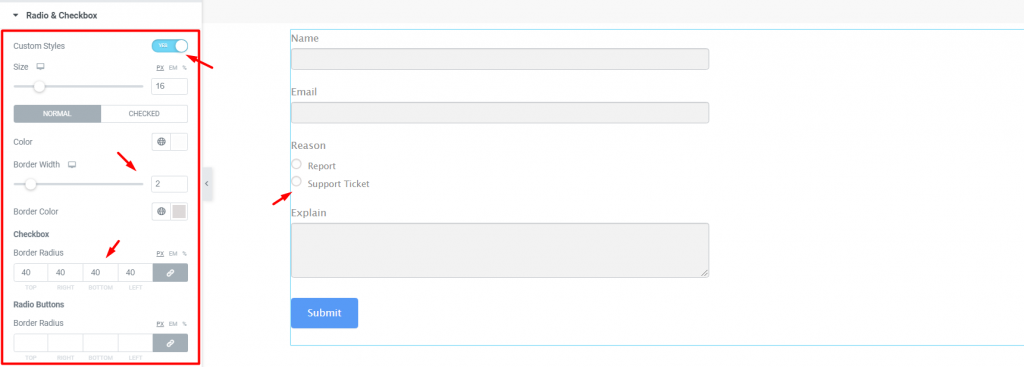
The radio & checkboxes are set by default. If you want to customize them, you need to flip the switcher labeled Custom Style at the top.
There are a bunch of options such as border width, color, size, and radius. Make something you are okay with.
Submit Button
Go to Style> Submit Button
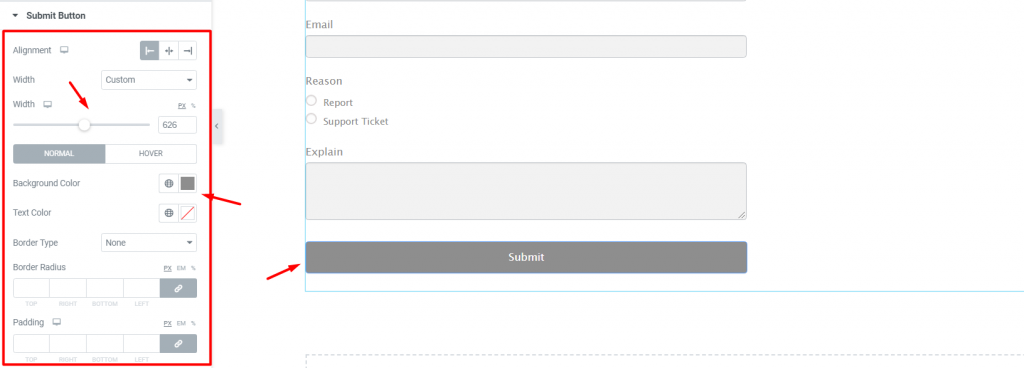
You can also customize the submit button of the form. Using the alignment and width option, you can make a full-sized or a custom-sized button.
Confirmation Message
Go to Style> Confirmation Message
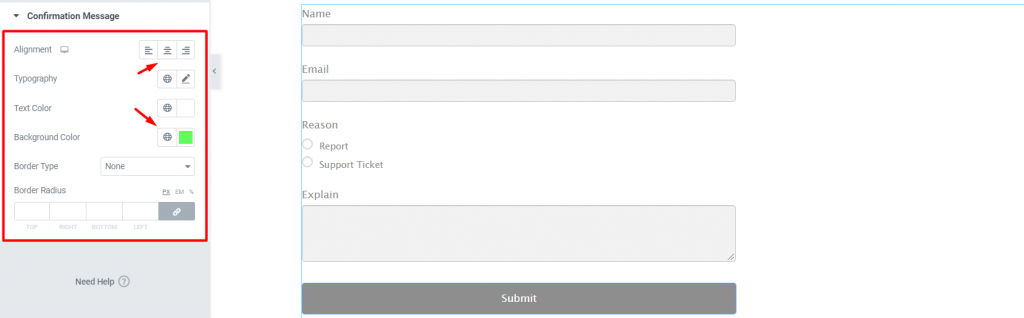
Once you have successfully submitted the formidable form, a confirmation message will popup. You can customize this message using the last section on the style tab.
Conclusion
For the visual info, watch this video and keep an eye on the demo page for more examples, provided by Bdthemes.